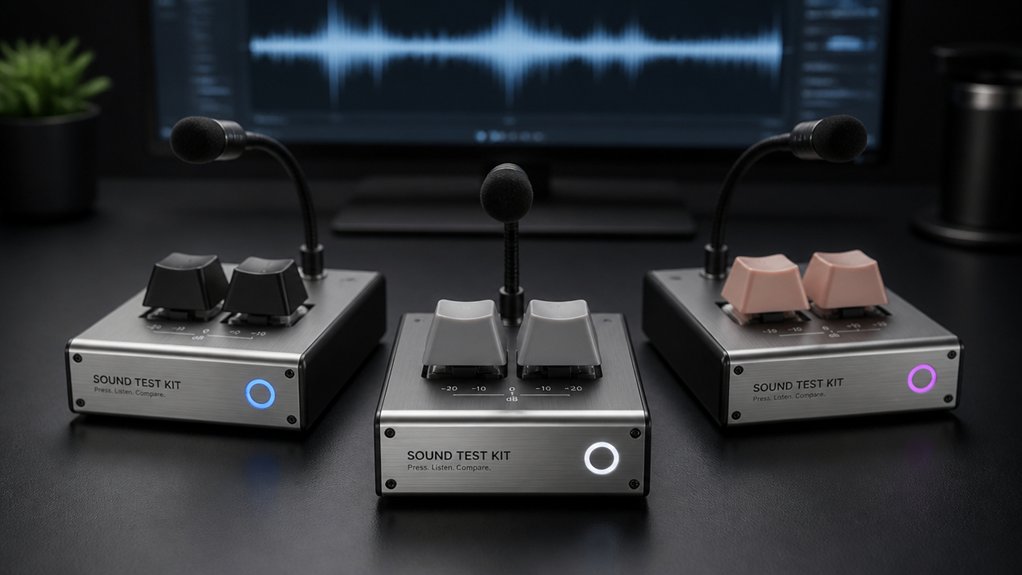
You’ve probably already felt how a single switch can change a build’s vibe, but picking the right test kit isn’t as simple as grabbing the first box you see. The Cherry MX tester gives you a solid, tactile feel with PBT caps and O‑rings, while KPREPUBLIC’s 24‑switch set covers almost every Kailh Box variety on a sturdy acrylic base. Then there’s the Mechanical Keyboard Switch Tester, which swaps keys on the fly for quick audible feedback. The differences matter, and they’ll shape how you evaluate your next keyboard.
| Cherry MX Switch Tester with Keycap Puller & O-Rings |  | Premium Tester | Switch Count: 12 switches | Switch Types: Cherry MX (various colors) | Base Material: Acrylic (frosted) | CHECK ON AMAZON | Read Our Analysis |
| KPREPUBLIC 24 Switch Tester with Acrylic Base (Purple Orange Yellow Gold) |  | Colorful Variety | Switch Count: 24 switches | Switch Types: Kailh Box Heavy Pro (various colors) | Base Material: Acrylic | CHECK ON AMAZON | Read Our Analysis |
| Mechanical Keyboard Switch Tester for Office & Enthusiasts |  | Fun‑Focused Kit | Switch Count: Multiple interchangeable axles (unspecified) | Switch Types: Generic mechanical switches (axle‑type) | Base Material: ABS plastic | CHECK ON AMAZON | Read Our Analysis |
More Details on Our Top Picks
Cherry MX Switch Tester with Keycap Puller & O-Rings
If you crave precise switch feel before buying a keyboard, the Cherry MX Switch Tester serves as a premium tester for enthusiasts. You’ll find twelve authentic Cherry MX switches—Red, Black, Blue, Brown, Green, Tactile Gray, Clear, White, Silent Red, Silent Black, Speed Silver, RGB Speed Silver—each paired with a printed PBT keycap. The acrylic base holds them securely, while a crystal model lets you spot colors instantly. O‑rings let you tune sound and travel: twelve black (0.2 mm) and twelve clear (0.4 mm). A keycap puller makes removal painless, and you can swap switches for DIY customization. The kit’s compact 2.36 × 3.48 × 1.18 in size and 0.06 kg weight keep your desk tidy while you evaluate linear, tactile, and clicky feels.
- Switch Count:12 switches
- Switch Types:Cherry MX (various colors)
- Base Material:Acrylic (frosted)
- Keycap Inclusion:Printed PBT keycaps (12)
- Sound Dampening Options:O‑rings (black & clear)
- Lighting:None
- Additional Feature:Acrylic crystal identification model
- Additional Feature:IP30 protection rating
- Additional Feature:Gold‑plated contacts
KPREPUBLIC 24 Switch Tester with Acrylic Base (Purple Orange Yellow Gold)
The KPREPUBLIC 24‑Switch Tester is perfect for enthusiasts who crave a colorful variety of tactile feedback. You get 24 detachable Kailh Box Heavy Pro switches—purple, orange, yellow, and gold—mounted on a clear acrylic base with blank keycaps. The vibrant colors let you instantly identify each switch while the acrylic plate stays sturdy and long‑lasting. You can swap switches quickly, compare tactile feel, and test on gaming consoles or keyboards. The kit includes only the base, switches, and keycaps; no extra accessories. Warranty covers defects, and KPREPUBLIC’s UPC is 732694393334. This setup streamlines personal switch testing for any build.
- Switch Count:24 switches
- Switch Types:Kailh Box Heavy Pro (various colors)
- Base Material:Acrylic
- Keycap Inclusion:Blank keycaps (24)
- Sound Dampening Options:None provided
- Lighting:None
- Additional Feature:Vibrant multi‑color scheme
- Additional Feature:Includes warranty information
- Additional Feature:Compatible with consoles
Mechanical Keyboard Switch Tester for Office & Enthusiasts
Office workers and keyboard enthusiasts alike love the RGB‑lit, rechargeable switch tester that doubles as a fun‑focused kit for instantly comparing click sounds. You’ll value its interchangeable mechanical switches, letting you swap axles on the fly while the ABS‑plastic body stays lightweight. The built‑in RGB lighting adds visual flair, and the quirky cat‑ and duck‑calls give audible feedback that’s both useful and entertaining. Compact dimensions—around 2.5 × 4–5 cm—fit easily on a desk or in a keychain pouch. YUGSHNKFC’s design tolerances may cause slight size variance, but the overall experience remains consistent and reliable for office work, programming, or gaming sessions.
- Switch Count:Multiple interchangeable axles (unspecified)
- Switch Types:Generic mechanical switches (axle‑type)
- Base Material:ABS plastic
- Keycap Inclusion:None (keychain style)
- Sound Dampening Options:Integrated sound effects (catcalls/duckcalls)
- Lighting:RGB lighting effects
- Additional Feature:Rechargeable RGB lighting
- Additional Feature:Fun cat/duck call sounds
- Additional Feature:ABS‑plastic keychain design
Factors to Consider When Choosing Keyboard Sound Test Kits for Auditioning Builds
When you pick a sound test kit, make sure it covers a wide switch variety range so you can hear every nuance. Check that the switch feel stays consistent across samples and that the kit offers noise‑dampening options you need. Finally, consider the build quality materials and aesthetic design appeal to match your setup.
Switch Variety Range
Because a broad switch variety range lets you feel and hear every nuance, you should prioritize kits that include tactile, linear, and clicky options. You’ll want actuation with different forces and travel distances so you can match a build to typing or gaming demands. Silent and loud switches let you gauge sound profiles in quiet offices or noisy rooms, while a color‑coded array speeds visual sorting during tests. Choose kits that mix tactile bumps, smooth linear travel, and distinct clicky feedback to capture the full auditory spectrum. This diversity lets you compare how each mechanism resonates in the same housing, ensuring you pick the exact sound and feel combo you crave for your next keyboard project.
Switch Feel Consistency
If you want reliable sound testing, the kit must deliver a consistent switch feel across every key. You’ll notice that actuation force variations—45cN for softer switches versus 80cN for firmer ones—need to be reproducible, otherwise your audition loses authenticity. Look for kits that mount switches securely and keep keycaps stable; any wobble will skew tactile feedback. Even when O‑rings or other dampening parts are included, they mustn interfere with the core mechanical response. Regularly calibrate the units, checking travel distance and tactile bump uniformity, to preserve fidelity over time. By prioritizing these factors, you guarantee each key feels exactly as the switch’s design intends, giving you trustworthy sound and feel data for every build.
Noise Dampening Options
Though you might think adding O‑rings simply mutes a keyboard, the choice of dampening material directly shapes both the acoustic profile and the tactile response of each key. When selecting a test kit, look for O‑rings that sit beneath the keycaps; they shorten travel and soften the bottom‑out click. Hardness matters—40A durometer rings give mild to moderate reduction, while thicker rings mute more aggressively but can make the feel spongier. A good kit offers multiple rings so you can swap hardness and thickness to match your environment and personal preference. Aim for kits that lower impact noise without sacrificing switch integrity, ensuring a clean, quiet audition in shared or quiet spaces.
Build Quality Materials
A solid test kit starts with durable materials—acrylic or ABS housings keep the platform stable during repeated switch firings, while printed PBT keycaps resist wear and preserve a consistent feel. You’ll want chamfered edges and a sturdy frame to avoid cracks when you slam the switches. Gold‑plated contacts in the switches extend electrical life and keep the acoustic signature steady session each actuation. Adding O‑rings or other dampeners not only tames harsh clicks but also shields components from mechanical fatigue. Choose a kit whose housing resists warping and whose keycaps stay crisp after thousands of presses. This combination of robust plastics, premium metal contacts, and thoughtful edge finishing guarantees reliable, repeatable sound testing for any build.
Aesthetic Design Appeal
When you pick a keyboard sound test kit, the visual design matters just as much as the acoustic performance. You’ll notice that kits built from acrylic or ABS plastic give a sleek, durable look while resisting scratches. Frosted or crystal‑clear finishes let you spot switch types instantly, and a frosted panel can soften glare for a cleaner desktop vibe. Adding vibrant RGB lighting not only boosts aesthetics but also makes testing more enjoyable, especially when you sync colors to switch actuation. Ergonomic shapes with chamfered edges feel comfortable in hand and lend a modern, streamlined silhouette. Finally, printed keycaps or themed models inject personality, turning a functional test rig into eye appealing piece of desk décor.
Portability & Storage
If you need to move your test rig from desk to desk, compact dimensions and lightweight construction are essential. A small footprint lets you slip the kit into a backpack or drawer, while a feather‑light frame means you won’t strain your shoulders during a quick swap. Look for detachable switches and keycaps; you can pop them out, pack them separately, and re‑assemble without lugging a bulky block. Durable acrylic or ABS housings shield the components from bumps and drops, so you can toss the kit into a bag without worrying about cracks. Including a keycap puller, O‑rings, and other tools inside the case cuts down on extra gear. Finally, a stable base that locks switches in place prevents parts from rattling loose while you carry or store the kit.
Price‑Performance Balance
Diverse switch selections drive the price‑performance balance of a keyboard sound test kit. You’ll get the most value when the kit bundles tactile and linear switches, letting you compare feel and sound without buying separate testers. Look for accessories like a keycap puller and O‑rings; they boost usability and customization while adding barely any cost. Durable acrylic bases extend lifespan, so you avoid replacing cheap, flimsy frames that eat your budget. Make sure the included switch types match the builds you plan to audition—no point spending on extra switches you’ll never use. By aligning the kit’s features with your specific needs, you maximize performance per dollar and keep expenses focused on truly useful testing tools.
Frequently Asked Questions
How Do I Calibrate Sound Levels Across Different Testing Environments?
You calibrate by measuring SPL with a calibrated mic, setting a reference level, applying gain adjustments, and documenting each room’s ambient noise. Then use the same reference tone across all environments.
Can I Use These Kits to Test Non‑Mechanical Keyboards?
Yes, you can test non‑mechanical keyboards with those kits; just swap the microphone placement and adjust the frequency‑response presets to capture the quieter, softer keypress sounds accurately.
What Maintenance Is Required for O‑Rings After Prolonged Use?
You should inspect o‑rings regularly, clean them with a soft brush and mild solvent, and replace any that’re cracked, worn, or hardened. Lubricate with silicone grease quarterly to maintain smooth key travel.
Do the Acrylic Bases Affect Acoustic Measurements?
Yes, acrylic bases can alter acoustic measurements; they absorb and reflect sound differently than metal or wood, so you’ll notice slight frequency dampening and altered resonance, especially in higher registers.
Is There a Recommended Microphone Placement for Consistent Results?
You should place the mic 2‑3 inches above the keyboard, centered between the left and right keys, angled slightly toward the middle, and use a pop shield to reduce plosives for consistent results.
Leave a Reply