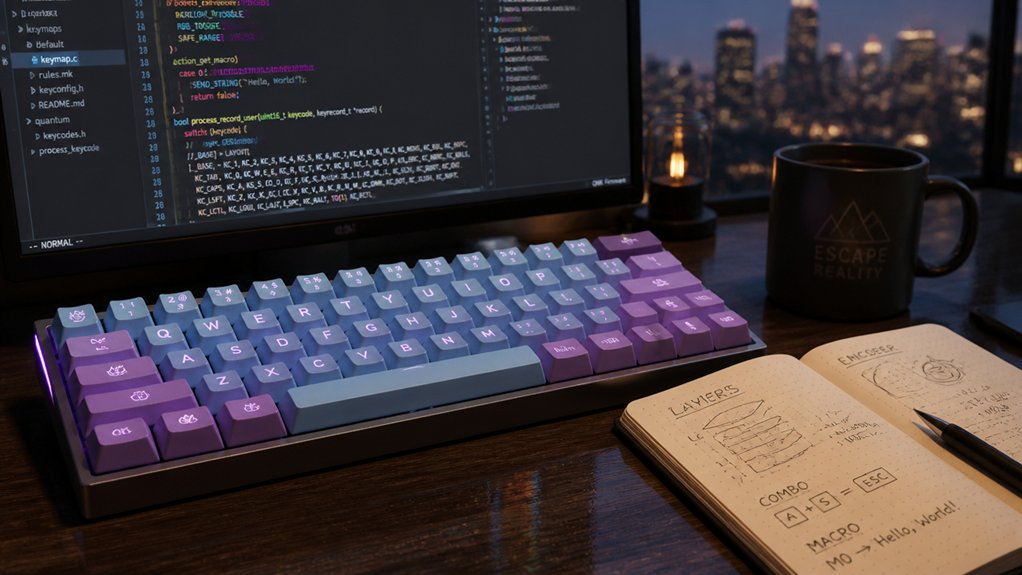
You’ve probably tried a few QMK tutorials, but the 2026 lineup brings something extra—real‑world wiring diagrams, macro‑friendly layering, and combo tricks that actually work on popular kits like the Keychron Q8 or the Nibble 65%. The guides are concise, GPL‑2.0 compliant, and updated with community feedback, so you won’t waste time on dead‑ends. Curious how these improvements translate to smoother builds and fewer glitches?
| Keychron Q8 65% Barebone Mechanical Keyboard – Grey | 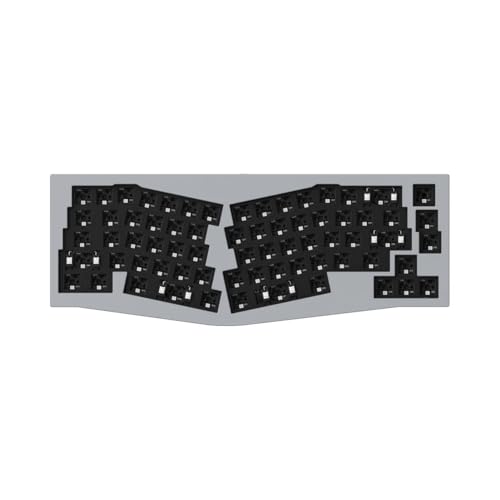 | Premium Build | Firmware Support: QMK | Hot‑Swap Compatibility: Hot‑swappable (3‑pin/5‑pin MX) | Connectivity: USB‑C wired | CHECK ON AMAZON | Read Our Analysis |
| Split Ergonomic Mechanical Keyboard with MX Switches USB‑C |  | Ergonomic Specialist | Firmware Support: QMK | Hot‑Swap Compatibility: Hot‑swappable (MX) | Connectivity: USB‑C wired | CHECK ON AMAZON | Read Our Analysis |
| Keychron K6 Pro Wireless Mechanical Keyboard (Hot‑Swappable) |  | Wireless Flexibility | Firmware Support: QMK/Launcher | Hot‑Swap Compatibility: Hot‑swappable (3‑pin/5‑pin MX) | Connectivity: USB‑C wired & Bluetooth 5.1 | CHECK ON AMAZON | Read Our Analysis |
| Tidbit 19 Key Programmable QMK Mechanical Numpad Kit (Plus – Black) |  | DIY Numpad Kit | Firmware Support: QMK | Hot‑Swap Compatibility: Hot‑swappable (MX) | Connectivity: USB‑C wired | CHECK ON AMAZON | Read Our Analysis |
| GMK104 Barebones Keyboard Kit with BT5.0 RGB Hot‑Swap |  | Full‑Size Powerhouse | Firmware Support: QMK/VIA | Hot‑Swap Compatibility: Hot‑swappable (3‑pin/5‑pin MX) | Connectivity: USB‑C wired, Bluetooth 5.0, 2.4 GHz wireless | CHECK ON AMAZON | Read Our Analysis |
| Nibble ANSI+ISO 65% Mechanical Keyboard Kit (White) | 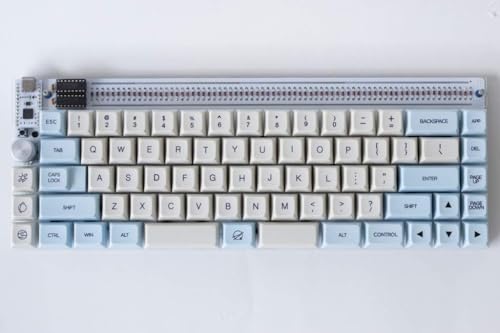 | ANSI/ISO Versatile | Firmware Support: QMK | Hot‑Swap Compatibility: Hot‑swappable (MX) | Connectivity: USB‑C wired | CHECK ON AMAZON | Read Our Analysis |
More Details on Our Top Picks
Keychron Q8 65% Barebone Mechanical Keyboard – Grey
If you’re a tinker‑enthusiast, the Keychron Q8’s CNC‑machined aluminum chassis delivers a premium build that invites endless customization. Its 65% Alice layout is barebone, so you’ll add your own MX‑style switches—3‑pin or 5‑pin, hot‑swap ready—plus PBT keycaps. Double‑gasket construction and foam dampen resonance, while south‑facing RGB LEDs shine from your typing angle. Screw‑in stabilizers on larger keys cut wobble, and the metal case guarantees durability. QMK firmware lets you remap keys, set macros, and program lighting, and the Keychron Launcher streamlines layout tweaks. USB‑C wiring powers the board, and it works on macOS, Windows, and Linux.
- Firmware Support:QMK
- Hot‑Swap Compatibility:Hot‑swappable (3‑pin/5‑pin MX)
- Connectivity:USB‑C wired
- Layout Size:65% (65 keys)
- Material (Enclosure):CNC‑machined aluminum
- RGB Lighting:South‑facing RGB LEDs
- Additional Feature:Double‑gasket construction
- Additional Feature:South‑facing RGB LEDs
- Additional Feature:CNC‑machined aluminum
Split Ergonomic Mechanical Keyboard with MX Switches USB‑C
Designers and programmers love the 36‑key split ergonomic specialist because its natural hand angle reduces fatigue while delivering full QMK customizability. You’ll find a compact 36‑key layout that keeps your desk tidy and supports QWERTY typing in an ambidextrous orientation. The plastic enclosure and aluminum plate give it a solid feel, while hot‑swappable MX sockets let you swap Leobog V4 switches without soldering. Extra caps and replacement switches add customization options. USB‑C powers the board, and per‑key RGB lighting shines in low‑light environments. QMK firmware lets you program macros, layers, and shortcuts, making it perfect for advanced users and enthusiasts.
- Firmware Support:QMK
- Hot‑Swap Compatibility:Hot‑swappable (MX)
- Connectivity:USB‑C wired
- Layout Size:36‑key split ergonomic
- Material (Enclosure):Plastic
- RGB Lighting:Per‑key RGB
- Additional Feature:36‑key split layout
- Additional Feature:Leobog V4 switches included
- Additional Feature:Plastic‑aluminum hybrid enclosure
Keychron K6 Pro Wireless Mechanical Keyboard (Hot‑Swappable)
The Keychron K6 Pro’s 65% hot‑swappable layout makes it perfect for anyone who wants QMK‑driven custom keymaps without sacrificing wireless flexibility. You’ll connect via Bluetooth 5.1 to up to three devices—laptops, phones, tablets—and switch instantly, while a USB‑C cable lets you program in wired mode. QMK/Launcher lets you remap every one of the 68 keys, set macros, and keep the map in both wired and wireless use. The barebone kit accepts any 3‑ or 5‑pin MX switch, so you can swap Cherry, Gateron, Kailh, or Panda without soldering. Included tools cover keycap and switch pullers, hex key, screwdriver, and cable. South‑facing RGB shines under PBT caps, and screw‑in stabilizers improve typing stability. Plastic housing, non‑water‑resistant, carries a one‑year limited warranty.
- Firmware Support:QMK/Launcher
- Hot‑Swap Compatibility:Hot‑swappable (3‑pin/5‑pin MX)
- Connectivity:USB‑C wired & Bluetooth 5.1
- Layout Size:65% (68 keys)
- Material (Enclosure):Plastic
- RGB Lighting:South‑facing RGB backlight
- Additional Feature:Bluetooth 5.1 multi‑device
- Additional Feature:Built‑in battery
- Additional Feature:Screw‑in stabilizers
Tidbit 19 Key Programmable QMK Mechanical Numpad Kit (Plus – Black)
Enthusiastic tinkerers will love this DIY numpad kit, offering 19 programmable keys and a Pro Micro MCU for endless layout tweaks. You’ll find top and bottom PCBs, acrylic supports, M2 standoffs, screws, diodes, a rotary encoder, and a color‑matched knob—all 100 % through‑hole for forgiving soldering. The kit works with MX‑style switches and 2U keycaps, though 2U keys lack stabilizers. QMK firmware lets you map any layout, create macros, and drive eight RGB underglow LEDs. USB power connects to laptops, PCs, tablets, Fire devices, and iPad 10. Assemble, flash QMK, and enjoy a fully custom, ambidextrous numpad.
- Firmware Support:QMK
- Hot‑Swap Compatibility:Hot‑swappable (MX)
- Connectivity:USB‑C wired
- Layout Size:19‑key numpad
- Material (Enclosure):Plastic
- RGB Lighting:8 underglow LEDs (RGB)
- Additional Feature:8 pre‑soldered LEDs
- Additional Feature:Rotary encoder knob
- Additional Feature:Acrylic support frame
GMK104 Barebones Keyboard Kit with BT5.0 RGB Hot‑Swap
If you crave a full‑size powerhouse that you can program down to every macro, the GMK104 barebones kit delivers. You’ll get 104 fully programmable keys with QMK/VIA support, a smart screen for real‑time display updates, two multimedia buttons, and a metal knob for precise volume control. Tri‑mode connectivity gives you Bluetooth 5.0, 2.4 GHz wireless, or wired Type‑C, while a 4000 mAh battery keeps you running for days. The gasket‑mounted, silent‑cushion design feels comfortable, and hot‑swap sockets accept 3‑pin and 5‑pin switches without soldering. South‑facing RGB, NKRO, and full Windows/macOS compatibility round out a versatile, office‑to‑gaming workstation.
- Firmware Support:QMK/VIA
- Hot‑Swap Compatibility:Hot‑swappable (3‑pin/5‑pin MX)
- Connectivity:USB‑C wired, Bluetooth 5.0, 2.4 GHz wireless
- Layout Size:Full‑size (104 keys)
- Material (Enclosure):Metal (gasket‑mounted)
- RGB Lighting:South‑facing RGB backlight
- Additional Feature:Tri‑mode wireless (BT5.0, 2.4 GHz)
- Additional Feature:4000 mAh battery
- Additional Feature:Smart screen display
Nibble ANSI+ISO 65% Mechanical Keyboard Kit (White)
Looking for a compact, programmable board that swaps between ANSI and ISO layouts? The Nibble ANSI+ISO 65% kit gives you 72 keys, a Pro Micro controller, and a white “PLUS” enclosure that’s ambidextrous. All components are through‑hole, so soldering is forgiving, and ICs are socketed to protect them. You’ll get acrylic supports, M2 standoffs, a reset switch, a rotary encoder, a color‑matched knob, and RGB underglow with ten pre‑soldered LEDs plus larger RGB LEDs. QMK firmware lets you remap keys, program macros, and create split spacebars or stepped caps lock. It works via USB on PCs, laptops, consoles, and phones.
- Firmware Support:QMK
- Hot‑Swap Compatibility:Hot‑swappable (MX)
- Connectivity:USB‑C wired
- Layout Size:65% (72 keys)
- Material (Enclosure):Plastic
- RGB Lighting:Underglow + large RGB LEDs (RGB)
- Additional Feature:ANSI & ISO layout support
- Additional Feature:Large RGB underglow LEDs
- Additional Feature:Pro Micro integrated USB
Factors to Consider When Choosing QMK Firmware Guides for Programming Custom Layouts
When you pick a QMK guide, check how deep it goes and whether it matches your keyboard model. Look for clear step‑by‑step examples that include macro and layer support, plus visual aids like diagrams. This way you’ll know the guide will actually help you program your custom layout.
Guide Depth and Detail
Choosing a QMK firmware guide that balances depth and practicality is essential for mastering custom layouts, because a well‑structured tutorial walks you through keymap layers, keycodes, and the exact syntax needed in keymap.c. You should look for guides that break down each layer, show how to assign keycodes, and explain the file hierarchy. Advanced sections on macros, tap‑dance, combos, and leader keys let you build sophisticated functions without guessing. Step‑by‑step code snippets illustrate how to edit, compile, and flash safely, while explanations of QMK Configurator file structures help you integrate custom maps into your build environment. Finally, troubleshooting chapters that list common errors and debugging tricks keep you moving forward when something goes wrong.
Compatibility With Keyboard Models
Even if your keyboard uses a Pro Micro‑style microcontroller, you need a QMK guide that explicitly supports that chip; otherwise the firmware won’t compile or flash correctly. First, confirm the guide lists your exact microcontroller—whether it’s Pro Micro, Elite‑C, or a custom board—so the build system knows which pins to map. Next, match the firmware version to your layout size and key count; a 65 % board needs a different keymap file than a 36‑key ortholinear. Verify that the guide covers hot‑swappable switch types and stabilizer setups, preventing mismatched firmware expectations. Look for sections on connectivity—USB‑C wired or Bluetooth wireless—so you can program remaps and macros without missing protocols. Finally, make sure the guide addresses your LED architecture (south‑facing RGB, underglow, etc.) so lighting customizations compile without errors.
Step‑by‑Step Examples
After confirming your keyboard’s microcontroller and LED setup, jump straight into a hands‑on example with the QMK Configurator or VIA. Start with a simple layout, map a few keys, and add a basic layer switch to see how the firmware reacts. Follow a tutorial that walks you through editing the keymap.c file, compiling, and flashing via USB or Bluetooth. Test each change before moving on—press the new keys, verify LEDs, and watch the console for errors. When you’re comfortable, try assigning a custom shortcut or a small macro to a spare key, then re‑compile and flash again. If a key doesn’t respond, double‑check the keycode and layer definition; if lighting fails, confirm the LED configuration and firmware settings. This incremental approach keeps debugging manageable and builds confidence.
Macro and Layer Support
If you want to boost productivity without rewriting your entire keymap, focus on how QMK handles macros and layers together. QMK lets you bind a single key to a sequence of keystrokes, launching apps, inserting repetitive text, or controlling the OS—all without leaving the keyboard. Pair that with its robust layer system, and you can switch between entirely different layouts on the fly using momentary or toggle keys. Transparent layers let you overlay new functions while preserving base keys, so you never lose essential commands. When choosing a guide, look for clear examples of macro definitions, layer declarations, and how to combine them—especially using the `process_record_user` hook to trigger macros only on specific layers. This synergy maximizes efficiency and keeps your firmware lean.
Visual Aids and Diagrams
When you skim a QMK guide, clear visual aids instantly cut through the jargon, letting you picture the key matrix, wiring, and layer hierarchy without guessing. Look for labeled diagrams that map each key to its row and column, so you can trace signals and verify solder points quickly. Color‑coded layers and modifiers make it easy to spot where a key changes function, while step‑by‑step screenshots of flashing tools reduce mistakes and boost confidence. Good guides also include visual representations of the physical board, highlighting solder pads and component placement before you start coding. Choose resources that combine concise text with these purposeful illustrations; they streamline troubleshooting and help you master custom layouts faster.
Community Updates and Maintenance
Clear diagrams get you up to speed, but a guide’s long‑term value hinges on how well the community keeps it alive. You’ll want a guide that reflects regular community updates, because those keep QMK compatible with new boards and embed the latest features and bug fixes. Look for active maintenance: issue trackers should be addressed quickly, and user feedback should shape each releases, boosting stability and usability. Community‑driven repositories are a goldmine, offering fresh keymaps, macros, and example configs that simplify custom layout programming. Diverse contributors expand support for niche keyboards and novel customizations, so a vibrant contributor base means broader options for you. Finally, stay plugged into forums and update logs; monitoring progress lets you adapt your code efficiently as new versions roll out.
Licensing and Distribution Terms
Because QMK firmware is GPL‑2.0 licensed, any guide you follow must respect that copyleft requirement, meaning you’ll need to share source code for any modifications you distribute. When you pick a guide, check that it explicitly mentions compliance with GPL‑2.0; otherwise you risk violating the license. Make certain the tutorial shows how to keep the original copyright notices and include a copy of the GPL in your firmware repository. You should also provide clear attribution to the upstream project and any third‑party code you incorporate. Before publishing a custom layout, verify that your distribution includes a link to the unmodified source and a full license file. This diligence protects you legally and preserves the community’s open‑source ethos.
Frequently Asked Questions
Can QMK Firmware Be Used With Bluetooth‑Only Keyboards?
Yes, you can use QMK firmware with Bluetooth‑only keyboards, but you’ll need a compatible Bluetooth module, proper power management, and the appropriate BLE stack support to handle wireless communication reliably.
How to Program Per‑Key RGB Lighting Using QMK?
You enable per‑key RGB by defining a lighting layer in your keymap, enabling `RGBLIGHT_ENABLE = yes` in `config.h`, setting `rgblight_mode()` and `rgblight_setrgb()` for each key, then compiling and flashing the firmware.
Is It Possible to Flash QMK Without a Usb‑C Cable?
Yes, you can flash QMK without a USB‑C cable by using an ISP programmer, a bootloader like DFU over UART, or a Bluetooth‑enabled bootloader; just connect the appropriate pins and run the flashing tool.
Can QMK Support Macros on Split Ergonomic Boards?
Yes, you can program macros on split ergonomic boards with QMK. Just define the macro keys in your keymap, enable the split feature, and flash each half; QMK handles synchronization automatically.
What Are the Steps to Recover a Bricked QMK Keyboard?
You’ll reset the board, flash the bootloader, re‑flash the firmware, and verify the keymap. Use QMK Toolbox or DFU‑util, hold the reset button, select the .hex, and press upload.
Leave a Reply