To build customizable mechanical keyboard kits, start by choosing a case material and mounting style that match your preferred typing feel and sound. Pick a hot-swap PCB for easy switch swapping or a solderable one for permanent setups. Select a compatible plate material to balance stiffness and acoustics. Install and lubricate stabilizers to reduce noise. Finally, select switches and keycaps that suit your typing comfort and aesthetic. Keep exploring to master assembly techniques and fine-tuning for peak performance.
Choose the Right Case for Your Mechanical Keyboard Kit

How do you pick the right case for your mechanical keyboard kit? The keyboard case is the outer shell that holds all components, so it greatly shapes your build’s look and feel.
You’ll want to decide between materials—aluminum cases offer sturdiness and heft, while plastic cases are lighter and can change the sound profile.
Next, make sure the case fits your chosen PCB and plate, since not every case supports all layouts or mounting styles.
Speaking of mounting styles, cases come with options like top mount, gasket mount, or sandwich mount, each affecting typing feel and sound differently.
Finally, check if the keyboard case includes extras like gasket foam, daughter boards, or stabilizer support, which can improve build quality and sound tuning.
Pick Hot-Swap or Solderable PCBs for Easy Customizing
Once you’ve chosen the right case, it’s time to focus on the PCB, the keyboard’s electronic heart. You can pick between a hot-swap PCB or a solderable PCB, each offering distinct benefits.
A hot-swap PCB lets you install or replace switches without a soldering iron, making it perfect if you want to experiment often or are new to customizing. Just be careful to support the socket properly during switch insertion to avoid damage.
On the other hand, a solderable PCB demands soldering skills and tools but grants more layout flexibility and reliable electrical contact. While soldering provides a permanent solution, it limits how easily you can swap switches. Choose based on your comfort with soldering and how much you want to customize later.
Select Plates for Balanced Typing Feel and Sound

Because the plate material directly affects both the typing feel and sound, choosing the right one is essential for your custom keyboard. The plate not only mounts switches but also shapes the keyboard’s stiffness and acoustics.
The plate material shapes your keyboard’s stiffness and acoustics, crucial for both typing feel and sound.
Here’s what to take into account for balanced typing feel and sound in Mechanical Keyboards:
- Aluminum and FR4 offer a perfect mix of firm feedback and pleasant sound.
- Brass provides a stiffer, higher-pitched typing experience.
- POM and polycarbonate soften acoustics and lower noise levels.
- Make certain the plate material matches your PCB and layout for proper switch fit.
- Selecting the right plate affects overall typing consistency and sound signature.
Picking a suitable plate helps you strike the ideal balance between typing comfort and sound quality in your mechanical keyboard.
Choose Switches: Linear, Tactile, or Clicky
When choosing switches, you’ll decide between linear, tactile, and clicky options, each offering a unique feel and sound.
Linear switches are smooth and quiet, tactile switches provide a subtle bump, and clicky switches give audible feedback. You can also improve any switch’s performance by lubricating them for smoother, quieter keystrokes.
Switch Types Explained
Although choosing the right mechanical switches might seem overwhelming, understanding the three main types—linear, tactile, and clicky—can help you find the perfect fit for your typing style.
Your custom mechanical keyboard’s typing feel depends heavily on this choice.
- Linear switches offer a smooth, quiet keystroke without bumps or clicks, ideal for fast typing and gaming.
- Tactile switches provide a noticeable bump for feedback, enhancing accuracy without noisy clicks.
- Clicky switches combine a tactile bump with an audible click, giving clear confirmation with each press.
- Each type affects your keyboard’s sound and feel uniquely.
- Personal preference plays a crucial role, and customizing (like lubing) can further refine the typing experience.
Knowing these switch types simplifies selecting the switch that matches your preferred typing feel perfectly.
Sound And Feel
How does the sound and feel of your keyboard impact your typing experience? The switch types you choose play a major role in this.
Linear switches provide a smooth, quiet keystroke without any bumps, ideal if you want a fluid feel.
Tactile switches give you a noticeable bump without loud noise, perfect for feedback without disturbance.
Clicky switches combine that tactile bump with an audible click, great if you enjoy clear key actuation sounds but can be noisy for shared spaces.
Trying different switch types is key to finding what suits you best.
Also, while we’ll explore lubrication benefits later, know that lubricating switches can enhance sound and feel by smoothing keypresses and adjusting acoustics, influencing typing comfort overall.
Lubrication Benefits
You’ll notice a remarkable difference in your keyboard’s sound and feel once you start lubricating the switches. The lubrication benefits include smoother keystrokes and reduced noise, making your typing experience much more enjoyable. We highly recommend lubing your switches to release their full potential.
- Linear switches get the biggest boost from lubing, smoothing out friction without altering their feel.
- Tactile switches benefit from reduced scratchiness but need careful lubrication to keep the tactile bump.
- Clicky switches require minimal lubrication to maintain their distinctive clicks, mostly on sliders.
- Lubrication reduces keyboard noise and prevents scratchy key presses.
- Proper lubing involves disassembling switches and using specialized tools and lubricants following detailed guides.
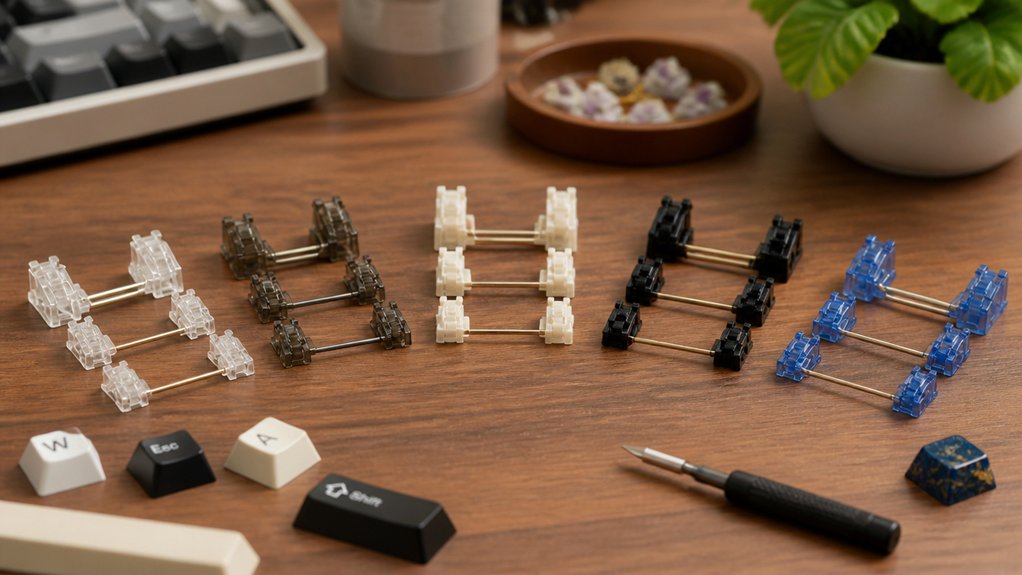
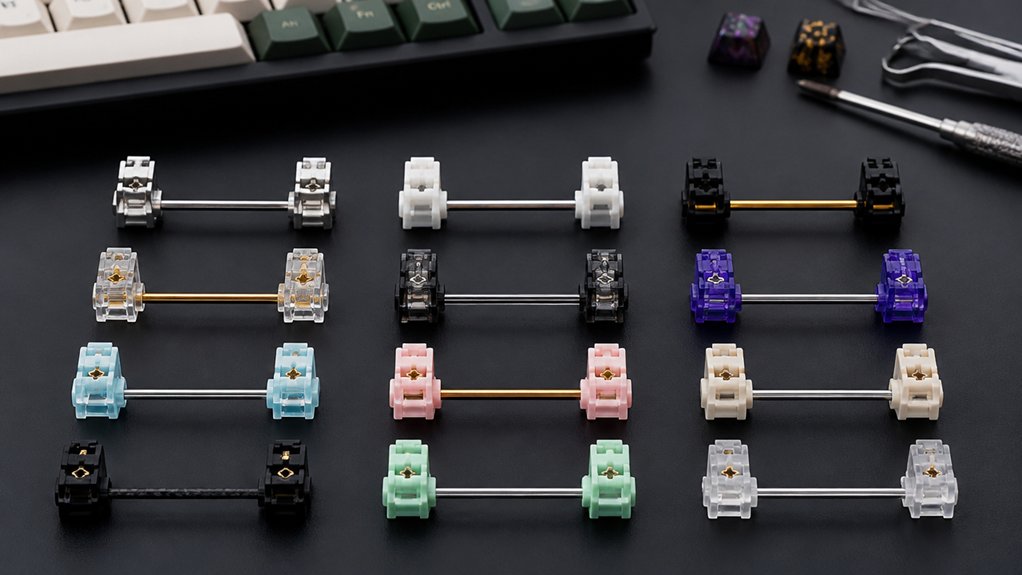
Install and Lube Stabilizers to Reduce Rattles
To keep your keyboard’s larger keys feeling smooth and quiet, you’ll want to install stabilizers correctly with the wire aligned to the larger PCB holes.
Using a brush and syringe to carefully lube the stabilizers can cut down on rattling and improve typing feel.
Take your time testing and adjusting after installation to get the best performance without overtightening screws.
Lubrication Techniques For Stabilizers
Although stabilizers are often overlooked, lubricating them thoroughly is key to eliminating rattles and improving keystroke smoothness.
When lubricating stabilizers, focus on key contact points with the right tools and lube.
- Use a brush and syringe for even lubricant application.
- Apply lube on the stabilizer housing, stem, and wire contact points.
- Lubrication can be done carefully without full disassembly.
- Test stabilized keys after lubing to guarantee rattle elimination.
- Patience during lubrication and testing guarantees the best results.
Proper Stabilizer Installation
When installing stabilizers, orient their wires toward the larger PCB holes to guarantee secure fitting and stability. This guarantees your custom mechanical keyboard’s larger keys stay steady without wobbling.
For screw-in stabilizers, use washers to protect the PCB, but don’t overtighten screws, as this can damage components and hinder smooth keypresses.
Next, thoroughly lube your stabilizers using a brush and the recommended lubricant to reduce rattles and improve keystroke consistency.
After installation, test each stabilized key by pressing it several times to detect any noise or stiffness; reapply lube if needed.
Remember, you can refine stabilizer tuning even after full keyboard assembly, making adjustments easier without disassembling your custom mechanical keyboard from scratch.
Proper installation and lubrication are key to a premium typing experience.
Match Keycaps for Comfort, Style, and Compatibility

How do you choose keycaps that balance comfort, style, and compatibility? Start by focusing on profile keycaps and materials. Profile shapes like OEM or Cherry impact typing feel, so make sure to pick one that suits your comfort.
Next, consider your keyboard’s layout and LED direction to avoid compatibility issues, especially with north-facing LEDs clashing with Cherry profile keycaps.
Aesthetics matter too—choose colors and designs that reflect your style without sacrificing usability.
Finally, check if the keycaps fit your hot-swap or solderable PCB to prevent installation headaches.
- Select profile keycaps for your typing comfort
- Make sure materials match your acoustic preferences (ABS or PBT)
- Verify compatibility with keyboard layout and LED direction
- Choose styles complementing your desk setup
- Confirm fit for your PCB type
Understand Keyboard Layouts for Your Space and Needs
You’ll want to pick a keyboard layout that fits both your desk space and the keys you use most.
Compact options like 60% and 65% save room, while TKL and 75% layouts offer a familiar feel with fewer keys. Consider what keys you need daily, such as arrow keys or numpads, to find the right balance for your setup.
Common Keyboard Layouts
Although choosing a mechanical keyboard layout might seem straightforward, it greatly affects your typing experience and desk setup.
When picking the right keyboards for your needs, consider how layout impacts key count, compactness, and compatibility with keycap sets and keyboard kits.
Here are common layouts you’ll encounter:
- 60%: Ultra-compact, omits function row and navigation keys
- 65%: Compact with arrow keys, great for gaming and daily use
- 75%: Includes function and navigation keys in a smaller form factor
- Tenkeyless (TKL): No numpad but retains most keys, good for workstations
- Full-size and 1800: Complete key sets including numpad, ideal if you need every key
Choose a layout that matches your desk space and the keys you frequently use.
Choosing Layout Size
Wondering which keyboard layout size fits your space and workflow best? When building a custom keyboard, consider layouts from compact 60% and 65% to larger 75%, TKL, full-size, and 1800.
The 65% layout offers a balanced, space-saving design with arrow keys, perfect for gaming and day-to-day tasks. If you want more keys without a full-size footprint, 75% or TKL layouts remove the number pad but keep function and navigation clusters.
Check if your chosen layout supports a daughter board, which can add extra connectivity or features without increasing bulk. Remember, keycap and switch compatibility depend on layout, so pick the right size based on your desk space and key needs to craft a custom keyboard that feels just right.
Find the Right Mounting Style for Typing Feel and Sound

When choosing a mounting style for your mechanical keyboard, you shape both how it feels to type and how it sounds. To pick the best fit, you should be sure to understand the unique characteristics of each mounting option.
Choosing your keyboard’s mounting style directly influences both typing feel and sound quality.
We strongly recommend checking these key styles:
- Top Mount: Plate screwed into the top case, offering a stiff feel with loud, metallic feedback and vibrations.
- Gasket Mount: Uses gaskets to isolate components, providing a range from soft to stiff feel while minimizing vibrations.
- Gummy O-Ring Mount: Large o-rings replace screws for very soft typing with high-pitched, clacky sounds.
- Sandwich Mount: Locks the plate between case halves, creating stiffness with metallic sound influenced by plate material.
- Integrated Plate Mount: Plate is part of the top case, resulting in a very stiff feel with muddy or metallic sound profiles.
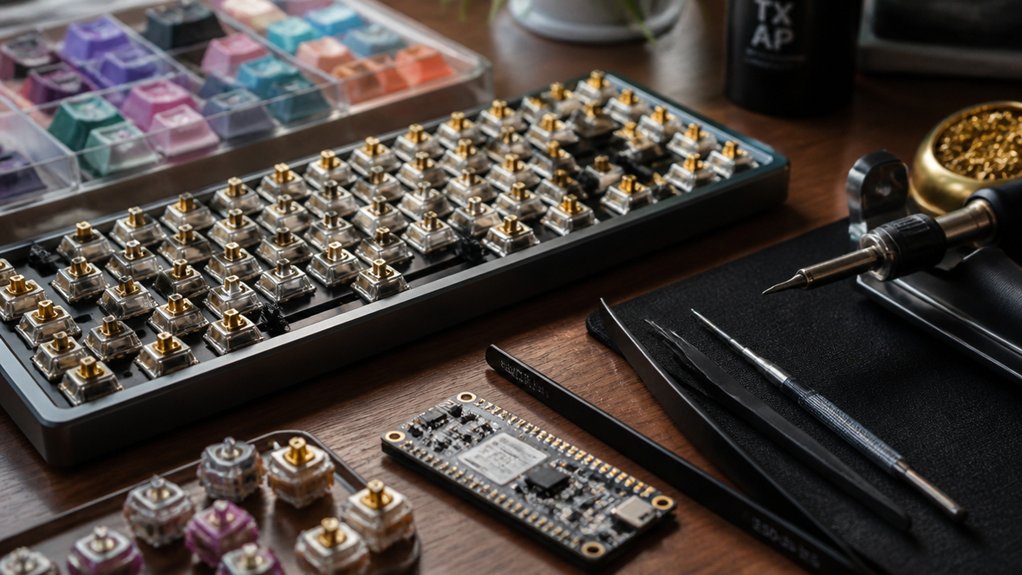
Assemble Your Mechanical Keyboard Step by Step
Start your mechanical keyboard assembly by thoroughly testing the PCB with tweezers and software like VIA to guarantee every key registers correctly. I suggest starting here as Step 1: Testing is essential to avoid issues later.
Next, carefully lubricate and install your stabilizers, making sure the wire faces the large PCB holes and test for any rattling.
After that, mount the plate onto the PCB, optionally adding plate foam for sound dampening.
Insert or solder switches, checking compatibility with hot-swap sockets if needed.
Prepare your case by installing gaskets, daughter boards, and foam, then assemble the PCB and plate into the case, securing all screws firmly.
Finally, install keycaps according to your preferred layout and profile, verifying full keyboard functionality before use.
Customize Your Keyboard Sound and Fix Stabilizer Noise

After assembling your keyboard and confirming every key functions properly, it’s time to focus on customizing its sound and fixing any stabilizer noise. Tuning your keyboards sound enhances typing satisfaction and reduces annoying rattles.
Once your keyboard is built and tested, fine-tune its sound to elevate typing comfort and minimize rattles.
Try these tips:
- Lubricate stabilizers thoroughly with a brush and syringe lube to cut rattling and boost smoothness.
- Use softer plate materials like POM or polycarbonate, and add foam (Poly-Fil or poron) under the PCB to mute hollow sounds.
- Experiment with gasket mounts or remove some gaskets to increase flex and soften metallic feedback.
- Apply masking tape on the underside of the PCB to amplify sound if your keyboard feels too quiet; this reversible mod adjusts sound output subtly.
- Make certain keycaps fit snugly on stabilizer stems and fill gaps causing persistent rattles using thin plastic pieces.
These steps help you achieve a quieter, richer acoustic profile tailored to your preference.
Frequently Asked Questions
What Do You Need to Build a Custom Mechanical Keyboard?
You need a case, PCB (hot-swap or solderable), plate, switches, stabilizers, keycaps, and basic tools like tweezers and a screwdriver. Don’t forget switch lube for a smooth, quiet typing experience and easy customization.
Is 84 Keys 75%?
Yes, an 84-key keyboard is considered a 75% layout. You’ll get a compact design with essential keys, including arrow and navigation keys, without the numeric keypad—perfect if you want functionality without taking up too much desk space.
How Much Does It Cost to Build a Custom Mechanical Keyboard?
You’ll spend around $100 to $500 building a custom mechanical keyboard, depending on your kit choice, switches, keycaps, and extras. Budget carefully to balance quality and customization without overspending on unnecessary gear or premium parts.
Is It Cheaper to Build or Buy a Keyboard?
It’s often cheaper to build your own keyboard if you choose components wisely and avoid pricey extras. But if you value convenience or warranty, buying prebuilt might be more cost-effective despite the premium price.
In Summary
Building your own customizable mechanical keyboard kit lets you tailor every detail—from the case and switches to the layout and sound. By choosing the right components and carefully assembling them, you create a keyboard that feels just right for your typing style and space. Remember, customizing stabilizers and mounting styles can fine-tune sound and comfort. With patience and care, you’ll enjoy a uniquely personal keyboard that enhances your productivity and typing experience every day.

Leave a Reply