
If you want a quiet, comfortable keyboard build, start with silent switches like Outemu Silent Peach V2 or TTC Silent Brown V2, matching your noise tolerance and feel. Choose a hot-swap PCB for easy switch installation, then lube stabilizers meticulously to cut rattle. Combine a gasket mount case with soft polycarbonate plates and thick PBT keycaps for the best sound dampening. These thoughtful choices reduce noise without sacrificing performance. Keep going to uncover more tips and tricks for ultimate silence.
What Makes Silent Switch Keyboard Kits Ideal for Quiet Typing
If you want a keyboard that keeps noise to a minimum, silent switch keyboard kits are your best bet. These kits feature specialized silent switches that reduce bottom-out noise and wobble, delivering a quieter sound and feel.
You’ll find lubricated, PCB-mount screw-in stabilizers included to cut down rattling on larger keys like the spacebar. A gasket mount design combined with softer plate materials such as POM or polycarbonate isolates vibrations effectively, preventing sound from traveling through the case.
Additionally, thick PBT keycaps complement the setup by muting keystrokes further. Together, these features create a typing experience that’s impressively quiet without sacrificing responsiveness, making silent switch keyboard kits ideal if you want to enjoy both peaceful sound and satisfying feel during long typing sessions.
What’s Inside a Silent Switch Keyboard Kit?
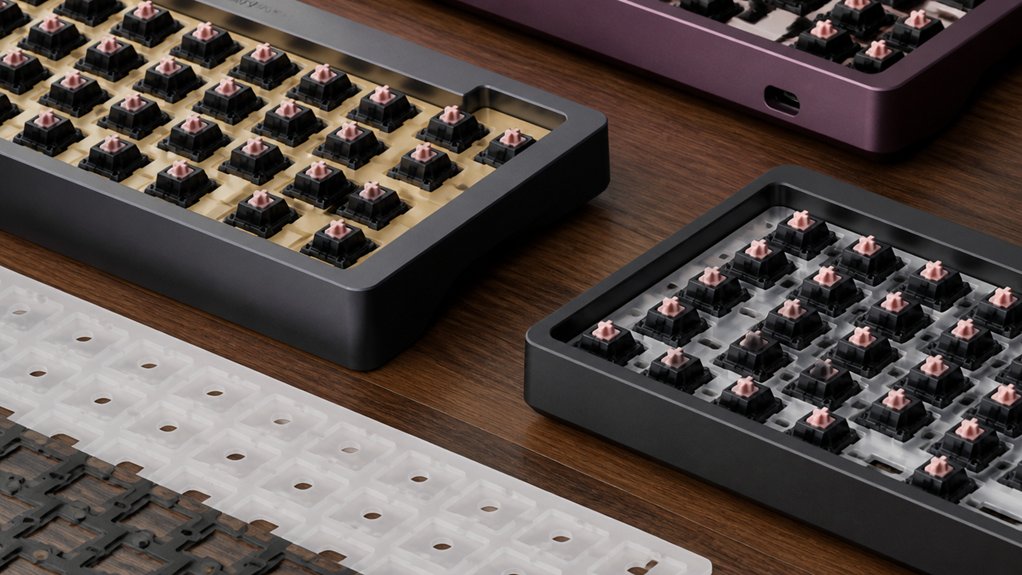
Wondering what components come together to create the quiet efficiency of a silent switch keyboard kit? Inside, you’ll find a thoughtfully designed case material—often aluminum or plastic—that houses the entire build.
The hot-swap PCB simplifies assembly by letting you install switches without soldering. Alongside, a matching plate made from aluminum, FR4, or polycarbonate holds the switches securely.
Stabilizers, usually pre-installed or screw-in types, help minimize noise on larger keys when properly lubricated. You’ll also get durable keycaps in PBT material, featuring quieter typing profiles like Cherry or OEM.
To further reduce noise, sound-dampening materials such as foam or gels are included or recommended inside the case. This combination guarantees your silent switch keyboard kit delivers a smooth, noise-reduced typing experience with easy customization options.
Silent Switch Types for Your Build

Which silent switch suits your build best depends on whether you prioritize near-silent operation or tactile feedback. If silence ranks highest, linear switches like the Outemu Silent Peach V2 stand out for their smooth, quiet feel and excellent build quality.
For a balanced typing feel with subtle feedback, tactile switches such as the Jade Yellow or Silent TOM offer quiet operation without sacrificing responsiveness. Newer options like Bobagum and TTC Silent Brown V2 provide varied choices to suit specific preferences.
When building a custom keyboard, testing sample switch packs helps you assess how different silent switches influence your typing feel and overall satisfaction. Tailoring your switch selection based on tactile or linear characteristics guarantees your custom keyboard matches your noise tolerance and performance needs perfectly.
Testing and Preparing Your PCB
After selecting the silent switches that best suit your typing preferences, it’s time to verify your PCB is ready for assembly. Begin by visually inspecting the PCB for any physical defects, bent solder points, or damaged switch sockets to guarantee everything functions properly.
Use key tester software like VIA to perform thorough testing, checking that all key registers respond correctly and spotting any faulty or miswired connections early. If you have a hot-swap PCB, take care inserting switches with a plate fork or support tool to avoid damaging delicate sockets.
Also, confirm stabilizers align with the PCB mounting points and fit securely to minimize rattling. Finally, double-check that the PCB layout matches your desired keyboard size and supports your chosen switch types and any LED or daughterboard requirements.
Installing and Lubing Stabilizers
Now that your PCB is ready, it’s time to install the stabilizers correctly to prevent key wobble and noise.
You’ll want to understand the different stabilizer types and choose the best one for your build, then apply effective lubrication to reduce friction and sound.
Let’s walk through key tips for mounting and lubing stabilizers for a silent, smooth typing experience.
Stabilizer Types Overview
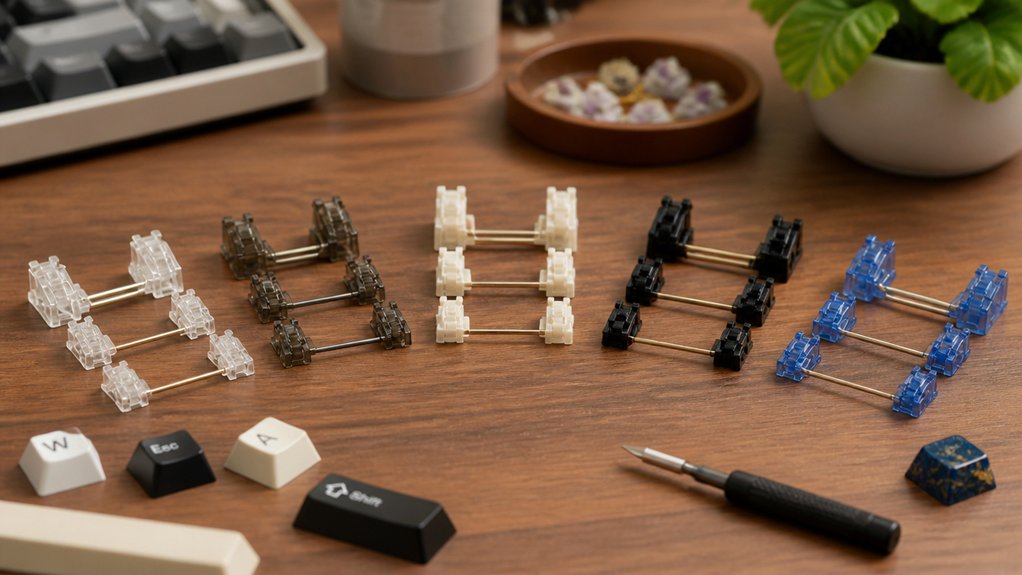
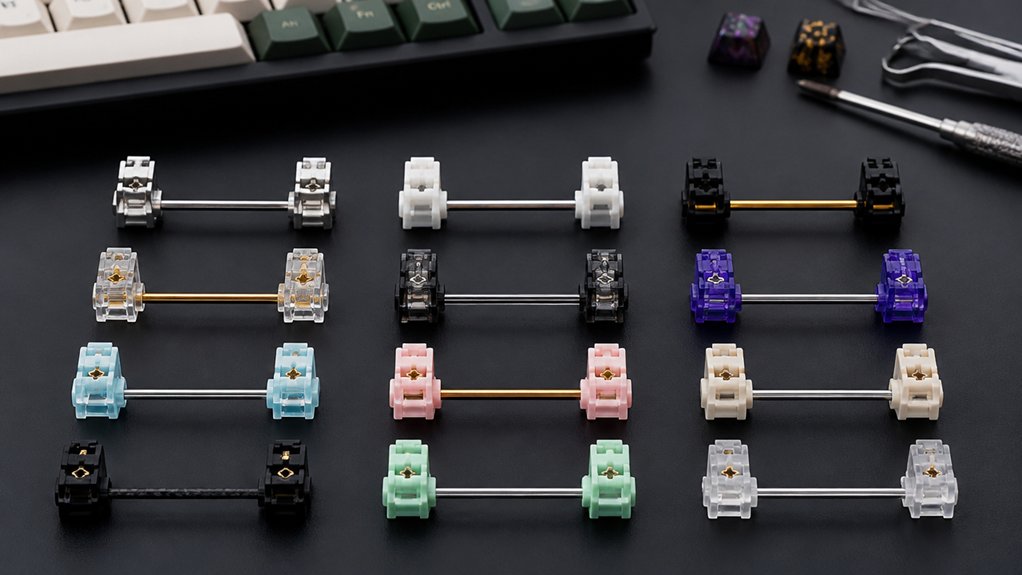
Though stabilizers might seem like small components, choosing the right type and installing them properly makes a huge difference in your keyboard’s feel and sound. PCB-mount stabilizers, which screw into the PCB, offer better stability and quieter operation than plate-mount stabilizers that clip into the plate.
When selecting stabilizers for your keyboard kits, consider the switch type and the size of your larger keys to guarantee the correct amount of stabilizers. Proper installation includes secure clipping or screwing and matching spacebar size to stabilizer quantity.
Lubricating stabilizers, especially where stems, housing sliders, and wire contact points meet, dramatically reduces rattle and noise. Pre-clipping stabilizers before installation further enhances smooth keypresses. Taking these steps lets you get the best performance from your silent switch keyboard build.
Effective Lubrication Techniques
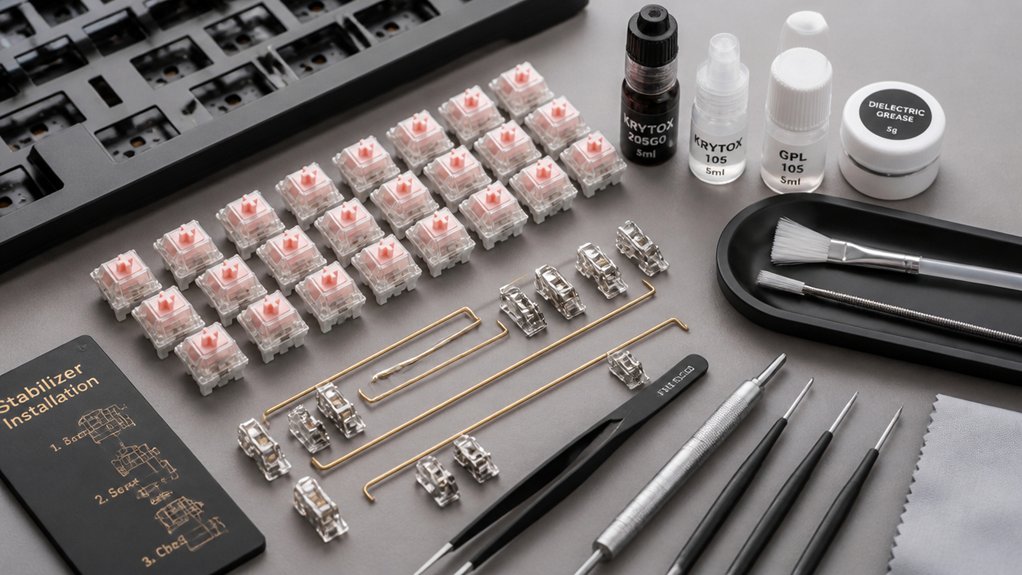
Choosing the right stabilizers is just one piece of the puzzle; properly lubricating them can transform your keyboard’s feel and sound. When lubing stabilizers, focus on the wire contact points, slider stems, and housing interiors to cut rattling and noise.
Use a thin, high-quality lubricant like Krytox 205g0 or Tribosys 3204 applied with a fine brush or syringe for smooth operation. Follow these key steps for effective stabilizer tuning:
- Clip excess plastic legs and perform band-aid modding to dampen sounds.
- Guarantee correct alignment of switches and stabilizers before lubing.
- Lubricate carefully, even if you don’t fully disassemble the stabilizers.
- Pair consistent lubrication with quality PCB-mount screw-in stabilizers for the quiet typing experience you want.
Installing Silent Switches in Hot-Swap Kits
How do you guarantee a smooth installation when working with silent switches in hot-swap kits? First, make certain your hot-swap PCB supports the silent switches’ pins and align them carefully to prevent bending.
Begin by lubricating your silent switches to minimize scratchiness and enhance quietness. Next, install lubed stabilizers on the PCB to reduce rattle noise from larger keys before placing the switches.
Use a switch puller and plate support tools to insert each silent switch into the hot-swap sockets securely without soldering. After installation, test each switch via software like VIA, confirming functionality and proper alignment.
Following these steps will help you build a quiet, reliable keyboard kit that maximizes the benefits of your silent switches and hot-swap PCB.
Case and Mounting Styles to Enhance Sound Dampening

When you want to silence your keyboard further, selecting the right case and mounting style plays a crucial role in dampening sound. A gasket mount keyboard case isolates the plate and PCB from the chassis, cutting down vibrations and metallic noise.
Using soft plate materials like POM or PC enhances this effect by absorbing sound. Aluminum cases with gasket mounts balance a solid typing feel and effective sound dampening, unlike sandwich or integrated mounts that often amplify noise.
To boost quietness, add plate foam or Poron inside the keyboard case.
Here’s what you should consider:
- Choose a gasket mount design for superior sound isolation.
- Opt for POM or PC plates to soften acoustic feedback.
- Pick aluminum cases for balanced dampening and durability.
- Use internal dampening foam to reduce echo and rattle.
Choosing Keycaps and Plates for Silent Switch Builds
When building a silent keyboard, you’ll want to pick plate materials like aluminum or FR4 for balanced sound, or softer options like POM for quieter acoustics.
Choosing thick PBT keycaps in Cherry profile can help absorb sound better than thinner ABS ones. Also, be sure your keycaps and plates fit your layout and mount style to avoid compatibility issues and optimize quietness.
Keycap Materials Impact
Although choosing the right silent switch is essential, selecting your keycaps and plates plays an equally important role in shaping your keyboard’s sound and feel. When building silent switch setups, materials and profiles profoundly influence typing sound and overall experience.
Consider these points:
- PBT keycaps are durable and produce a deeper, less sharp typing sound compared to ABS keycaps, which create brighter, higher-pitched acoustics.
- Keycap profile affects sound; Cherry profiles offer balanced acoustics, while taller SA profiles can sound louder and more resonant.
- Use a keycap puller carefully to avoid damage, especially when swapping profiles or materials.
- Make certain keycap compatibility with switch LED orientation to maintain both aesthetics and functionality.
Choosing wisely lets you optimize your silent switch builds for comfort and sound.
Plate Material Choices
Since the plate material shapes both the feel and sound of your keyboard, choosing the right one is essential for silent switch builds. FR4 plates and aluminum offer a balanced typing sound and moderate keyboard stiffness, making them solid choices when you want durability without excessive noise.
If you aim to minimize typing noise further, softer materials like polycarbonate reduce vibrations and produce a deeper, quieter acoustic profile. Remember, plate material directly influences how stiff your keyboard feels and how much noise it generates.
Pairing these plates with carefully selected keycaps can enhance the silent switch experience. By understanding how materials like FR4 and polycarbonate affect your build, you’ll create a quieter, more satisfying keyboard tailored to your needs.
Layout Compatibility Factors
Choosing the right plate material plays a big role in controlling noise, but you’ll also need to take into account how your keyboard layout affects keycap and plate compatibility for a silent switch build.
Your silent switch keyboard’s layout impacts which plate and keycaps fit seamlessly with the PCB and case, influencing noise reduction and usability.
Consider these layout compatibility factors:
- Choose plates made of softer materials like POM or polycarbonate to minimize sound and vibration.
- Verify keycap profile compatibility, especially since north-facing LEDs may clash with Cherry profile keycaps often used in silent builds.
- Select a layout size (60%, 65%, 75%, TKL) that supports your preferred keys without limiting plate options.
- Guarantee the plate supports proper stabilizers for larger keys to prevent rattle and maintain silence.
Easy Mods to Improve Sound and Typing Feel
If you want to quiet your keyboard and enhance typing feel, lubricating the stabilizers and switch components with a high-quality lubricant like 3204 makes a noticeable difference. This reduces scratchiness and rattling sounds, especially around stabilizer wire contact points.
Lubricating stabilizers and switches with 3204 significantly cuts scratchiness and rattling for a smoother, quieter typing experience.
Different mounting styles, like Gasket or Top Mount, also influence sound and feel, so consider pairing mods accordingly.
Installing soft plates made from polycarbonate or POM helps dampen vibrations more than aluminum or brass alternatives, resulting in a softer typing experience.
Adding foam inside the case cavity, such as Poron or silicone, greatly cuts down hollow noises without sacrificing key response.
For a simple mod, try applying masking tape beneath the PCB to subtly adjust resonance and improve acoustics.
Together, these easy mods dramatically improve your keyboard’s sound and typing feel.
Frequently Asked Questions
Where Can I Find Replacement Parts for My Silent Switch Keyboard Kit?
You can find replacement parts for your silent switch keyboard kit on specialized sites like MechanicalKeyboards.com, Amazon, or AliExpress. Don’t forget to check keyboard enthusiast forums and local electronics stores for unique or specific components.
How Do I Troubleshoot Connectivity Issues After Assembly?
Check your USB cable and port first, then confirm the PCB is properly soldered. Restart your computer and try different ports. If problems persist, update your keyboard firmware or use software diagnostics to isolate the issue.
Can I Customize the RGB Lighting With Silent Switch Kits?
Yes, you can customize the RGB lighting with silent switch kits if the keyboard supports it. Just install compatible software or firmware, then adjust colors, effects, and brightness to match your preferences easily.
What Maintenance Is Required to Keep My Silent Switch Keyboard Performing Well?
You’ll want to regularly clean your keyboard by removing dust and debris, lubricate switches occasionally for smoothness, and check for loose components. Avoid eating or drinking near it to keep silent switch performance consistent over time.
Are Silent Switch Keyboards Compatible With All Operating Systems?
Yes, you’ll find silent switch keyboards compatible with all major operating systems like Windows, macOS, and Linux. Just connect via USB or Bluetooth, and your system should recognize it without needing special drivers or software.
In Summary
Silent switch keyboard kits are perfect if you want a quieter, more satisfying typing experience. With the right components—quiet switches, lubed stabilizers, and sound-dampening cases—you can build a keyboard that’s both functional and peaceful. Remember to test your PCB thoroughly and pick keycaps and plates that complement your build. By following these steps and adding simple mods, you’ll enjoy a custom keyboard that feels great to type on and keeps noise to a minimum.

Leave a Reply