

Start by picking a keyboard layout that fits your desk space and typing style—65% layouts offer arrows in a compact design, while 75% or TKL options make shifting easier. Next, prep your switches and stabilizers carefully: lube stabilizers with Krytox 205g0 to reduce rattle and thoroughly lube switches for smoothness. Finally, customize sound by experimenting with case materials, foam mods, and plate choices to find your perfect acoustics. Keep exploring to reveal even more pro-level build tips.
Choose the Best Keyboard Layout and Switches for You
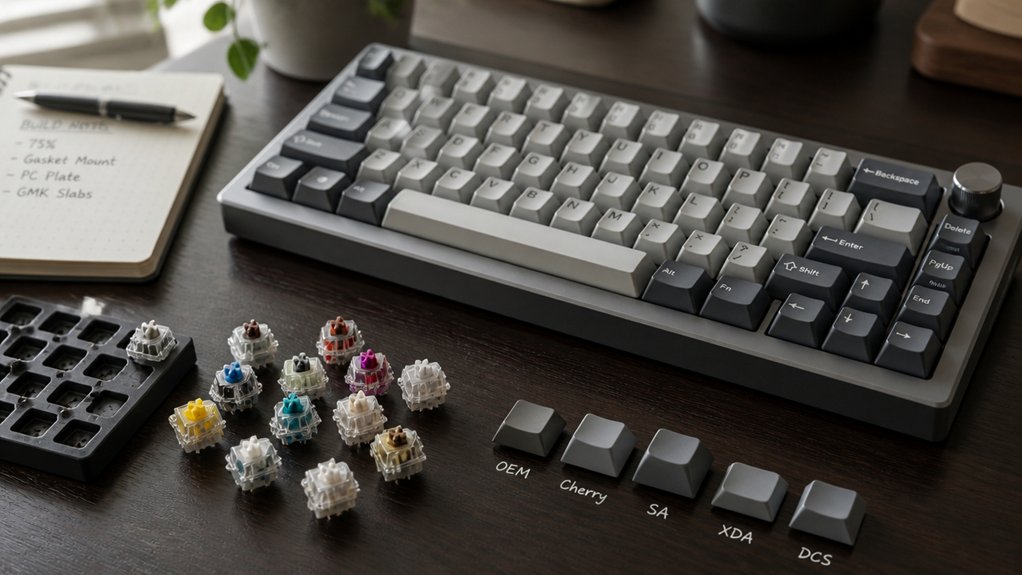
How do you pick the perfect keyboard layout and switches for your setup? Start by considering your available desk space and how you use your mechanical keyboard.
A 65% keyboard layout is great if you want arrow keys without a full-size bulk, while 75% and TKL layouts make shifting easier.
Next, choose switches based on typing feel: linear for smooth keystrokes, tactile for bumps, or clicky for audible clicks. If your hot-swap PCB supports it, test different switch types without needing a soldering iron.
Don’t forget the mounting style and keyboard case materials—they affect sound and stiffness. Keycap profile, like taller SA or thicker PBT sets, can also influence sound depth and feel.
Sampling switches ahead guarantees your build matches your preferences perfectly.
Prep Stabilizers and Switches for Your Mechanical Keyboard Build
Once you’ve chosen your ideal keyboard layout and switches, the next step is prepping stabilizers and switches to guarantee a smooth and satisfying typing experience. Start by lubing stabilizers with Krytox 205g0 to reduce rattle. Use washers on screw-in stabilizers and orient wires toward larger PCB holes. For switches, use a switch opener to comfortably lube each part, ensuring smooth keypresses.
| Step | Tip |
|---|---|
| Stabilizer Lube | Use Krytox 205g0 |
| Stabilizer Install | Wire toward larger PCB holes |
| Switch Prep | Open with switch opener |
| Switch Lube | Take time for thorough lubing |
| Testing | Use VIA software to check PCB and keys |
Always test your PCB with installed parts. Support hot-swap sockets carefully to avoid damage during your keyboard build.
Assemble Your Keyboard and Customize Case, Plate, and Sound Mods
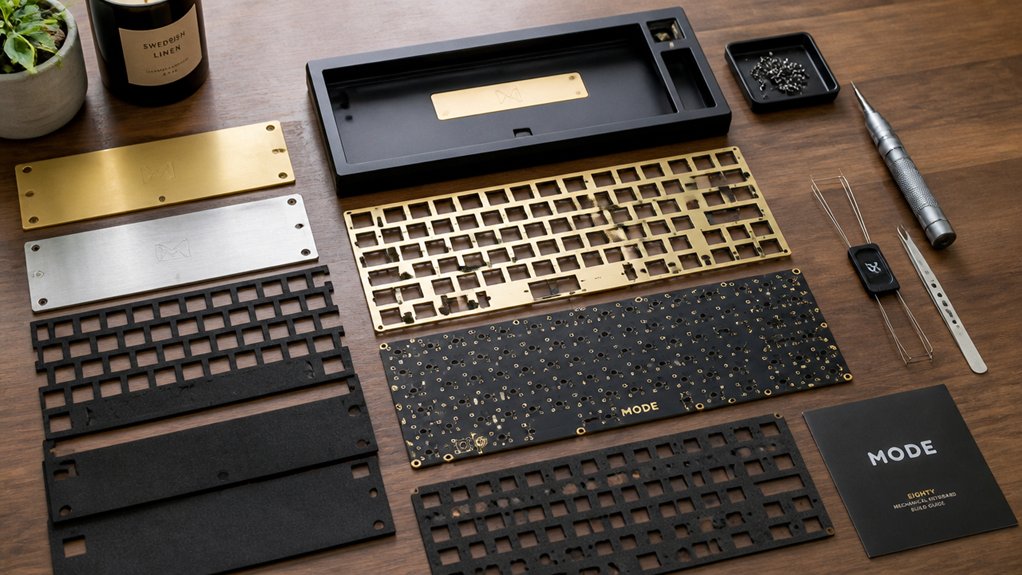
Assembling your keyboard marks a crucial step where you bring together all prepared components while tailoring case, plate, and sound mods for an ideal typing experience. Start with lubing stabilizers correctly, orienting the wire toward larger PCB holes to minimize rattle and enhance the tactile bump.
Choose plate materials wisely; aluminum or FR4 balance stiffness and sound, while softer plates like POM or polycarbonate deliver quieter, deeper acoustics. Experiment with case mounting styles such as gasket or top mount, adjusting gasket placement to fine-tune typing feel and resonance.
Incorporate foam kits or Poly-Fil under the PCB to soften hollow sounds and warm acoustics. Finally, apply the tape mod on the PCB bottom to boost volume if preferred. These steps guarantee your custom keyboard build maximizes both performance and sound.
Frequently Asked Questions
How Do I Clean and Maintain My Custom Keyboard Over Time?
You should regularly remove keycaps and gently clean them with warm, soapy water. Use compressed air to blow out dust, wipe the board with a microfiber cloth, and avoid eating or drinking nearby to keep it pristine.
What Software Is Best for Advanced Key Remapping and Macros?
You’ll want to try QMK Firmware for advanced key remapping and macros; it’s highly customizable. Alternatively, VIA offers an easier interface if you prefer a more user-friendly experience without deep coding knowledge.
Can I Mix Different Switch Brands in One Keyboard Build?
Yes, you can mix different switch brands in one keyboard build. Just make sure they have compatible stems and pin types, so they fit your keycaps and PCB properly. This way, you get varied feel and sound!
What Are the Best Keycap Materials for Long-Term Use?
You’ll want PBT keycaps for long-term use since they resist shine, wear, and fading better than ABS. They also feel more textured and durable, making your keyboard look great and perform well over time.
How Do I Troubleshoot Unresponsive Keys After Assembly?
You’ll want to first check your solder joints for cold or missed connections. Clean your switches and stabilizers, confirm your firmware is up-to-date, and test each key with a keyboard tester to isolate the malfunctioning switch.
In Summary
Customizing your mechanical keyboard kit lets you create a truly personal typing experience. By choosing the right layout and switches, prepping stabilizers and switches carefully, and assembling with attention to detail, you’ll build a keyboard that feels just right. Don’t forget to explore case, plate, and sound mods to make it uniquely yours. With these tips, you’re well on your way to crafting a keyboard that’s both functional and enjoyable every time you type.



