

To reduce stabilizer noise, focus on precise lubrication using a fine-tip syringe to target contact points and wires with thin, consistent layers. Guarantee proper alignment of housings and full insertion of lubed wires without forcing. Choose high-quality lubricants like Crytox 205 Grade 0 and avoid over-lubing, which can cause sluggishness. Fine-tuning and troubleshooting, such as adjusting for rattling or loose parts, will help you achieve a quieter, smoother keyboard—discover the detailed techniques to master the process.
Why Proper Stabilizer Lubrication Matters
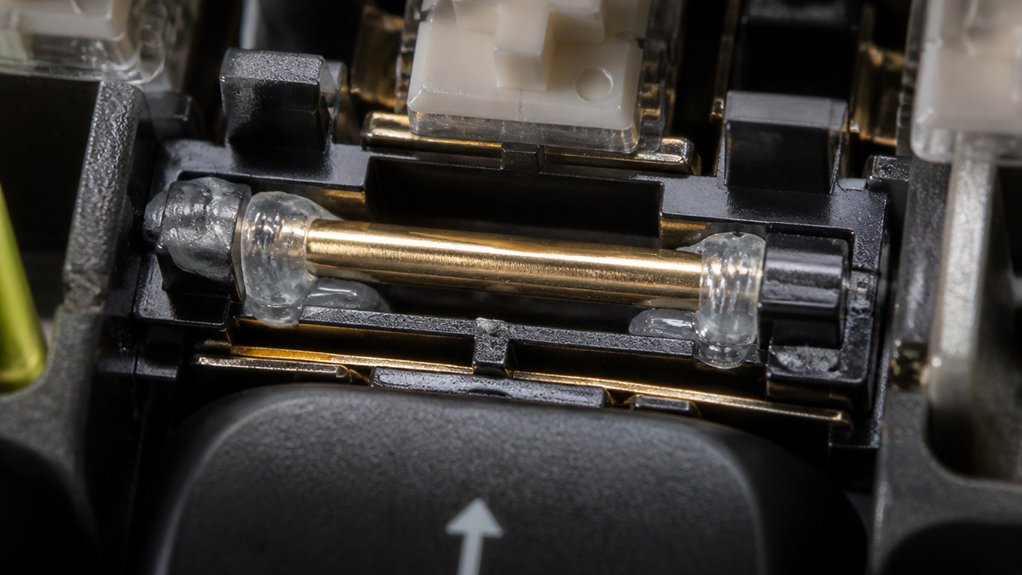
Proper stabilizer lubrication is essential because it directly impacts the noise and feel of your mechanical keyboard. Make sure you apply the right amount of lubricant to avoid rattling and stiff keys.
Using a thin lubricant like Crytox 205 Grade 0 on the housing walls helps reduce friction, while a slightly thicker coat on the wires fills gaps and prevents noisy vibrations.
Inadequate lubrication leads to unwanted rattling, making keystrokes unpleasant, whereas over-lubing causes sluggishness. Precise application is key to balancing sound and performance.
Applying lubricant before assembly lets you hear the improvements early and guarantees stabilizers move smoothly during testing. Consistent, careful lubrication is recognized as the single most effective mod for enhancing the sound quality and feel of your stabilizers.
Choosing lubricants with suitable viscosity levels ensures optimal application and long-lasting performance.
How to Use a Syringe to Lubricate Stabilizers Effectively
Using a syringe to lubricate stabilizers allows for targeted, precise application of lubricant, helping you avoid the pitfalls of over- or under-lubrication, especially if it’s your first time.
Target stabilizer lubrication with a syringe for precise, effective application and optimized keyboard performance.
Select a syringe with a fine tip and carefully insert it halfway into the stabilizer stem hole. Slowly inject lubricant, such as Crytox 205 grade 0, while observing the stabilizer’s response. Be cautious not to over-lubricate, as excess lube causes sluggish key feel and may require full disassembly later.
Apply just enough to form a thin, visible layer that covers contact points and the stabilizer wire, reducing rattling without impeding smooth motion. Ensuring the wire fit is snug and durable is crucial, which is why choosing stabilizers with high-quality housing materials such as POM or TPU can enhance performance and longevity.
After lubricating, test the stabilizer with your keycaps installed to confirm noise is minimized and motion remains balanced.
Choosing the Best Lubricants for Quiet, Smooth Stabilizers
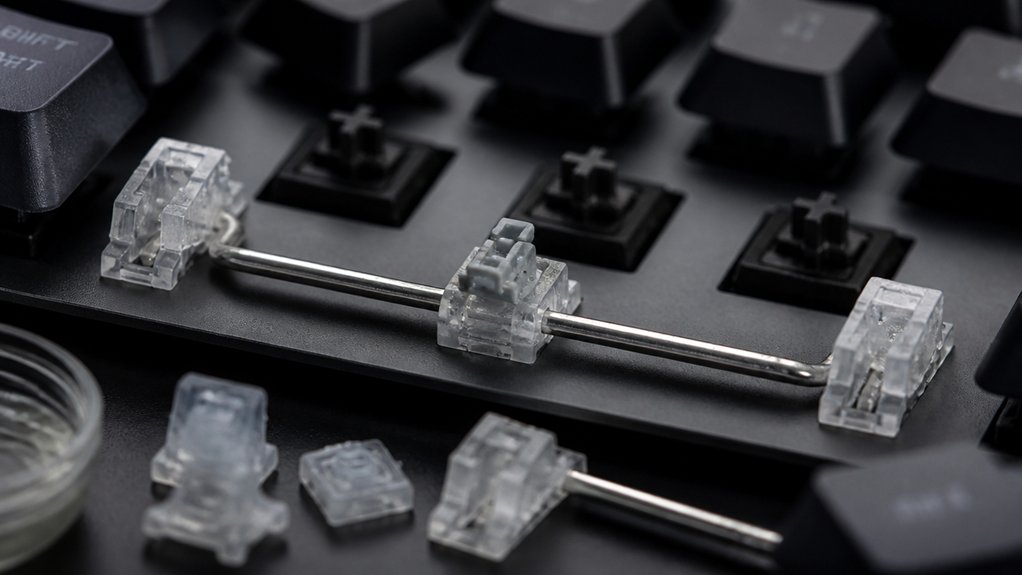
Choosing the right lubricant is essential for achieving quiet, smooth stabilization. When selecting a lubricant, consider options like Crytox 205 grade 0, which is preferred for its thin consistency that reduces friction and noise without causing sluggishness.
For effective wire lubrication, semi-thick lubricants such as dielectric grease or super lube fill gaps and minimize metal-plastic rattling while maintaining smooth motion. Use a fine paintbrush or syringe for precise application, preventing excess that can hinder function.
Keep in mind, applying too thick a layer—especially inside the stabilizer housing—can create sluggishness. A well-chosen lubricant, paired with a quality keycap set, guarantees minimal noise and enhanced tactile experience. This careful selection transforms your keyboard into a quieter, more satisfying typing instrument. Additionally, choosing lubricants with thermally stable properties ensures consistent performance under various operating conditions, maintaining the desired thocky sound over time.
How to Align and Assemble Stabilizers for Minimal Rattling
Ever wonder how to get your stabilizers to glide smoothly without rattling? When assembling a mechanical keyboard, start by aligning both stabilizer housings in the same direction. This guarantees consistent movement and helps reduce misalignment noise.
Carefully insert the lubed wire fully into the housing holes, making sure it seats without forcing, to avoid uneven contact and rattling. Check that the stabilizer stems fit snugly into the housings—any looseness can cause noise during key presses.
Before final installation, test the stabilizer assembly by pressing and wiggling the wire; this helps identify misalignments or binding issues. Install stabilizers onto the PCB and plate gently, avoiding flex or mispositioning that could create gaps and increase rattling sound. Using stabilizer tuning kits can further fine-tune performance and reduce noise. Proper alignment and assembly are vital for a quiet, smooth typing experience.
Troubleshooting Noisy Stabilizers and Fine-Tuning for Silence
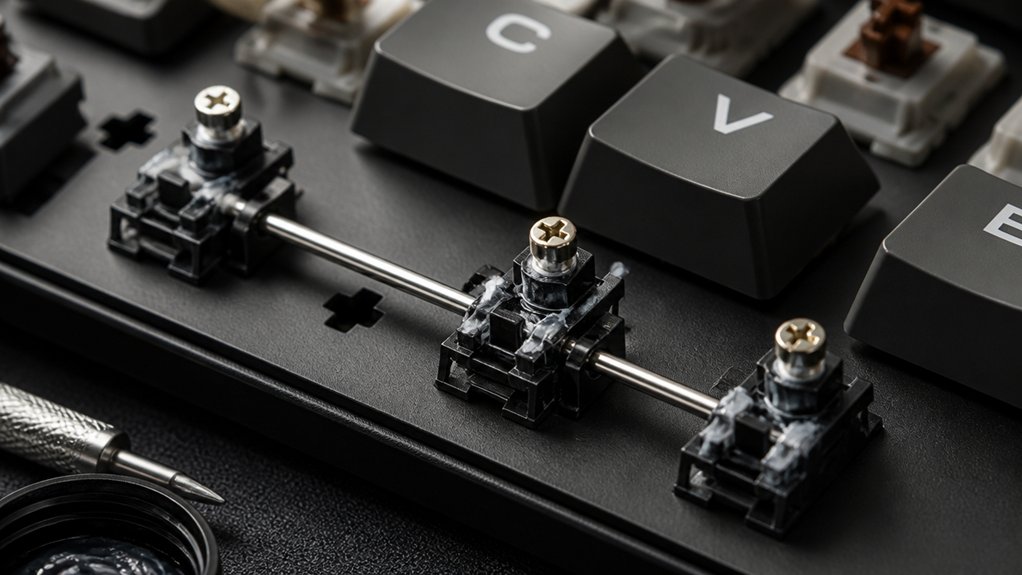
When troubleshooting noisy stabilizers, start by pinpointing the source of rattling through gentle presses on each stabilized key while listening for metal-on-plastic sounds or housing friction.
Identify rattling sources by gently pressing keys and listening for metal-on-plastic sounds or housing friction.
Next time, focus on precise diagnosis before applying lubricant. Use a syringe to inject thin layers of crytox 205 grade 0 into contact points and along the wire, filling gaps to reduce rattling without over-lubing.
Remember:
- Avoid over-lubing, which causes sluggishness and noise
- Test with final keycaps to account for material effects
- Fine-tune through iterative lubrication and testing
- Balance silence with smooth response for ideal feel
- Consider stabilizer design features such as reinforced housings or wire hooks for added stability and noise reduction
Patience is key, as fine-tuning involves trial and error. Carefully monitor the stabilizer performance to achieve a quiet, responsive typing experience without sacrificing feel.
Frequently Asked Questions
How to Make Keyboard Stabilizers Better?
You make keyboard stabilizers better by carefully lubing the housing with Crytox 205, applying dielectric grease to fill gaps, injecting lubricant through the stem hole precisely, using screw-in stabilizers, and testing with keycaps on to optimize noise and feel.
How to Make Stabilizers Less Rattly?
You can make stabilizers less rattly by lubricating the housing with Crytox 205, thoroughly lubricating the wire, ensuring proper seating, and using syringe injections for precise lubrication. Test with keycaps to fine-tune noise and smoothness.
How Can I Reduce Keyboard Noise?
You can reduce keyboard noise by lubricating stabilizers with crytox 205, clipping the “fang” prongs, and ensuring proper reassembly with aligned housings and lubed wires. Test with keycaps to fine-tune for quieter, smoother typing.
Do Keyboard Stabilizers Affect Sound?
Yes, keyboard stabilizers greatly affect sound. Proper lubrication minimizes rattling and metallic noise, creating a smoother, quieter typing experience. The quality and lubrication of stabilizers are essential to achieving an ideal noise profile for your keyboard.
In Summary
By applying these advanced techniques, you’ll greatly reduce stabilizer noise and enjoy a quieter, more satisfying typing experience. Proper lubrication, careful alignment, and choosing the right lubricants make a big difference. Don’t rush the process—fine-tune your stabilizers patiently. With some effort, you’ll achieve smooth, silent keystrokes that elevate your overall keyboard performance. Keep practicing these techniques, and you’ll soon master the art of stabilizer noise reduction.


