

To master advanced keyboard rebuilds, focus on selecting the right components like high-quality PBT keycaps, switches suited to your feel, and compatible stabilizers. Use precise tools for disassembly and reassembly, organize parts carefully, and upgrade parts like springs and sound dampeners to customize your sound and feel. Mounting styles and materials greatly affect acoustics and responsiveness. Keep tuning with lubrication, filming, and foam mods. Continue exploring these techniques to elevate your custom keyboard skills even further.
Key Components and Their Roles in a Keyboard Rebuild
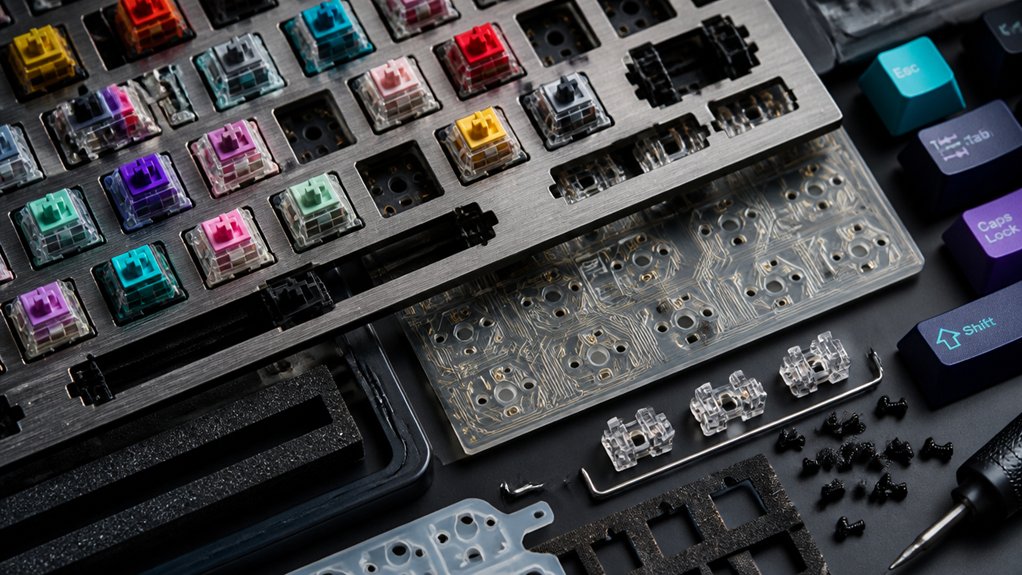
Understanding the key components in a keyboard rebuild is essential to achieving ideal performance and feel. Your keycap and switch choices play a crucial role.
Keycaps come in two types: ABS and PBT, each influencing texture and durability. Over time, keycaps can wear or become loose, so replacement might be necessary to restore typing comfort. High-grade PBT material offers resistance to wear, friction, and fading legends, making it a popular choice for durable keycaps.
Switches are the core of your keyboard’s feel, with options like tactile, linear, and clicky styles. Depending on your preference, you may need to replace switches that have lost their smoothness or responsiveness. Additionally, switches, whether new or serviced, directly impact the typing experience.
Paying attention to these components guarantees your rebuilt keyboard performs at its best, providing both excellent feel and longevity.
Tools and Replacement Parts for Your Custom Build
To build your custom keyboard, you’ll need essential tools like screwdrivers, key and switch pullers, and lubricants to guarantee smooth assembly.
Compatible replacement parts such as switches, stabilizers, keycaps, and foam layers let you fine-tune your build for peak feel and sound.
With options like hot-swappable PCBs and specialty springs, you can customize every aspect of your keyboard’s performance and aesthetics.
Choosing the right keyboard switch lubricants can significantly enhance your typing experience by reducing unwanted noise and improving smoothness.
Essential Assembly Tools
Building a custom keyboard requires a precise set of tools and replacement parts to guarantee a smooth and successful rebuild. Essential assembly tools are often sold as kits tailored for keyboards, including precision screwdrivers like T5 and PH0 to fit various screws. Spudgers, keycap pullers, and switch pullers help remove components carefully without damage. Tweezers suited for your form factor make handling small parts easier.
For switch installation, dielectric grease is sometimes used to improve electrical contact and reduce noise. Soldering tools, like soldering irons and desolders, are necessary for soldered builds. Organizing fasteners with magnetic trays or labeled containers maintains order. A clean workspace with an anti-static mat protects delicate electronics and guarantees all parts are handled safely during assembly.
Compatible Replacement Parts
When selecting compatible replacement parts for your custom keyboard, it’s essential to match components precisely to your specific model and layout.
Handling parts with your bare hands, focus on aligning the top and bottom sections to guarantee seamless integration.
To create your ideal setup, consider:
- Carefully choosing keycaps that fit your keyboard layout, whether Cherry, OEM, or SA profiles, for peak feel and aesthetics.
- Sourcing springs like Hyde Spring to fine-tune key tension, enhancing typing comfort and response.
- Ensuring switches and stabilizers are compatible, especially if your build features hot-swap sockets or soldered PCBs, to keep your keys feeling crisp and reliable.
- Paying attention to hot-swap socket compatibility when selecting sockets for your switches, ensuring they match your switch profile and support the required electrical specifications to maintain performance and durability.
Matching parts accurately guarantees your rebuild remains comfortable, functional, and personalized.
Customization Options Available
Customizing your keyboard involves selecting the right tools and replacement parts to fine-tune its performance and aesthetics. Essential tools include a precision screwdriver set, keycap puller, switch puller, and lubricant brushes, which help you disassemble, swap, and maintain components efficiently. Using high-quality keyboard switch pullers ensures safe removal and minimizes the risk of damaging delicate parts. Replacement parts vary widely, such as different switch types—linear, tactile, and clicky—along with keycaps made from materials like PBT or ABS to suit your typing feel and style. Hot-swap PCBs let you change switches without soldering, expanding customization options, while soldered PCBs require tools for permanent switch installation. Upgrading stabilizers with clips, lubing, or specialized sets reduces rattle. Additional options include gasket materials, foam inserts, and various case designs, all influencing sound, feel, and look of your keyboard.
How to Ensure Compatibility of Your Parts and Upgrades
Determining compatibility is essential to guaranteeing your keyboard rebuilds function properly and avoid costly mistakes. You need to verify that parts match your specific model’s requirements.
- Check that replacement keys, switches, and stabilizers align with your keyboard’s stem type and layout—improper fit can ruin your build.
- Confirm hot-swap sockets support your switches; GMK boards only support MX-style sockets, so avoid Hall Effect or optical switches.
- When upgrading springs, source from trusted suppliers like Hyde Spring and confirm the size and force suit your key specifications.
Additionally, confirm connector types and cable orientations match, especially for modular assemblies or laptops.
Match case dimensions and mounting styles to your existing framework for seamless compatibility and flawless performance.
Mounting Styles and Build Components to Achieve Your Desired Feel
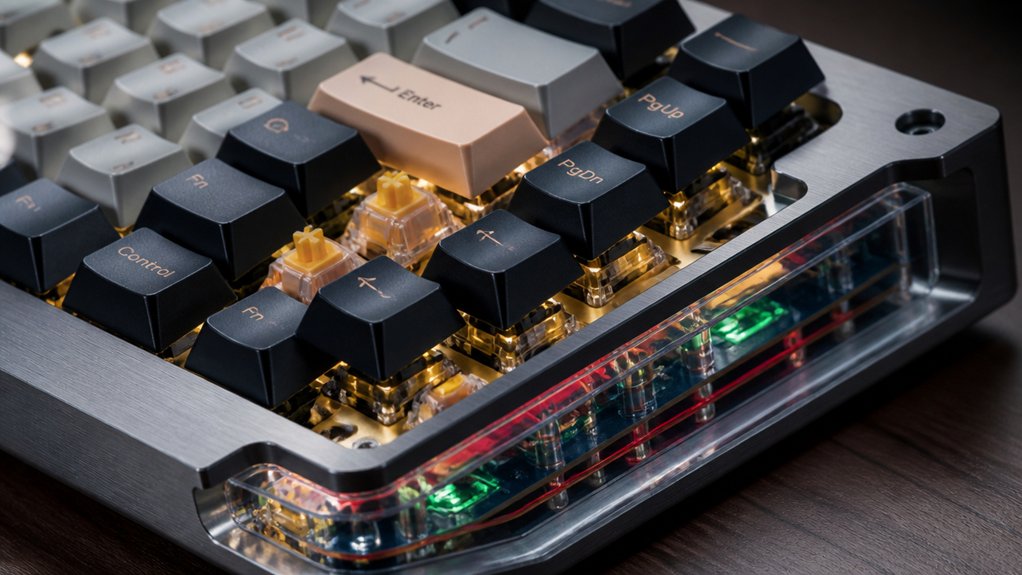
Choosing the right mounting style directly affects your typing feel and sound profile, whether you prefer the softer, cushioned feel of gasket mounts or the firm, stable response of top or tray mounts. The material of your plate also plays a key role, influencing resistance, weight, and acoustic qualities. By understanding how different build components interact, you can craft a keyboard that perfectly matches your preferences. Additionally, selecting gasket-mount kits made from heat-resistant alloys or composites can ensure durability and optimal thermal performance for a premium experience.
Mounting Methods Overview
Ever wondered how the different mounting methods influence the feel and sound of your keyboard? Each style shapes your typing experience uniquely.
- Gasket mounts use silicone or foam gaskets, offering a softer, cushioned feel and a mellow “thock” sound—perfect if you crave comfort and low noise.
- Tray mounts screw the PCB directly to the case, delivering a firm feel with a consistent bottom-out sound—ideal for reliability and straightforward builds.
- Top mounts clamp the plate between case halves, creating a rigid, stable experience favored in high-end models, enhancing precision and feedback.
Your choice impacts vibration damping, flex, acoustics, and feel, helping you craft a board that resonates with your preferences.
Material Impact on Feel
How does the material of your keyboard’s components influence its overall feel? Your choice affects both the typing experience and sound.
Gasket mounting, with silicone or foam gaskets between the plate and case, creates a softer, cushioned feel and a rounded “thock” sound. Tray mount screws the PCB directly to the case, offering a firm, consistent feel with a crisp bottom-out sound, often favored for durability and cost savings. Top mounting clamps the plate between case halves, delivering a sturdy, precise feedback ideal for high-end builds.
Plate material also matters: aluminum adds weight, providing a stiff, lively resistance during key return, while plastic or brass results in different stiffness levels.
Additionally, case acoustics shape sound profiles—hollow plastic cases sharpen the tone, whereas denser or dampened materials soften and lower the noise. Using forged aluminum, as seen in premium cases, enhances both durability and the high-quality feel of the keyboard.
Choosing Switches and Keycaps for Sound and Tactile Feedback
Are you aiming for a keyboard that delivers the perfect blend of sound and tactile feedback? Your choice of switches and keycaps plays a vital role.
First, consider linear switches like Cherry MX Red; they produce smooth keystrokes with minimal noise, ideal for a quiet, fluid sound profile. Second, tactile switches such as HMX Frog give a noticeable bump that enhances feedback richness and typing feel. Third, clicky switches like Box White deliver sharp, audible clicks (~10 dB louder), creating a pronounced sound signature.
Pair these with PBT keycaps for a grittier feel and deeper sound, or ABS keycaps for a smoother texture and vibrant RGB shine-through. Finally, lubricating switches with Krytox oils can soften sound and refine feedback, elevating your typing experience.
Tuning Your Keyboard With Lubing, Filming, and Foam Mods

Once you’ve chosen the right switches and keycaps, fine-tuning your keyboard’s sound and feel makes a big impact. Lubricating switches with PTFE oils like Krytox 105 on springs and Krytox 205g0 on rails reduces friction and noise, but be careful with tactile switches to avoid dulling the bump. Filming involves inserting thin layers between switch housing parts, easing wobble and silencing noise. Foam layers placed beneath the PCB or inside the case cut resonance by 3-5 dB, producing a quieter, more solid sound. Stabilizer tuning includes clipping wire feet, lubricating housings, and greasing wire ends for less rattle and cleaner tones. Pre-lubed stabilizers benefit from a light additional lube, especially with hot-swap keyboards for quick upgrades. Incorporating sound dampeners can further enhance acoustic performance and reduce vibrations for a more refined typing experience.
Step-by-Step Disassembly and Reassembly for Safe, Precise Repair
Before diving into disassembly, make sure your device is fully powered off and unplugged to prevent electrical damage or accidental activation.
Carefully remove fasteners with the right tools, like T5 or PH0 bits, to avoid stripping screws or damaging components.
As you proceed, remember to:
- Gently flip latches and slide cables like fingerprint sensors, keyboards, backlights, and touchpads straight out—force can tear delicate connectors.
- Keep fasteners organized by type and size, using separate containers for quick, correct reassembly.
- Align new or repaired parts precisely, reconnect cables in reverse order, and secure latches firmly to guarantee proper seating and full functionality.
For added safety and precision, consider using compact and portable soldering irons during any repair or rework that involves soldering components.
Finish by replacing the bottom cover fasteners with appropriate torque, making certain all cables are routed correctly, and the device is securely closed.
Troubleshooting Common Issues and Improving Performance
Troubleshooting common issues and boosting keyboard performance often involves identifying wear points and making targeted improvements. First, replace worn bushings and key tops to restore second-touch feel and cut down on sloppy responses. Increasing key tension by consulting spring suppliers like Hyde Spring or upgrading to quality wood-core stacks from Herrberger Brooks or OSI can enhance stability. Lubricate tactile switch rails and springs—but avoid the tactile legs—and clip and lube stabilizers for smoother operation and less rattle. By adding foam layers under the PCB and case, you can reduce hollow resonance by 3-5 dB, creating a quieter, deeper sound. Finally, address stripped screws and connection issues carefully to maintain functionality and prevent key failures.
| Wear Points | Targeted Solutions |
|---|---|
| Bushings/Key Tops | Replace for responsiveness |
| Springs | Upgrade or adjust tension |
| Switches/Stabilizers | Lubricate and clip for smoothness |
Frequently Asked Questions
What Is a 96% Keyboard Missing?
A 96% keyboard is missing the one-centimeter gap between the main key cluster and the numpad found on full-size keyboards, but it keeps all main functions, including arrow keys and navigation keys, for a compact yet complete layout.
What Is Everything I Need to Build a Keyboard?
You need a case, PCB, plate, stabilizers, switches, keycaps, and tools. Decide between hot-swap or soldered switches. Choose your layout, and consider additional items like foam, lubricants, and stabilizer clips for customization.
Where Can I Find Advanced Keyboard Settings?
You can find advanced keyboard settings in manufacturer-provided software like QMK Toolbox, VIA, or proprietary apps. These tools let you remap keys, customize RGB lighting, program macros, and adjust hardware functions to personalize your keyboard fully.
Is a 75% Keyboard Better Than 100%?
It depends on your needs. You might prefer a 75% keyboard if you value space-saving, ergonomic design, and most key functions. Conversely, a 100% keyboard suits those requiring dedicated numpads and full access to all keys.
In Summary
With the right knowledge and tools, you can expertly customize and rebuild your keyboard to match your preferences. From selecting the perfect switches and keycaps to fine-tuning with lubrication and foam mods, every detail affects your experience. Remember to disassemble and reassemble carefully, troubleshoot issues confidently, and always guarantee compatibility. With patience and practice, you’ll craft a keyboard that’s not only functional but also perfectly tuned to your style and needs.


