

To build a reliable wireless mechanical keyboard, choose the right protocol like Bluetooth or 2.4 GHz for your needs. Opt for a hot-swap PCB to simplify assembly and guarantee compatibility with wireless modules. Plan your layout for stability and comfort, avoiding interference from metal parts. Use quiet stabilizers and switches to keep noise down. Manage cables well, and test firmware early with wired connections. Keep troubleshooting tips in mind to fix connectivity issues—more tips await to help you perfect your build.
Why Build a Wireless Mechanical Keyboard? Benefits and Considerations
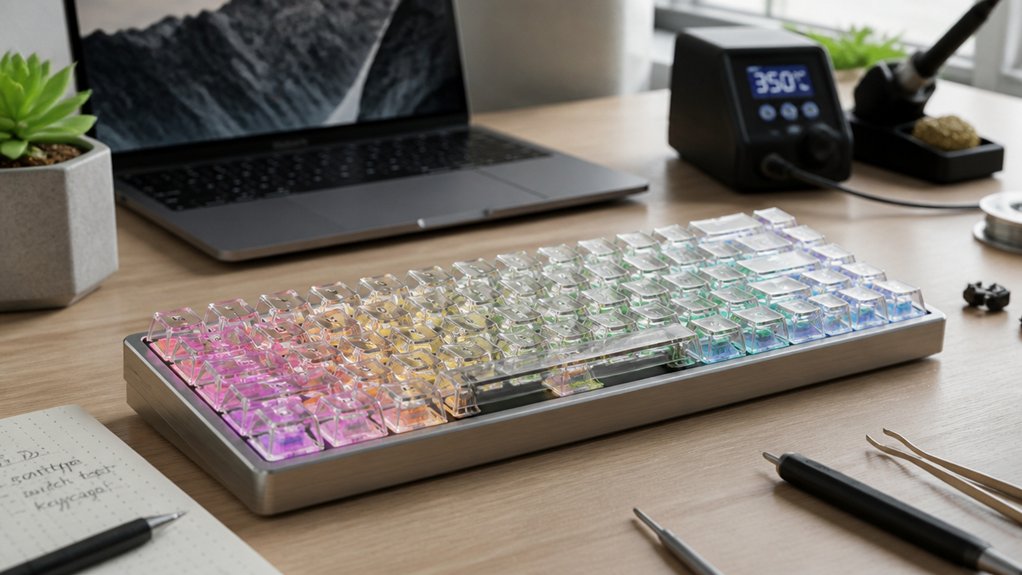
Ever wondered why more keyboard enthusiasts are building wireless mechanical keyboards? The main appeal is the convenience of going cable-free, which keeps your desk clean and boosts mobility.
A wireless custom keyboard easily connects via Bluetooth or 2.4 GHz, making it compatible with multiple devices. When building your own, you can choose a wireless PCB that suits your needs and customize the firmware to optimize performance.
Battery options affect how long you can type without recharging—many builders select larger batteries for better longevity. Plus, you gain full control over layout, switch type, and keycaps, all while enjoying wireless functionality.
Keep in mind, though, that some latency differences and firmware considerations may come up, but the benefits of a personalized, clutter-free setup make it worthwhile. Incorporating high-quality wireless PCBs with power management features can further enhance performance and reliability.
How to Choose the Right Wireless Protocol for Your Keyboard
Choosing the right wireless protocol depends on your device compatibility, range needs, and power preferences. Bluetooth offers easy multi-device support but may consume more battery and have higher latency, while proprietary protocols typically provide lower latency and better stability for gaming. Consider your usage scenario to balance connection reliability, power efficiency, and device ecosystem before investing. Additionally, some keyboards feature multi-device Bluetooth switching, allowing seamless toggling between multiple connected devices for increased versatility.
Compatibility With Devices
Selecting the right wireless protocol for your DIY mechanical keyboard depends on how you plan to use it and the devices you want to connect to. Bluetooth is the most common wireless protocol, offering broad compatibility with Windows, macOS, Android, and iOS devices without extra adapters.
If you prioritize stability and low latency, especially for gaming, a 4 GHz RF wireless connection with a dedicated receiver could be better—though it requires compatibility with a receiver on your device. Dual-mode keyboards with both Bluetooth and 4 GHz RF wireless give you flexibility to easily switch between desktop and mobile devices.
Check if your device supports the connection type natively to avoid needing extra dongles or adapters. Compatibility tailored to your devices guarantees seamless performance across all platforms. Additionally, consider wireless polling rate and connection stability to ensure consistent responsiveness during intensive tasks.
Power Consumption Considerations
When determining the right wireless protocol for your DIY mechanical keyboard, considering power consumption is essential to guarantee long-lasting battery life. Bluetooth Low Energy (BLE) is ideal because it offers low power consumption, allowing weeks or months of use on typical lithium-ion batteries.
Proprietary 2.4 GHz protocols deliver lower latency but tend to consume more power, necessitating larger batteries or frequent charging. Choose a wireless protocol with features like sleep modes and quick wake-up to optimize battery life.
Incorporating low-power microcontrollers and efficient hardware components, such as high-efficiency voltage regulators, can also reduce overall power draw. For example, hall effect switch technology used in some high-end boards can contribute to lower power usage and enhanced responsiveness. Balancing power consumption with your use case assures your custom keyboard remains reliable without sacrificing portability or connectivity.
Range and Signal Stability
Ever wondered how the wireless protocol you pick impacts your keyboard’s range and signal stability? The protocol determines how well your connection holds up and how far it can reach.
Bluetooth Low Energy (BLE) is common, offering stable connections within about 10 meters, perfect for most desks. Proprietary 2.4 GHz protocols provide lower latency and more consistent signal stability, with ranges beyond 15 meters, great for gaming or professional use.
To improve signal stability, minimize physical obstructions and interference from other 4 GHz devices like Wi-Fi routers or microwaves. Using a high-quality antenna and positioning it away from the metal parts in your keyboard case boosts range and reduces connection dropouts.
In addition, selecting a keyboard with a robust build quality and switch types that suit your usage can also help maintain a stable wireless connection. Choosing the right wireless protocol guarantees reliable connectivity and peak performance for your DIY keyboard.
Selecting a Compatible Hot-Swap PCB to Simplify Setup
Choosing the right hot-swap PCB is essential for a DIY wireless mechanical keyboard, as it directly influences connectivity and ease of assembly. You want a PCB that supports wireless protocols like Bluetooth or 2.4GHz for seamless operation.
Selecting a compatible hot-swap PCB ensures seamless wireless connectivity and easy assembly for your DIY mechanical keyboard.
Opt for a hot-swap PCB with built-in wireless modules or compatible daughter boards to reduce wiring complexity. Ensuring the PCB layout matches your case and switch type prevents fitting issues during build. Additionally, a PCB with reliable power management, such as integrated battery charging, simplifies setup and maintains stable wireless performance. Incorporating hot-swap socket compatibility ensures you can easily customize or upgrade switches without extensive reassembly.
Planning Your Keyboard Layout for Wireless Stability and Comfort
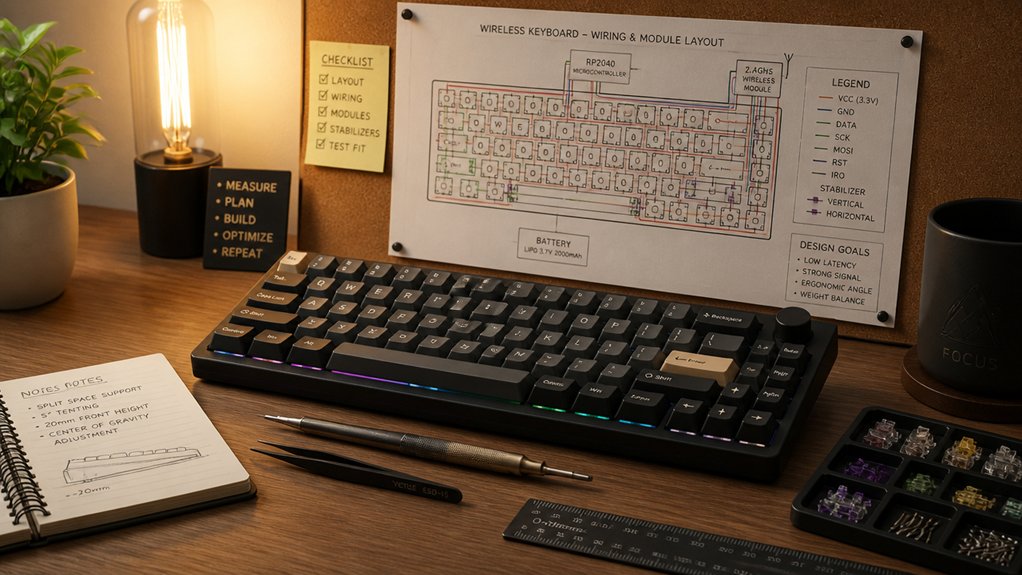
Choosing a compact layout like 65% or 75% helps keep the wireless signal strong and reduces power needs. Arrange keys for easy access to your most-used ones to keep typing comfy during long sessions. Steer clear of complex macro layers that might slow down your connection and cause instability. Incorporating a dedicated media controls layout can enhance accessibility without sacrificing stability.
Stable Wireless Connection Strategies
To guarantee a stable wireless connection, the key is thoughtful layout planning that minimizes potential interference and maintains signal strength. Place the wireless PCB and battery centrally within your case material to guarantee balanced weight and reduce signal interference. Additionally, selecting components with hot-swap compatibility can facilitate easier upgrades and maintenance, ensuring your keyboard remains reliable over time. Avoid routing large metal components or thick aluminum plates near your wireless module, as they can cause signal attenuation. Design your keyboard layout to maintain consistent key spacing and avoid excessive stagger or split designs, which can complicate antenna placement. Assure your wireless module has a clear line of sight or minimal obstruction to your receiver, and consider external antennas if needed. For reliable performance, choose wireless protocols like Bluetooth Low Energy (BLE) or 4 GHz with adaptive frequency hopping. Proper layout supports stable wireless operation and maximizes range.
Ergonomic Layout Design
Designing an ergonomic keyboard layout that also supports wireless stability requires careful planning to balance comfort and signal integrity. Opt for compact sizes like 65% or 75% to maintain a small keyboard size that encourages proper hand placement without excessive reach. Arrange frequently used keys within easy thumb and finger reach, using split or staggered ergonomic layouts to reduce strain. Keep layouts simple by minimizing extensive function layers, which can add wireless signal latency and hinder responsiveness. Avoid large or split cases that may interfere with antenna placement, risking signal degradation. When choosing your layout, also consider the placement of internal wireless modules and batteries. Properly planned ergonomic layout design guarantees both comfort and stable wireless connections, providing an ideal typing experience. Additionally, selecting a keyboard with features like hot-swappable switches can improve durability and customization, enhancing overall wireless performance.
Picking the Best Stabilizers and Switches for Quiet, Smooth Typing
Selecting the right stabilizers and switches is essential for achieving quiet, smooth keypresses in your wireless mechanical keyboard. Choose screw-in stabilizers to boost stability and reduce rattling, especially important in wireless keyboards where sound isolation matters.
Lubricate both the stabilizer housing and wire with Krytox 205g0 or Krytox XHT-BDZ to eliminate noise and improve smoothness. Opt for tactile or linear switches like Gateron Browns or Reds, which produce quieter sounds compared to clicky types, ideal for silent wireless setups.
Hand-lubricating your switches can greatly enhance keypress smoothness and decrease noise—factory-lubed switches work if hand-lubing isn’t feasible. Proper installation of stabilizers with the wire aligned toward larger PCB holes and secure clips prevents wobble and minimizes typing noise.
Ensuring Your Keycaps and LEDs Are Compatible With Wireless Design
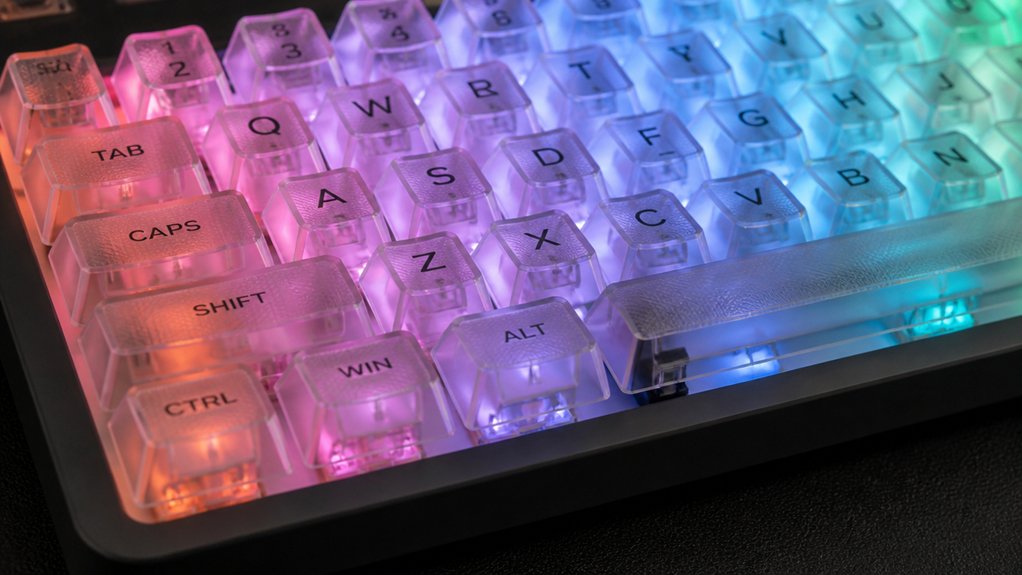
Guaranteeing your keycaps and LEDs are compatible with your wireless keyboard’s design is essential for both aesthetics and functionality.
Check that the LED orientation matches your keyboard’s layout; north-facing LEDs are common in wireless designs but may not align with Cherry profile keycaps. Choose keycaps made from translucent materials or with clear legends to enhance backlighting visibility, especially for RGB effects.
Confirm that your PCB (Printed Circuit Board) supports LED functionality and that wiring or daughterboards won’t interfere with wireless antenna placement or signal strength.
Avoid thick or opaque keycaps, as they can diminish LED brightness and reduce backlighting effectiveness.
Finally, verify that the lighting system’s power consumption fits within your wireless keyboard’s battery capacity, maintaining peak wireless performance and runtime.
Being aware of SMD LED sizes and their compatibility ensures efficient integration and optimal illumination.
Assembling Your Keyboard: Wiring, Case, and Cable Management Tips
When assembling your wireless mechanical keyboard, focus on proper wiring techniques to prevent stress on connections and guarantee reliable signal transfer.
Check that your case has enough space for the wireless module and allows easy access for maintenance or charging.
Use cable ties or clips to keep internal cables organized, and route antennas away from metal parts to maintain peak wireless performance.
Proper Wiring Techniques
Proper wiring is essential to making your wireless mechanical keyboard reliable and efficient. To guarantee strong signal and stable connections, focus on correct antenna placement and secure orientation. Use a quality, shielded cable for internal wiring to minimize electromagnetic interference.
When wiring the PCB, plan your cable routing carefully to avoid pinching or bending, which can cause damage or signal degradation. Secure all connections with cable ties or adhesive mounts to prevent movement and noise during typing.
Pay close attention to solder joints: maintain proper soldering with your soldering iron, avoiding excess to guarantee consistent electrical contact. Proper wiring techniques help prevent signal loss, improve longevity, and keep your keyboard performing at its best.
- Guarantee antenna connections are secure and oriented correctly
- Use shielded cables for stable wireless communication
- Manage cables thoughtfully to preserve signal integrity
Case Compatibility Checks
Before assembling your wireless mechanical keyboard, it’s crucial to verify that the chosen case is compatible with your PCB. Check the mounting styles—tray mount or gasket mount—to guarantee a proper fit and stability.
Confirm that your PCB’s dimensions and connector placement align with case cutouts and cable routing channels, avoiding pressure on cables or components. Pay attention to cable management inside the case; secure antenna wires away from metal parts to maintain signal strength and reduce interference.
If your setup includes wireless daughterboards or Bluetooth modules, confirm they can be installed firmly without blocking case screws or foam layers that help dampen sound. Carefully route and secure charging or data cables to prevent pinching and allow for easy future maintenance or battery changes.
Cable Management Tips
Organizing cables inside your wireless mechanical keyboard is key to guaranteeing a clean build and reliable performance. Proper cable management prevents signal interference, especially around the antenna or USB receiver, and extends the life of internal cables.
Use cable ties or adhesive clips inside the case to secure internal cables, avoiding pressure points or pinches that could cause damage or performance issues. Carefully plan cable paths before assembly to keep wires neat and accessible for future upgrades or troubleshooting. Confirm the antenna and Bluetooth modules are routed away from metal parts in the case to maintain a strong connection.
Properly aligned and secured cables prevent accidental disconnections, while damping materials around cables reduce vibrations and noise for a quieter typing experience.
Configuring Wireless Firmware and Early Testing to Troubleshoot Issues
Ensuring your wireless firmware is correctly configured is essential for smooth operation and troubleshooting. Start by verifying that the firmware supports your PCB’s Bluetooth or RF module to prevent connectivity issues later.
Use early-stage testing by connecting the PCB to VIA or QMK configurator via USB to confirm the firmware recognizes the device and that key mapping functions properly. Flash the wireless firmware with debugging enabled so you can monitor signal strength, battery status, and connection stability during initial tests.
Before switching to wireless mode, perform wired switch functionality tests to catch hardware faults. Finally, confirm proper pairing procedures and test keypress responsiveness using dedicated apps or utilities to identify potential firmware or hardware misconfigurations early.
Troubleshooting Common Wireless Connectivity and Power Problems
Wireless connectivity and power issues are common hurdles when building or troubleshooting a custom mechanical keyboard, but many of these problems have straightforward solutions. Low batteries or incomplete charging often cause connectivity and latency issues in wireless keyboards.
Regularly update your keyboard’s firmware and wireless dongle drivers to guarantee compatibility and prevent disconnections. Signal interference from other wireless devices or dense obstructions can weaken connectivity; keep your keyboard within a 10-meter range and away from other electronics.
Power-saving modes might delay wake-up or cause unresponsiveness; adjust sleep settings or disable aggressive power management in firmware or your OS.
- Re-pair your keyboard with the receiver or Bluetooth host to fix connection drops
- Keep your wireless keyboard within recommended range to avoid signal interference
- Update firmware and drivers for peak connectivity
Fine-Tuning Sound, Feel, and Rattling Before You Start Using Your Keyboard
Before you start using your keyboard, it’s essential to fine-tune its sound and feel for peak typing. Lubing switches with Krytox 205g0 and Krytox XHT-BDZ guarantees quiet, smooth keypresses and reduces scratchiness.
Thoroughly lubing stabilizers eliminates rattling and creates consistent motion. Test and adjust keycap stems to prevent gaps with stabilizers, adding thin plastic fillers if needed.
To reduce hollow or echoing sounds, use foam reduces or place Poly-Fil under the PCB, especially on gasket-mounted keyboards, which benefit from sound absorption. Experiment with gasket and screw placement to maximize case flex and softness of the typing feel.
Don’t forget to perform switch testing using VIA or VIAL to confirm responsiveness and address any noises or inconsistencies before regular use.
Frequently Asked Questions
How Do I Ensure My Hot-Swap PCB Is Compatible With All Switch Types?
You guarantee compatibility by choosing a hot-swap PCB with a universal socket design, such as hot-swap sockets compatible with MX-style switches, and double-check switch pin configuration and size to avoid installation issues with various switch types.
What Software Tools Are Best for Early Testing of Wireless Keyboard PCBS?
You should use software like KiCad for PCB design, then employ firmware tools like QMK or VIA for testing. These tools help you verify connectivity, layout, and functionality early, ensuring your wireless keyboard PCB works properly before assembly.
How Can I Optimize Gasket Mounting for Different Case Materials?
You should experiment with gasket material compressibility and placement for each case type. Adjust gasket thickness, density, and positioning to balance sound, feel, and vibration absorption, ensuring ideal mounting performance across different materials like metal, wood, and plastic.
Which Stabilizer Lubricant Provides the Quietest Typing Experience?
You should use a high-quality dielectric or krytox-based lubricant for your stabilizers, as these reduce noise effectively. Apply liberally, guarantee even coverage, and cycle the stabilizers to maximize quietness and smooth operation during typing.
How Do I Verify LED Orientation Matches My Keycap Layout?
You verify LED orientation by checking the LED’s flat side or shorter leg, matching it with the PCB’s designated pin side. Make certain the LED’s positive and negative leads align correctly with your keycap layout to prevent issues.
In Summary
Building your own wireless mechanical keyboard can be a rewarding project that enhances your typing experience. By choosing the right components, planning carefully, and troubleshooting effectively, you’ll create a custom setup that’s both functional and comfortable. Remember to test thoroughly and fine-tune for sound and feel. With patience and attention to detail, you’ll enjoy a sleek, reliable wireless keyboard that’s tailored exactly to your needs—ready to elevate your daily work and gaming sessions.



