
You’ll love wireless DIY mechanical keyboard kits for their clean desk setups, portable layouts, and versatile connectivity like Bluetooth and 2.4 GHz. Hot-swap PCBs make assembly easy without soldering, letting you customize switches anytime. Plus, dual-mode options mean you get stable wired performance and wireless freedom. With good battery life and materials that balance durability and weight, these kits fit various needs. Keep exploring to discover how to optimize your wireless build perfectly.
What Makes Wireless DIY Keyboards Different From Wired Kits?
What sets wireless DIY mechanical keyboard kits apart from wired ones? When you choose wireless mechanical DIY kits, you get built-in Bluetooth or proprietary wireless modules that free you from cables, enhancing portability.
Unlike wired kits, these require rechargeable batteries or AA/AAA batteries, meaning you need to manage power. You’ll also notice wireless kits have extra components like antennas and more complex PCBs to guarantee a stable, low-latency connection.
Assembly involves additional steps to integrate battery compartments and optimize signal strength, which is different from the straightforward wiring in wired kits. Models such as the Keychron V6 Max or Luminkey Nova Mini showcase this well by combining hot-swap customization with wireless functionality, offering flexibility and untethered use that wired-only kits can’t match.
Why Choose Wireless Freedom for Your Keyboard Setup
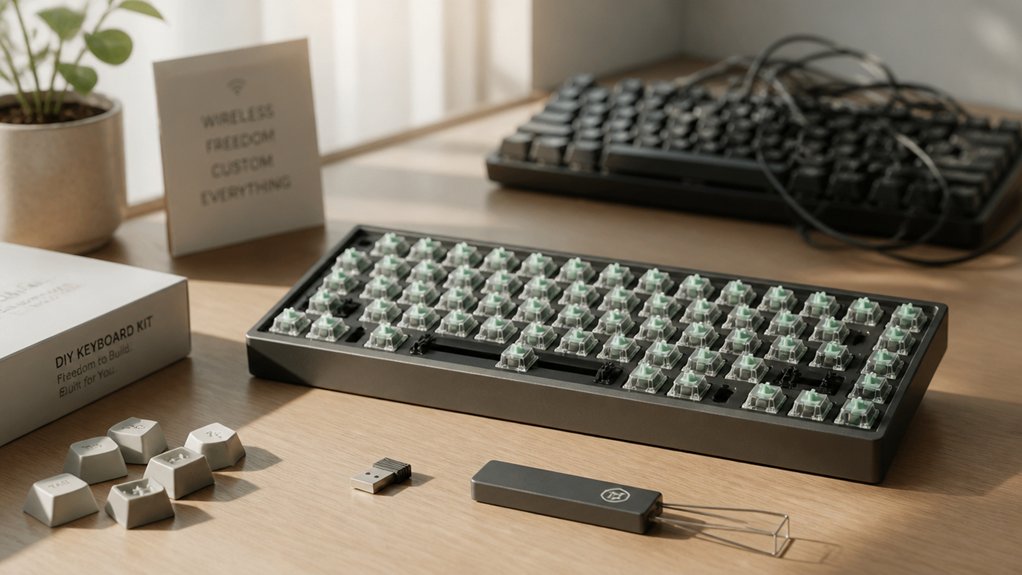
How much easier would your workspace feel without tangled cables or fixed positions? Wireless DIY mechanical keyboard kits free you from clutter, offering a clean, organized desk.
You can easily switch between devices like computers, tablets, and smartphones using Bluetooth-enabled kits, making your setup versatile. Portability matters, too—wireless kits such as the Keychron V6 Max let you take your keyboard anywhere without hassle.
These kits also boast optimized battery life with power-saving modes, so you stay connected longer. By going wireless, you gain the flexibility to arrange your keyboard wherever you want, boosting comfort and productivity.
Choosing wireless DIY mechanical keyboard kits means you get a customizable, clutter-free, and portable typing experience that adapts seamlessly to your lifestyle.
How Hot-Swap PCBs Simplify Wireless Keyboard Assembly

Hot-swap PCBs let you install or swap switches without soldering, making wireless keyboard assembly much easier.
You can quickly customize or fix your setup while switching between wired and wireless modes seamlessly. Just be sure your PCB supports the features you want for smooth compatibility.
Hot-Swap Advantages Explained
Why spend hours soldering when you can assemble your wireless mechanical keyboard in under 30 minutes? Hot-swap PCBs let you insert or remove switches without any soldering, making your DIY mechanical keyboard build quicker and hassle-free.
This means you can easily test different switch types until you find your perfect feel without technical frustration. Plus, hot-swap PCBs reduce the risk of damage during assembly or when replacing switches—ideal for wireless kits that require portability and occasional maintenance.
With hot-swap compatibility, you can upgrade or swap switches later without taking apart your entire keyboard. This flexibility not only speeds up your initial build but also guarantees your wireless mechanical keyboard evolves with your preferences over time.
Wireless Assembly Made Easy
By eliminating the need for soldering, hot-swap PCBs make building a wireless mechanical keyboard straightforward and fast. When you choose a wireless DIY keyboard kit with a hot-swap PCB, you can easily install or swap switches without fuss, speeding up assembly and customization.
This setup cuts down complex wiring since wireless connectivity pairs perfectly with hot-swap functionality. You get a cleaner build and can try different switch types quickly, all while enjoying cable-free convenience.
Many hot-swap PCBs support popular firmware like VIA and QMK, letting you customize keys and layouts effortlessly. Plus, USB-C ports on these PCBs simplify wired charging and initial setup. Overall, hot-swap PCBs make wireless DIY keyboard assembly accessible and hassle-free.
PCB Compatibility Considerations
Although assembling a wireless mechanical keyboard may seem complex, choosing a PCB designed for hot-swap switches simplifies compatibility challenges considerably. Hot-swap PCBs let you install or swap switches without soldering, making wireless DIY kits faster and easier to build.
These PCBs often support popular firmware like VIA and QMK, streamlining customization of wireless settings without extra hassle. Many wireless DIY kits integrate flexible PCB designs that accommodate Bluetooth modules and batteries, so you don’t have to worry about fitting components together.
Choosing the Best Wireless Connectivity: Bluetooth, 2.4 GHz, or Hybrid
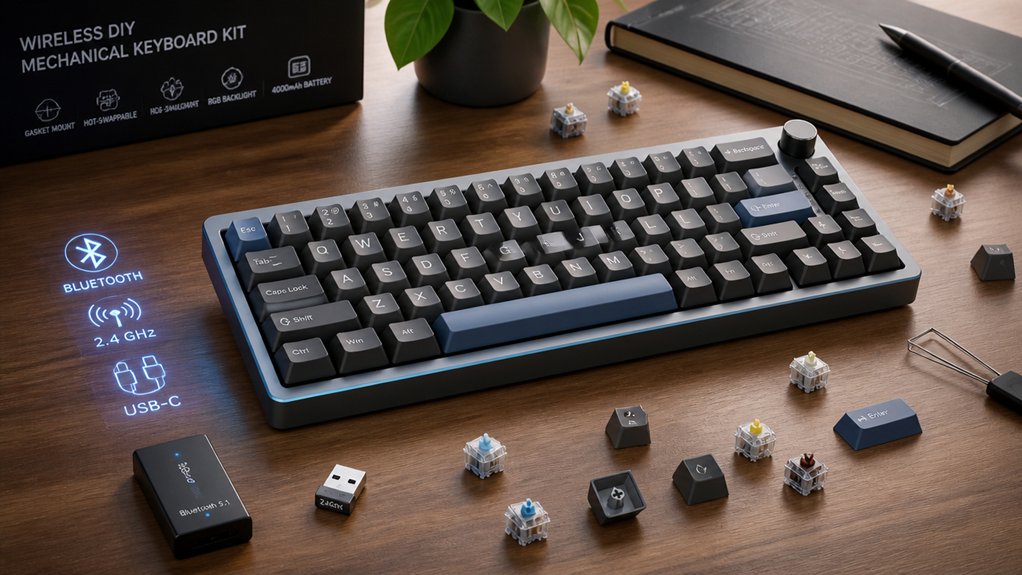
When selecting wireless connectivity for your DIY mechanical keyboard, how do you decide between Bluetooth, 2.4 GHz, or a hybrid setup?
Bluetooth offers broad device compatibility and convenience with lower power consumption, making it great for everyday wireless use. However, it can have higher latency compared to 2.4 GHz connections.
If you need faster response times and a more stable connection—ideal for gaming or high-performance typing—2.4 GHz wireless is your best bet, though it often requires a dedicated USB dongle.
Hybrid wireless keyboards combine both technologies, giving you the flexibility to switch between devices and connectivity modes seamlessly.
Before choosing, consider your device compatibility, latency preferences, and whether you want a dongle-free experience or prioritized performance for your typing needs.
Picking the Right Layout and Case Materials for Wireless Builds
Deciding on wireless connectivity is just one part of building a solid wireless mechanical keyboard. Next, you’ll need to pick the right layout and case materials to balance portability, durability, and performance.
Selecting the perfect layout and case materials is key for a portable, durable, and high-performing wireless mechanical keyboard.
- Choose a compact layout like 60%, 65%, or 75% to maximize battery life and keep your keyboard portable.
- Consider aluminum cases if you want durability and a richer sound, but be aware they add weight, which may reduce battery life and affect wireless range.
- Opt for polycarbonate or acrylic cases to keep things lightweight and boost RGB diffusion, enhancing aesthetics without compromising wireless functionality.
Balancing these choices guarantees your wireless keyboard feels great and performs reliably on the go.
Customizing Your Wireless Keyboard With Switches and Keycaps

Picking the right switches and keycaps lets you tailor your wireless keyboard’s typing experience and look exactly to your liking. With wireless DIY kits, you choose switches that deliver the exact tactile feedback, sound, and actuation force you want. Hot-swap PCBs let you swap switches quickly without soldering, so you can easily experiment.
Keycaps come in various profiles, materials, and colors, letting you create a personalized aesthetic that matches your style and typing comfort. Don’t forget quality stabilizers and lubricants—they greatly enhance feel and sound.
Since wireless keyboards often use compact layouts like 60% or 65%, make certain your chosen switches and keycaps fit these smaller frames perfectly, balancing portability with performance. Customizing these elements makes your keyboard truly yours.
Comparing Battery Life and Charging Options for Wireless Kits
When choosing a wireless mechanical keyboard kit, understanding battery capacity and charging options is key to matching your usage habits. You’ll want to compare kits that offer USB-C fast charging, wireless charging pads, or large batteries for longer runtimes.
Plus, knowing how to optimize settings like backlighting and power-saving modes can help you get the most out of your keyboard’s battery life.
Battery Capacity Comparison
Although wireless DIY mechanical keyboard kits offer great flexibility, their battery capacity plays a crucial role in how long you can use them between charges. You’ll find battery sizes ranging from 2000mAh to 4000mAh, directly affecting wireless runtime.
Here’s what to take into account:
- Larger batteries, like the 4000mAh in Keychron’s V6 Max, can deliver over 40 hours of continuous use.
- Battery life varies depending on features such as RGB lighting and wireless protocols (Bluetooth uses less power than 2.4GHz).
- Some kits let you type wired while charging, so you don’t lose productivity when the battery runs low.
Choosing the right battery capacity guarantees your wireless kit stays ready whenever you are, minimizing downtime between charges.
Charging Methods Explained
Battery capacity sets the stage for how long your wireless mechanical keyboard lasts between charges, but knowing how to recharge it efficiently can make a big difference in your overall experience.
Wireless DIY mechanical keyboard kits generally rely on lithium-ion batteries, with capacities between 1500mAh and 4000mAh, influencing both battery life and weight.
When considering charging methods, USB-C wired charging is common and convenient, letting you use your keyboard while it powers up. Some kits, like the Keychron V6 Max, even support fast charging to minimize downtime.
Alternatively, Qi wireless charging offers cable-free convenience but comes with slower charge times and needs compatible pads.
Ultimately, balancing battery capacity with user-friendly charging methods guarantees your wireless DIY keyboard meets your workflow needs with minimal interruption.
Usage Time Optimization
Since optimizing usage time hinges on both battery life and charging options, you’ll want to weigh these factors carefully when choosing a wireless DIY mechanical keyboard kit.
To help you get the most out of your wireless setup with rechargeable batteries, consider the following:
- Battery Capacity – Premium kits like the Keychron V6 Max offer larger batteries, extending usage time without frequent recharges.
- Fast Charging – USB-C fast charging lets you quickly top up power during short breaks, minimizing downtime.
- Power Management – Disable RGB backlighting and enable power-saving modes to stretch battery life further.
Also, dual-mode connectivity (Bluetooth and wired) lets you switch to wired mode to preserve battery when needed. Balancing these aspects guarantees longer, uninterrupted wireless use.
How Dual-Mode Bluetooth and Wired Connectivity Boost Flexibility
When you use a dual-mode wireless mechanical keyboard, you get the best of both worlds: the freedom of Bluetooth convenience and the dependability of wired USB-C connectivity. Dual-mode wireless DIY mechanical keyboard kits let you switch effortlessly between devices like laptops, tablets, and smartphones via Bluetooth, perfect for multitasking on the go.
At the same time, wired mode delivers low-latency, stable performance ideal for gaming or heavy typing sessions without worrying about interference or battery life. This flexibility means you can extend battery life by plugging in when needed, ensuring uninterrupted use.
Kits like the Keychron V6 Max highlight how dual-mode functionality enhances both customizability and reliability, making your typing experience seamless whether you’re wireless or wired.
How Wireless Builds Affect Noise and Typing Feel

Although wireless mechanical keyboard kits offer the convenience of untethered use, their designs often impact noise levels and typing feel in subtle ways.
Wireless mechanical keyboard kits provide freedom from cables but subtly influence sound and typing sensation.
When building your DIY custom keyboard, keep these factors in mind to tailor your typing experience:
- Many wireless kits include gasket mounts and foam layers that dampen noise, creating a quieter typing experience compared to rigid wired keyboards.
- Additional components like batteries shift weight distribution, slightly altering tactile feedback and overall typing feel.
- Some kits sacrifice heavier sound-dampening materials to accommodate wireless parts, resulting in a softer, more cushioned sound profile.
Luckily, most wireless DIY customs use hot-swap PCBs, so you can easily experiment with switches to fine-tune both noise and feel to your preference. This balance of form and function uniquely shapes your typing experience.
The Portability Benefits of Wireless DIY Mechanical Keyboards
You’ll notice how wireless DIY mechanical keyboards boost your mobility, letting you switch devices instantly without cables getting in the way.
Their compact designs and rechargeable batteries make them perfect for on-the-go use, keeping your setup light and flexible.
Plus, going wireless clears your workspace of clutter, so you can focus better wherever you work.
Enhanced Mobility Anywhere
How easily can you take your mechanical keyboard anywhere you go? Wireless DIY mechanical keyboard kits boost your portability, letting you work or game without being tethered.
Here’s how they enhance your mobility:
- Seamless Connectivity: Most kits use Bluetooth, so you can switch between laptops, tablets, or phones effortlessly.
- Compact Design: With 65% or 75% layouts, these keyboards fit snugly in your backpack, making transport hassle-free.
- Customizable On-the-Go: Hot-swap PCBs let you modify keys or switches without soldering, perfect for adjustments wherever you are.
With a portability rating above 56, wireless DIY mechanical keyboard kits like the Keychron V6 Max make typing fluid and flexible, whether remote working, traveling, or casually typing anywhere you want.
Clutter-Free Workspace
When you ditch cables with wireless DIY mechanical keyboard kits, your workspace instantly feels cleaner and more organized. Wireless keyboards eliminate clutter, making clean desk setups easier to maintain. You gain the freedom to position your keyboard anywhere without tangling cables. Compact designs like 60% or 65% layouts take up less space, boosting both aesthetics and functionality. Plus, wireless kits like the LuminKey Nova Mini or Keychron’s models let you switch between devices easily, enhancing productivity on the go or in shared spaces.
| Benefit | Explanation |
|---|---|
| Cable-Free Workspace | Eliminates desk cable clutter |
| Portability | Easy to move and share |
| Compact Layouts | Smaller footprint for clean desk setups |
| Multi-Device Support | Connects to multiple devices |
| Flexible Placement | Choose ideal keyboard positioning |
Troubleshooting Common Wireless Connection Issues
Struggling to maintain a stable connection with your wireless DIY mechanical keyboard? Troubleshooting common wireless issues can quickly get you back on track. Here’s what to do:
Having trouble keeping your wireless DIY mechanical keyboard connected? Here’s how to troubleshoot common wireless issues effectively.
- Update Firmware: Confirm your keyboard’s firmware is current. Outdated software often causes drops or pairing failures in DIY wireless setups.
- Minimize Interference: Keep the keyboard away from other Bluetooth or 2.4 GHz devices that congest wireless channels and disrupt signals.
- Check Battery and Re-Pair: Verify your battery is fully charged since low power causes intermittent losses. Remove the keyboard from your device’s Bluetooth settings and re-pair to clear corrupted data.
Using recommended USB dongles instead of generic ones also helps maintain a reliable wireless connection. These steps will enhance your DIY keyboard’s performance and eliminate common connection hassles.
Budget Tips for Building Your Wireless Mechanical Keyboard
Now that you’ve tackled common wireless connection issues, focusing on budget-friendly options can help you build a reliable mechanical keyboard without overspending. Consider wireless DIY kits like the Luminkey Nova Mini or Keychron V6 Max—they offer solid wireless functionality around $70.
Choosing kits with hot-swap PCBs saves you from extra soldering costs and lets you customize switches easily. Prioritize kits that include USB-C cables and built-in Bluetooth to avoid buying accessories separately.
For cases, aluminum or polycarbonate options within $100–$200 strike a good balance between durability and cost. Finally, pick kits with strong community support and thorough documentation to minimize frustrating trial-and-error during assembly.
These tips guarantee you build a wireless DIY keyboard that’s both budget-friendly and reliable.
Frequently Asked Questions
Can Wireless DIY Keyboards Connect to Multiple Devices Simultaneously?
Yes, you can connect many wireless DIY keyboards to multiple devices simultaneously. They usually support multi-device pairing, letting you switch between devices quickly without reconnecting every time, making your workflow smooth and efficient.
Do Wireless Mechanical Keyboards Support Full NKRO (N-Key Rollover)?
Yes, many wireless mechanical keyboards support full NKRO, letting you press multiple keys simultaneously without ghosting. Just make sure the specific model you choose explicitly states NKRO support for wireless use to avoid limitations.
Are There Firmware Options Specifically Designed for Wireless DIY Keyboards?
Yes, you’ll find firmware like QMK and ZMK tailored for wireless DIY keyboards. They support Bluetooth, optimize battery life, and offer customization, letting you fully control your wireless keyboard’s features and performance with ease.
How Does Wireless Latency Compare to Traditional Wired Keyboards?
Wireless latency is usually slightly higher than wired, but you won’t notice it in everyday use. Modern tech keeps delays under a few milliseconds, so your typing and gaming remain smooth and responsive without cables getting in the way.
What Are the Best Practices for Storing Wireless DIY Keyboard Kits?
You should store your wireless DIY keyboard kit in a dry, dust-free environment. Keep all components organized in labeled containers, avoid extreme temperatures, and remove batteries if storing long-term to prevent corrosion and guarantee everything stays in good condition.
In Summary
Choosing a wireless DIY mechanical keyboard kit gives you the freedom to customize without the clutter of cables. You’ll enjoy easier assembly thanks to hot-swap PCBs and have options like Bluetooth or 2.4 GHz for reliable connectivity. Plus, wireless builds boost portability and keep your setup sleek. With the right layout, materials, and a little budget planning, you can create a personalized, noise-friendly keyboard that fits your style and typing needs perfectly.


Leave a Reply