

To effectively customize QMK firmware keys, start by choosing compatible hardware and setting up your development environment with the right tools. Organize your keymaps with clear, descriptive layers and use custom keycodes for macros. Test your configurations using simulators before flashing, and guarantee you perform a safe upgrade to avoid bricking your device. Experiment with advanced features like tap dancing and dynamic layers to boost functionality—exploring these options will lead to a fully personalized keyboard experience.
Understand What QMK Firmware Is and What It Can Do for Your Keyboard

Have you ever wondered how to personalize your mechanical keyboard beyond the default settings? That’s where QMK Firmware comes in. It’s an open-source keyboard software that lets you customize your keyboard’s keymap, layers, macros, and lighting directly on the keyboard processor.
With QMK firmware, you can create a custom keymap without needing prior coding experience, thanks to its simple syntax rules. Your custom layouts travel with the keyboard wherever you go—no extra software needed.
Plus, advanced features like support for up to 32 layers, mouse keys, tap dances, and RGB lighting make your keyboard more versatile and visually engaging. Compatible with many hobbyist mechanical keyboards, QMK provides a versatile way to enhance your typing experience seamlessly.
Choose Compatible Hardware to Get Started With QMK
To start customizing with QMK, you need to confirm your keyboard hardware is compatible. Use the `qmk list-keyboards` command or check the firmware repository to verify support for your specific model.
If your current keyboard isn’t supported, consider switching to a supported board with open firmware options for easier customization.
Verify Board Compatibility
Guaranteeing your keyboard is compatible with QMK firmware is a crucial first step before diving into customization. Compatibility determines whether you can safely flash custom firmware onto your device without issues. To verify this, consider these steps: 1. Check the official QMK keyboard support list to confirm your keyboard model is supported. 2. Run the command `qmk list-keyboards` in the QMK environment to see if your device appears. 3. Research your keyboard model online for user reports and community support related to QMK. 4. If unsupported, explore alternative boards designed for QMK, which often have open-source firmware options. 5. Pay attention to the hot-swappable switch support to ensure you can change switches easily without soldering. Choosing a keyboard with strong QMK support simplifies the process and guarantees smoother customization and flashing.
Check Firmware Support
Wondering if your keyboard can be customized with QMK firmware? First, check its compatibility list or run commands like `qmk list-keyboards` to verify support. Most hobbyist mechanical keyboards, including models like the Keychron Q3 and Freebird60, are compatible, but it’s essential to confirm. Additionally, hot-swappable switch compatibility is crucial since using supported switch types simplifies the custom firmware process. If your keyboard in bootloader mode isn’t supported, you may need to select a different model or replace it with a compatible one. Some keyboards use proprietary firmware that doesn’t support QMK, so choosing widely supported boards guarantees you can easily customize keymaps, macros, and RGB lighting. Confirming compatibility upfront saves time and effort, making it easier to install QMK and start customizing your keyboard’s functions without hardware limitations.
Consider Hardware Customization
Choosing the right hardware is essential for a smooth QMK customization experience. Picking a custom mechanical keyboard that’s compatible with QMK guarantees easier flashing and key remapping. Additionally, selecting a keyboard with a reputable hot-swappable switch support can significantly simplify the process of experimenting with different tactile responses and switch types.
Before buying, verify if the keyboard supports QMK, since not all kits do. Look for popular models like the Keychron Q3, which offer extensive firmware customization and strong community support.
Consider these factors:
- Select a keyboard with an accessible bootloader or dedicated boot key for simple firmware updates.
- Opt for a model that supports RGB LEDs to reveal richer lighting customization.
- Make sure the hardware has extra features or programmable keys for advanced macros.
- Confirm compatibility with your preferred development tools to streamline your DIY project.
Set Up Your Development Environment for Easy Firmware Building
Setting up your development environment is the first step toward customizing QMK firmware with ease. First, install QMK CLI with `pip install –upgrade qmk`, then run `qmk setup` to clone the firmware repository and organize your files. Configure your keyboard and keymap using `qmk config` commands for smoother firmware building. Make sure you have Python 3.11+, Git, and build tools installed relevant to your OS. For Windows, QMK MSYS offers a ready-to-use terminal environment that simplifies flashing your keyboard. Use this setup to streamline firmware compilation and guarantee everything works smoothly before flashing your keyboard. Remember, a well-configured environment makes customizing keys faster and more reliable. If you follow these steps, you’ll be ready to build and flash your firmware confidently. Proper switch compatibility and support for layered key functions can streamline this process even further.
Design Clear and Organized Layers for Your Keymap
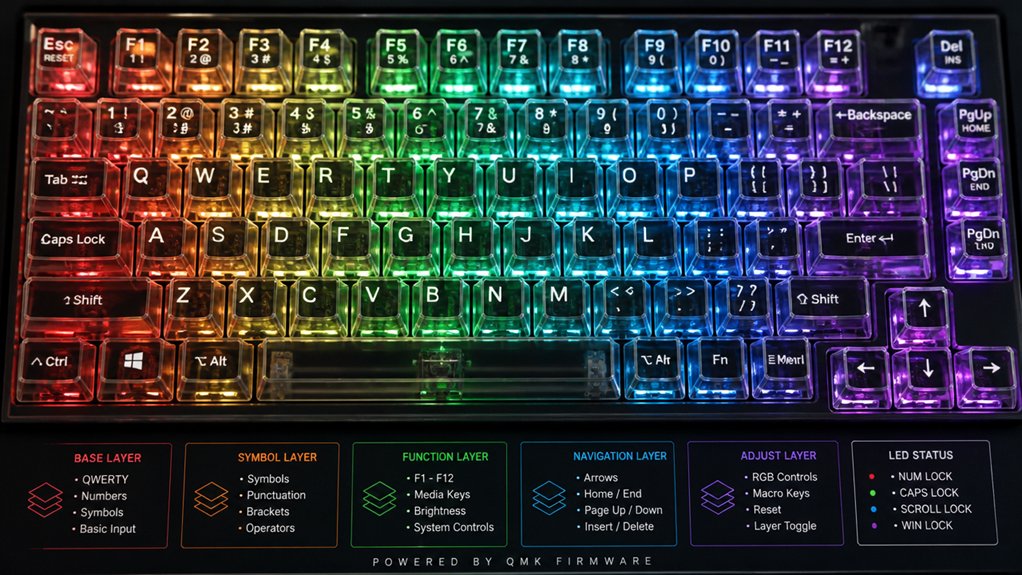
To keep your keymap easy to understand and modify, use descriptive layer names that clearly indicate their purpose, like `MAC_BASE` or `MAC_FN`. A hot-swap compatibility approach allows you to easily change switches without soldering, making customization more flexible and accessible. Focus on placing common functions in your default layer and reserve higher layers for modifiers or special controls. Limiting active layers and maintaining consistent layouts help prevent conflicts and make your setup more intuitive.
Use Descriptive Layer Names
Using clear and descriptive layer names in your keymap helps you quickly identify each layer’s purpose without confusion.
When you name your layers logically, you make it easier to understand and modify your setup. To customize your keyboard effectively, consider:
- Using names like `MAC_BASE` or `WIN_FN` to specify platform-specific layers.
- Organizing layers hierarchically, such as separating base layers from function layers, for clarity.
- Adding names that reflect the layer’s role, like `VIM_MODE` or `MEDIA`, to avoid generic labels.
- Documenting each layer in `keymap.c` guarantees your setup remains understandable, especially when collaborating or revisiting your keymap for my keyboard.
- Implementing switch comparison charts when selecting or customizing switches ensures you choose the optimal feel for your typing preferences.
Clear layer naming keeps your work organized and speeds up updates or troubleshooting.
Prioritize Common Functions
Prioritizing common functions in your keymap involves organizing layers around frequently used keys, ensuring quick access and an intuitive workflow. Group essential functions like media controls, macros, or mouse keys on dedicated layers to keep your layout clean. Use layer toggles (`TG(layer)`) or momentary switches (`MO(layer)`) to switch functions efficiently, minimizing complex key combinations. To avoid conflicts, set transparent keys (`KC_TRNS`) on higher layers, allowing fallback to lower layers. Clear layer names and a consistent order help you navigate your configuration variables effortlessly. Focus on placing core functions in your base layer for smooth daily use, while organizing related functions on secondary layers to maintain clarity and speed. Additionally, integrating switch durability considerations ensures your custom setup remains reliable through extensive use.
Maintain Consistent Layouts
Creating a logical and consistent layout for your keymap layers sets the foundation for a workflow that’s both efficient and easy to navigate.
To maintain this, you should:
- Use clear, descriptive naming conventions like `BASE` or `FN` to keep layout organized and intuitive.
- Employ transparency (`_______`) in layers to inherit functions from lower layers, ensuring consistency.
- Limit active layers at any one time to keep key behavior predictable and minimize confusion.
- Group related functions—such as navigation, media, or macros—on dedicated layers, making them easily accessible.
- Regularly review and optimize your layer structure, adhering to best practices for clarity and efficiency.
Regularly document and comment your `keymap.c` with ASCII art or annotations. This helps visualize the layout and reduces errors during layer customization, maintaining a clean, organized layout.
Create Custom Keycodes and Macros for Additional Functionality

To add new functionality to your custom keyboard, defining unique keycodes allows you to trigger specific actions or macros that extend beyond standard keypresses. You can start by creating custom keycodes with an enum, beginning with `SAFE_RANGE` to prevent conflicts with existing QMK keycodes.
Then, implement the `process_record_user` function to detect when your custom key is pressed. Inside this function, you can use `macro` commands, such as `SEND_STRING()` to input text or toggle booleans to manage macro states.
For complex multi-stroke macros, utilize `SS_TAP()`, `SS_DOWN()`, and `SS_UP()` macros. Remember to return `true` at the end of `process_record_user` to guarantee normal key processing continues alongside your custom macro functions. Additionally, ensuring compatibility with various microcontrollers like the ESP32 or STM32 can expand your customization options.
Add RGB Lighting Hints to Show Your Keyboard’s Status
Adding RGB lighting hints to display your keyboard’s status enhances both usability and aesthetics by providing real-time visual feedback.
You can do this using the `rgb_matrix_indicators_user` callback function in `keymap.c`. To set the color, use `rgb_matrix_set_color` for specific keys or LEDs, or map LEDs precisely with `rgb_matrix_map_row_column_to_led`.
Here are steps to implement this:
- Detect the current keyboard layer with `get_highest_layer(layer_state)`.
- Use `rgb_matrix_indicators_user` to trigger color updates based on status changes.
- Apply color codes—red for Caps Lock, green for layer 1, blue for layer 2.
- Guarantee your custom `rgb_matrix_indicators_user` function dynamically updates LED colors as the keyboard state changes.
This approach makes your keyboard visually informative and personalized.
Test Your Keymap Locally Before Flashing to Prevent Mistakes
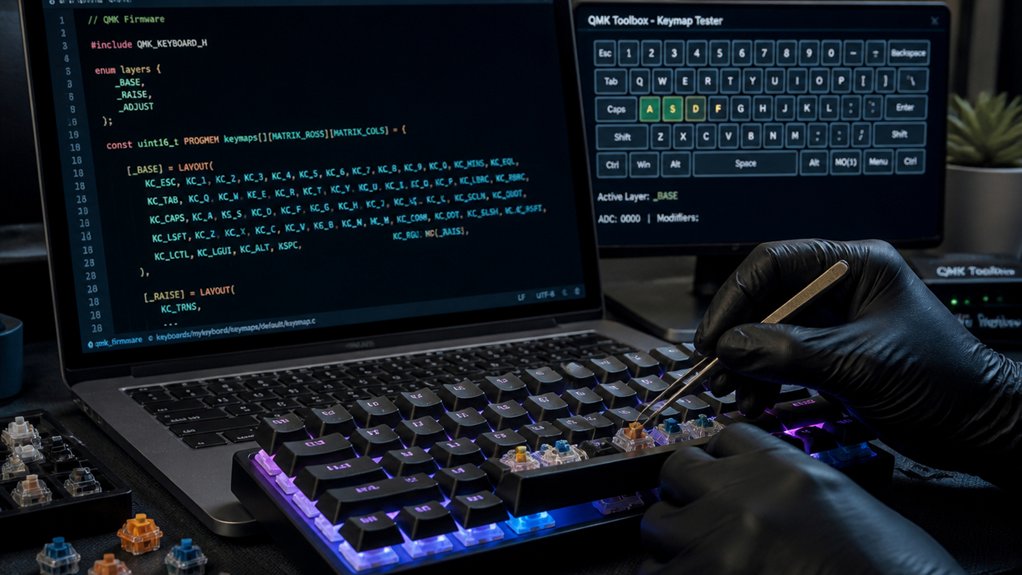
Before flashing your custom keymap, it’s essential to verify its functionality locally. Use emulator software like VIA or an online QMK Configurator preview to test keypresses and confirm everything works as intended.
Running these tests helps catch errors early, saving you time and preventing potential hardware issues.
Use Emulator Software
Using emulator software like VIA or Keyboard Layout Editor allows you to test your QMK keymap directly on your computer, which helps identify errors early in the development process.
By using an emulator, you can catch layout mistakes and keycode conflicts before flashing, preventing potential bricking or misconfiguration. Emulator tools replicate layer switching, macros, and special functions as they’d behave on your physical keyboard, providing an accurate real-time preview.
To maximize your testing:
- Import your keymap JSON or keymap.c files directly into the emulator.
- Simulate keypresses to verify functionality.
- Check for layout errors and conflicts.
- Save time by catching mistakes early, reducing repeat flashes.
Emulator software offers a safe way to validate your keymap without risk of hardware errors.
Verify Keypress Functionality
Verifying keypress functionality is a crucial step that can save you time and prevent errors before flashing your firmware. When using QMK, you can test your keymap locally by utilizing the `process_record_user` function to simulate key presses. By adding code that calls `send_string()` or `tap_code()` within this function, you can verify that the key is pressed and responded to correctly before flashing.
Additionally, use the `qmk compile` command to check for syntax errors in your keymap. Tools like QMK Toolbox’s “Test” feature or `qmk console` enable you to interactively send keypresses and observe responses without flashing.
Incorporate transparent (`KC_TRNS`) layers for easier testing of complex layouts, and always back up your keymaps to prevent data loss during adjustments.
Perform Safe Firmware Flashing to Avoid Bricking Your Keyboard
Flashing your keyboard’s firmware carries the risk of bricking the device if proper precautions aren’t taken, so it’s essential to follow safe practices throughout the process.
First, make sure to enter the keyboard into bootloader mode correctly, using the dedicated keycode like QK_BOOT or specific key combos (e.g., Fn+\ or Space+B).
Second, never unplug the keyboard during flashing, as interrupting the process can permanently damage it.
Third, use QMK Toolbox or the `qmk flash` command to upload your firmware, verifying that it matches your keyboard model and layout.
Finally, confirm your connection to the DFU or bootloader device before flashing to avoid communication errors. Keeping backups of your current firmware helps restore your keyboard if needed.
Troubleshoot Common Issues During Setup and Flashing
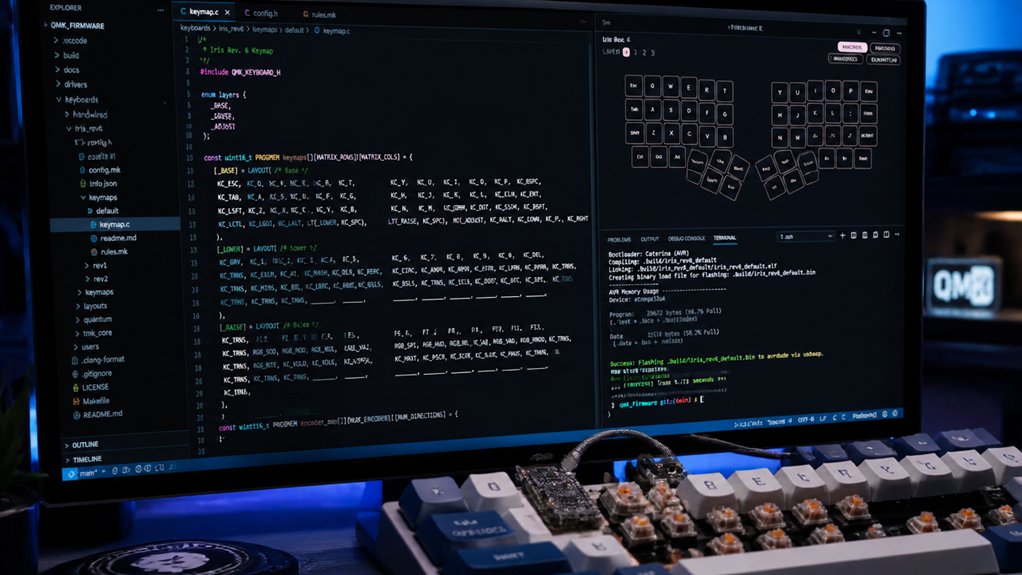
When encountering issues during setup and flashing, it’s essential to identify the root cause quickly to avoid damaging your keyboard or wasting time.
First, make certain you put your keyboard into the correct bootloader mode, using specific methods like the QK_BOOT key or manufacturer combos, before flashing. Never unplug your keyboard during the process, as this risks firmware corruption.
Ensure your keyboard is in bootloader mode using dedicated methods before flashing; avoid unplugging during the process.
Use the Command Line and run `qmk doctor` afterward to detect missing dependencies or configuration issues that might block flashing. Confirm your keyboard model and keymap are correctly specified with the `-kb` and `-km` flags during `qmk compile` to prevent errors or incompatible firmware.
If flashing fails in QMK Toolbox, verify the device appears as DFU and reset it via the reset button or key combos to properly enter bootloader mode.
Try Advanced Features Like Tap Dancing and Dynamic Layer Switching
Once you’ve mastered basic QMK setup and flashing, exploring advanced features like tap dancing and dynamic layer switching can greatly boost your keyboard’s functionality.
Tap Dance lets a key perform multiple actions based on tap count within the `TAPPING_TERM`, typically set in `config.h`, tailoring responsiveness to your typing pace.
Dynamic layer switching allows you to toggle or momentarily activate layers using keycodes like `TG(layer)` or `MO(layer)`, creating seamless shifts.
- Adjust the `TAPPING_TERM` to optimize tap speed and prevent unintended actions.
- Use Tap Dance to assign dual functions to a single key, saving space.
- Stack up to 32 layers for versatile setup tailored to different applications.
- Combine Tap Dance with dynamic layer switching for enhanced workflow efficiency.
Frequently Asked Questions
How Do I Effectively Organize Multiple Layers for Complex Keymaps?
You should clearly label each layer, organize keys logically, and use transparent layer switching. Keep a consistent structure, avoid overlapping functions, and test your setup thoroughly to guarantee fluid, efficient access across all complex layers.
What Are Best Practices for Customizing Tap Dancing Features?
To customize tap dancing, you should define clear tap-hold actions, test each configuration thoroughly, and use descriptive variable names. Keep your code organized and modular, making debugging easier while ensuring your tap dancing features work seamlessly and intuitively.
How Can I Incorporate Visual RGB Indicators for Layer States?
You can incorporate visual RGB indicators for layer states by configuring layered lighting effects in your keymap. Use QMK’s RGB matrix features to assign specific colors to each layer, activating different indicators when switching layers.
What Steps Ensure Reliable Firmware Flashing Without Damaging My Keyboard?
You should backup your firmware, use correct flashing tools, follow manufacturer instructions carefully, verify connections, and make sure you’re flashing the right firmware. Double-check everything before proceeding, and avoid disconnecting during flashing to prevent damage.
How Do I Troubleshoot Common Issues During Keymap Compilation?
You troubleshoot keymap compilation issues by checking for syntax errors, verifying correct keycodes, updating QMK firmware and dependencies, and consulting compile logs for specific error messages. This approach helps identify and fix problems efficiently, ensuring successful builds.



