

Before modding your keyboard, discharge static by touching grounded metal and wear an anti-static wrist strap. Use the right tools like small screwdrivers and tweezers, and handle components gently to avoid damage. Apply adhesives carefully and only with removability in mind. Disconnect wires properly, handling connections gently, and confirm everything’s secure before testing. Use a clean, static-free workspace to prevent accidents. Staying cautious with each step helps guarantee a safe modding experience—more tips follow to keep you safe.
Discharge Static Electricity Before Modding

To prevent damaging your keyboard’s sensitive components, you should always discharge static electricity before starting any modding. Static buildup can easily transfer to the PCB and other electrical parts, causing irreversible damage.
Before handling keyboard components, touch a grounded metal object, such as a metallic desk or an unpainted metal surface, to safely discharge static charge. For extra protection, wear an anti-static wrist strap connected to ground, which continuously prevents static discharge while working.
Avoid working over carpets or in dry environments, as these increase static buildup. When storing or transporting components, use anti-static bags or containers. Additionally, selecting an appropriate anti-static mat can provide a dedicated static-safe workspace, further protecting your electronics during modding.
Gather the Right Tools: Screwdrivers, Tweezers, and ESD Protection
Before you begin disassembling your keyboard, assembling the right tools is a must. Start with good screwdrivers, like Phillips #0 or #1, to prevent stripping screws in the keyboard case.
Tweezers with fine tips help you safely handle small components such as stabilizer clips, springs, and other tiny parts, avoiding damage. A switch puller simplifies removing switches without applying excessive force.
Protect sensitive components by wearing an ESD wrist strap or working on an ESD mat to prevent static damage to the PCB and Printed Circuit Board. Keep your tools organized in a non-metallic container to avoid short circuits or losing small parts during disassembly.
Always clean tools before use to prevent dirt or oils from contaminating parts or interfering with lubing and sound modifications. Using anti-static tweezers can further reduce the risk of static discharge when working with sensitive electronic parts.
Handle Switches and PCB Components Gently

Handling switches and PCB components with care is essential to prevent damage during keyboard modding. To avoid damaging sensitive parts, always handle switches by their housing and refrain from pulling on stems or pins. Be gentle pulling switches to prevent bending PCB pins or misaligning the switch. Heavy-duty PCB holders with adjustable clamps can help stabilize the board during work, reducing the risk of accidental damage. Use anti-static wristbands or mats to reduce static discharge, which can harm delicate components like PCB traces. When working on the PCB, avoid touching exposed traces with your fingers. During soldering or desoldering, allow the PCB to cool thoroughly and control the heat from your soldering iron to prevent heat damage.
Apply Adhesives and Liquids Carefully and Reversibly
When applying adhesives or liquids to keyboard components, precision and caution prevent long-term damage or difficulty in future modifications. Use only small amounts of adhesives—prefer reversible options like removable tapes or Play-Doh—for experimenting with sound mods.
Avoid hot glue unless you’re sure, as it’s difficult to remove and can damage components or cause permanent bonds. When applying tape, carefully cut and position it to avoid interfering with mechanical stems or switches.
Be mindful of overflow; excess lubricant or adhesive can seep into switches or PCBs, risking electrical shorts or mechanical issues. Always allow adhesives and lubricants to fully cure outside the keyboard before reassembling to prevent trapped moisture or unwanted bond strength.
Additionally, selecting residue-free cleaning products and ensuring thorough drying can help maintain the longevity and safety of your keyboard during modding.
These careful steps help guarantee your mod is both effective and reversible.
Disconnect and Reconnect Keyboard Wires Safely
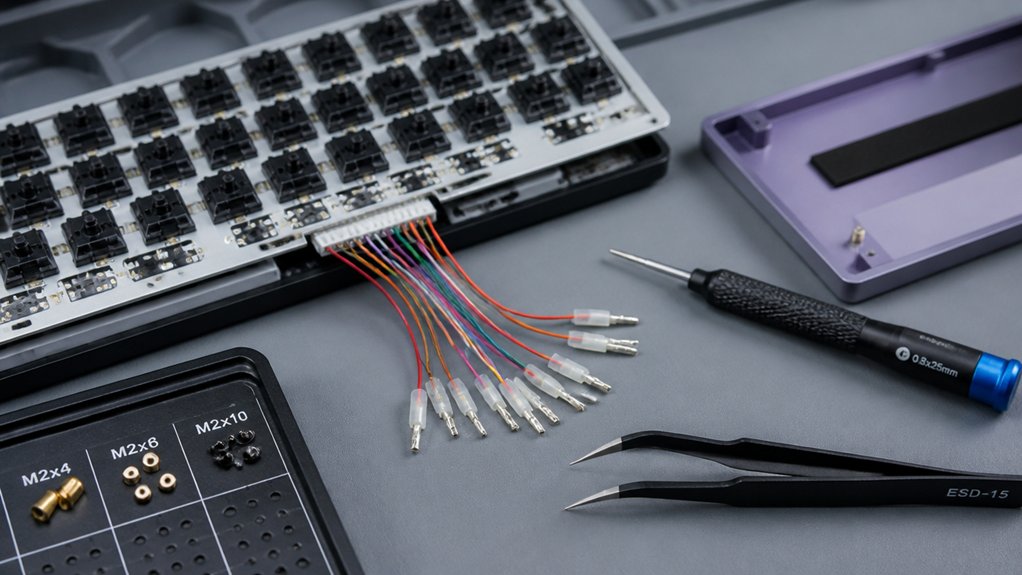
Always unplug your keyboard before disconnecting or reconnecting wires to prevent electrical shocks. Handle cables gently and pull on the connector housing, not the wires, to avoid damage. Make sure all connections are secure to prevent intermittent malfunctions. For added safety, consider features like resettable fuses built into some boards to protect your device from power surges.
Power Down Before Disconnection
Before disconnecting or reconnecting your keyboard wires, make sure to fully power down and unplug your computer. This prevents electrical shorts and hardware damage when handling sensitive components.
Follow these steps:
- Power down your computer completely and wait a few seconds to allow residual power to dissipate.
- Unplug the power cord to eliminate any remaining electrical charge.
- Handle all keyboard wires and connectors gently to avoid bending pins or damaging USB-C and USB-A ports.
- Only reconnect or disconnect keyboard cables when the computer is off, unless it has hot-swappable capability explicitly designed for safe in-use connections. This minimizes risks of electrical shorts and guarantees safe, reliable hardware modifications.
- Always verify connector compatibility to ensure the cables fit snugly and maintain a stable connection, reducing the risk of damage during handling.
Handle Cables Carefully
Handling keyboard cables carefully is essential for a safe and successful modding process.
When doing internal cable handling, always unplug the USB or any internal connectors with care. Gently wiggle the connector side to avoid bending pins or damaging delicate wires. Never pull directly on the cables; instead, grip the connectors firmly to prevent wire strain or breakage.
Reconnecting cables requires attention; make certain the connectors are properly oriented and fully seated to maintain a solid electrical connection and prevent intermittent issues.
To protect the keyboard PCB, ground yourself or use an anti-static wrist strap when handling internal wires, and avoid static electricity.
Being cautious during cable management prevents damage and ensures your keyboard functions flawlessly after reassembly. Additionally, using high-quality aviation connectors can enhance durability and connectivity, reducing the risk of disconnection or damage over time.
Test Your Keyboard After Modding to Ensure Functionality
Once you’ve finished modding your keyboard, it’s crucial to test all features to guarantee everything functions correctly. Start by powering on the keyboard and test all keys for proper actuation and responsiveness.
If you’ve made firmware or layout changes, perform a function layer test to verify custom key assignments register correctly.
For internal case or PCB modifications, check for shorts or disconnections before reassembling. Test on multiple devices if possible, since some mods, like Press N Seal, may affect power draw or cause boot issues.
Document your results and conduct sound profile checks to confirm the desired acoustic effects are achieved without sacrificing key stability. Additionally, verify switch compatibility to ensure that all switches are properly seated and that hot-swappable sockets function as intended. This thorough testing guarantees your modded keyboard performs reliably and meets your desired specifications.
Set Up a Clean, Static-Free Workspace for Safe Modding
Setting up a clean, static-free workspace is essential for maintaining the integrity of your keyboard components during modding. Start with an anti-static mat and wrist strap to prevent electrostatic discharge (ESD) that can damage sensitive parts like the PCB.
Work on a non-conductive surface, such as wood or plastic, to minimize the risk of short circuits. Keep your workspace clear of dust contamination, debris, and food particles to avoid damaging delicate modding tasks like lubing or stabilizer adjustments.
Good lighting and organization are key—use small containers or trays for screws, springs, and keycaps to prevent loss. Always ground yourself before touching electronic parts, and avoid wearing static-generating clothing, ensuring a safe, organized workspace for every modding session. Additionally, understanding ESD protection diodes can help you better safeguard your components during handling and assembly.
Frequently Asked Questions
What Is a 96% Keyboard Missing?
A 96% keyboard is missing a dedicated navigation cluster, including keys like Insert, Home, Page Up, Delete, and End. It combines most keys into a compact, dense layout, saving space but omitting these separate functions.
Is 84 Keys 75%?
No, an 84-key keyboard isn’t considered a 75%. The 75% layout typically has around 80-82 keys, with a more compact design. Your keyboard likely falls into a slightly larger, hybrid category.
Can I Spray WD-40 on Keyboard?
No, you shouldn’t spray WD-40 on your keyboard. It can damage switches, circuits, and key components, attract dust, and cause sticky keys. Instead, use proper cleaning agents like isopropyl alcohol for safe maintenance.
Why Do People Like 75% Keyboards?
People like 75% keyboards because they save space, combine functionality with portability, improve ergonomics, foster a minimalist aesthetic, and let you customize and mod your keyboard without sacrificing essential keys, making them perfect for various uses.
In Summary
By following these safety tips, you can enjoy modding your keyboard without risking damage or injury. Always discharge static, use the right tools, and handle components gently. Be cautious with adhesives and liquids, and make sure wires are properly disconnected. Testing your keyboard afterward guarantees everything works smoothly. Set up a clean, static-free workspace for the safest modding experience. Stick to these tips, and you’ll customize your keyboard confidently and safely.



