

Crafting artisan keycaps from resin and wood allows you to create personalized, stunning pieces for your keyboard. Resin keycaps offer vibrant colors, intricate designs, and customization options, while wood provides natural textures and organic beauty. You’ll need specific tools, materials, and techniques like mixing resin carefully or carving with precision. Proper finishing and maintenance keep your creations looking their best. Want to master these craftsmanship tips? Keep exploring to reveal all the secrets behind making exceptional artisan keycaps.
Introduction: Why Artisan Keycaps Are a Creative Touch for Mechanical Keyboards
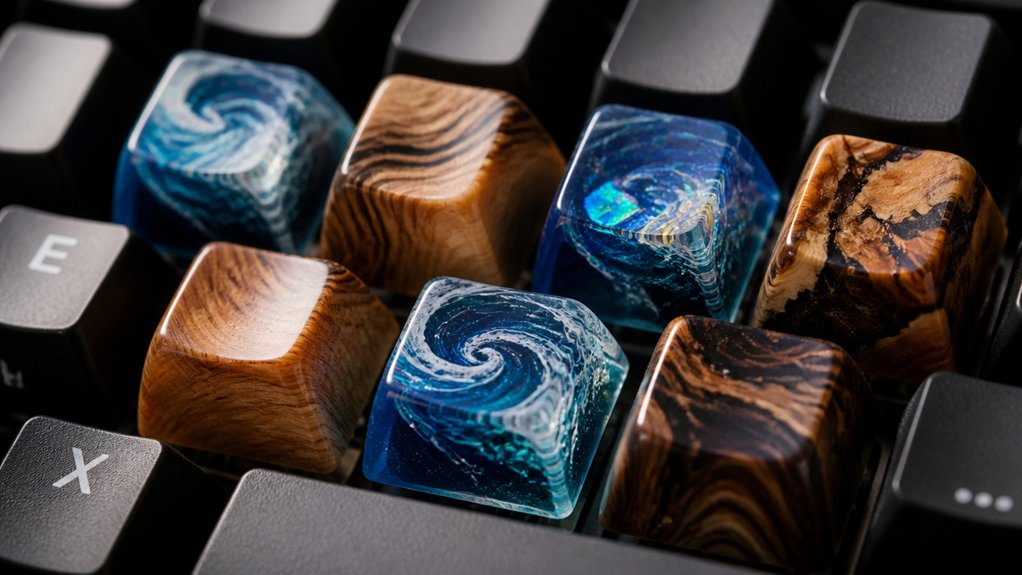
Artisan keycaps add a vibrant, personal touch to mechanical keyboards, turning a standard device into a work of art. These unique pieces serve as decorative accents, often handmade from materials like resin and wood.
Their intricate designs, such as micro landscapes or natural elements, elevate a keyboard’s aesthetic beyond the ordinary. Crafted in small batches, Artisan Keycaps offer a bespoke artistry that can range from $20 to over $200.
They’re designed to fit Cherry MX-style stems, blending durability with creativity—perfect for accent keys like Escape or function keys. The creation process involves detailed sculpting, mold making, and multi-layer casting, ensuring each keycap’s distinct pattern and tactile quality.
While mostly meant for display or occasional use, they add a striking, personalized flourish to your keyboard. Materials and durability factors play a crucial role in maintaining their vibrant appearance and longevity.
Resin vs. Wood Keycaps: Which Material Fits Your Style?
Choosing between resin and wood keycaps ultimately depends on your style and priorities.
A resin keycap offers vibrant colors, intricate designs, and customizable effects through multi-shot casting and mica powders, making it perfect if you want bold, visually striking pieces. Resin artisan keycaps are crafted from durable urethane plastics and cured under UV light, ensuring they last and resist daily wear. They often feature translucent or glittering effects compatible with RGB lighting.
On the other hand, wood keycaps provide natural textures, unique grain patterns, and a warm, tactile feel for a more artisanal, understated look. While resin caps excel in detailed, controlled aesthetics, wood caps reflect organic imperfections and craftsmanship. Your choice hinges on whether you prefer vivid, customizable art or natural, traditional appeal. Additionally, material durability plays a crucial role in selecting the right artisan keycap to ensure long-lasting beauty and performance.
How to Make Resin Artisan Keycaps: A Step-by-Step Guide
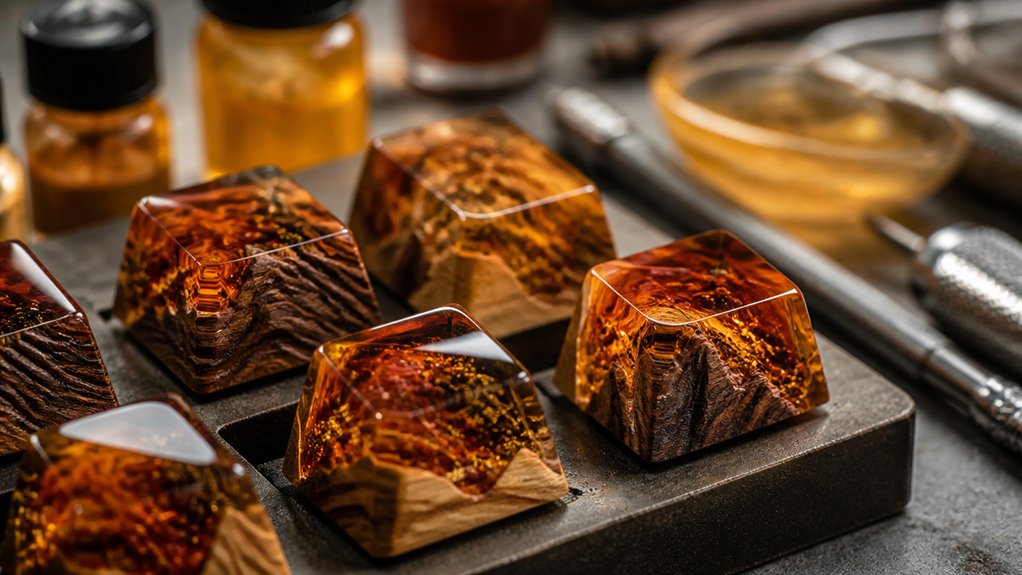
Once you’ve prepared your resin mixture with accurate measurements and colorants, pouring it into your mold carefully is essential to avoid bubbles. Using high-transparency resin materials ensures vivid illumination and even light diffusion through your finished keycaps. After curing, you’ll trim, sand, and polish the keycap to guarantee a smooth, durable finish. Mastering these finishing steps will give your artisan keycaps a professional look and feel.
Preparing Resin Mixture
To prepare your resin mixture properly, start by selecting the right urethane liquid plastic resin, such as from the Smooth-On Smooth-Cast line, guaranteeing you pick a pot life and cure time that matches your casting style. Whether you choose Smooth-Cast 325 for quick curing or 327 for longer working time, consistency is key.
Measure the resin and hardener accurately by weight using a digital kitchen scale with hundredth of an ounce precision to guarantee proper chemical ratios for complete curing. Mix the components thoroughly but gently in disposable plastic cups with plastic or wooden stir sticks to avoid introducing air bubbles that can mar the artisan keycap’s clarity and finish.
Incorporate resin colorants like pigments, alcohol inks, mica powders, or metal powders before pouring to achieve the desired color and effects. To ensure your resin casts remain stable and resistant to environmental changes, consider wood material and its properties for added warmth and resilience.
Curing and Finishing Process
The curing and finishing process transforms your poured resin into a polished, durable keycap. Begin by curing the resin under a UV lamp for 5 minutes, then extend to 10 minutes based on resin opacity. Carefully remove the cured keycap from the mold, trimming excess resin or sprues with flush cutters. Next, perform wet sanding with fine-grit sandpaper (300–800 grit) to smooth edges and eliminate sharp points. Rinse thoroughly with water and dry completely to remove resin dust. Use a small brush or toothbrush with mild soap to clean residual dust after sanding. Ensure the resin is fully cured to achieve a seamless glass-like finish. Avoid prolonged UV light or heat exposure to prevent distortion, and handle your keycap with care to guarantee its durability and appearance.
Carving Wooden Keycaps: Natural Beauty for Your Keyboard
When carving wooden keycaps, choosing the right wood, like walnut or maple, can enhance both beauty and durability. Using precise carving tools and techniques guarantees a perfect fit and intricate designs. Finishing with sealing methods protects the wood from moisture and sunlight, keeping your keycaps looking stunning over time. Implementing advanced surface finishes like anodizing or powder coating further prevents wear and preserves the aesthetic appeal.
Selecting Unique Wood Types
Have you ever considered how the choice of wood can transform your artisan keycaps? Selecting unique wood types like walnut, cherry, or maple brings distinct character and natural beauty to your collection.
These hardwoods are prized for their dense grain, natural color variations, and durability, making them ideal for daily use. By hand-carving or CNC-machining, you can emphasize each wood’s organic patterns, creating micro landscapes and textured surfaces that resin alone can’t replicate.
The type of wood influences the weight, tactile feel, and finish of your keycaps, affecting both comfort and longevity. To preserve their beauty, artisan wood keycaps are often sealed with oil or varnish, highlighting natural hues while protecting against moisture and wear. Selecting the right wood type is essential for achieving the desired aesthetic and functional qualities in your keycaps.
With unique wood choices, each keycap becomes a one-of-a-kind piece.
Carving Techniques and Tools
Carving wooden keycaps requires precise tools and careful technique to bring out the natural beauty of the wood. You’ll use micro chisels, rotary tools with carving bits, and small files to shape natural wood blocks into keycap-sized designs. Using the right material and build quality ensures durability and a high-quality finish. Selecting woods like maple, cherry, or walnut helps guarantee durability and fine grain, which influence the texture and carving detail quality. Maintaining accurate sizing, usually based on OEM or SA profile dimensions, is vital for compatibility with Cherry MX stems and keyboard layouts. During carving, steady hand control and patience are essential, as small variations in wood can affect the final ergos and aesthetics. The choice of tools and meticulous technique allow you to craft a beautifully detailed and functional keycap that highlights the wood’s natural qualities.
Finishing and Sealing Methods
To preserve the natural beauty and durability of your carved wooden keycaps, applying the right finishing and sealing methods is essential. Varnish is a popular choice, with multiple coats of clear matte or satin varnish protecting the surface while highlighting the wood’s grain.
Between coats, use high-grit sandpaper (800-2000 grit) to smooth the surface, enhancing tactile feel and visual clarity. For an organic appearance, you might opt for beeswax or natural oil finishes, though these require periodic reapplication to maintain protection.
Sealing the wood prevents moisture absorption, reducing cracking or discoloration, especially in humid environments. Proper product compatibility ensures the chosen finish does not adversely react with the wood or detailed carvings. Handle carved keycaps gently, and choose finishes that emphasize intricate details without obscuring texture for a stunning, long-lasting result.
Tools and Materials Needed for Resin and Wood Keycap Crafting
Crafting artisan keycaps from resin and wood requires a careful selection of tools and materials to guarantee quality results.
Your keycap mold is crucial, often made of two-part silicone, providing the precise shape needed. High-quality urethane liquid plastics like Smooth-On Smooth-Cast are ideal for resin casting, paired with colorants such as mica powders and alcohol inks.
For shaping and detailing, use sculpting tools like polymer clays, dental picks, and X-acto knives. Mixing containers, stir sticks, and digital scales secure accurate resin measurement.
Proper brush material is essential when applying finishes or paint to avoid damaging the delicate surfaces. Finishing tools like flush cutters, wet/dry sandpapers (300-800 grit), and polishing supplies help achieve smooth edges.
Safety gear—including gloves, eye protection, and respirators—is indispensable during handling, while a well-ventilated workspace with silicone mats and cleanup supplies keeps the process clean and safe.
Creating Multi-Layer Resin Designs With Dyes and Inclusions
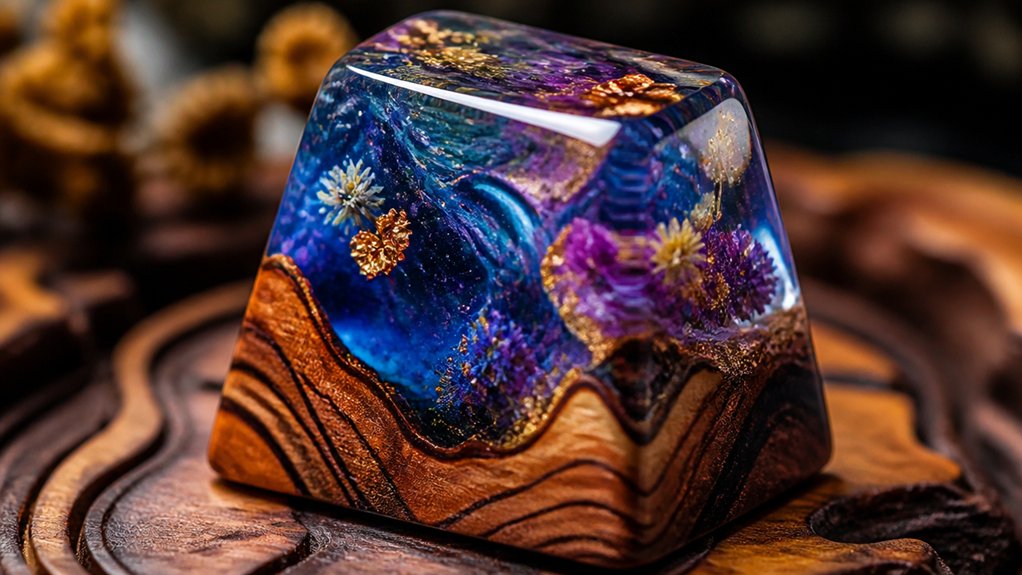
Building multi-layer resin designs allows you to create keycaps with stunning depth and intricate details. You’ll achieve this through multi-shot casting by pouring each dyed resin layer separately, then curing to prevent blending.
Use vibrant dyes, mica powders, or alcohol inks for colorful effects that shift with light, enhancing visual appeal. Incorporate inclusions like tiny wood fragments, metallic powders, or glitters within specific layers to craft micro landscapes or natural textures.
To guarantee clarity and crisp separation, meticulously control pour opacity and curing times—typically 5 to 10 minutes under UV light. Before each layer, carefully mix using a digital scale and remove bubbles with a lighter or torch.
This detailed process builds complex, multi-dimensional keycaps that stand out.
Shaping and Carving Wooden Keycaps With Precision
To carve wooden keycaps with precision, you need to select quality hardwoods that offer durability and beautiful grain patterns.
Using fine carving tools like micro chisels and rotary tools, you can shape your designs carefully while maintaining the correct size for switch compatibility.
Finishing touches with sanding and polishing help smooth edges and preserve the natural wood texture, ensuring a flawless fit and aesthetic.
Selecting Quality Wood Materials
When selecting wood for artisan keycaps, prioritizing quality is essential to guarantee durability and a clean, precise carve. Quality hardwoods like maple, walnut, and cherry are ideal, offering a fine grain that carves smoothly and resists wear over time.
The choice of wood affects the keycaps’ appearance and longevity, so opt for premium options. To confirm clean carvings, stabilize delicate pieces with mounting bases or clamps designed for micro-scale work, preventing splitting and providing a smooth finish.
After carving, sealing your keycaps with clear epoxy or resin enhances durability and preserves natural beauty, creating a touch-friendly surface. When working with wood, focus on the following:
- Selecting premium hardwoods for durability and grain quality
- Stabilizing materials during carving to prevent damage
- Sealing for longevity and aesthetic preservation
Tools for Precise Carving
Achieving precise shaping and carving of wooden keycaps demands the right set of tools designed for fine detail work. These tools help you create the intricate contours and smooth surfaces keycaps are designed to showcase. Use fine-grit files, micro chisels, and rotary tools with sanding attachments for detailed shaping. To guarantee accuracy, leverage calipers for measurement and magnification aids like jeweler’s loupes or bench microscopes for micro landscape designs. Woodworking blades and scalpels are essential for delicate cuts, avoiding splintering. Finish with progressive sanding from coarse to fine grit paper, often wet-sanded for a pristine surface. Here’s a quick overview:
| Tool | Purpose | Tip |
|---|---|---|
| Fine-grit files | Shaping contours | Use light, even strokes |
| Micro chisels | Detailing and carving | Steady hand, precision required |
| Rotary tools | Smoothing and shaping difficult spots | Attach fine sanding bits |
| Calipers | Accurate measurements | Regularly check profiles |
| Magnification aids | Micro landscape details | Enhance precision during carving |
Techniques for Finishing Touches
Refining wooden keycaps with precision requires careful shaping and carving techniques that emphasize control and detail. To successfully make keycaps, you need steady hand movements, fine tools, and attention to grain orientation. Use micro chisels, rotary tools, and X-acto knives to carefully detail small surfaces without damaging contours.
Achieve smooth, ergonomic profiles by sanding progressively from coarse to fine grit sandpapers, finishing with wet sanding around 800 to 2000 grit for a polished surface. Consider the wood grain to prevent splintering or cracking, applying sharp tools and slow feed rates.
Once shaped, seal the surfaces with varnishes or oils to preserve intricate details and prevent moisture damage, ensuring your handcrafted keycaps are both beautiful and durable.
- Use fine tools for detailed shaping and carving
- Progressively sand for smooth, ergonomic surfaces
- Apply protective finishes to preserve details
Finishing and Polishing Resin and Wood Keycaps for a Smooth Look
Finishing and polishing resin and wood keycaps transforms rough edges into a smooth, professional-looking product that’s worth showcasing. To achieve this, start by carefully trimming excess resin with flush cutters, then wet sand the bottom edges with finer grits from 300 to 800 to guarantee a comfortable fit.
When polishing the resin surface, use microfiber cloths and fine polishing compounds or automotive polish to restore clarity and remove minor scratches—this enhances the keycap’s visual appeal.
For wood-infused resin, lightly sand without penetrating too deeply, then apply a satin-matte varnish to boost durability while preserving natural textures.
Always rinse and dry thoroughly, using a soft toothbrush to clean crevices, and avoid harsh chemicals or prolonged UV exposure that could compromise the colors and materials, maintaining keycaps worth your time and effort.
Ensuring Your Artisan Keycaps Fit Your Mechanical Keyboard
To guarantee your artisan keycaps fit your mechanical keyboard properly, start by confirming the keycap profile and size match your keyboard’s layout.
Most artisan keycaps designed for Cherry MX-style switches fit boards with Cherry MX RGB-style switches, including brands like Filco and Ducky. However, they’re incompatible with membrane or proprietary boards.
Most artisan keycaps for Cherry MX switches fit Cherry MX RGB boards like Filco and Ducky, not membrane or proprietary ones.
Verify the stem type—Cherry MX and TMX are most common, with TMX allowing cross-compatibility with Topre switches. Also, check the spacing between keys and the height of neighboring keycaps to avoid interference, especially if replacing standard keys with larger or uniquely shaped artisan caps.
Use a wire-loop keycap puller for safe removal and installation, protecting the delicate details of your artisan caps and preventing switch damage.
- Confirm keycap profile and size match your layout
- Verify stem compatibility (Cherry MX or TMX)
- Measure spacing and keycap heights for proper fit
Care and Maintenance Tips to Keep Your Resin and Wood Keycaps Looking New
Proper care and maintenance are essential to keep your resin and wood artisan keycaps looking their best over time. To maintain their appearance, clean resin and wood artisan keycaps gently with a microfiber cloth to remove dust. Avoid harsh chemicals and prolonged UV exposure, which can cause fading or damage.
For deeper cleaning, briefly soak the keycaps in warm, soapy water, then use a soft-bristled brush to carefully remove dirt from intricate details without scratching surfaces. Handle keycaps by the sides to prevent stressing delicate resin or wood elements and reduce wear on mounting areas.
Store unused keycaps individually wrapped or in padded organizers to protect against scratches and sun damage. Minor surface scratches can be repaired with wet sanding and polishing for resin, while maintaining wooden keycaps requires avoiding moisture exposure.
Troubleshooting Common Resin and Wood Keycap Problems
When facing issues with resin and wood keycaps, identifying the root cause is essential for effective troubleshooting. Common problems like air bubbles, warping, or tacky surfaces can often be resolved with proper techniques.
Using a pressure pot during curing minimizes air bubbles in resin, resulting in a smoother finish. Ensuring wood components are well-sealed and dried prevents moisture absorption and warping. For tacky surfaces after curing, additional UV exposure or re-curing helps set the resin properly.
To fix edges and sprues, carefully use flush cutters and wet sand with 300–800 grit paper, avoiding damage to wood inlays. Always avoid overheating during curing or polishing, as it can cause discoloration or brittleness, especially when working with resin and wood together.
Where to Buy Quality Supplies and Ready-Made Artisan Keycaps
Looking for high-quality supplies to craft artisan keycaps or ready-made pieces that stand out? You can find excellent options for keycaps for mechanical keyboards through specialized online stores.
Resources like TheBlackVioletCo in Indiana offer artisan resin keycap making kits with molds, dyes, and resin options starting at $26.25, shipped internationally. Ready-made artisan keycaps featuring enchanting resin and wood volcanic eruption designs, compatible with Cherry MX switches, can range from $20 to over $200, depending on complexity.
For resin casting supplies like Fast-Cast resins, pigments, and silicone molds, dedicated shops provide tools including UV lamps and sanding kits. Platforms like Etsy also host sellers offering limited drops, group buys, and custom orders, ensuring you find premium components or unique keycaps for mechanical keyboards that match your style.
Tips for Collecting and Showcasing Your Handmade Keycaps
To keep your handmade keycaps looking their best and guarantee they last, it’s essential to store and display them thoughtfully. For your first artisan keycap, use padded organizers or wrap it individually to prevent scratches and reduce sunlight exposure, which can degrade resin and paint over time.
Display your keycaps on clear acrylic stands or in shadow boxes to showcase their intricate wood and resin designs while protecting them from dust and damage. Regular gentle cleaning with a microfiber cloth helps preserve their finish.
When installing or removing artisan keycaps, use a wire-loop keycap puller to avoid damaging delicate details. For display, choose less frequently used keys like Escape or function keys, balancing aesthetics with durability and showcasing your unique, handcrafted pieces.
- Store in padded organizers or wrap individually
- Use acrylic stands or shadow boxes for display
- Clean gently with microfiber cloth
Frequently Asked Questions
How Durable Are Resin and Wood Artisan Keycaps Over Time?
Resin keycaps are quite durable, resisting everyday wear if properly sealed, but can chip or crack under heavy impact. Wood keycaps are less durable, prone to scratches and damage, though regular care can extend their lifespan.
Can Handmade Artisan Keycaps Be Customized for Specific Keyboard Layouts?
Yes, you can customize handmade artisan keycaps for specific keyboard layouts. You just need to provide detailed measurements and design preferences, and artisans can craft unique, tailored caps that perfectly fit your keyboard’s configuration and style.
What Safety Precautions Should Be Taken During Resin Casting and Carving?
You should wear gloves and a mask during resin casting and carving to prevent skin contact and inhalation of fumes. Work in a well-ventilated area, follow manufacturer instructions, and keep your workspace clean to guarantee safety throughout the process.
How Do I Prevent Resin or Wood Keycaps From Yellowing or Fading?
To prevent resin or wood keycaps from yellowing or fading, you should protect them from UV exposure with a clear sealant, avoid direct sunlight, and store them in cool, dark places, ensuring they stay vibrant and durable over time.
Are There Any Eco-Friendly or Sustainable Options for Crafting Artisan Keycaps?
Yes, you can choose eco-friendly materials like bamboo, cork, or recycled wood, and use environmentally friendly resins. Proper sealing, minimal exposure to sunlight, and sustainable sourcing help guarantee your artisan keycaps stay beautiful longer.
In Summary
Creating your own artisan keycaps lets you add a personal, artistic touch to your keyboard. Whether you prefer the glossy, customizable look of resin or the natural charm of wood, crafting these pieces can be rewarding and fun. With the right tools and care, your handmade keycaps will not only enhance your setup’s aesthetic but also showcase your creativity. Immerse yourself in the process, enjoy each step, and make your keyboard truly one-of-a-kind.



