
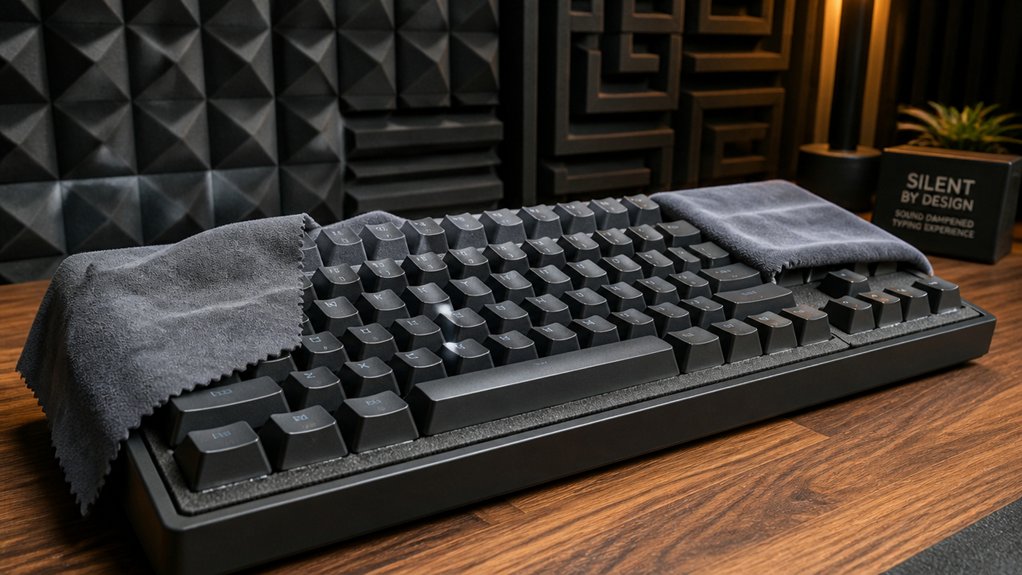
To dampen keyboard noise, start by choosing quieter switches like Cherry MX Silent Reds or Browns. Use O-rings on keycap stems and lubricate switches and stabilizers to soften impact sounds. Upgrade to thicker PBT keycaps and add foam or silicone pads inside your case for extra dampening. Opt for soft desk mats and resilient mounting styles to reduce vibrations. Combining these techniques will greatly quiet your keyboard—discover more tips to achieve an even quieter typing experience.
Introduction: How to Quiet Your Mechanical Keyboard Effectively
Are you tired of loud clacking when typing on your mechanical keyboards? To reduce noise effectively, start with straightforward steps.
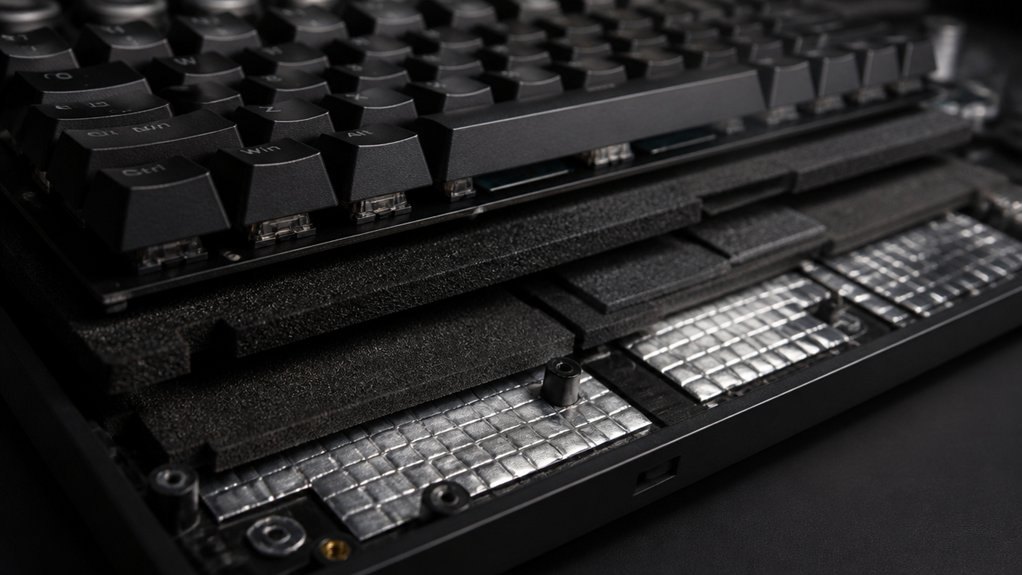
Installing O-rings on keycap stems cushions bottom-out impacts, lowering sound from keypresses. Adding foam inside the case between the PCB and base absorbs vibrations and echoes, reducing noise by up to 50%. Lubricating switches and stabilizers with the right grease, like Krytox, diminishes friction and rattling, creating a smoother, quieter typing experience. For even better sound dampening, consider silicone case fillers that provide vibration isolation and sound absorption, enhancing overall quietness.
Installing O-rings, adding foam, and lubricating switches significantly dampen noise and improve your typing comfort.
Consider choosing quieter switch types such as Cherry MX Silent Red if you want an easy upgrade. Combining these methods—installing O-rings, adding foam, and lubricating switches—provides a solid foundation for sound dampening.
These practical improvements help make your mechanical keyboards quieter without sacrificing performance or feel.
What Causes Mechanical Keyboard Noise?
Have you ever wondered what makes mechanical keyboards so loud? The primary cause of keyboard noise lies in the mechanical switches and their moving parts. When you press a key, the sound produced comes from several sources, such as the keycap hitting the switch housing and the spring mechanism inside. Additionally, large stabilizers, if unlubricated, often rattle, adding to noise. Larger keys with stabilizers can cause additional vibrations and rattling if not properly dampened. The type of keycaps and case impacts sound reverberation. Thin ABS keycaps and hollow keyboard cases amplify vibrations, making keystrokes sound louder.
To reduce sound, it’s essential to take into account these components, especially the stabilizers, switches, and keycaps that directly influence the keyboard noise.
Choosing the Right Quieter Switches and How to Install Them
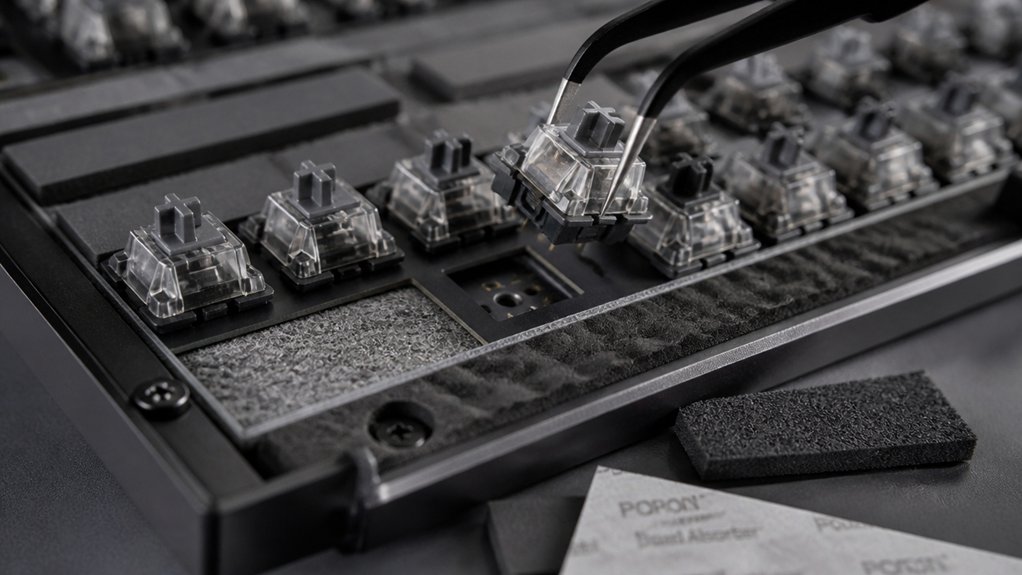
If you’re looking to quiet down your mechanical keyboard, choosing the right switches can make a big difference. Quieter switches like Cherry MX Silent Red or Brown use built-in silicone dampeners that markedly reduce keystroke noise compared to traditional clicky or linear switches.
Silent linear switches cut down on both the tactile noise and bottom-out impact, ideal for noise-sensitive environments. Installing these switches is straightforward if your keyboard is hot-swappable—just remove the existing switches, then insert the new ones without soldering. For non-hot-swappable boards, you’ll need to desolder the old switches first.
Before committing fully, test the quieter switches with your keycaps to find the perfect balance between noise reduction and your preferred typing feel.
How O-Rings and Cushioning Reduce Bottom-Out Impact Sounds
O-rings act as soft cushions that absorb the shock when keys reach their bottom-out point, reducing the sharp noise you hear. They make keypresses quieter by limiting the impact force, turning loud thuds into muted sounds. Installing them is straightforward and can greatly improve your typing experience without much hassle. To maximize their effectiveness, ensuring a snug fit around the switch stem is essential for optimal noise reduction and comfort.
Impact Absorption Effect
When you install O-rings or cushioning materials on your mechanical keyboard, they work by absorbing the impact when a key bottoms out, which greatly reduces the resultant noise. This impact absorption decreases the sharp “thud” sound, making your typing quieter and more pleasant. A properly fitted dampening layer can also help in maintaining consistent keyboard acoustics and tactile feedback across all keystrokes.
O-rings fitted on keycap stems help cushion the keycap’s bottom-out fall, dampening sound and reducing mechanical stress on switches.
- Impact absorption minimizes the force felt at the bottom of each keystroke, lowering noise.
- Noise reduction is achieved by softening the plastic-to-plastic contact, muffling the sound.
- Dampening sound helps extend switch and keycap lifespan by lessening wear and tear from hard bottoms.
Proper installation guarantees even impact absorption across all keys, providing consistent sound dampening.
Keypress Noise Reduction
Reducing the noise from key presses primarily involves dampening the impact when your keys bottom out, and this is where O-rings and cushioning materials come into play.
O-rings are installed on keycap stems, acting as soft cushions that reduce the sharp thud caused by keycaps bottoming out against the switch housing. Thicker, softer O-rings typically provide greater sound reduction but may slightly impact key travel. Cushioning materials like landing pads or silencing clips serve a similar purpose, absorbing impact energy and muffling bottom-out sound without affecting switch actuation notably.
Proper installation involves removing keycaps and fitting the O-rings snugly on the stems. By effectively reducing bottom-out impact sounds, these solutions improve overall typing quietness and can cut noise levels by up to 50%.
In some cases, applying a lubricant specifically designed for keyboard switches can further decrease friction and noise during key presses.
Easy Installation Process
Installing O-rings and cushioning materials is a straightforward process that anyone can do, even without prior experience. To start, you’ll need to remove the keycaps to access the keycap stems.
Carefully slide the O-rings cushion onto each stem, ensuring they fit snugly. This simple step is essential for effective noise dampening because it softens the impact during bottom-out. Key benefits include reduced keystroke volume and less noise from the spring and stem.
You can enhance soundproofing further with cushioning materials like landing pads, which absorb shock and dampen impact sounds.
- Remove keycaps carefully
- Slip O-rings onto keycap stems
- Reattach keycaps for quick results
This process typically takes 15-30 minutes for a full keyboard, making it an efficient, beginner-friendly upgrade. Using EVA foam or similar damping materials can further improve sound absorption by cushioning the key components during actuation.
Lubricating Switches and Stabilizers for Smooth, Silent Keystrokes
Lubricating your switches and stabilizers is a crucial step in achieving smoother, quieter keystrokes. You should lubricate the switch stems and switch housing with products like Krytox 205g0 or Tribosys to reduce friction and plastic-on-plastic noise, making your keystrokes more fluid. Applying thicker grease to stabilizer metal bars and contact points helps eliminate rattling and boosts silence, especially for larger keys like spacebar and shift. Lightly oiling the springs inside switches minimizes spring noise without compromising tactility or performance. Using the band-aid mod—placing a small tape piece under stabilizers—also reduces impact noise from stabilizer bottoms and metal bar vibrations. Proper disassembly and precise application are essential to avoid damage and guarantee consistent noise reduction. Additionally, selecting lubricants with proper thermal and chemical stability ensures long-lasting performance and sound quality.
Adding Sound-Absorbing Foam Inside Your Keyboard Case
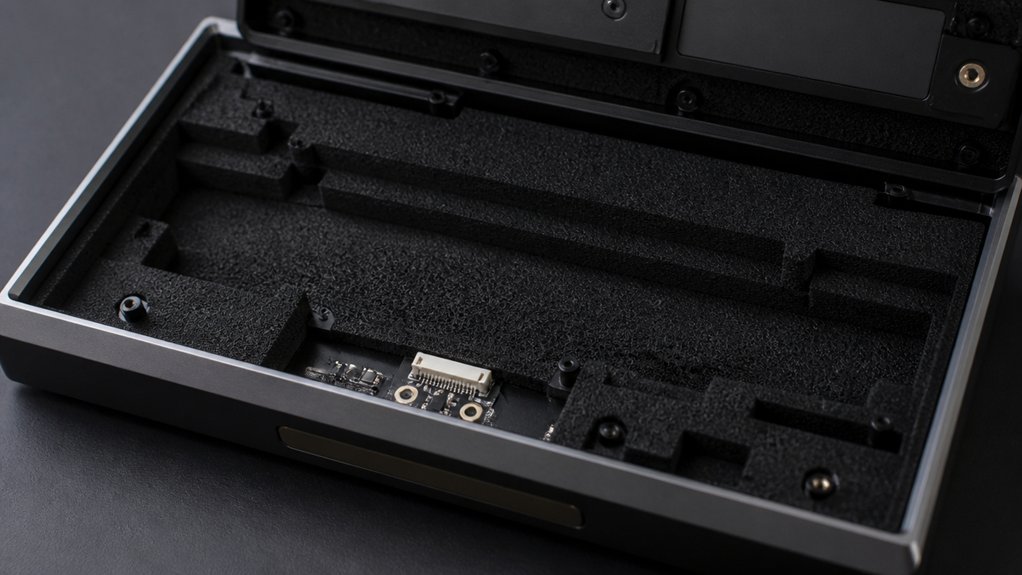
To effectively reduce noise, you’ll want to carefully place sound-absorbing foam inside your keyboard case, ideally between the PCB and the base. Make sure to choose non-conductive foam, like acoustic or silicone pads, to prevent electrical issues, and keep the foam thickness between 1.5 to 3mm for best results. Proper placement—such as in hollow chambers or between layers—can make a significant difference in quieting reverberations and enhancing your typing experience. Additionally, selecting foam with appropriate material and thickness can optimize vibration damping and sound absorption.
Foam Placement Tips
Have you considered how placing sound-absorbing foam inside your keyboard case can greatly reduce noise?
To maximize dampening, position the foam flat between the PCB and the case base. Use non-conductive materials like silicone pads or open-cell foam, ideally 1.5 to 3mm thick, to guarantee safety and effective sound absorption. Be sure the foam doesn’t obstruct switches, stabilizers, or keycap stems, which helps maintain full functionality.
- Place foam directly inside the case to absorb sound at its source
- Layer foam or combine plate and case foam for extra noise reduction
- Remove keycaps and carefully unscrew the case for proper placement and cleaning during installation
- Choose high-density closed-cell foams for weather-resistant, durable sound dampening performance benefits
Proper foam placement enhances sound dampening by targeting internal sound pathways, giving you quieter, more refined typing without sacrificing performance.
Choosing Proper Foam
Choosing the right foam for your keyboard involves selecting a material that offers effective sound absorption without compromising safety or functionality.
Foam with a thickness of 1.5-3mm works well for reducing noise and is compatible with most mechanical keyboard cases. Opt for non-conductive, sound-absorbing foam like silicone pads or specialized damping foam to guarantee durability and safety inside the keyboard case.
Proper placement is key: place the foam flat between the PCB and keyboard base to absorb vibrations and prevent hollow reverberation. Installing multi-layered foam—covering the plate and case—can further diminish sound output by dampening vibrations and sound waves.
Using quality foam inside your case can cut typing noise by up to 50%, improving both sound dampening and typing feel.
Upgrading Keycaps and Components for Better Sound Dampening
Upgrading your keycaps and stabilizers can make a noticeable difference in reducing keyboard noise. Replacing thin ABS keycaps with thicker PBT keycaps (1.3–1.5mm) absorbs sound better and produces deeper, less sharp “clack” sounds. Double-shot PBT or silicone-infused keycaps incorporate sound-absorbing materials, boosting dampening while maintaining durability. Using thicker keycaps reduces vibration and hollow noises. Additionally, upgrading stabilizers with lubrication minimizes rattling, while mods like Band-Aid or clipping further reduce clatter on large keys. You can also add O-rings or silencing clips under keycap stems to cushion impacts, softening the bottom-out sound. These changes work together to improve your keyboard’s sound profile without compromising feel or responsiveness. Improving your keycap materials, such as choosing PBT over ABS, can significantly enhance sound dampening and overall typing experience.
Improving Case Soundproofing With Additional Dampening Layers
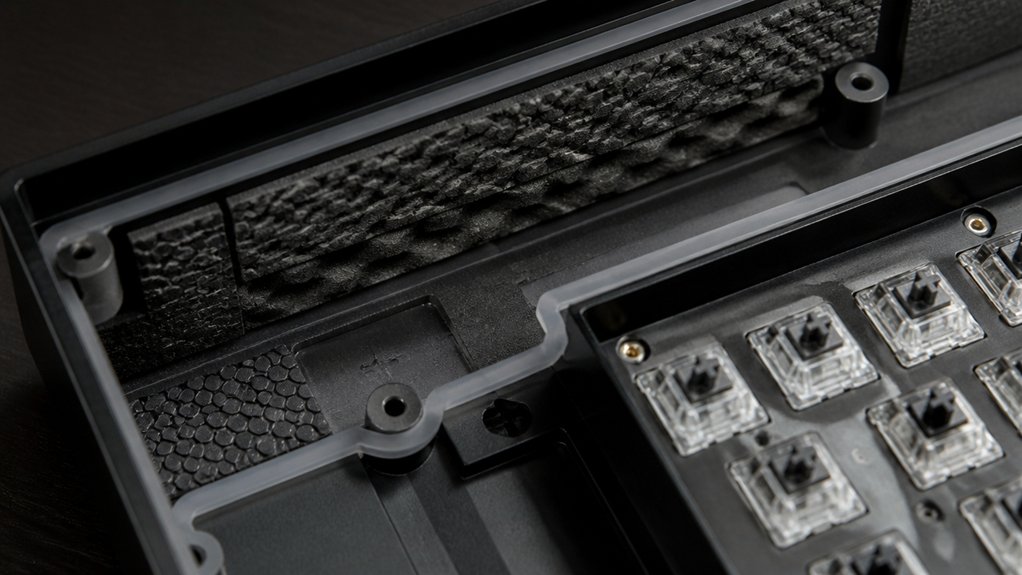
Enhancing your keyboard’s case soundproofing involves adding sound-dampening layers that target internal vibrations and echoes. Foam pads, estimated at 1.5-3mm thick, placed between the PCB and case base, absorb vibrations and greatly reduce hollow reverberation and keypress noise.
Installing multiple foam layers, including plate foam and case foam, minimizes contact noise and dampens echoes, creating a softer acoustic profile. Using non-conductive materials like silicone pads or acoustic foam guarantees electrical safety while improving sound absorption.
Filling empty cavities inside the case with dense materials such as bitumen sheets or closed-cell foam prevents internal sound amplification. Just be cautious to avoid obstructing switches or stabilizers, as proper foam placement maximizes dampening without impacting keyboard functionality.
Reducing Reflection and Vibrations Using Desk Mats and Mounting Styles
Using the right desk mats and mounting styles can effectively minimize keyboard vibrations and reduce sound reflections that bounce off hard surfaces. A soft, dense Desk Mat absorbs keyboard vibrations, preventing them from echoing or amplifying noise.
Extended mats or large mousepads create a cushioned base that reduces case reverberation and dampens high-frequency sounds. Softer materials like rubber or fabric mats dampen reflections better than hard surfaces such as glass or polished wood.
Switch to a gasket mount setup, which isolates the keyboard’s plate and case using resilient materials like Poron. This reduces vibrations transmitted to your desk and minimizes reflection.
- Use a thick Desk Mat to absorb keyboard vibrations
- Opt for gasket mounts to isolate vibrations
- Choose softer desk surfaces for enhanced reflection reduction
Final Tips: Combining Techniques for Maximum Noise Reduction
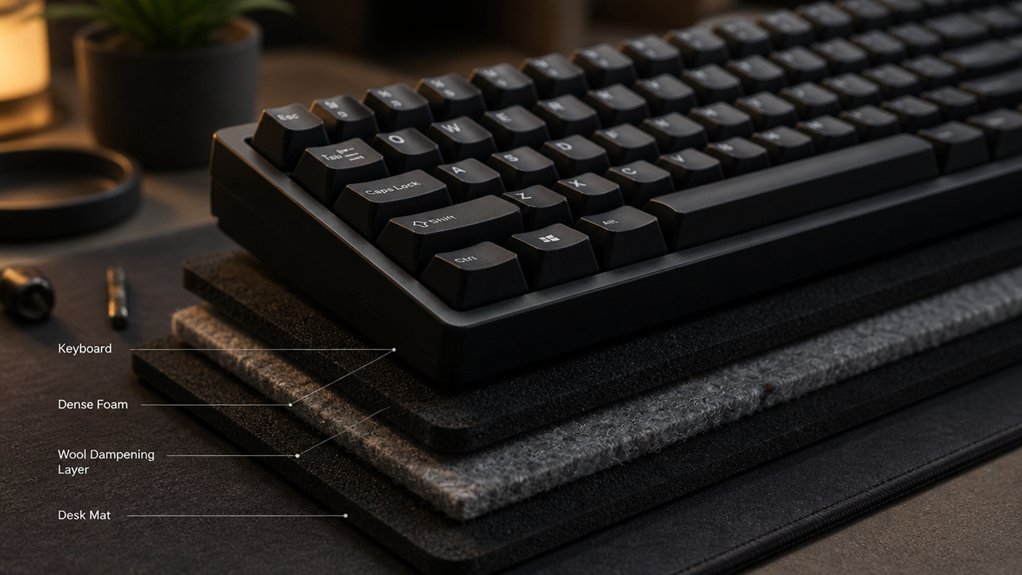
To get the quietest typing experience, try layering multiple dampening techniques like foam inside the case and O-rings on switches.
Focus on using sound-absorbing materials, such as thicker PBT keycaps and foam, to effectively reduce noise. Remember to balance these methods with your preferred typing feel for a comfortable, noise-minimized setup.
Layer Multiple Dampening Methods
Combining multiple dampening methods can greatly boost your keyboard’s noise reduction when done thoughtfully. Layering techniques such as foam, stabilization mods, and lubrication work synergistically to minimize sound and rattling.
For example, you might use foam between the PCB and case, add silicone pads, and incorporate plate foam for maximum impact absorption. Enhancing stabilizers with band-aid clips or lubing them reduces rattling, while applying switch lubrication lessens friction and opens up quieter keystrokes. Keyboard enthusiasts often blend these methods to find the right balance of sound dampening and typing feel.
Consider combining:
- Foam layers (silicone pads, plate foam)
- Stabilizer modifications (band-aid clips, lubing)
- Lubrication and switch filming
These layered approaches provide a thorough dampening setup, elevating your typing experience.
Prioritize Sound Absorbing Materials
Maximizing noise reduction hinges on carefully selecting and placing sound-absorbing materials within your mechanical keyboard. Foam is your best option for sound dampening, as it effectively absorbs vibrations and reduces hollow sounds.
Using foam padding between the PCB and keyboard plate, along with inside the case, can cut noise by up to 50%, dampening vibrations and internal reverberation. Thin silicone or closed-cell foam layers—1.5 to 3mm thick—are ideal for absorbing sound without hindering switch movement.
Pairing foam with additional dampening techniques, like O-rings or landing pads, minimizes bottom-out impacts. Proper foam placement is vital—cover cavity areas prone to echo while avoiding interference with electrical components or switch operation, ensuring maximum noise reduction without sacrificing functionality.
Balance Sound and Feel
Integrating sound-dampening techniques without sacrificing the keyboard’s feel requires a strategic approach. To make your mechanical keyboard quieter while maintaining a satisfying typing experience, combine several methods thoughtfully.
Use acoustic foam inside the case to absorb sound without affecting key responsiveness. Apply grease to the stabilizer and add small rubber rings to reduce rattle on larger keys, ensuring smooth, quiet keystrokes. Consider silicone keycaps, which provide a softer sound profile and a different tactile feel.
To optimize balance:
- Incorporate acoustic foam inside the case
- Lubricate stabilizers with medium-thick grease
- Use silicone or thicker PBT keycaps
Layering these techniques effectively minimizes noise without mushiness, preserving key feel and performance.
Frequently Asked Questions
What Are the Best Materials for Soundproofing a Mechanical Keyboard Case?
You should use foam, rubber, or silicone to soundproof your mechanical keyboard case. These materials absorb vibrations effectively, reduce noise, and are easy to install inside the case, making your typing quieter and more comfortable.
How Do Stabilizer Modifications Impact Overall Keyboard Sound Levels?
Modifying stabilizers reduces rattling and creates a smoother keystroke, which greatly lowers noise levels. By lubing, clipping, or replacing stabilizers, you make your mechanical keyboard quieter, enhancing sound dampening and improving overall typing comfort.
Can Desk Positioning Influence Keyboard Noise Reduction?
Yes, your desk positioning can influence keyboard noise reduction. Placing your keyboard on a softer surface, away from walls, and using sound-absorbing mats or pads can minimize vibrations and echoes, markedly lowering overall noise levels during use.
Are There Specific Lubricants Recommended for Quieter Keyboard Switches?
Yes, lubricants like Krytox 205g0, Tribosys 3204, and dielectric grease are recommended for quieter switches. You apply them carefully to stems and springs, reducing friction and noise, and ensuring smoother keystrokes without damaging your keyboard components.
How Effective Are External Soundproofing Options Like Keyboard Covers?
External soundproofing options like keyboard covers can greatly reduce noise levels, especially when made from dense materials. You’ll notice less echo and quieter typing, making them effective for shared spaces, though they might slightly alter your typing feel.



