
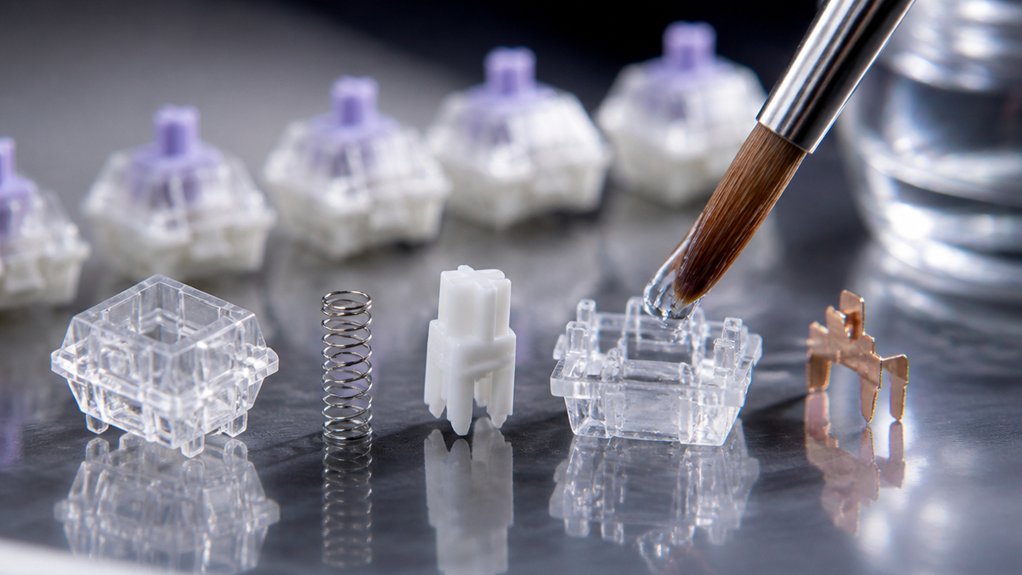
To effectively clean your mechanical keyboard switches, start by unplugging your keyboard and removing keycaps with a keycap puller. Use isopropyl alcohol (90%+) and lint-free cloths or cotton swabs to gently clean switch contacts and housings. For stubborn grime, soft brushes or ultrasonic cleaners work well. Be cautious not to soak plastic parts too long. If you want detailed step-by-step tips on disassembly, cleaning, and troubleshooting, stay tuned for more helpful advice.
Why Regular Cleaning Keeps Your Mechanical Switches Performing Well
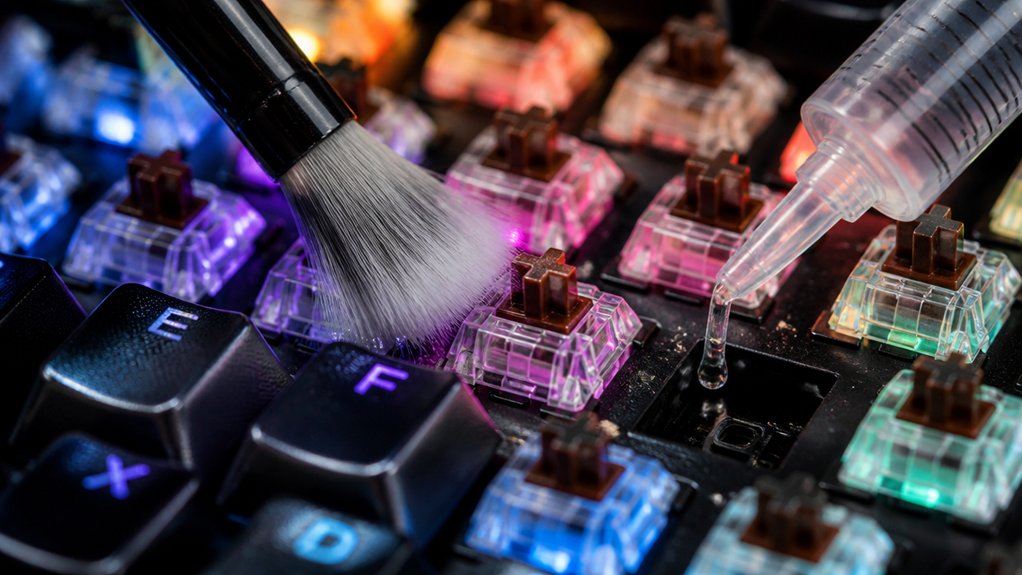
Regular cleaning of mechanical keyboard switches limits debris buildup, helping maintain smooth, reliable keystrokes and preventing damage to internal parts. Using 90%+ isopropyl alcohol is effective for cleaning mechanical keyboard switches, as it dissolves grime without harming delicate components. Ensuring the use of residue-free formulations further reduces the risk of sticky deposits and long-term contamination.
Gathering Tools and Setting Up a Safe Workspace for Keyboard Maintenance
Before beginning the cleaning process, gather all necessary tools to guarantee a smooth and efficient maintenance session. Essential cleaning supplies include isopropyl alcohol, lint-free cloths, a keycap puller, a soft brush, and high-density cotton swabs for switch cleaning. Using safe cleaning solutions that are compatible with electronic components ensures the longevity and safety of your keyboard. Set up a clean, well-lit workspace with good ventilation to handle alcohol safely and prevent dust contamination. Unplug your keyboard and take a photo of the layout to assist reassembly. Organize removed parts in small containers to avoid misplacing switches, springs, or stems. Avoid harsh chemicals and excessive moisture, and make certain all components are completely dry before reassembling. Proper preparation guarantees safe and effective switch cleaning, helping maintain peak keyboard performance.
How to Safely Disassemble Your Mechanical Keyboard for Deep Cleaning
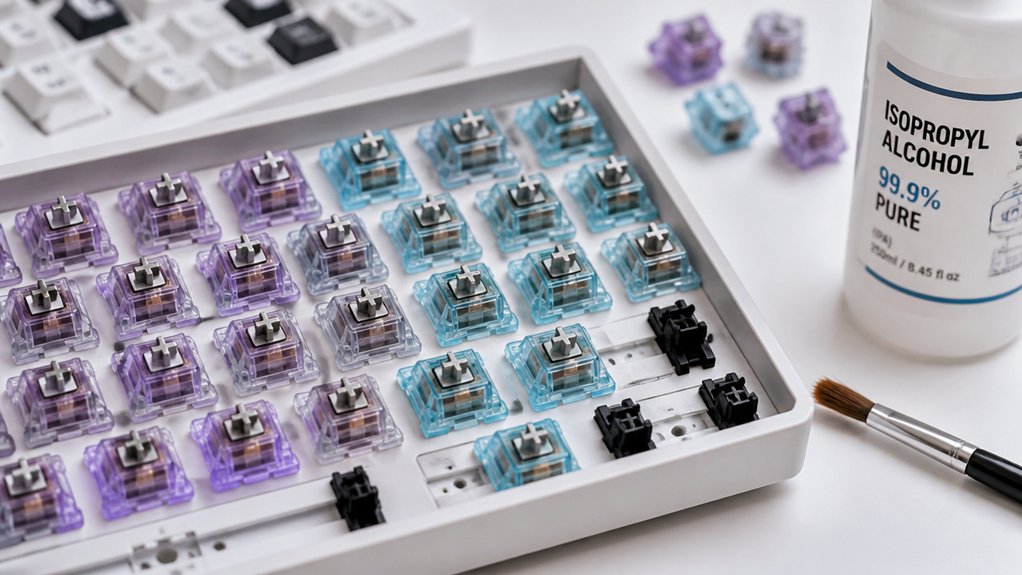
Disassembling your mechanical keyboard safely starts with unplugging it and capturing a clear photo of the key layout, which will guide you during reassembly.
Begin by using a keycap puller to gently remove all keycaps, starting with larger keys with stabilizers, avoiding damage. If your keyboard is hot-swappable, carefully pull out switches with a switch puller. For soldered switches, you’ll need to desolder each switch with proper tools before removing.
Use a switch opener to carefully disassemble each switch into the switch housing, stem, and spring, keeping parts organized in containers. Handle all parts carefully to prevent damage to contact leaves or internal mechanisms. Material quality and build detail are crucial factors that ensure longevity and effective cleaning during this process.
Make sure your workspace is clean and well-lit for precise disassembly, and take your time to avoid mishandling delicate components.
Manual Techniques to Clean Switch Components Without Damage
Start by carefully disassembling your switches with a dedicated opener to prevent damage to the contact leaf and housing.
Use high-density cotton swabs dipped in 90%+ isopropyl alcohol for gentle cleaning of contacts and housings, and employ small soft brushes for stubborn residue.
Make sure all parts are thoroughly dry at room temperature before reassembling or lubricating to avoid moisture-related issues. It is also beneficial to utilize precise application tools like fine-tipped pens or brushes to ensure even coverage and prevent over-lubrication.
Disassembly and Inspection
Careful disassembly is essential to clean a mechanical keyboard’s switches without damage. To begin, unplug your keyboard and photograph the layout to guarantee proper reassembly.
Use a dedicated switch remover tool to gently disassemble the switches, carefully removing the top housing, stem, spring, and bottom housing. Avoid bending or damaging the metal contact leaf inside.
Clean the switch housings with a cotton swab dipped in high-concentration (90%+) isopropyl alcohol, applying gentle pressure and avoiding prolonged soaking to prevent plastic warping or discoloration.
Briefly soak stems and springs in alcohol or use an ultrasonic cleaner, then air dry completely. Keep in mind that material quality and durability can influence how well your switches respond to cleaning procedures.
Finally, conduct a thorough inspection under bright light for grime or damage, organizing parts carefully to prevent loss during reassembly.
Gentle Cleaning Techniques
To clean your switch components without causing damage, opt for gentle manual techniques that prioritize preserving their delicate parts. Use a high-density cotton swab dipped in 90% or higher isopropyl alcohol to gently remove dirt and grime from switch housings and contact leaves, avoiding fully submerging the switches.
Employ a soft-bristle brush or fine paintbrush to carefully dislodge debris from switch components, ensuring you don’t apply excessive force that could damage internals. Clean individual switch stems and springs by soaking them in isopropyl alcohol or mild soap solution for 3–5 minutes, then let them air dry completely at room temperature—avoid heat or sunlight to prevent warping or discoloration. For optimal safety, consider using the right tools designed specifically for delicate electronic cleaning to avoid accidental damage.
Handle switch parts gently with tweezers and steer clear of harsh chemicals to protect the plastic housings and sensitive contact leaves.
When and How to Use Ultrasonic Cleaners for Heavy Buildup
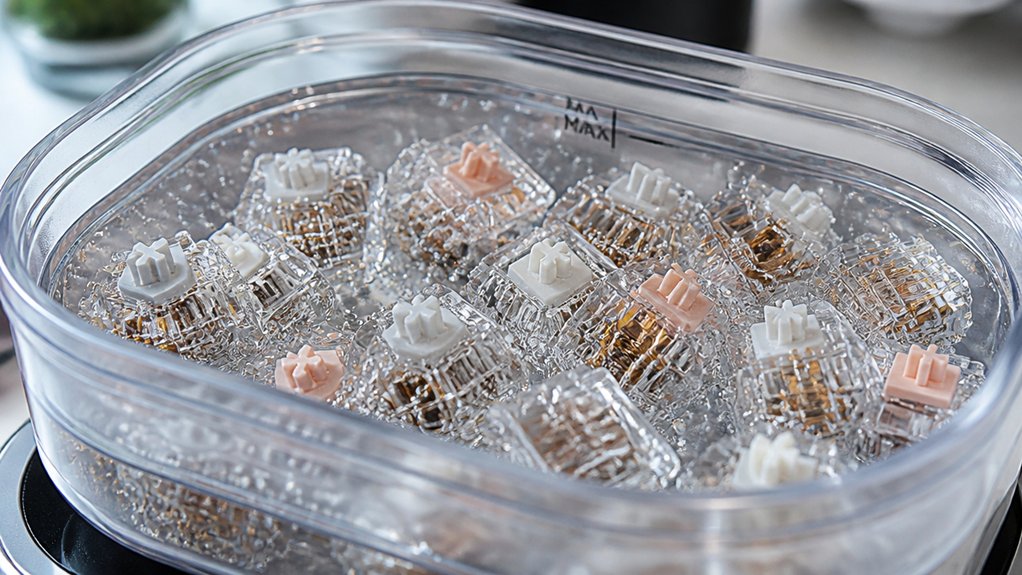
When your mechanical keyboard switches are heavily coated with lubricant or grime, ultrasonic cleaners provide an effective way for deep cleaning. They use high-frequency sound waves to gently dislodge residues from switch stems and springs, especially when dealing with heavy lubricant buildup. Incorporating anti-static properties during cleaning helps protect delicate internal components from static discharge. To properly clean, submerge only metal and plastic parts like springs and stems—avoid soaking switch housings to prevent damage. Use a solution with a mild detergent or isopropyl alcohol to enhance cleaning of oily residues. Keep ultrasonic cycles between 3 to 10 minutes, depending on buildup severity. After cleaning, thoroughly rinse the parts with water and let them air dry for at least 8 hours. This step helps prevent corrosion and guarantees peak switch performance before re-lubrication and reassembly.
Cleaning Switch Stems, Springs, and Housing Effectively and Safely
Disassembling your switches properly is the first step to cleaning their stems, springs, and housings effectively. Use a switch opener to separate the components carefully, making certain you don’t damage contact leaves or housing interiors.
Soak the stems and springs in 90%+ isopropyl alcohol or a mild soap solution for 3–5 minutes to dissolve old lubricant and grime. Avoid soaking the housing to prevent material degradation.
Clean the housings gently with an alcohol-soaked cotton swab or a soft brush, being careful not to expose transparent parts to prolonged alcohol to prevent discoloration or cracking. Being mindful of the switch feel and build quality can help ensure you don’t compromise its tactile response.
After cleaning, confirm all components are completely dry at room temperature before re-lubricating or reassembling. This process helps maintain switch performance and prevents moisture-related issues.
Tips for Avoiding Damage During Disassembly and Reinstallation
Careful handling during disassembly and reinstallation is essential to prevent damaging your switches or PCB.
Before removing key switches from your mechanical keyboard, take a photo of the layout to guarantee proper reinstallation. Use a switch puller and switch opener to gently remove switches, avoiding bending pins or damaging the PCB and switch components.
Handle switch parts carefully, keeping the leaf intact and avoiding excessive force when separating housings, stems, and springs. After cleaning, verify all parts are fully dry before reassembly.
When reinstalling, align switches precisely with the PCB matrix and press gently but firmly until they seat securely. Confirm stabilizers and housings are properly seated to prevent connectivity issues and secure smooth operation. Proper material durability and ergonomic design features can also help prevent damage during this process.
Troubleshooting Sticky or Unresponsive Keys After Cleaning
Ever notice your keyboard keys feel sticky or unresponsive even after cleaning? This can happen if residue remains or switch connections aren’t ideal.
Sticky keys may persist due to residue or poor switch connections even after cleaning.
To troubleshoot, first, check if you’ve thoroughly cleaned the switches last step. Use isopropyl alcohol sparingly: apply 1–2 drops into each switch housing and actuate the key 20–30 times.
Important tips:
- Make sure the switch is completely air dried for at least 10–15 minutes before testing key responsiveness.
- If the sticky keys persist, consider disassembling the switch for deeper cleaning or replacing it.
- Avoid over-lubricating, as excess can cause mushy keys or worsen responsiveness.
- Using appropriate lubricants can help ensure smooth operation and prevent future stickiness, especially if applied carefully and within recommended quantities.
Inspect switch connections to confirm they’re properly aligned and free of debris, preventing unresponsiveness in your sticky mechanical keyboard.
Reinstalling Switches and Testing Your Keyboard for Smooth Operation
When reinstalling your switches, make sure they’re properly aligned on the PCB, pressing gently until you hear a click to guarantee a secure fit.
Double-check that stabilizers and larger keys are reattached correctly to prevent wobbling and inconsistent feel.
Finally, test each key to confirm smooth, responsive operation, and recheck alignment and cleanliness if anything feels off.
Proper Alignment Techniques
To guarantee your switches are properly aligned, start by matching their pins with the PCB solder pads or hot-swap sockets carefully. Proper alignment secures secure electrical connections and prevents damage during install.
Gently press the switches evenly onto the PCB until you feel or hear a soft click, indicating proper seating. Use the original keyboard layout as a reference to position each switch accurately, especially for keycaps and stabilizer keys.
Once installed, perform a thorough test:
- Check for responsive, smooth keystrokes across the keyboard layout.
- Make certain no switches wobble or resist during travel.
- Confirm uniform key height and travel for consistent operation.
This process guarantees a properly aligned mechanical keyboard, optimizing both key feel and durability.
Secure Switch Connections
After ensuring that your switches are properly aligned and fully inserted, the next step is to secure them firmly in place. For a mechanical keyboard, this guarantees peak switch performance and reliable electrical connections.
Gently press each switch into its slot until you hear a tactile click, confirming it’s fully seated and locked. Check that all switch pins are straight and fully inserted through the PCB to prevent intermittent issues or unregistered keys.
Once all switches are securely installed, reassemble the keyboard housing, making sure all tabs and screws are tight to avoid movement that could disrupt switch connections.
Afterward, test each key for responsiveness and smooth operation, addressing any sticky or unregistered keys by rechecking switch alignment and cleanliness.
Functionality Verification Steps
Once you’ve reseated all the switches, it’s vital to verify their functionality to guarantee the keyboard operates smoothly.
Start by pressing each key multiple times to verify smooth, consistent actuation without sticking or resistance. Use typing in a text editor or key testing software to confirm all keys register accurately and promptly.
Listen for uniform switch sounds and confirm tactile feedback feels consistent, indicating proper lubrication and assembly. If a key feels off or doesn’t respond, reinspect switch contacts and keyboard assembly.
After making any adjustments, retest the keys to verify smooth operation. Follow these essential steps:
- Press each key multiple times to confirm smooth actuation.
- Test keyboard functionality by typing or using key testing software.
- Listen for uniform sounds and retest after adjustments to confirm consistent tactile feedback.
Extra Tips to Protect and Extend the Life of Your Mechanical Switches
Protecting and extending the lifespan of your mechanical switches requires consistent care and mindful handling. Use high-quality, thin lubricants like Krytox GPL-205 for linear switches and Tribosys 3204 for tactile switches to reduce friction and prevent mushiness, ensuring smoother operation.
Always make sure switches are completely dry before reassembling after cleaning, as moisture can cause corrosion and disrupt electrical contact. Avoid prolonged exposure of switch housings to isopropyl alcohol above 70%, since it can cause discoloration or texture changes that impair function.
Regular maintenance every 3 to 6 months helps remove dust, dirt, and old lubricant buildup, preserving switch smoothness. Handle switch components gently with proper tools to avoid damaging delicate contact leaves and housing interiors.
Deciding When to Call a Professional or Replace Switches
Even with regular cleaning and maintenance, some issues might still require professional help or switch replacement.
Persistent keyboard issues after cleaning may need professional repair or switch replacement.
If your mechanical keyboard’s keys remain sticky or unresponsive after two thorough cleanings with 90%+ isopropyl alcohol and proper drying, it’s time to evaluate replacement.
Also, pay attention to physical damage, discoloration, or texture changes, which signal material degradation or internal failure needing switches’ replacement.
For hot-swappable keyboards, avoid risking damage by attempting to disassemble or desolder switches without experience.
If electrical connection failures or unrepairable contact damage persist, consulting a professional is the safest course.
Evaluate calling a professional or replacing switches if:
- Keys stay sticky or unresponsive after cleaning
- Switches show visible damage or discoloration
- Issues involve complex electrical or contact failures
Frequently Asked Questions
How Do You Clean Mechanical Keyboard Switches?
You unplug your keyboard, remove keycaps, and carefully open switches with a switch opener. Gently clean housings with high-concentration isopropyl alcohol, soak stems and springs briefly, dry thoroughly, then reassemble and lubricate for smooth operation.
Is WD40 Good for Cleaning Keyboards?
WD40 isn’t good for cleaning keyboards. It contains oils that attract dust and can damage plastic and internal contacts, potentially voiding your warranty. Instead, use isopropyl alcohol for safe, effective cleaning without residue.
Can I Use 70% Alcohol to Clean My Keyboard?
You shouldn’t use 70% alcohol to clean your keyboard, as it contains too much water and may cause damage. Instead, opt for 90% or higher alcohol, applying it sparingly with a cotton swab for safe, effective cleaning.
How to Clean a Mechanical Keyboard Without Removing Switches?
You can clean your mechanical keyboard without removing switches by flipping it upside down, gently shaking out debris, using compressed air around the keys, and wiping surfaces with a damp microfiber cloth soaked in 90%+ isopropyl alcohol.
In Summary
Regularly cleaning your mechanical keyboard keeps your switches functioning smoothly and prolongs their lifespan. With the right tools and techniques, you can safely disassemble, clean, and reassemble your keyboard at home. Just be patient and gentle throughout the process. When in doubt, don’t hesitate to seek professional help or consider replacing worn-out switches. Proper maintenance will guarantee your keyboard stays responsive and enjoyable to use for years to come.



