

To build a quality mechanical keyboard, focus on mastering soldering skills, including proper technique, troubleshooting, and avoiding common mistakes. You should learn to use the right temperature, pre-tin pins and pads, and keep joints clean for durability. Additionally, understanding how to fix cold joints and straighten bent pins guarantees reliable connections. Developing these skills helps create a sturdy, well-functioning keyboard—keep going to discover even more tips for successful builds.
Why Soldering Skills Matter When Building a Custom Keyboard
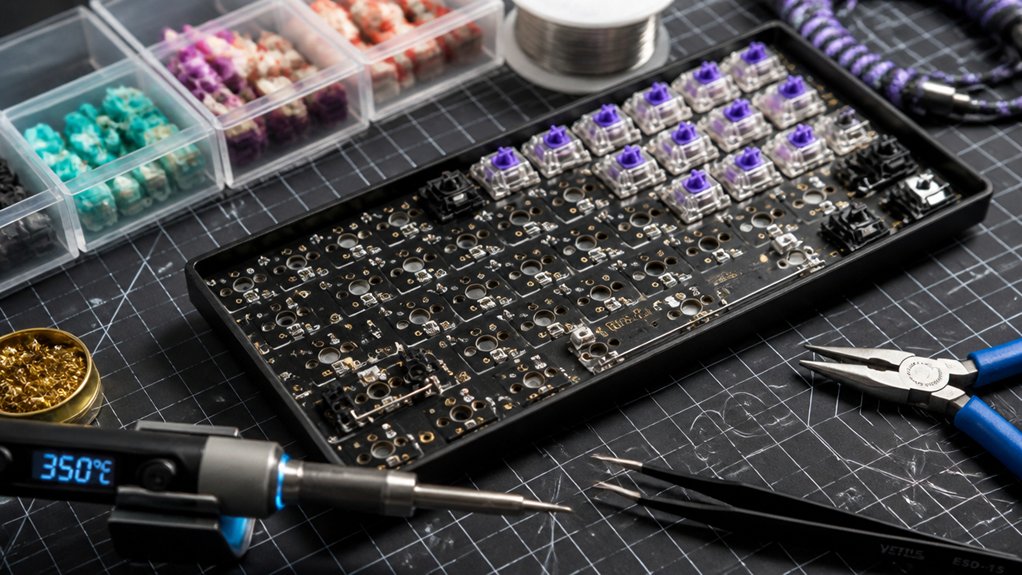
Soldering skills are essential when building a custom mechanical keyboard because they guarantee strong, permanent connections between switches and the PCB. You’ll use a soldering iron to secure switch pins during PCB assembly, ensuring every key registers properly. Using the proper solder wire with the right alloy composition, flux type, and diameter ensures reliable and durable joints. Unlike pre-built keyboards offer, a custom mechanical keyboard requires soldering to attach mechanical switches securely, especially if you choose a non-hot-swap design. Proper soldering prevents issues like cold joints or shorts, which could cause some keys to malfunction.
Be cautious of bent pins, which can disrupt connections or damage the PCB. Mastering good soldering habits makes troubleshooting easier and avoids costly repairs. Whether you’re customizing layouts or switch types, soldering skills are foundational to a reliable, durable keyboard build.
Mastering Essential Soldering Techniques for Keyboard Builds
To achieve reliable and high-quality connections in your keyboard build, mastering essential soldering techniques is crucial. Use a temperature-controlled soldering iron set between 350°C and 400°C to prevent damage.
Proper technique involves heating both the switch pins and PCB pads simultaneously before applying a small amount of lead-free solder, forming smooth, shiny solder joints.
To improve efficiency and quality:
- Pre-tin the switch pins and PCB pads, creating a thin solder layer for quicker soldering.
- Avoid cold solder joints by not moving components while soldering and inspecting connections with a magnifier.
- Use a solder sucker or desoldering braid to correct mistakes or replace switches, protecting your PCB.
- Ensure your soldering iron tips are well-maintained and clean, promoting consistent heat transfer and better solder joints.
These skills guarantee strong, durable, and electrically sound connections essential for a quality keyboard build.
Common Soldering Mistakes and How to Fix Them

Have you ever completed a soldering job only to find a faulty connection or a short circuit? Common soldering mistakes in mechanical keyboard builds include applying too much solder, which causes solder bridges between switch pins or across the PCB, risking shorts.
Cold solder joints, resulting from insufficient heat or poor technique, appear dull and grainy; reheat them to improve the bond.
Bent or misaligned switch pins can prevent proper contact; straighten switch pins with tweezers before soldering.
Missing solder on a switch pad leads to unresponsive keys—simply reheat and apply solder again.
Excess heat can damage PCB pads or switch pins, so use a temperature-controlled soldering iron around 350°C and limit contact time.
Using high-quality components and proper handling techniques helps ensure reliable and durable connections.
Frequently Asked Questions
What Is a 96% Keyboard Missing?
A 96% keyboard is missing some less-used keys, like the dedicated navigation cluster, certain function keys, and sometimes the right Ctrl or right Alt. It prioritizes space-saving while retaining most of the essential keys you need.
Is 84 Keys 75%?
Yes, an 84-key layout is typically considered a 75% keyboard. You’ll find it offers a compact form factor with essential keys like function and arrow keys, balancing space-saving design with functionality for both typing and gaming.
What Are Effective Keyboard Skills?
Effective keyboard skills include proficient switch preparation, precise stabilizer installation, thorough PCB testing, careful soldering or hot-swap switch insertion, and sound tuning techniques. These guarantee smooth, reliable performance and personalized acoustics, enhancing your overall typing experience.
What All Do You Need to Build a Mechanical Keyboard?
To build a mechanical keyboard, you need essential tools like a switch and keycap puller, lube brushes, and optional tools such as switch openers. You’ll also require a compatible PCB, switches, stabilizers, a mounting plate, case, and keycaps.
In Summary
Mastering soldering skills is key to building your perfect mechanical keyboard. With steady hands and the right techniques, you can customize switches and create a clean, durable build. Avoid common mistakes by practicing and staying patient. Remember, every good build starts with a solid foundation of soldering knowledge. Keep honing these skills, and you’ll enjoy a custom keyboard that’s both functional and personalized. Happy building!



