

If your mechanical keyboard gets wet, unplug it immediately and flip it upside down on a towel to drain excess liquid. Avoid pressing or squeezing to prevent spreading the moisture. Use cool air and fans to gently dry it in a well-ventilated space for at least 48 hours, and up to 72 hours if needed. Make sure it’s completely dry before reassembling or powering on. Keep listening for tips on drying safely and avoiding damage.
How to Quickly Dry Your Mechanical Keyboard After Spills
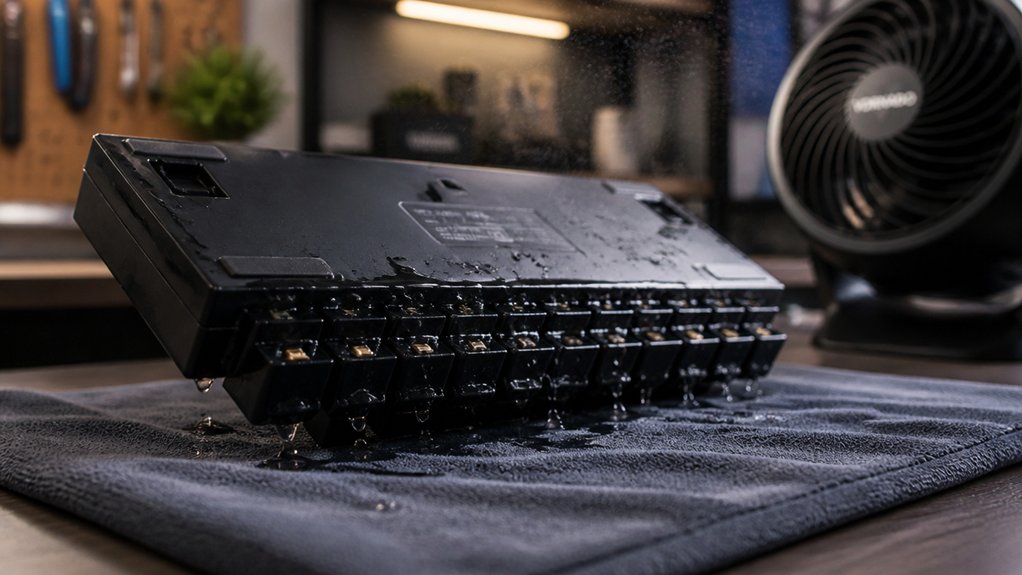
If you’ve just spilled liquid on your mechanical keyboard, acting quickly can help minimize damage. First, unplug it immediately and flip it upside down onto a towel so the liquid can drain out. Avoid pressing or squeezing the keyboard, as this might push liquid further inside.
Use a dry microfiber towel or paper towel to gently blot the surface, absorbing as much excess moisture as possible without using heat or pressure. Don’t try to speed up drying with hairdryers or sunlight, as high heat can warp plastic components or damage electronics.
Instead, place the keyboard in a well-ventilated area or near fans to promote cool airflow. Ensuring the keyboard and all keycaps are completely dry—typically 48 hours—is essential before reconnecting to prevent electrical shorts. It’s also beneficial to use high-purity IPA to carefully clean and disinfect the keyboard once it’s dry, helping to remove any residual contaminants.
Drain Excess Moisture Safely Before Drying
Before you start drying your keyboard, it’s essential to carefully remove as much excess moisture as possible.
If liquid spilled on your mechanical keyboard, unplug it right away to prevent electrical damage. Flip the keyboard upside down onto a towel to allow gravity to help drain pooled liquid. Gently shake or tap the keyboard to dislodge trapped moisture from inside.
Use paper towels or a microfiber cloth to softly blot remaining surface moisture without pushing liquid deeper. Keep the keyboard in a well-ventilated, cool area, avoiding heat sources like hairdryers or sunlight, which can warp components. It’s also advisable to use a compressed air can to blow out moisture from hard-to-reach places without pushing liquid further inside.
These steps will help you effectively drain excess liquid and set the stage for safe and thorough drying.
What’s the Best Way to Air-Dry Your Keyboard?
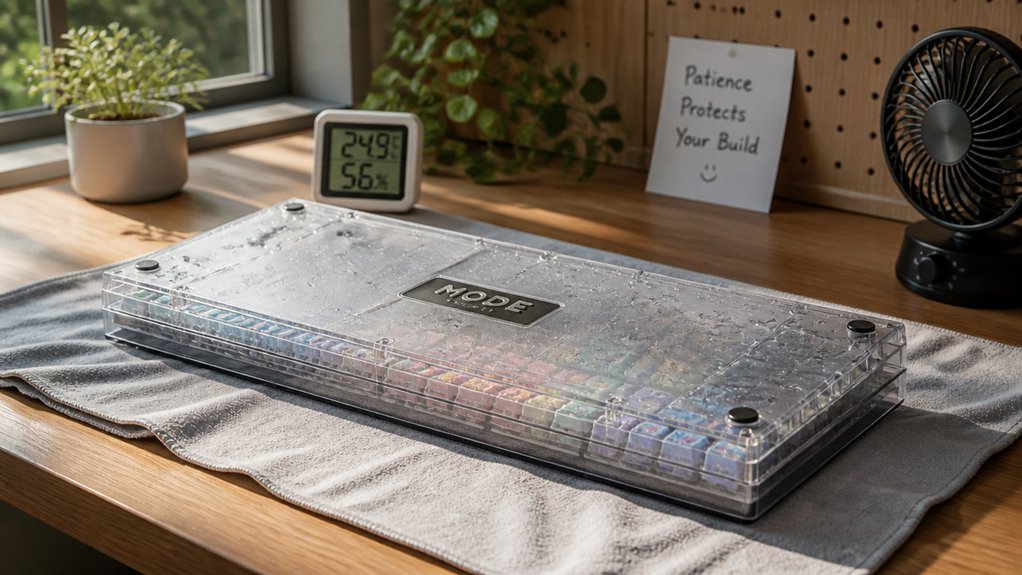
To air-dry your keyboard effectively, place it in a cool, well-ventilated area away from direct heat or sunlight.
Use fans or gentle airflow to circulate air, helping moisture evaporate without risking warping.
Keep it undisturbed for at least 48 hours, ensuring all components are completely dry before reassembling.
Consider using appropriate PCB cleaning techniques to ensure no residual moisture remains within internal components.
Optimal Drying Environment
Achieving the best drying environment for your mechanical keyboard involves placing it upside down on a dry towel in a well-ventilated space. This setup helps gravity drain residual moisture and promotes even evaporation during the drying process.
To maximize effectiveness, make certain the room has good airflow—using fans or circulating cool air—without applying heat. Keep the environment at room temperature to prevent warping or discoloration of plastic parts. During this time, your goal is to create a safe, low-humidity space that supports steady drying. Incorporating flexible drying options can further aid in ensuring all areas of your keyboard dry thoroughly.
- Feel confident knowing you’re protecting your valuable mechanical keyboards from lasting damage
- Experience peace of mind as you watch moisture evaporate without risking warping
- Look forward to handling your keyboard again, fully dry and ready to perform at its best
Avoiding Heat Sources
While placing your mechanical keyboard upside down on a towel helps drain moisture efficiently, choosing the right drying method is equally important. To guarantee your mechanical keyboard dry completely without damage, avoid heat sources like hairdryers or direct sunlight. Excess heat can warp plastic components and cause discoloration, compromising your keyboard’s integrity.
For added safety, consider using heat resistance silicone mats or similar protective surfaces to prevent direct contact with potentially damaging heat sources. Instead, opt for natural air circulation using a fan or cool air to speed up the drying process safely. Keep the keyboard in a well-ventilated area, and resist the temptation to rush drying time with heat.
Effective Drying Duration
Allowing your mechanical keyboard adequate time to dry is essential for preventing future issues. To dry completely, you should air-dry your keyboard for at least 48 hours, yet extending this to 72 hours or more offers added protection against hidden moisture.
During this period, place the keyboard upside down on a clean towel in a well-ventilated area, enhancing airflow with fans or cool air circulation—yet avoid heat sources that can warp parts.
Remember, patience pays off. Rushing the process might leave moisture trapped inside, risking corrosion or malfunction. Utilizing sound dampening accessories like O-rings can help improve your keyboard’s acoustic profile once dried, while ensuring no moisture remains inside the switches.
- Feel confident that your keyboard is safe and ready to reassemble
- Reduce the risk of future damaging issues
- Keep your investment functioning flawlessly for years to come
How Long Should You Leave Your Keyboard to Dry Completely?
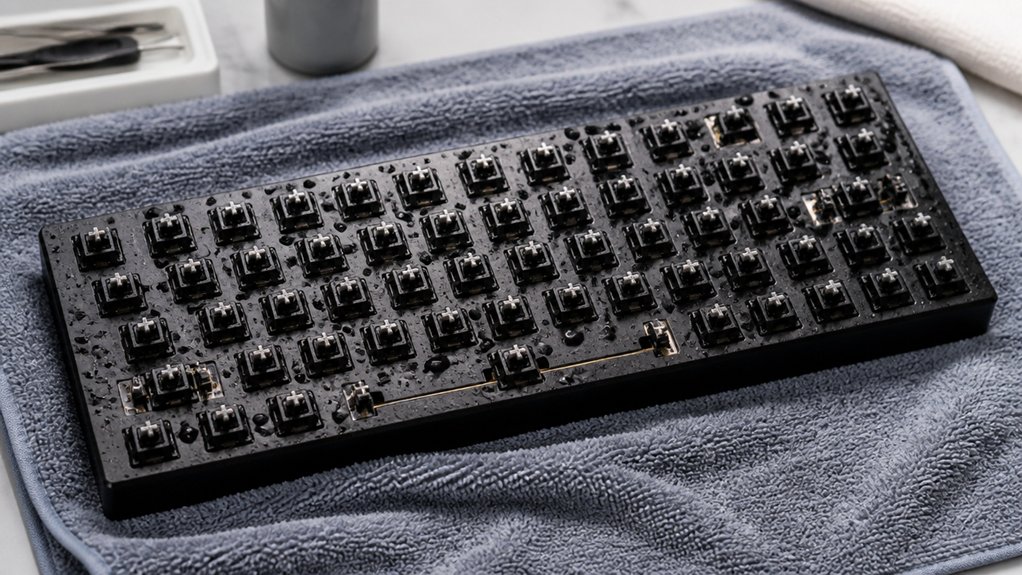
Wondering how long you should leave your keyboard to dry completely? Generally, it’s best to leave your keyboard for at least 48 hours before reusing or reassembling it. This guarantees all moisture fully evaporates, preventing damage from residual humidity.
For smaller spills or after cleaning, drying times of around 24 hours might suffice, but longer periods are safer, especially after significant liquid exposure.
Avoid using heat sources like hair dryers or direct sunlight, as they can warp plastic and harm electronics. Instead, place your keyboard upside down on a towel in a well-ventilated, cool area.
The longer you let it dry, the lower your risk of internal damage, so patience really pays off—think 48 hours or more if necessary. Allowing adequate static decay time helps mitigate the buildup of static charges that could harm electronic components.
How to Use Fans and Cool Air to Speed Up Drying
Using fans and cool air can efficiently speed up the drying process of your keyboard after a spill or cleaning. Position the keyboard upside down on a towel, allowing gravity to help drain internal moisture while airflow evaporates remaining dampness.
Using fans and cool air speeds up your keyboard’s drying after spills—position upside down, let gravity and airflow do the work.
Turn on a fan or cool air blower nearby, directing airflow underneath and across the keys for even drying, without risking heat damage.
- Feel confident knowing you’re avoiding heat that warps plastic or damages switches.
- Watch internal components dry thoroughly, preventing long-term issues.
- Rest assured, automatic sleep modes for 24-48 hours guarantees complete moisture removal.
- Proper airflow helps activate these features, ensuring thorough drying without additional effort.
Keep the area dust-free and well-ventilated to prevent contaminants from settling inside. Proper airflow accelerates drying without risking damage, making your keyboard safe and ready for use sooner.
Why You Should Avoid Using Hairdryers or Heaters
Using hairdryers or heaters may seem quick, but it can warp or melt plastic parts of your keyboard. The heat can also damage delicate electronic circuits, leading to malfunctions. Avoiding forced hot air helps prevent moisture from penetrating deeper and hurting your keyboard’s components. Additionally, improper use of high-temperature tools can damage sensitive components, compromising the entire device.
Warping Plastic Components
Applying heat with hairdryers or heaters might seem like a quick fix for drying your keyboard, but it can cause serious damage to its plastic components.
Excessive heat damages the delicate plastic parts of your mechanical keyboard, causing warping plastic components, deforming keycaps, and compromising the housing. This distortion not only affects the appearance but can also hinder key functionality.
- Imagine your keys sticking or misaligning
- Witness the loss of original shape and aesthetic
- Feel the frustration of a weakened, less durable keyboard
- Using improper drying methods can also lead to discoloration and yellowing acrylic, further degrading the visual appeal and durability of your case.
It’s safer to air dry your mechanical keyboard using fans or cool air circulation, which preserves its shape and integrity.
Avoid rapid drying methods to guarantee your keyboard remains functional and visually intact.
Rapid Moisture Evaporation
Although it might seem tempting to quickly dry your keyboard with a hairdryer or heater, this rapid approach can cause significant damage. Applying high heat to evaporate liquid can warp plastic components and harm internal electronic circuits.
The intense heat may deform keycaps and stabilizers, leading to poor key function and misalignment. It can also weaken solder joints on the PCB, risking nonfunctional keys and costly repairs.
Instead, air dry your keyboard for at least 48 hours using cool air or fans. This slow, gentle process allows moisture to evaporate safely without harming internal parts. Avoid heat, as rapid drying may seem efficient but ultimately increases the risk of irreversible damage, compromising your keyboard’s longevity. Patience guarantees a safer, thorough dry.
Potential Electronic Damage
Exposing your keyboard to sudden, intense heat can cause immediate and permanent electronic damage. Make sure you use caution when drying your keyboard, as applying high heat sources can warp plastic parts and harm delicate electronic components inside. Forced heat may also cause keycap legends to fade or peel, diminishing both appearance and usability.
Rapid heating can evaporate moisture too quickly, leaving residues or uneven drying that lead to corrosion or shorts in circuits. To protect your keyboard first, avoid using hairdryers or heaters. Instead, opt for air drying at room temperature for at least 48 hours, ensuring complete moisture evaporation without risking irreparable damage.
Protect your investment and extend your keyboard’s lifespan by steering clear of heat-based drying methods.
Signs Your Keyboard Is Fully Dry and Safe to Reassemble
Knowing when your keyboard is fully dry is essential before reassembling it, as residual moisture can cause damage. You should wait at least 48 hours, ensuring all components show no visible moisture or dampness. Test pressing keys; if pressing keys produces no sticking or sluggishness, residual moisture has likely evaporated from switches and stabilizers. Check the surface and switch gaps—if they feel completely dry, with no coldness or wetness, it indicates thorough drying. Reassembling after this period minimizes risks of electrical short circuits or mechanical damage caused by trapped liquids. Use the following checklist to confirm readiness:
| Signs of Fully Dry Keyboard | Reassemble & Press Keys |
|---|---|
| No visible moisture | No sticking or sluggish keys |
| Surface feels completely dry | Keys register properly without missed inputs |
| Switch gaps aren’t wet | No residual dampness in board |
| No coldness on surface | Functionality confirmed |
Troubleshooting: What to Do If Your Keyboard Still Doesn’t Work
If your keyboard still isn’t functioning properly after drying and reassembling, don’t panic—there are targeted steps you can take to identify and resolve the issue.
First, remove the PCB and let it dry for an additional 24 hours before testing again, as residual moisture can cause issues.
Check that all keycaps and stabilizers are correctly seated and free of debris that could obstruct switches. Be sure not to reconnect or power on the keyboard while it’s still damp, since this risks short circuits and permanent damage.
If problems persist, consider visiting a repair shop; professional repairs typically cost $40 to $60.
You should also thoroughly inspect for sticky residue inside switches and clean with isopropyl alcohol or lightly lubricate after drying to improve key response.
Tips to Prevent Water Damage in the Future
Taking proactive steps to prevent water damage can save you both time and money in the long run. First, always unplug your keyboard immediately after any liquid exposure to prevent electrical damage and short circuits. Use keyboard covers to protect against spills and dust, especially when eating or drinking nearby. Avoid placing liquids near your workspace to minimize risks.
Regularly clean your keyboard with compressed air to remove dust and debris, which can trap moisture. Wipe down surfaces with a slightly damp microfiber cloth to keep it clean and dry. Store your keyboard in a dry, cool environment away from direct sunlight or heat sources that can warp plastic or damage electronics. These precautions greatly lower the chances of water damage occurring in the future.
Drying Tips for Different Types of Mechanical Keyboards
Different types of keyboards require specific drying methods to prevent damage. You should be especially careful with laptop keyboards, mechanical ones, and even piano keyboards, each needing tailored approaches.
Let’s look at effective strategies for safely drying each of these to keep your instruments in top shape.
Laptop Keyboard Drying Techniques
When a spill occurs on your laptop keyboard, promptly powering off the device and removing the battery (if possible) are essential steps to prevent internal damage. Once unplugged, carefully flip your laptop upside down on a towel to let any liquid drain naturally. This prevents liquid from seeping further into the device.
Avoid using heat sources like hair dryers or sunlight, as they can warp plastic or damage electronics. Be gentle when handling and confirm that the laptop remains flipped, allowing maximum airflow and drainage.
You should also:
- Keep the laptop upside down for at least 24 hours
- Use fans or cool air circulation to aid drying without moisture buildup
- Wait patiently before attempting to power it back on, confirming all internal parts are thoroughly dry before reassembling or turning it on again.
Mechanical Keyboard Air Drying
To effectively air dry your mechanical keyboard, start by unplugging it and removing all keycaps, which allows unobstructed airflow to switches and internal components.
Place the keyboard upside down on a towel in a well-ventilated, dry area. This position helps moisture escape from beneath the keys and switches.
Avoid using heat sources like hairdryers or direct sunlight, as these can warp plastic parts and damage electronics.
If your keyboard has metal stabilizers, be sure to dry around them thoroughly and allow extra air drying time if necessary.
For heavily soaked keyboards, consider drying key parts separately and using a fan with cool air to encourage evaporation without risking heat damage.
Patience during air drying guarantees your mechanical keyboard returns to proper working condition safely.
Piano Keyboard Care Tips
Ever wondered how to properly dry your piano keyboard after it gets wet? The key is patience and careful handling.
First, gently wipe away any surface moisture with a clean microfiber cloth, avoiding harsh scrubbers. Next, avoid using heat sources like hairdryers, as they can warp or damage internal electronics. Instead, let the keyboard air dry in a well-ventilated area, ensuring all moisture evaporates thoroughly.
If you spilled something, clean the keys with warm water and then pat dry with microfiber before letting it sit to dry completely. Remember, prolonged moisture exposure can cause corrosion or damage.
Handle your piano keyboard carefully, especially when drying, to protect delicate keys and electronic contacts.
*Be patient during drying.*
*Handle carefully to avoid damage.*
*Ensure complete dryness before use.*
Common Mistakes to Avoid During the Drying Process
One common mistake during the drying process is using heat sources like hairdryers or placing the keyboard in direct sunlight, which can quickly warp plastic parts and damage sensitive electronics. To guarantee your keyboard dries properly, avoid using heat sources, as they can cause irreversible damage.
Make sure there’s not much liquid inside, and don’t rush the process—wait at least 48 hours until it’s fully dried before attempting to reassemble or test it. Also, don’t seal the keyboard in a container with drying agents like rice or kitty litter, since trapped moisture can cause more corrosion.
Never ignore residual moisture by testing keys prematurely, as this can lead to electrical shorts. Patience is key to avoiding permanent damage and guaranteeing your keyboard is safe to use again.
When to Seek Professional Repair After Water Damage
If your mechanical keyboard isn’t responding after drying, it’s time to contemplate professional repair. A mechanical keyboard that fails to power on or register key presses despite thorough drying and cleaning likely has internal damage needing expert intervention.
If your mechanical keyboard still won’t respond after drying, professional repair may be necessary to fix internal damage.
Seek professional repair if:
- Keys stay sticky or malfunction after waiting at least 48 hours,
- The keyboard isn’t working properly or shows inconsistent key travel,
- Spills involved sticky liquids like soda or coffee, requiring intensive cleaning.
Avoid using the keyboard if keys remain unresponsive or erratic, as this can cause further internal damage or corrosion.
The cost for professional repair usually ranges from $40 to $60, depending on the extent of damage. Trust a technician to properly disassemble, clean, or replace damaged components to restore your mechanical keyboard’s performance.
Frequently Asked Questions
What to Do if a Mechanical Keyboard Gets Wet?
If your mechanical keyboard gets wet, immediately unplug it, flip it upside down on a towel, and remove keycaps. Let it dry for at least 48 hours with good airflow before reassembling, avoiding heat sources.
How Long Does It Take for a Mechanical Keyboard to Dry?
It typically takes at least 48 hours for your mechanical keyboard to dry completely. You should avoid using heat sources, flip it upside down, and guarantee all moisture evaporates before reassembling or reusing it safely.
Will a Keyboard Still Work if It Gets Wet?
Your keyboard might still work if it gets wet, but only if you disconnect it immediately, drain excess liquid by flipping it upside down, and wait at least 48 hours to dry thoroughly before trying to use it again.
How to Get Rid of Moisture in Keyboard?
To get rid of moisture, immediately unplug your keyboard, flip it upside down, and drain excess liquid. Wipe external surfaces with a dry cloth, disassemble for internal drying, and let all parts air-dry in a cool, ventilated space for at least 48 hours.
In Summary
Drying your mechanical keyboard quickly and carefully is key to preventing damage. Act fast, remove excess moisture, and dry it thoroughly using air, fans, or cool air. Avoid rushing the process or using heat, and consider professional help if needed. With patience and proper techniques, you can save your keyboard and keep it in top shape. Just remember these tips to guarantee a safe and effective drying process every time.



