
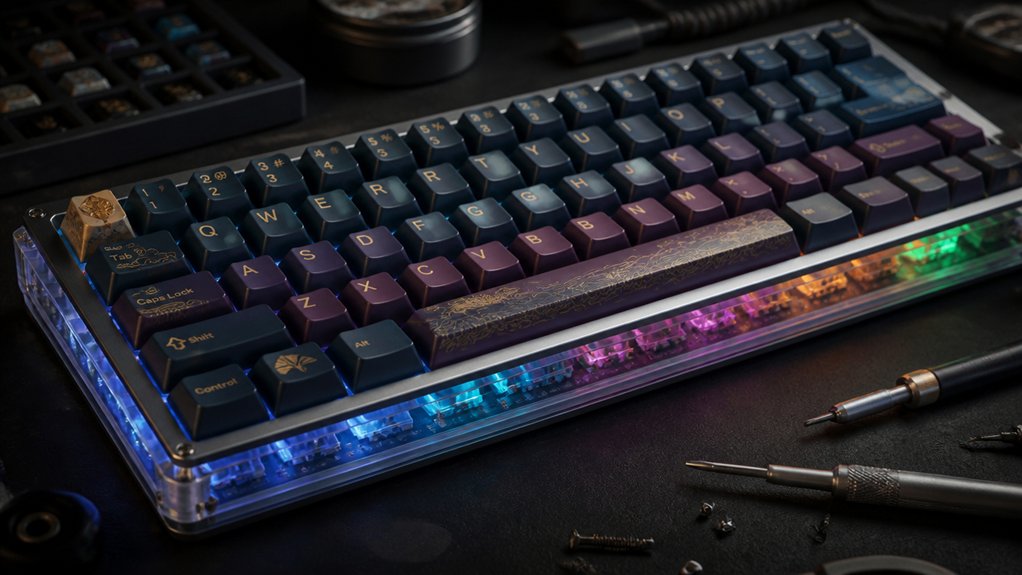
Mastering advanced mechanical keyboard modding lets you customize your setup for a perfect typing experience. You can tune switch feel and sound, reduce key wobble, and create a signature acoustic profile. By exploring techniques like stabilizer tuning, acoustic layering, and spring swapping, you’ll improve both performance and personalization. This way, your keyboard reflects your style and preferences. If you keep exploring, you’ll discover how to elevate your modding skills even further.
Why Mastering Advanced Keyboard Mods Elevates Your Setup
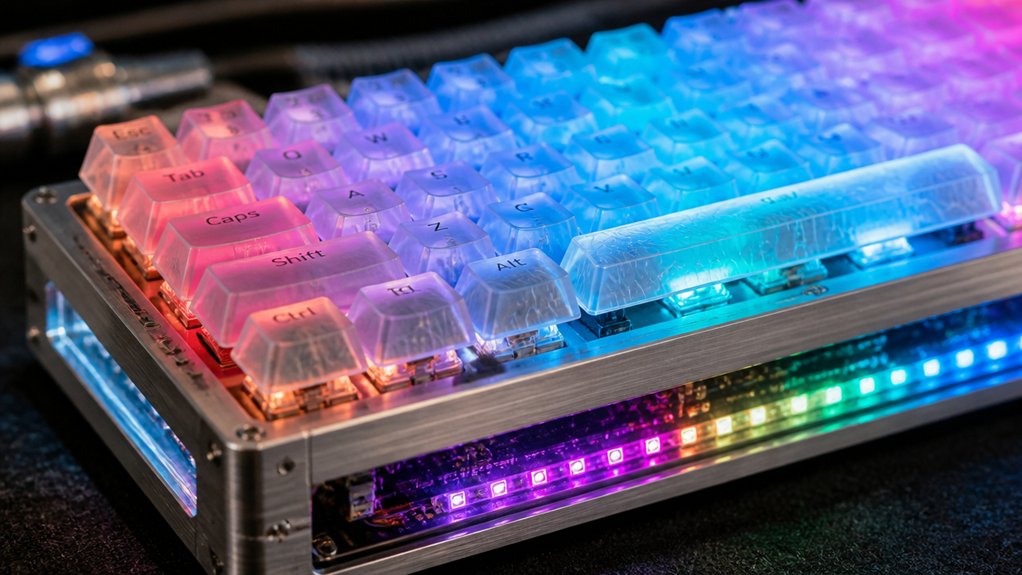
Mastering advanced keyboard mods takes your setup beyond basic customization, allowing you to craft a typing experience that’s truly personalized and refined. Spring swapping and switch filming let you fine-tune the sound profile and actuation force, giving you a unique typing feel that suits your preferences.
Stabilizer tuning enhances stability and reduces unwanted noise like metallic ping, while case foam and acoustic enhancements absorb vibrations for quieter, deeper “thock” sounds. Keyboard stabilizer maintenance and tuning are essential for long-lasting performance and a refined typing experience. Stem swapping (frankenswitching) and spring upgrades reveal custom switch characteristics, blending tactile and auditory qualities.
Developing your skills in these techniques guarantees consistent, smoother typing, avoiding common issues that can arise from improper modding. Ultimately, advanced modding empowers you to craft a keyboard that’s perfectly aligned with your aesthetic, sound, and feel goals.
What Makes Advanced Modding Worth It for Enthusiasts
Advanced modding lets you express your style and preferences more precisely, making your keyboard uniquely yours. With techniques that improve sound and feel, you’ll enjoy a more satisfying and personalized typing experience. It also opens up creative possibilities, pushing your skills and ideas further than basic mods ever could. Utilizing sound dampening options like O-rings and dampeners can significantly enhance your acoustic profile, giving you greater control over your keyboard’s final sound.
Enhanced Personal Expression
For keyboard enthusiasts, the appeal of advanced modding lies in the ability to craft a truly personalized typing experience. Through custom mechanical keyboard tuning, you can achieve a unique switch feel tailored to your preferences, whether it’s spring swapping or stem filming.
Stabilizer tuning and sound dampening help you control keypress consistency and noise, enhancing your overall experience. Upgrading case materials, like aluminum or brass, creates distinctive acoustic and tactile signatures, transforming the keyboard into a true expression of style.
These complex keyboard customization techniques give you the power to craft signature sounds—deep “thock” or muted quietness—that reflect your personality. Engaging in advanced modding turns your keyboard into a form of personal artistic expression and technical mastery. High-quality stabilizers with features like gold-plated wires and reinforced housings further elevate your build quality and sound profile.
Superior Sound and Feel
Enthusiasts find that techniques like switch filming, spring swapping, and stem swapping greatly enhance the keyboard’s feel by reducing wobble, adjusting actuation force, and creating distinctive tactile feedback that stock components can’t achieve.
In mechanical keyboards, keyboard modding allows you to fine-tune sound and feel through stabilizer housing modifications, lubing switches, and applying switch films. The Band-Aid Mod and gasket mount setups further dampen rattle and uneven keypress sounds, producing a more satisfying, stable typing experience.
Layered acoustic enhancements with foam and premium materials amplify resonance and tone, whether aiming for bright clicks or deep “thock.” Altogether, advanced modding empowers you to craft a personalized keyboard offering refined tactile response and superior sound signature—beyond what stock parts can deliver.
Unlocking Creative Potential
Revealing creative potential in keyboard modding opens up a world where you can craft a truly personalized typing experience that reflects your unique preferences.
Through advanced modding techniques like spring swapping, stem swapping, and switch filming, you can precisely shape the tactile feedback, actuation force, and sound profile of your mechanical keyboard. Mastering stabilizer tuning and band-aid mods minimizes wobble and rattling, ensuring consistent feel on larger keys.
Acoustic stacking strategies, involving multi-layer foams and case adjustments, help create custom “thocky” or muted sound signatures tailored to your style. Additionally, experimenting with custom keycaps and proper switch break-in maximizes comfort and sound quality.
Using high-quality stabilizers with elastic support bases, precision-molded stems, and pre-lubricated components can significantly enhance overall performance and reduce noise material quality, empowering you to design a one-of-a-kind keyboard that embodies your creative vision and enhances your overall typing experience.
Key Techniques: Switch Filming and Spring Swapping
Mastering switch filming and spring swapping allows you to fine-tune your mechanical keyboard’s feel and sound. Switch filming involves inserting plastic or foam films between switch housings to reduce stem wobble, boosting switch stability and delivering a deeper, more solid keystroke sound. Spring swapping lets you customize actuation force by replacing internal springs, shaping tactile feel and reducing finger fatigue—choices range from ultra-light (35-45g) to heavy (80-100g+). Proper installation guarantees smooth operation and prevents binding. Testing each modification before full assembly guarantees comfort and performance. Using switch films carefully selected for material compatibility and thickness can further optimize the balance between cushioning and firmness for your desired typing experience.
How to Improve Stabilizer Performance Effectively
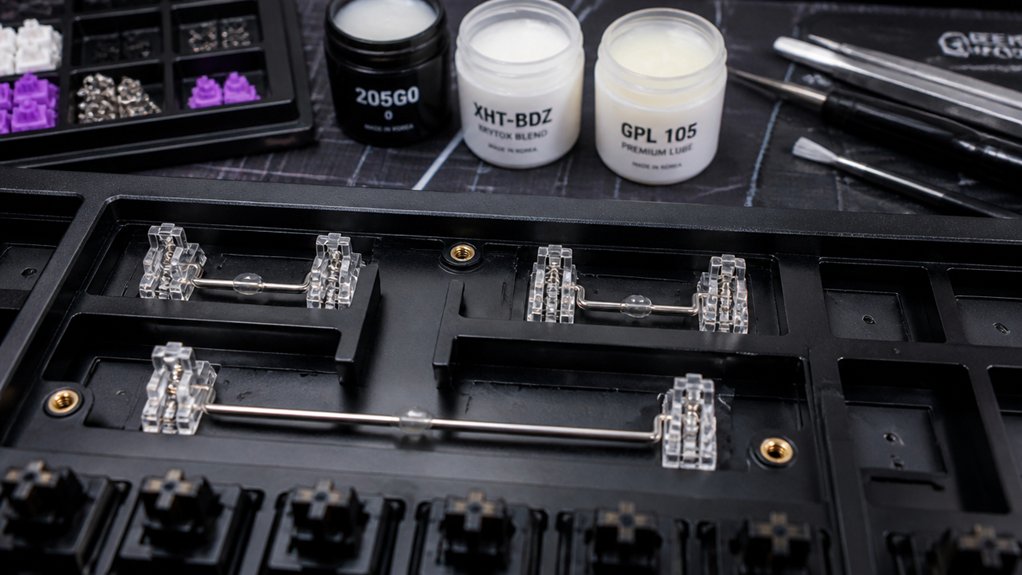
To enhance stabilizer performance, precise wire balancing is essential, ensuring that the stabilizer wire is level and evenly elevated. This prevents uneven key activation and a mushy feel.
Start by applying the band-aid mod with thin fabric, like silk or satin, under the stabilizer housings to reduce rattling and improve sound dampening.
Next, lubricate all stabilizer components—stems, housings, and wires—with a suitable lubricant like 205g0, which smooths keypresses and cuts noise.
For further tuning, trim the band-aid fabric carefully and tighten screws just enough to avoid altering the feel or causing residual rattling.
Additional options include the Holee mod with medical tape inside stabilizer stems, offering a thinner dampening solution but possibly increasing mushiness.
Using Acoustic Stacking for Richer Keyboard Sound
Using acoustic stacking allows you to shape your keyboard’s sound profile by layering materials that dampen and resonate within the case of the keyboard. Foam is commonly used to dampen the sound, with options like 3-4mm EVA foam and 2mm Poron plate foam.
Placing foam carefully between the PCB and switches, or inside the case, helps target specific resonances for a richer, deeper tone. A common approach involves adding Plate Foam to soften keystrokes, while multiple layers of masking tape help fine-tune the sound.
Be mindful: overdoing the stacking can over-dampen the keyboard, resulting in a muted, lifeless sound. Strategic combinations, like aluminum cases with brass plates and Poron foam, produce a deep, thocky signature loved by enthusiasts. Incremental testing guarantees you achieve the desired acoustic balance. Material quality plays a crucial role in achieving optimal sound dampening and resonance control.
Optimizing Case Mounts and Gasket Tuning for Better Feel
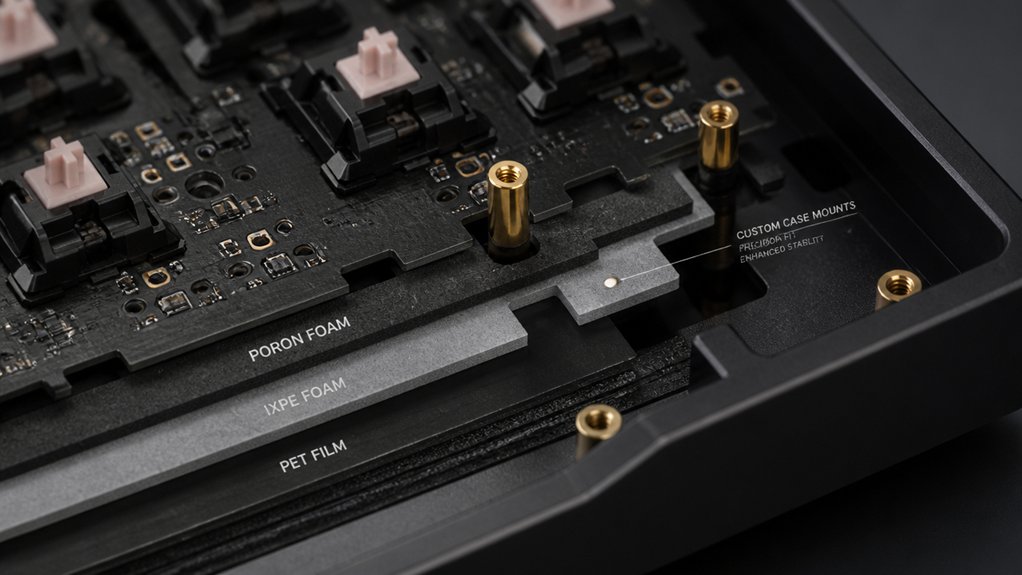
Choosing the right gasket material, like Poron or silicone, can greatly impact your keyboard’s feel and sound. Adjusting gasket thickness and mounting position lets you fine-tune flex and response to match your preferences. Proper screw compression and mounting system choices guarantee stability while maximizing comfort and sound dampening. For optimal performance, selecting gasket materials with heat-resistant properties ensures durability and a consistent typing experience.
Gasket Material Selection
Selecting the right gasket material can greatly influence your keyboard’s feel and sound. Your choice affects typing feel, sound dampening, and keyboard flex. For premium feel and sound dampening, Poron foam is ideal, offering softness and responsiveness. EPDM foam delivers moderate cushioning and absorption at a lower cost, balancing tactile feedback with sound control. Silicone gaskets give a softer, bouncier experience, increasing flex and dampening subtle noise. Neoprene gaskets are firmer and flexible, providing stability and controlling resonance. Be mindful of gasket thickness—1mm for firmer feel, 1.5mm for balanced performance, and 2mm for the softest, most flexible typing experience. Carefully selecting gasket material guarantees your custom build has the perfect blend of feel, sound, and flex. Additionally, considering the foam’s acoustic properties ensures optimal vibration damping and sound clarity in your modded keyboard.
Mounting System Optimization
Optimizing your case mounts and gasket setup is essential for achieving a refined typing experience, as even subtle adjustments can dramatically influence feel and sound. Switch between mounting styles, like tray mount or gasket mount, to control keyboard flex and typing softness. Proper gasket material choice (Poron, silicone, neoprene) and thickness (1mm-2mm) shape bounce and noise. Position gaskets strategically on the front, back, and sides to customize sound better and feel. Adjust screw compression to balance flex and stability—tighten for firmer feel, loosen for more cushion. Incorporating weight inserts enhances stability and deepens the sound. Proper gasket tuning ensures a more comfortable, quieter, and satisfying typing experience. Durable materials play a crucial role in maintaining consistent performance over time.
Conditioning and Breaking In Switches for Consistency
Breaking in switches is essential to achieve a smooth, consistent keystroke. Proper conditioning guarantees mechanical switches perform reliably, reducing friction and noise for smoother keystrokes and a more uniform typing experience.
To break in switches effectively:
- Perform 50-100 actuations per switch, using side-to-side and rotational motions.
- Use automated break-in machines for 500–1000 actuations, especially for budget switches.
- After installing pre-lubed switches, do 50-100 actuations to help distribute lubricant evenly.
- Expect sound and feel to improve over 1–2 weeks as lube settles.
- Choosing the right lubricant with suitable viscosity can further enhance the breaking-in process and overall switch performance.
Whether you’re customizing for minimal scratchiness or optimizing sound, breaking in switches is key to a consistent typing experience and premium keyboard mods.
Knowing When Complex Mods Add Value
Understanding when complex mods add genuine value depends on your goals and the specific characteristics of your mechanical keyboard.
Advanced mods like switch filming and stabilizer wire balancing can greatly improve typing feel and sound, but only if they align with your needs. If you’re working with budget switches, switch filming reduces wobble and rattling, delivering noticeable improvements. However, premium switches may show minimal gains.
Core modifications such as acoustic dampening and gasket tuning can enhance stability and sound, but overlayering acoustic dampening can deaden the sound or feel.
Essential Tools and Components for Precise Modding
To achieve precise modding, you need the right tools and components close at hand. From fine-tipped screwdrivers and keycap pullers to measurement devices like calipers, each plays a vital role.
Having a well-stocked toolkit guarantees you can make accurate adjustments and upgrades with confidence.
Essential Toolkits Overview
Precise mechanical keyboard modding relies heavily on having the right toolkit, as each component plays a vital role in achieving peak performance and feel. To fine-tune your setup, you’ll need tools like switch openers, precision screwdrivers, and quality lubricants such as Krytox 205g0 or Krytox 3203 for smooth, quiet switches.
Switch films and tweezers help reduce stem wobble without hindering travel. Stabilizer tuning requires small feeler gauges or wire benders to level and balance stabilizers, enhancing sound and stability.
Additionally, foam sheets like EVA or Poron, coupled with proper cutting tools, deliver effective sound dampening and key feedback control. By mastering these essential components, you’ll elevate your modding game and craft a keyboard tailored to your preferences.
Key Modding Components
Achieving high-quality keyboard modding starts with selecting the right tools and components, as they directly impact the accuracy and finish of your work.
For mechanical switches, using switch films made of plastic or foam helps reduce wobble and rattling by stabilizing the housing gap without hindering stem movement. Lubricants like Krytox 205g0 and Tribosys 3204 are essential for reducing friction and enhancing switch smoothness.
Stabilizer tuning involves small tools and materials, such as band-aid fabric strips and feeler gauges, to minimize key rattle and guarantee stability.
For sound optimization, layered dampening materials like foam, EVA, or silicone gaskets absorb vibrations and improve acoustics.
Incorporating the right components guarantees precise, smooth, and sound-optimized modding that elevates your mechanical keyboard experience.
Precision Measurement Devices
In mechanical keyboard modding, the accuracy of your adjustments hinges on the use of essential measurement tools. Precision measurement devices allow you to fine-tune every detail, guaranteeing peak keyboard feel and sound.
- Feelers gauges help balance stabilizer wire height, reducing rattles and creating an even keypress.
- Digital calipers measure switch and keycap components precisely, aiding compatibility and spring or film swaps.
- High-quality micrometers enable exact thickness checks of foam layers, films, and gaskets for peak acoustic dampening.
- Torque wrenches guarantee consistent screw tightening, balancing gasket mount flex and avoiding over-tightening.
Using these tools supports incremental mod testing, allowing you to quantify small adjustments and achieve a consistent, personalized mechanical keyboard feel.
Troubleshooting Common Challenges in High-Level Mods
High-level mods often present unexpected challenges that require careful troubleshooting to guarantee your keyboard performs perfectly. When working with mod components, you might find stabilizers rattling or uneven keypresses, often fixed by fine-tuning the stabilizer wire tension or adjusting the fit of switch films.
Gasket mount setups demand precise screw tension: overtightening reduces flex, while loose screws impair stability. Switches with stem swaps or spring replacements can cause issues if the parts aren’t compatible or properly installed—testing one switch first helps identify fitment problems.
Acoustic dampening layers should be added systematically; over-dampening risks a dull sound too. Always verify switch films for free stem movement to prevent binding or sticking, especially in frankenswitch builds. Patience and systematic trialing are keys to resolving these high-level mod challenges.
How to Experiment Safely With Advanced Modding
Experimenting with advanced keyboard mods can be exciting, but it’s essential to approach each step with caution to prevent damaging your components. Start by testing changes on a single switch to confirm compatibility and comfort, reducing risks during mods like frankenswitching or stabilizer tuning.
Use community resources and documented guides to verify materials, techniques, and part compatibilities, minimizing trial-and-error. When lubricating switches or installing switch films, apply steady, controlled pressure to avoid impairing function.
During stabilizer tuning, incrementally add and test modifications—such as case foam or wire adjustments—to monitor effects on sound and tactility. Always work in a clean, well-lit space with proper tools, practicing soldering or firmware flashing on hot-swappable boards before attempting irreversible modifications.
Personalize Your Keyboard With Expert Techniques
Elevate your keyboard’s personality by mastering expert techniques like spring swapping, switch filming, and stabilizer tuning. These advanced modding techniques let you customize your keyboard’s actuation force and reduce wobble, delivering a more precise and satisfying typing experience.
Stabilizer tuning and Band-Aid mods minimize key rattle and uneven presses, boosting consistency and acoustic quality. Layering acoustic materials such as Poron foam, tape mods, or gasket tuning helps you craft a sound profile—from deep “thock” to muted quietness—according to your preferences.
Creating custom frankenswitches by combining desirable tactile and auditory characteristics allows you to personalize your keyboard even further, matching your comfort and sound goals. Upgrading case materials and mounting styles refines resonance, culminating in a truly premium typing experience.
Frequently Asked Questions
What Is a 96% Keyboard Missing?
A 96% keyboard is missing a dedicated numeric keypad, extra macro or multimedia keys, and sometimes extended function keys. It offers a compact layout, combining essential keys while sacrificing some of the larger, specialized keys for space efficiency.
Why Do Gamers Hate Membrane Keyboards?
Gamers hate membrane keyboards because they give slow, inconsistent responses and lack tactile feedback, making fast-paced gaming frustrating. They also cause fatigue and can’t be customized, limiting performance, comfort, and the immersive feel essential for competitive play.
Is a 60% or 75% Keyboard Better for Gaming?
A 60% keyboard is better for gaming if you prioritize minimal movement and focus, while a 75% provides better access to arrow and navigation keys for games needing quick menu navigation or shortcuts.
Is 84 Keys 75%?
Yes, the 84-key layout is considered a 75% keyboard. You get a compact design with all essential keys, including function and navigation keys, making it a space-saving option while maintaining full functionality for gaming and typing.
In Summary
By mastering advanced modding techniques, you can truly elevate your keyboard experience. You’ll enjoy better sound, improved typing feel, and a personalized setup that reflects your style. While it might seem complex at first, with the right tools and patience, you’ll find joy in every upgrade and tweak. Keep experimenting, troubleshoot confidently, and watch your keyboard transform into a true reflection of your passion and expertise. Happy modding!



