
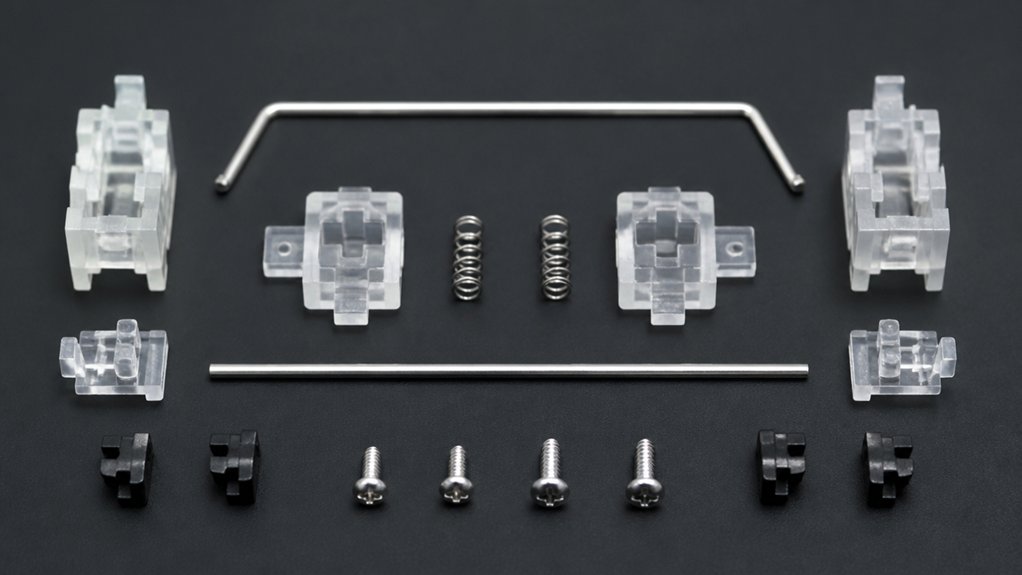
To repair and upgrade your mechanical keyboard stabilizers, start by identifying common issues like rattling or wobbling, then gather tools like screwdrivers, lubricants, and cleaning supplies. Disassemble the stabilizers carefully, clean all parts, and apply lubricant to reduce noise and improve smoothness. Clipping, taping, or adjusting wires can enhance stability. Choosing quality stabilizers and performing regular maintenance keep them performing well. Keep going to discover detailed steps and expert tips for perfect results.
Signs That Your Stabilizers Need Repair or Modding
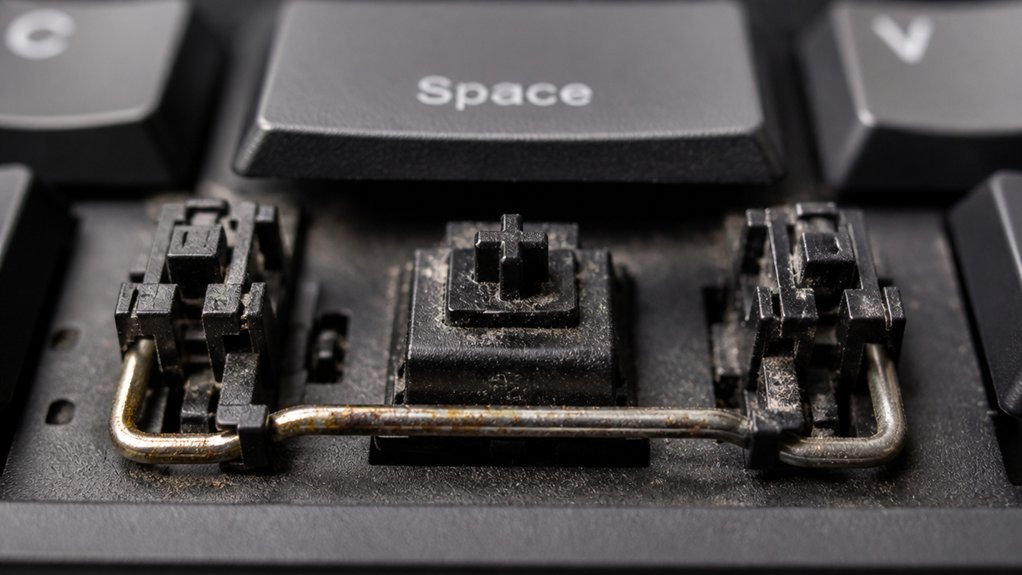
If your keyboard’s stabilized keys are acting up, it’s a clear sign that your stabilizer may need repair or modding. Persistent rattling or noise from keys like the spacebar or enter often indicates the stabilizer isn’t properly lubricated or is misaligned, which can be fixed with dielectric grease.
Sticky or rattling keys often signal stabilizer issues, fix with lubrication or alignment adjustments.
Noticeable key wobble or uneven keypress feels point to poor fit in stabilizer inserts or worn stabilizer stems.
Impact noises or sharp clicking sounds happen when the stabilizer housing contacts the PCB—damping mods can help here.
If keycap movement causes noisy or inconsistent stabilizer stem shifts, it suggests miscoordination between the keycap size and stabilizer stem.
Plate-mount stabilizers can also loosen over time and need tightening or replacement.
Recognizing these signs helps determine if your stabilizer requires repair or modding.
Tools and Materials Needed for Stabilizer Repair
To repair your stabilizers effectively, you’ll need some essential tools like precision screwdrivers, wire cutters, and keycap pullers.
Having the right lubricants, such as Krytox 205g0 and dielectric grease, is vital for smooth operation and noise reduction.
Make sure your cleaning supplies—like isopropyl alcohol and microfiber cloths—are within reach to keep everything properly maintained.
Additionally, using high-quality stabilizer materials ensures durability and reduces unwanted noise during use.
Essential Repair Tools
When repairing stabilizers on your mechanical keyboard, having the right tools and materials is essential to get the job done efficiently and effectively. A key step involves removing and disassembling stabilizer housing and screw-in stabilizers, so a precision screwdriver is vital. A keycap puller and stem holders help you safely detach keycaps and stabilize components during work.
For cleaning and lubrication, you’ll need supplies like isopropyl alcohol, microfiber cloths, cotton swabs, and foam pads to guarantee thorough cleaning. To improve smoothness and reduce noise, Krytox 205g0 is a recommended lubricant, while dielectric grease shields contact points from wear. Keeping these tools and materials organized and within reach makes stabilizer repair more straightforward and guarantees a professional result.
Key Materials Required
Repairing stabilizers requires assembling a set of precise tools and reliable materials to guarantee a smooth and effective process. Key materials include high-quality lubricants like Krytox 205g0 for smoothness, dielectric grease for noise dampening, and Extreme Fluoro for premium builds. Reliable stabilizers, such as screw-in types, are essential; vendors like KeebsForAll offer options starting at $15.99. You’ll need basic tools like precision screwdrivers, wire cutters, keycap and switch pullers, and stem holders to disassemble and modify stabilizers safely. For cleaning, use isopropyl alcohol, microfiber cloths, cotton swabs, and fabric Band-Aid Mod to secure thorough cleaning and noise reduction. Proper storage of lubricants and cleaning supplies in a cool, dry place preserves their effectiveness, especially for stabilizer maintenance and Custom Mechanical projects.
Disassembling and Cleaning Your Keyboard Stabilizers
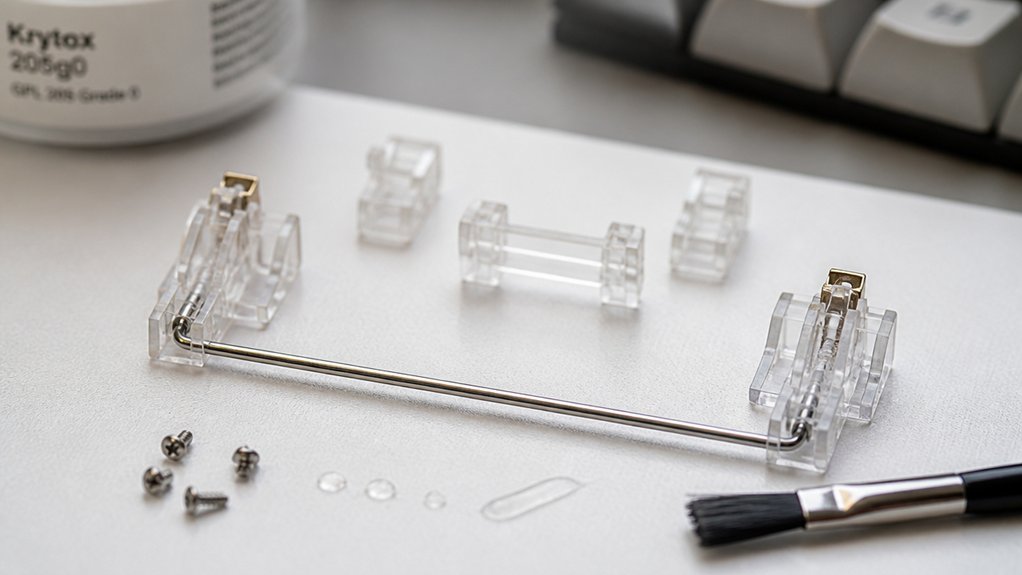
Disassembling your keyboard stabilizers begins by gently pulling them at a 90-degree angle until you hear a snap, which indicates they’re released from their housing.
Gently pull stabilizers at a 90-degree angle until they snap free from their housing.
Once free, carefully remove the housing parts and the small stabilizer components. To clean, wipe the stabilizer parts with toilet paper or paper towels, focusing on holes and sides. Use tweezers to push paper through small holes for deep cleaning.
Avoid washing the stabilizers unless preferred; if you do, let them air dry completely before reassembly. Use precision tools like non-angled tweezers and plastic cutters for disassembly and clipping modifications to improve fit.
Regular disassembly and cleaning of stabilizers during mechanical keyboards maintenance help keep keys smooth and quiet, preventing dirt buildup and ensuring consistent performance.
How to Lubricate Stabilizers for Quiet, Smooth Keys
Lubricating your stabilizers is a key step in achieving quiet, smooth key presses, and it requires careful application to prevent any buildup that could affect performance.
First, disassemble the stabilizers by separating the housing, stem, and wire, giving you full access for lubrication.
Use Krytox 205g0 grease sparingly on the stabilizer housing walls and wire contact points to reduce friction and rattling noise effectively. Apply a small amount of dielectric grease on PCB contact points beneath the stabilizers to dampen impact noise and improve smoothness during key presses.
After any wire adjustments or clip mods, re-lubricate to maintain consistent smoothness and prevent squeaks or wobble.
Regularly lubricate and clean your stabilizers to guarantee quiet operation and prolong their lifespan. Incorporating material compatibility considerations ensures the lubricant won’t damage plastic or metal parts over time.
Clipping Stabilizer Inserts and Taping for Better Stability
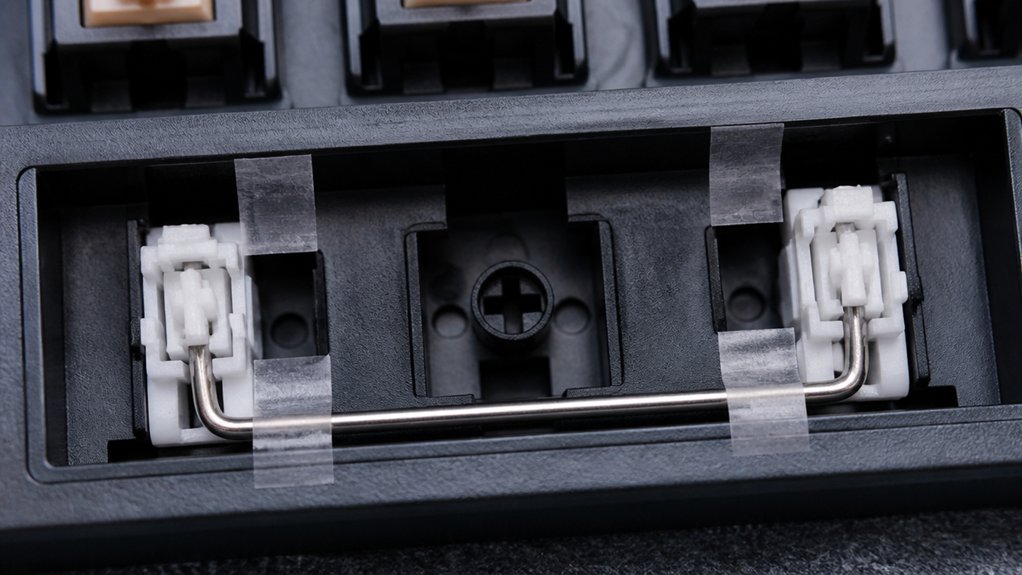
To improve stabilizer stability, clipping the stabilizer inserts and applying tape are effective modifications. Clipping stabilizer inserts involves trimming the two opposite protruding “feet” on the bottom of the insert with plastic cutters to reduce wobble and improve stability.
After clipping, flatten the top edges of the insert feet for a smoother fit and less key rattle during typing. Using tape for the Holee Mod helps fill gaps between the stabilizer insert and keycap, minimizing rattling and excessive movement.
Cut small strips of medical tape to match stabilizer holes, attach sticky side up, press into place, and fold over for security. Combining clipping inserts, taping, and thorough lubrication of the stabilizer housing greatly enhances the stability of Mechanical Keyboard Switches and results in smoother, quieter keypresses. Additionally, selecting high-quality stabilizer materials like nylon housings and stainless steel wires can further improve durability and performance.
Adjusting Stabilizer Wires and Performing the Holee Mod
When adjusting stabilizer wires and performing the Holee Mod, careful attention to detail is essential for peak performance.
Careful tuning of stabilizer wires and modifications ensures a seamless, quiet, and stable typing experience.
Start by straightening the wires little bit with pliers, ensuring they align evenly to prevent rattling and wobble, especially under the shift key. Properly inserted wires at a 90-degree angle into the housing holes maintain consistent tension and help your Custom Keyboard work well.
Next, apply thin strips of medical tape inside the stabilizer housing to snugly fit the stems, reducing rattles caused by looseness.
Before reassembling, lubricate all contact points with Krytox 205g0, focusing on wires and housing walls for smooth keystrokes.
In addition, using high-quality stabilizer materials can enhance durability and minimize noise over time. With these tweaks, your stabilizers will deliver a quieter, more stable feel—perfect for a satisfying typing experience when you want your Custom Keyboard to perform at its best.
Choosing the Best Stabilizers and Upgrades for Your Build
Choosing the right stabilizers and upgrades is essential for achieving a stable, quiet, and satisfying typing experience. For larger keys, like spacebars or enter keys, screw-in PCB-mounted stabilizers provide the best stability, with less movement and wobble. Additionally, opting for stabilizers with high-quality materials and thoughtful design features can significantly reduce noise and improve overall performance. Factory pre-clipped stabilizers are convenient to install and reduce the need for customization, ensuring better sound dampening straight away. Brands like Cherry, GMK, Durock, and Akko strike a good balance of durability, noise reduction, and performance. Always double-check your keyboard’s PCB and plate compatibility before purchasing. Upgrading stabilizers can also help set ideal Actuation Force, making your build both more comfortable and reliable for everyday use.
Maintaining and Troubleshooting Stabilizers for Long-Term Performance
Regular maintenance is key to guaranteeing your stabilizers stay smooth and quiet over time. You should perform monthly checks by removing keycaps and cleaning stabilizer housings with compressed air. If you hear rattling, check wire alignment and apply Krytox 205g0 lubricant and dielectric grease sparingly to reduce friction and noise. Fully disassemble stabilizers annually for deep cleaning, re-lubrication, and clipping inserts to minimize wobble and impact noise. Regularly inspect and adjust the fit and orientation to prevent issues caused by loose inserts or skewed wire positioning, which can impact your overall typing experience. Use mods like fabric tape and dielectric grease to dampen sound further. Proper maintenance guarantees your Common Keyboard remains reliable, protected by hCaptcha, and keeps stabilizers performing smoothly over time.
“`markdown
| Action | Purpose | Frequency |
|---|---|---|
| Remove keycaps, clean housing | Prevent buildup, guarantee smooth operation | Monthly |
| Check wire alignment, re-lubricate | Minimize rattling, noise, and wobble | As needed |
| Deep clean and clip inserts | Enhance stability and reduce impact noise | Annually |
| Inspect f and adjust fit | Prevent wobble, improve feel | Regularly |
| Apply mods (tape, grease) | Dampen sound, prolong stabilizer life | As needed |
“`
Frequently Asked Questions
How to Fix Mechanical Keyboard Stabilizers?
You fix mechanical keyboard stabilizers by removing keycaps, disassembling them, applying lubricant, trimming clips, using band-aid mods, straightening wires, and carefully reassembling to guarantee proper alignment, reduced noise, and smoother key presses.
What Is the Best Lubricant for Stabilizers?
The best lubricant for stabilizers is Krytox 205g0, known for smoothness and noise reduction; however, if you want premium performance, Extreme Fluoro offers superior stability and feel. Apply sparingly for ideal results.
How to Disassemble Keyboard Stabilizer?
You start by removing keycaps and switches, then press down on stabilizer clips to unclip the housing. Lift it straight up until it snaps, then carefully separate the components for cleaning or modifications, keeping parts oriented properly.
Can You Lube Stabilizers Without Removing Them?
Yes, you can lube stabilizers without removing them by carefully applying lubricant around the wire and housing gaps through the keycap stems. However, full disassembly guarantees better coverage, effectiveness, and noise reduction for smoother, more reliable stabilizer performance.
In Summary
By mastering stabilizer repair and upgrade techniques, you can greatly improve your keyboard’s feel and sound. Regular maintenance keeps your stabilizers in top shape, ensuring smooth, quiet keystrokes during long typing sessions. Whether you’re clipping, lubing, or upgrading, taking these steps empowers you to customize your keyboard for peak performance. Keep experimenting and troubleshooting to enjoy a reliable, satisfying typing experience tailored just for you.



