
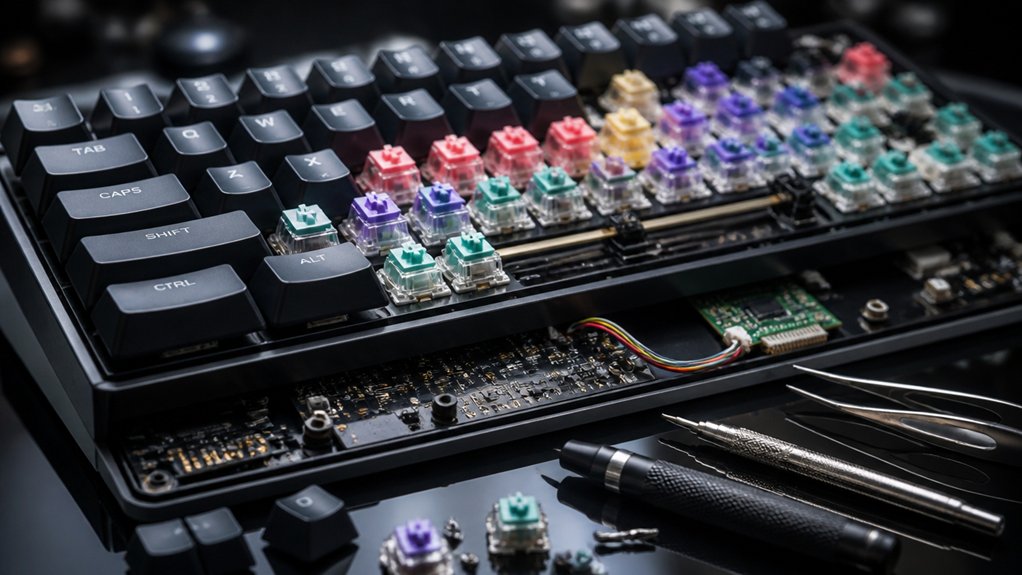
To disassemble a keyboard effectively, start by preparing a tidy workspace with good lighting and gather the right tools like a magnetic Phillips screwdriver and small prying tools. Carefully photograph the layout, then gently remove keys and screws, organizing them for easy reassembly. Handle circuit boards carefully, avoiding static and moisture. Follow a systematic process for reassembly, tighten screws evenly, and check for proper key response. Continuing with this guide will teach you all the essential steps for a safe, successful disassembly.
Why Proper Disassembly Is Key to Keyboard Maintenance
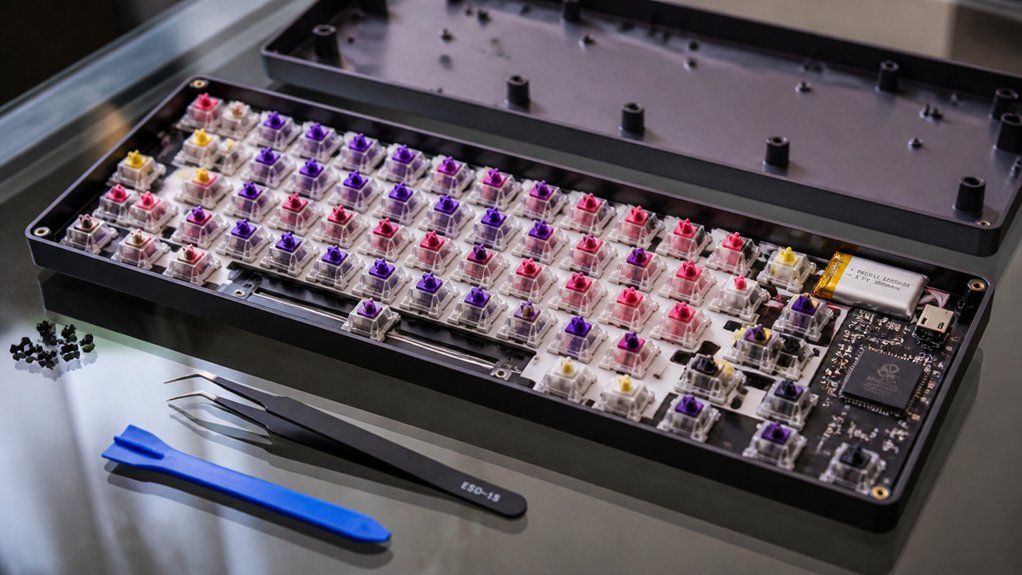
Proper disassembly is essential for maintaining your keyboard because it helps prevent damage to sensitive components like circuit boards and stabilizer bars. When you perform proper disassembly, you identify and remove all screws, including those hidden under labels or rubber feet, ensuring the keyboard halves come apart without cracks or warping. Using the right tools, such as a magnetic Phillips screwdriver and flathead for prying, minimizes the risk of stripping screws or snapping key tabs. Document the key order and layout before removing keys; this step guarantees accurate reassembly and preserves correct functionality and ergonomics. Additionally, understanding the soldering process involved in keyboard assembly can help you troubleshoot and repair issues more effectively when disassembling and reassembling. Methodical disassembly also allows for targeted cleaning of gunk around keys and between circuit board layers, directly boosting your keyboard’s responsiveness and lifespan. Proper disassembly is key to effective, safe maintenance.
Preparing Your Workspace and Tools Before You Start
Setting up your workspace and gathering the right tools are essential steps before disassembling your keyboard. Make sure your workspace is clean, flat, and free of dust and debris to prevent losing small parts during disassembly. Using appropriate tools such as a magnetic Phillips screwdriver and a flathead screwdriver or small pliers for key removal will help avoid damage. Use containers or bottle caps to securely hold screws and tiny components, making certain they don’t get misplaced. It’s also wise to take clear photographs of your keyboard layout before starting, as this helps with accurate reassembly later. Confirm you have sufficient lighting, and consider having compressed air or cleaning supplies ready to make the internal cleaning process easier. Proper preparation helps make disassembly smoother and less stressful, especially when dealing with small, delicate parts and replacement nozzles.
How to Take Photos to Document Your Keyboard Layout
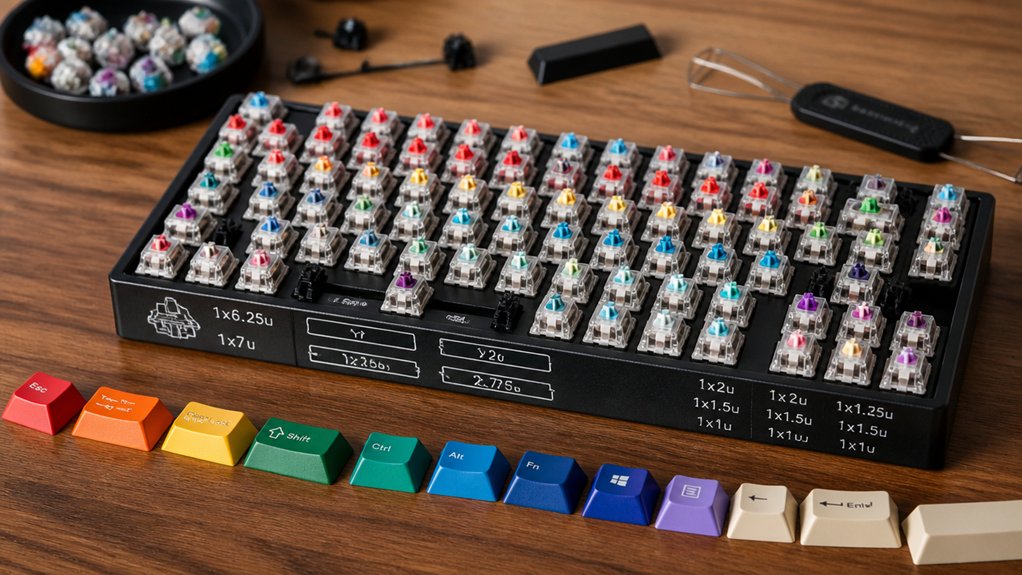
Have you ever struggled to reassemble a disassembled keyboard because you forgot how the keys were arranged? To avoid this, take clear, well-lit overhead photos of your keyboard before disassembly. Capture the entire layout, especially unique keys like the space bar, shift keys, and arrow keys, to remember their orientation and any stabilizers. Photograph both the top and underside of keyboard halves to record screw locations, hidden components, and labels. Keep keys in position during photos and use a consistent background to avoid confusion. Additionally, document any non-standard or custom key arrangements separately. Use this simple table to plan your shots:
| Key Type | Placement | Special Features |
|---|---|---|
| Space Bar | Center, bottom row | Stabilizer included |
| Shift Keys | Left and right sides | Unique size/design |
| Arrow Keys | Bottom right corner | Position specifics |
| Function Keys | Top row, above number keys | Marker for placement |
| Customized Keys | Non-standard positions | Separate documentation |
For optimal accuracy, include close-up images of any hot-swap socket configurations, ensuring you remember the socket type and switch compatibility for future builds.
How to Safely Remove Keys From Your Keyboard
Removing keys from your keyboard safely requires patience and attention to detail. To start, use a small flathead screwdriver or pliers to gently pry the keys by pushing or gripping their tabs without applying excessive force. Keep in mind that keys usually pop out from the front side, so lift them carefully. Begin with easier keys, avoiding larger ones like the space bar, which might’ve a metal spring or sway bar that needs cautious handling. Keep the keys organized in their original order to make reassembly simpler and prevent losing small components. Before removing, take photos of your keyboard layout, especially focusing on the keyboard back, to serve as a reference. This will guarantee you reattach each key correctly and safely. Additionally, using a keyboard switch puller can help remove switches without damaging the parts or causing injury.
How to Find and Remove Screws From the Bottom Panel
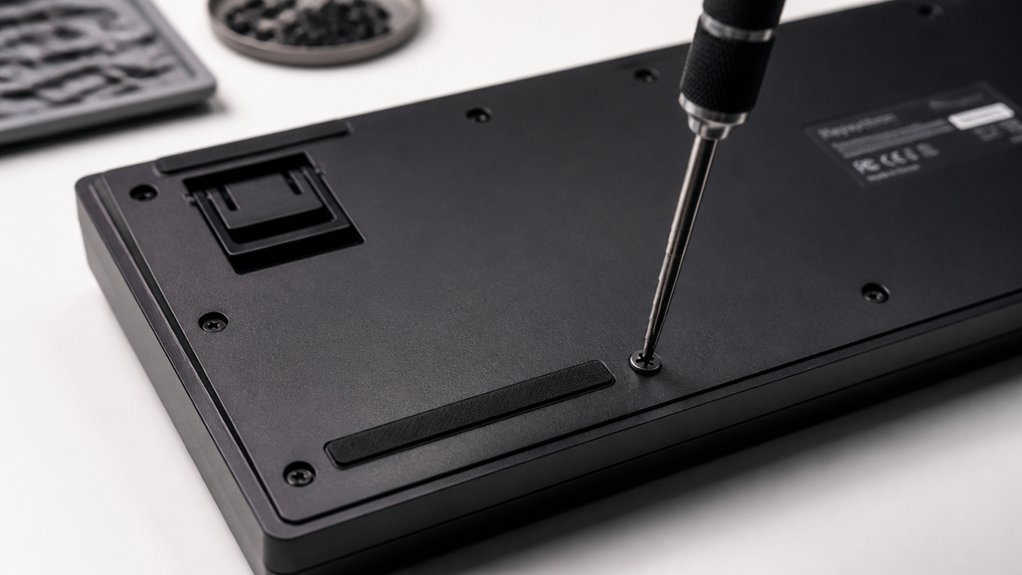
To locate the screws holding the bottom panel in place, flip the keyboard over carefully and inspect all areas where the panel meets the case. Look for screws around the edges, and don’t forget to check beneath labels, stickers, or rubber feet, as they often hide screws.
Use a Phillips screwdriver, preferably magnetic, to remove each screw smoothly—turn left to loosen and right to tighten. Keep screws organized in a small container or a bottle cap so you don’t lose any during disassembly.
Remember, avoid overtightening when reassembling to prevent damaging plastic parts.
- Flip the keyboard over gently, examining all edges.
- Check beneath stickers, rubber feet, or labels.
- Use a magnetic Phillips screwdriver for easy removal.
- Keep screws organized during the process.
Opening Your Keyboard Case Without Damage
Careful prying is essential to open your keyboard case without causing damage. First, flip the keyboard over and remove all screws with a Phillips screwdriver, keeping them in a safe container. Check for hidden screws under labels and rubber feet.
Once free, gently insert a flathead screwdriver or prying tool at a corner, working slowly around the edges to separate the two halves. Apply moderate force, avoiding excessive pressure that might crack the plastic casing.
When opening, be cautious around the circuit boards inside, as forceful prying can damage delicate components. Keep track of screw sizes and positions to guarantee smooth reassembly.
Always work gradually, and don’t force the case open, especially around internal components, to prevent unintended damage. Using sturdy workspace support can help stabilize the keyboard during disassembly.
Handling Internal Components and Circuit Boards Carefully
When handling internal components, lift circuit boards carefully to avoid damaging the printed conductive lines. Don’t touch the circuitry directly, and use compressed air to remove dust without risking harm. Avoid using excessive force when prying apart keyboard halves, keeping spacer layers intact to prevent shorts. Additionally, consider employing moisture-free formulas to ensure sensitive electronics remain dry during cleaning.
Handle Circuit Boards Gently
Handling circuit boards carefully is essential to prevent damage to the delicate printed lines and circuitry inside your keyboard. When you handle circuit boards gently, you reduce the risk of accidental breakage or short circuits.
Always avoid touching the flexible circuit board layers directly; instead, use compressed air to clean dirt between layers without lifting or bending them unnecessarily. Remember, the electronic board has two layers separated by a spacer that prevents shorts—never remove or damage this spacer during disassembly.
Also, be mindful when prying apart keyboard halves—start from the corners and watch for hidden screws beneath labels or rubber feet. To keep things organized and avoid needless strain, store screws and small parts securely and refrain from overtightening during reassembly.
Being aware of ESD safety measures is crucial to prevent electrostatic discharge from damaging sensitive electronic components during handling.
Avoid Touching Printed Lines
Avoid touching the printed lines on circuit boards to prevent accidental damage and malfunction. When handling internal components, always hold the board by the edges and avoid applying pressure on the conductive paths. Using residue-free formulations can help minimize the risk of leaving contaminants that might interfere with electrical contacts.
Use compressed air to blow away dirt and debris from between circuit boards instead of using physical contact, which can harm delicate traces. Be gentle when lifting flexible circuit layers to prevent tearing or disrupting printed connections.
Working on a clean, static-free surface protects the electronic components and reduces static discharge risk. Remember, touching printed lines can cause permanent damage that affects keyboard functionality.
If you must touch the board, do so carefully and minimally, ensuring you don’t disturb or damage the sensitive printed connections. This cautious approach helps keep your disassembly safe and effective.
Use Compressed Air Properly
Using compressed air correctly is essential to keep your keyboard’s internal components safe. When blowing air inside, lift each flexible circuit board layer carefully, avoiding contact with the printed circuit lines. A helpful tip is to use tools like Helping Hands Magnifier, which can assist in precisely positioning and inspecting small parts before and after cleaning. Blow compressed air gently between flexible circuit board layers to remove dirt and debris without disassembling the solid circuit board. Never spray air directly on the main solid circuit board, as debris is unlikely to gather there and damage could occur. Use canned air from office or department stores in short bursts to prevent moisture buildup inside your keyboard. Make sure the keyboard is open and stable on a clean surface to avoid accidents. Applying air with controlled force helps prevent dislodging or damaging internal components.
How to Clean Your Keyboard’s Inside Parts and Circuit Boards
When cleaning inside your keyboard, handle circuit boards gently and avoid touching the printed lines to prevent damage. Use proper tools like compressed air and soft brushes to remove debris without harming delicate components. Additionally, employing anti-static brushes protect sensitive electronics from static discharge and static buildup during cleaning. Focus on cleaning carefully to keep your keyboard functioning properly and extend its lifespan.
Handling Circuit Boards Carefully
To clean your keyboard’s circuit boards without causing damage, you need to handle each flexible circuit layer with care. Lift each layer gently, avoiding contact with the printed lines to prevent tearing or damage.
Use compressed air to blow away dirt from between the flexible circuit boards, but be careful not to remove the solid circuit layer.
Only clean the circuit boards if keys aren’t functioning correctly, since debris usually won’t build up beneath the solid board.
Never rinse or spray liquid directly onto circuit components, as this risks electrical damage. Keep all electronic parts handled delicately and remember to track screws and their placements for a smooth reassembly.
- Gently lift each circuit layer without touching printed lines
- Use compressed air to blow away dirt, avoiding the solid board
- Only clean if keys malfunction, not from dirt buildup
- Never apply liquids directly to the circuit boards
Utilizing Proper Cleaning Tools
Cleaning the inside parts of your keyboard requires careful selection of tools to avoid damage. Use a flathead screwdriver and small pliers to carefully remove keys by pushing or gripping their tabs—these work well for maintaining key order during reassembly.
When cleaning circuit boards, avoid rinsing them; instead, gently lift each flexible layer and blow away dirt with compressed air, which works well without risking damage to printed lines.
To remove screws securing the plastic key housing, use a magnetic Phillips screwdriver, and handle electronic boards delicately to prevent damaging fragile components.
Compressed air cans, available at office or department stores, are ideal for cleaning between flexible circuit layers and debris removal, as they work well without disassembly of solid circuit boards.
Thoroughly dry keys and the keyboard front before reassembling to prevent moisture issues.
Best Ways to Clean and Maintain Keys Without Damage
Properly cleaning keyboard keys requires a delicate approach to prevent damage. To do so, use small pliers or a flathead screwdriver to gently pry keys from their tabs, pushing the tabs together to avoid breaking them.
Gently pry keys with small tools, ensuring tabs stay intact to avoid damage.
Start removing keys from the front so they drop out cleanly, and consider labeling or photographing key positions for easy reassembly.
When cleaning, focus on the key surfaces to remove sticky residues, using mild soapy water or disinfectant sprays. Avoid rinsing circuit boards—only rinse keys and the keyboard front, then make certain all parts are thoroughly dried.
Handle the space bar cautiously due to its metal spring; you might prefer leaving it in place if unsure to prevent damage.
- Pry keys gently to avoid breaking tabs
- Remove keys from the front for clean drops
- Clean surfaces with mild soap or disinfectant
- Be cautious with the space bar’s spring
Step-by-Step Guide to Reassemble Your Keyboard Properly
When reassembling your keyboard, make sure you insert each key in its correct spot and press firmly until it clicks into place.
Take your time aligning the two halves properly and tighten the screws gradually from the corners inward to prevent damage. Use reference images if needed to verify key positions and guarantee everything fits securely.
Correct Key Placement
Have you taken photos of your keyboard layout before removing the keys? Doing this helps guarantee the correct placement of each key thats inside your keyboard during reassembly.
Start by installing larger keys first, like the shift key and space bar, aligning their springs and sway bars carefully. Use distinct features such as grooves, curvature, and key size to orient each key correctly.
Remember, although the left and right Alt keys are interchangeable, Windows keys need the correct corner orientation. For specific keys like arrow keys, refer to your photo or a QWERTY layout, since their side grooves and sizes vary.
Press each key firmly until you hear a click, confirming its proper locking into the spacer and grooves for full functionality and correct alignment.
Proper Screw Tightening
To guarantee your keyboard is reassembled correctly, start by loosely inserting screws at each of the four corners. This good idea guarantees even alignment before tightening everything down.
Next, tighten center screws to help distribute pressure evenly across the assembly. Remember to follow the “lefty loosie, righty tighty” rule—tighten screws progressively and evenly in multiple passes. This prevents warping or cracking plastic parts.
Be careful not to overtighten, as this can damage the plastic casing or strip the threads. Using a magnetic Phillips screwdriver is a good idea because it improves grip on tiny screws and prevents losing them inside the keyboard.
Take your time and check each screw to guarantee everything is secure without over-tightening, giving your reassembled keyboard long-lasting stability.
Tips for a Secure and Accurate Reassembly
Ensuring a secure and accurate reassembly starts with paying close attention to detail throughout the process. Taking detailed photos of the keyboard layout and key placement helps us remember exact positions and orientations, preventing errors.
Keep all screws and small parts organized separately and labeled—using containers or bottle caps—which helps us avoid losing essential components. Note the specific characteristics of keys like the space bar spring, arrow keys, and window keys so you can reinstall them correctly.
When replacing screws, start with the four corners, then move inward, tightening gradually to prevent stripping or misalignment. Using reference images or layouts during reassembly helps us verify key positions, especially for keys with unique grooves or shapes.
Staying meticulous guarantees a smooth, precise reassembly.
Final Checks Before Using Your Cleaned Keyboard
Before you start using your cleaned keyboard, compactly verify that everything is in place. Guarantee all keys are back together correctly, confirmed by a gentle click sound for each. Make sure the space bar spring is secure, providing consistent response and stability. Check that the keyboard halves are fully aligned and snapped together without gaps before replacing the screws. Tighten screws gradually from the corners inward to avoid damage. Test each key’s function to identify any missed or misaligned keys early. Do a final visual inspection, confirming that no parts are loose. This guarantees your keyboard is properly reassembled, safe, and ready to use. Here’s a quick checklist to ease your mind:
| Step | What to Check | Result |
|---|---|---|
| Keys | Properly in place, confirm with clicks | All keys respond correctly |
| Space Bar | Spring securely fitted | Even key response |
| Alignment | Fully snapped with no gaps | Back together smoothly |
| Screws | Tightened from corners inward | Firm closure |
| Function Test | Keys respond normally before use | Ready for action |
Common Mistakes to Avoid During Disassembly and Reassembly
Disassembling and reassembling a keyboard requires careful attention to avoid common pitfalls that can complicate the process or cause damage. Im going to show you some mistakes to avoid for a smoother experience.
- Losing screws: Store them securely in a container like a bottle cap to prevent missing pieces during reassembly.
- Forcing the keyboard open: Use moderate force at one corner, instead of ripping it apart on your lap, to avoid dirt contamination or damage.
- Forgetting key placement: Photograph or note key positions beforehand, especially for non-uniform keys like the space bar or arrow keys.
- Overtightening screws: Tighten screws just enough to hold components securely without cracking plastic parts or damaging the housing.
Avoid these common mistakes to guarantee a successful disassembly and reassembly process.
Frequently Asked Questions
How Do I Dismantle a Keyboard?
You remove all screws, check under labels and rubber feet, then carefully pry the halves apart starting from a corner. Gently remove keys, disconnect circuit layers, and organize parts with photos for easy reassembly.
Can You Pop the Keys off a Keyboard?
Yes, you can pop the keys off a keyboard. Carefully pry them with a flathead screwdriver or small pliers, noting the key order and handling larger keys gently to avoid damaging springs or sway bars underneath.
What Can I Use Instead of a Key Puller?
You can use small flathead screwdrivers, needle-nose pliers, a plastic card, or tweezers to carefully pry or grip keys. Just make sure you apply gentle force to avoid damaging clips or the key mechanism during removal.
What Tool Do You Use to Take Apart a Keyboard?
You use a Phillips screwdriver to remove screws, a flathead or pry tool for casing, small pliers or a keycap puller for keys, and compressed air to clean. Keep screws organized in a container during disassembly.
In Summary
Disassembling your keyboard carefully guarantees you can clean or repair it effectively. Take your time, document everything with photos, and use the right tools to avoid damage. Follow each step methodically, double-check your work during reassembly, and don’t rush the process. With patience and attention to detail, you’ll have a clean, well-functioning keyboard. Remember, avoiding common mistakes makes all the difference in keeping your device safe and functional.



