
Pick a switch that fits your space, typing style, and hand strength. If you work in a quiet office, go for silent linear or lightly tactile options like Cherry MX Silent Red or Kailh Box Brown to keep noise low. For gaming, choose a smooth, low‑force linear switch such as Cherry MX Red or Kailh Silver for rapid actuation. Programmers often prefer tactile bumps—Cherry MX Brown or Gazzew Boba U4T—for feedback without loud clicks. Match the actuation force (40‑45 gf for light hands, 50‑60 gf for medium) and pre‑travel (short for speed, longer for comfort) to your preference, and consider hot‑swap boards to test different switches before committing. Continue and and you’ll discover detailed recommendations for each use case.
Identify Your Typing Environment & Noise Tolerance for Mechanical Keyboard Switches

Where do you type most of the time—quiet home office, bustling coworking space, or a shared dorm? You’ll want to match your environment’s noise level with the right switches.
In a quiet home office, linear switches or Cherry MX Brown or Kailh Box Brown tactile switches keep the sound low while still giving feedback. In open offices or dorms, avoid clicky switches like Cherry MX Blue, which produce loud clicks that can distract others.
Linear or brown tactile switches keep noise low; avoid clicky blues in shared spaces.
If you need near‑silence, silent linear switches such as Cherry MX Silent Red mimic laptop acoustics and blend into noise‑sensitive settings. Remember, housing and LED design affect resonance, so test the actual sound before committing.
Choose the switch type that respects your space and your coworkers’ ears.
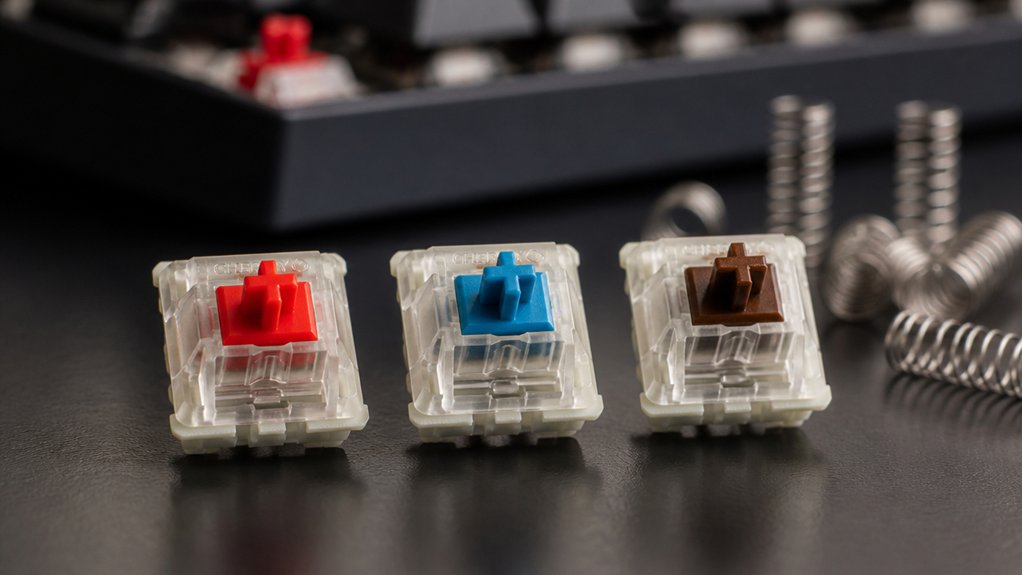
Compare Linear, Tactile, and Clicky Mechanical Keyboard Switches
What feels best under your fingers? You’ll notice that linear mechanical keyboard switches glide with a smooth, consistent keystroke and usually carry a lighter actuation force, perfect for quiet, rapid typing or gaming.
Tactile switches give you a subtle bump at the actuation point, balancing feedback and quieter operation, which helps reduce errors in office environments.
Clicky switches add an audible click to that tactile bump, creating a distinct rhythm that many typists love but can be disruptive in shared spaces.
- A linear switch feels like a sleek, silent glide across a polished road.
- A tactile switch feels like a gentle hill you crest before the key registers.
- A clicky switch feels like a crisp snap, echoing each press with a satisfying pop.
Match Actuation Force to Hand Strength

You’ll first assess your grip strength to see how much force you can comfortably apply, then pick a switch whose actuation weight lines up with that measurement.
If you’re on the lighter side, aim for 40‑45 gf switches; if you’re stronger, 60 gf or higher will keep accidental presses at bay. Matching the two guarantees you type longer without fatigue.
Assess Your Grip Strength
Ever wondered whether your keyboard’s actuation force matches your hand’s grip strength? Start by feeling how hard you push a key to reach the actuation point.
If a light tap feels enough, you likely need a low‑force switch; if you have to press harder, a heavier switch will be more comfortable. Test a few Cherry MX Red keys for a 40‑45 gf feel, then try Cherry MX Black for a 60‑65 gf resistance.
Note the feedback at the actuation point and how your fingers react over a minute of typing.
- Your fingers glide effortlessly on a light switch, reducing fatigue.
- A firmer keystop stops accidental presses when you have a strong grip.
- Medium‑weight switches give balanced feedback for average hand strength.
Choose Compatible Actuation Weight
A good rule of thumb is to match the switch’s actuation force to the strength of your grip: lighter keys (40‑45 gf) feel effortless for weaker fingers, while heavier ones (60 gf or more) give a firmer stop that prevents accidental presses for strong hands.
When you test mechanical switches, focus on the actuation force that feels natural for your hand strength. Light switches boost typing comfort for delicate fingers, but they may cause accidental hits if you’re a heavy typist. Heavy switches add resistance, reducing fatigue during long sessions for strong hands.
Medium‑weight switches (50‑60 gf) strike a balance, offering responsive feedback without over‑exertion. Try different switch types, compare actuation versus bottom‑out force, and settle on the weight that minimizes strain while keeping your typing experience smooth.
Pre‑Travel Distance: Speed & Comfort Impact
You’ll notice that a shorter pre‑travel distance lets you fire keys faster, which is perfect for gaming or rapid typing.
When the travel is longer, the key movement feels more deliberate and reduces the chance of accidental presses, boosting comfort.
Your choice hinges on whether you value speed or a cushioned feel.
Pre‑Travel Speed
How far your finger travels before a switch actuates dramatically shapes both speed and comfort. Short pre‑travel distance means the key registers almost instantly, so your typing speed spikes and you hit the actuation point with minimal effort.
Cherry MX Speed switches exemplify this, delivering rapid key registration for gaming and fast‑pacing work. However, if the distance is too tiny, you risk accidental presses; a balanced pre‑travel distance keeps responsiveness while preserving control.
- A 1.2 mm pre‑travel on Cherry MX Speed feels like a light tap that snaps into actuation.
- A 2.0 mm pre‑travel on Kailh Box Browns offers a deliberate, smoother key‑down rhythm.
- A 2.3 mm pre‑travel on Gazzew Boba U4T gives a generous finger travel before key registration, enhancing comfort.
Comfort Through Travel Length
When you prioritize comfort over sheer speed, longer pre‑travel distances give your fingers a smoother, more cushioned descent before actuation, reducing fatigue during long typing sessions.
In mechanical keyboards, a pre‑travel distance of around 2 mm or more lets each keystroke feel softer, spreading the force across a broader arc. Switches feel more forgiving, especially tactile varieties like Gazzew Boba U4T, which combine that extra travel with noticeable tactile feedback.
The added cushion eases strain, making marathon typing or coding marathons less taxing. While short‑travel switches win on speed, the longer travel length boosts typing comfort, letting you maintain accuracy without sacrificing endurance.
Choose based on how much cushioning you need for sustained use.
Pick a Cherry MX Switch for Your Needs
Which Cherry MX switch fits your workflow? If you crave a tactile bump without loud clicks, Cherry MX Brown delivers a quiet 45 gf actuation and 2 mm pre‑travel, perfect for office typing.
Cherry MX Brown offers a quiet tactile bump with 45 gf actuation and 2 mm pre‑travel for office typing.
For audible feedback, Cherry MX Blue adds a clicky snap at 50 gf, satisfying home workers who love sound.
Gamers chasing speed gravitate toward Cherry MX Red’s smooth linear feel at 45 gf, while Cherry MX Silent Red offers the same linear action with a muted profile for noise‑sensitive spaces.
Cherry MX Speed Silver trims pre‑travel to 1.2 mm, giving rapid activation for competitive play.
- Feel the quiet bump of Cherry MX Brown as you type emails.
- Hear the crisp click of Cherry MX Blue while coding late at night.
- Experience lightning‑fast linear presses with Cherry MX Speed during e‑sports.
Pick a Kailh Switch for Your Needs
After exploring Cherry MX options, let’s look at Kailh switches that cater to similar preferences.
If you crave a gentle tactile bump without a loud click, the Box Brown offers 50 gf actuation force and a 1.8 mm pre‑travel, sitting snugly between clicky and linear feels. For a light, ultra‑smooth linear experience, the Silver delivers 40 gf actuation and a 1.1 mm travel, perfect for quiet typing. The Box Black gives a springy linear response at 60 gf, easing finger fatigue compared to traditional blacks.
Want a crisp clicky click? Gold provides a precise audible click at 60 gf with 1.4 mm travel. Finally, Copper supplies a “Brown lite” tactile bump at 40 gf and 1.1 mm travel, ideal for quick, low‑force feedback.
Choose the switch that matches your actuation force comfort and sound preference.
Bottom‑Mount vs. Box‑Mount: Which Feels Right for You?

You’ll notice that bottom‑mount switches work with almost any keycap set, while box‑mount ones often need caps molded for their enclosed stem.
The actuation feel also shifts: box‑mounts give a tighter, more stable keystroke, whereas bottom‑mounts feel more traditional and a bit wobblier.
Finally, consider how each design impacts your keyboard’s aesthetics and lighting, since the stem shape can affect how LEDs shine through.
Mount Mount Compatibility Considerations
Bottom‑mount switches use an open cross‑shaped stem that fits most traditional keycaps, while box‑mount switches—like Kailh Box—enclose the stem in a box‑shaped housing for extra stability and dust protection.
You’ll notice that bottom-mount switches give you broader keycap compatibility, letting you swap in countless aftermarket sets without hassle. Box-mount switches, on the other hand, lock the stem in a tighter housing, boosting switch stability and keeping dust out, but they require keycaps shaped for the box cross.
When you decide which mount fits your build, weigh the trade‑off between the freedom of bottom-mount keycap options and the solid feel of box-mount switches.
- A classic keycap set slides onto a bottom‑mount stem effortlessly.
- A rugged, dust‑proof keyboard uses box‑mount switches for tighter wobble control.
- Mixing mounts forces you to pick compatible keycaps for each style.
Actuation Feel Differences
When you compare the tactile experience of bottom‑mount and box‑mount switches, the most noticeable difference is stability: box‑mount designs lock the stem in a tight housing, cutting wobble and delivering a crisp, precise actuation, while bottom‑mount switches let the stem move more freely, offering a softer, more traditional feel that many typists still enjoy.
The mechanical switch’s key press feels tighter with a box design, giving you consistent feedback and reduced travel variance. In contrast, a bottom‑mount switch yields a slightly looser sensation, which some users associate with a classic typing rhythm.
Because the box design minimizes wobble, you’ll notice smoother, repeatable keystrokes, whereas the bottom‑mount’s open housing may feel more forgiving but less precise. Choose the feel that matches your typing style.
Aesthetic and Lighting Options
Stability and wobble aren’t the only factors that set bottom‑mount and box‑mount switches apart; their designs also dictate how your keyboard looks and glows.
Bottom‑mount stems leave a wide opening for LEDs, letting switch makers push bright, uniform lighting through the keycap. Box‑mount stems hide the LED behind a tighter housing, creating a more focused glow that can accentuate each key’s outline.
The choice influences keycap compatibility too—cross‑mount caps showcase the light fully, while box‑mount caps may mask it, shaping your overall aesthetic.
- A sleek, minimalist board with box‑mount switches that beam subtle halos from under each key.
- A vibrant, RGB‑heavy setup where bottom‑mount switches flood every keycap with vivid color.
- A custom themed layout that mixes both mounts for contrast, using specific keycaps to highlight lighting effects.
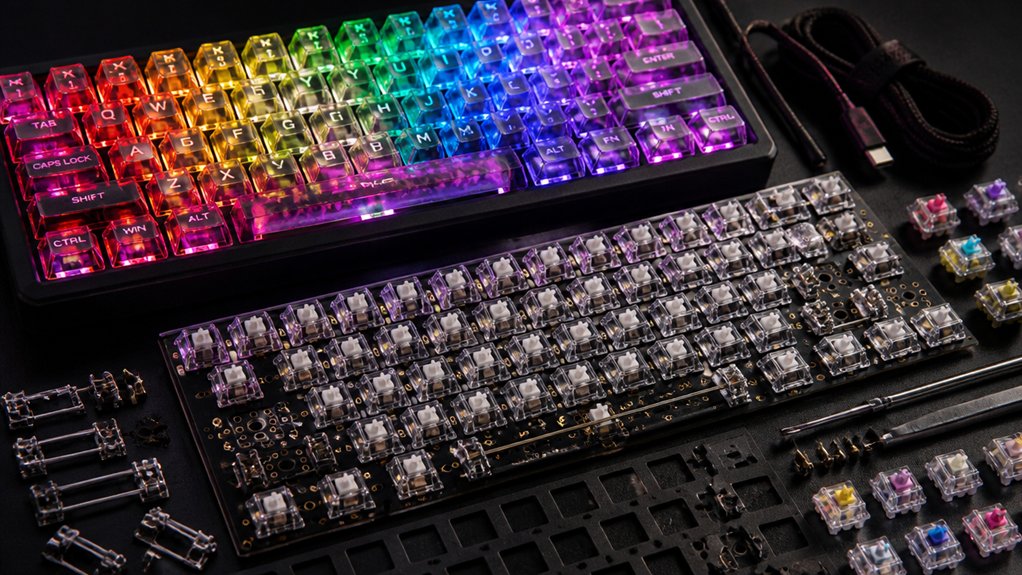
Hot‑Swap Basics: Change Switches Solder‑Free

If you want to swap a switch without soldering, just pull the old one out and drop a new one into the hot‑swap socket. The hot‑swap design lets you change switches instantly, so you can test different mechanical switches and settle on the feel you love.
Before you start, verify switch compatibility—most sockets accept 3‑pin or 5‑pin layouts, but some specialty switches won’t fit. This plug‑and‑play approach cuts repair time, lets you replace faulty parts, and extends your keyboard’s life.
You can mix tactile, linear, and clicky switches on a single board, creating a personalized typing experience that evolves as your preferences change. Hot‑swap keyboards empower customization without the hassle of soldering.
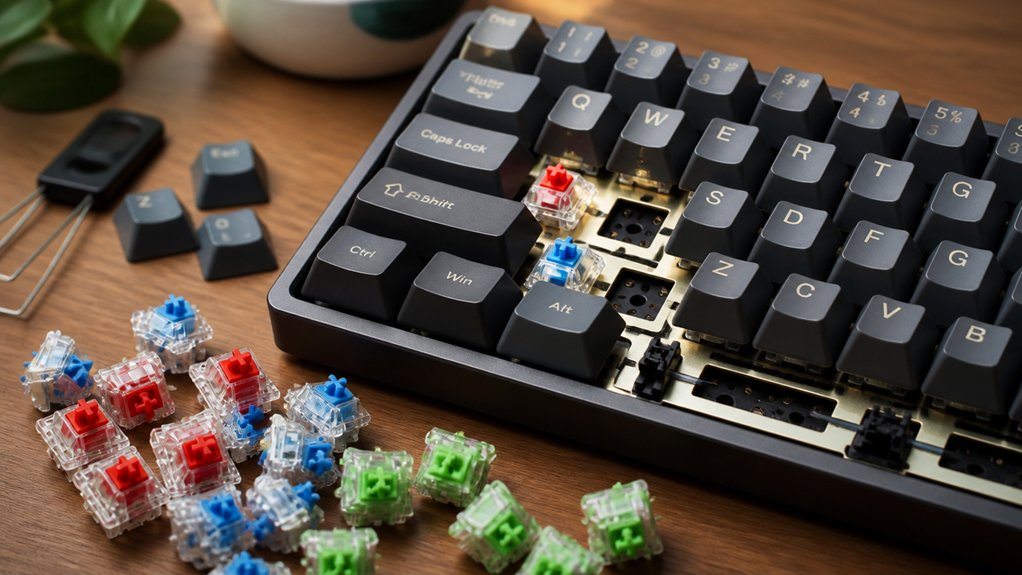
Test Switches Before You Commit?
Curious about which switch truly fits your typing style? You should test switches in person before committing. Visiting a store with a hands‑on testing station lets you compare tactile, linear, and clicky options side‑by‑side.
Test switches in person to feel, hear, and compare tactile, linear, and clicky options side‑by‑side.
Feel the actuation force, hear the click, and gauge travel distance. Those real‑world impressions reveal preferences that specs alone can’t convey and prevent long‑term regret.
- You press a smooth linear switch, noticing its buttery glide and low actuation force.
- You tap a tactile switch, feeling a subtle bump that guides each keystroke.
- You hit a clicky switch, hearing a crisp snap that satisfies your auditory feedback needs.
Best Switch Types for Gaming, Programming, and Office Work
When you choose a keyboard for gaming, programming, or office work, the switch type makes the biggest difference in comfort and performance.
For gaming, you’ll want linear Cherry MX switches like the Red or Kailh Silver; they glide with a 40 gf actuation force and minimal pre‑travel, letting you fire repeats instantly.
Programming benefits from tactile switches—Cherry MX Brown or Gazzew Boba U4T give you a noticeable bump without a click, reducing errors while staying quiet.
In an office, silent or lightly tactile options such as Cherry MX Silent Red or Kailh Box Brown keep noise down and provide a smooth, comfortable feel for long typing sessions. Pre‑lubricated tactile stems, like Akko V3 Cream Blue Pro, further enhance stability for extended work.
Choose the switch that matches your primary task, and you’ll notice the difference right away.
Final Checklist: Preferences, Budget, Build
Choosing the right switch is only half the battle; the next step is to match that choice to your typing feel, budget, and build plan.
Choosing the right switch is half the battle; match it to feel, budget, and build plan.
First, nail down your preferences: linear smoothness, tactile bump, or clicky click. Then check your budget—premium tactile like Gazzew Boba U4T cost more, while pre‑lubricated Akko V3 Cream Blue Pro stay affordable.
Finally, decide on the key build: a custom soldered plate lets you fine‑tune every switch, whereas a hot‑swappable board offers quick swaps and future upgrades without soldering.
- A quiet office desk with silent linear switches, low‑cost hot‑swap case.
- A gaming rig craving clicky feedback, mid‑range budget, custom soldered PCB.
- A hobbyist’s desk with tactile bump, premium budget, modular hot‑swap chassis.
Frequently Asked Questions
Which Type of Keyboard Switch Is Best?
You’ll find the best switch by matching feel, sound, and force to your habits—linear for smooth, quiet speed; tactile for balanced bump without click; clicky for audible feedback, then test to confirm.
What Switch Should I Get for My Keyboard?
You should pick a switch that matches your typing style: go linear for smooth, fast presses; tactile for a quiet bump; clicky for audible feedback. Test a few, then decide.
Do Pro Gamers Use Linear or Tactile?
You’ll find most pro gamers favor linear switches for their smooth, low‑force actuation, but some choose tactile switches when they need extra feedback to avoid accidental presses in precision‑focused games.
How to Pick the Right Keyboard Switch?
You should match the switch to your feel, noise tolerance, and hand strength—pick clicky for audible feedback, tactile for a quiet bump, or linear for smooth, silent presses, and test them in person.
In Summary
By now you’ve matched your environment, noise tolerance, and hand strength to the right switch family—linear for speed, tactile for feedback, clicky for audible confirmation. Pick a Cherry MX that fits your actuation force and pre‑travel preferences, and don’t forget hot‑swap compatibility for future tweaks. Test a few samples, then lock in the switch that feels natural for gaming, coding, or office work. Keep your budget and build goals in mind, and you’ll enjoy a keyboard that’s both comfortable and efficient.

Leave a Reply