
To quiet your mechanical keyboard and reduce ping, start by adding sound-absorbing foam inside the case and placing mats under your keyboard. Install rubber O-rings on key stems to cushion impact noise, especially for larger keys. Lubricate switches and stabilizers carefully to smooth out keystrokes and lower noise. Keep keycaps tight and free of debris, and tighten stabilizer screws to prevent rattles. Combining these tips can make a noticeable difference—keep going to discover more ways to silence your keyboard.
What Causes Mechanical Keyboard Ping and Noise?
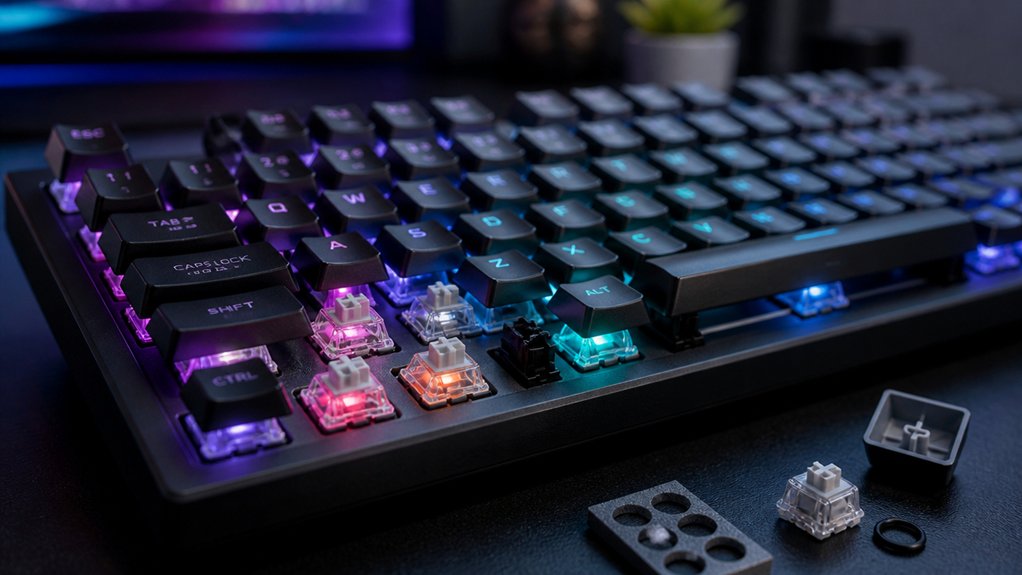
Have you ever wondered why mechanical keyboards sometimes sound louder than expected? The main reason is the noise level caused by key bottoming out—when keys hit the switch bodies, creating a loud plastic-on-plastic impact.
Key bottoming out creates loud plastic-on-plastic impacts, amplifying the sound of mechanical keyboards.
Inside most keyboards, a solid metal backplate amplifies this sound, acting like a resonance board for keystrokes. Even quieter switches like Cherry MX Reds aren’t completely silent; their mechanical design still produces noticeable noise compared to rubber dome keyboards.
The materials used in the frame also contribute, especially rigid metals that reflect sound. Additionally, larger keys, with multiple stem contact points, generate more noise during typing.
All these factors combine, making the noise level of a mechanical keyboard more pronounced than you might expect. Proper stabilizer tuning kits and sound dampening techniques can significantly reduce these noises, enhancing the overall typing experience.
How to Add Sound-Absorbing Material Inside Your Keyboard
To effectively reduce the noise produced by your mechanical keyboard, inserting sound-absorbing materials inside can make a noticeable difference.
One simple method is adding rubber O-rings beneath each keycap, which absorb impact noise when your keys bottom out on the switch stems. This makes your typing much quieter and reduces harsh plastic-on-plastic sounds.
Consider these tips:
- Remove keycaps with a keycap puller before installing O-rings.
- Place O-rings around the center columns of each switch stem.
- Use multiple O-rings on larger keys like spacebar and backspace for even dampening.
- A kit with about 135 O-rings costs around $10 and can fully outfit a standard keyboard.
- Ensuring proper fit and compatibility with your switches is crucial for optimal noise reduction material compatibility.
These simple steps greatly lower typing noise and help you achieve a much quieter keyboard experience.
How to Install Rubber O-Rings to Reduce Key Impact Noise
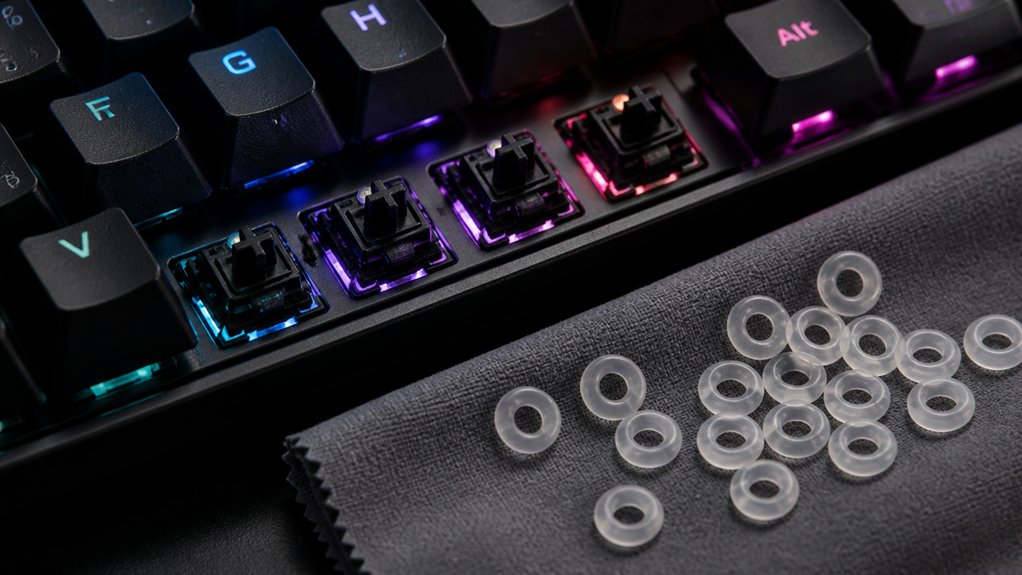
To get started, carefully remove all your keycaps using a keycap puller.
Next, slide an O-ring around the center column of each switch stem, making sure it’s snug but not too tight.
A properly fitted O-ring can help absorb vibrations, reducing keystroke noise further.
Finally, reattach the keycaps securely to complete the process.
Removing Keycaps Properly
Wondering how to install rubber O-rings on your mechanical keyboard to reduce noise? Start by carefully removing each keycap using a keycap puller or plastic tool. Be gentle to avoid damaging the stems.
For larger keys like the spacebar and backspace, you’ll need to remove multiple keycaps and install multiple O-rings on each stem to maximize noise dampening.
When positioning the O-rings, place them around the center column of each switch stem to act as a cushion. Make certain the O-rings sit securely to absorb impact noise effectively.
Reinstall the keycaps, aligning them properly with the switch stems to prevent damage. Patience is key—this process takes about five minutes for a full-size keyboard but drastically reduces ping and noise. Using durable keycap pullers can make the removal process smoother and safer for your keyboard.
Placing the O-Rings Correctly
Placing rubber O-rings correctly is essential for effectively reducing key impact noise. Use a keycap puller to carefully remove each keycap, avoiding damage. Then, fit each O-ring snugly around the center column of the switch stem where the keycap presses down. Here’s a visual guide:
| Key Size | O-Ring Placement |
|---|---|
| Standard Keys | One O-ring on each stem center |
| Larger Keys | Multiple O-rings on all stem columns for synergy. |
| Spacebar/Backspace | Multiple O-rings across all columns for even noise reduction. |
| Other Larger Keys | Apply O-rings where the key impacts the switch stem. |
After installing, reattach the keycaps gently to maintain proper key travel and alignment. For optimal durability, ensure the O-rings are made from a durable material, which helps maintain effectiveness over time.
Reinstalling Keycaps Securely
Once you’ve installed the rubber O-rings on each switch stem, it’s important to reattach the keycaps carefully to guarantee everything stays secure and functions correctly.
For different switch types, make certain the keycaps sit flush and the O-rings remain in place. Gently press the keycap straight down onto the stem until it’s firmly seated.
For larger keys like the spacebar and backspace, fit multiple O-rings on each stem to maximize noise reduction. Proper reinstallation prevents key wobble and maintains the keyboard’s feel.
- Use a keycap puller to avoid damaging the keycaps during removal
- Make certain the O-ring stays centered on the stem during reattachment
- Confirm all keys depress and register properly when pressed
- Check for consistent key height and feel across switch types
- Remember that sound dampening can be influenced by factors such as microphonics and microphone placement, so consider overall setup for optimal acoustic results
How to Apply Lubricant to Switches for Quieter, Smoother Keystrokes
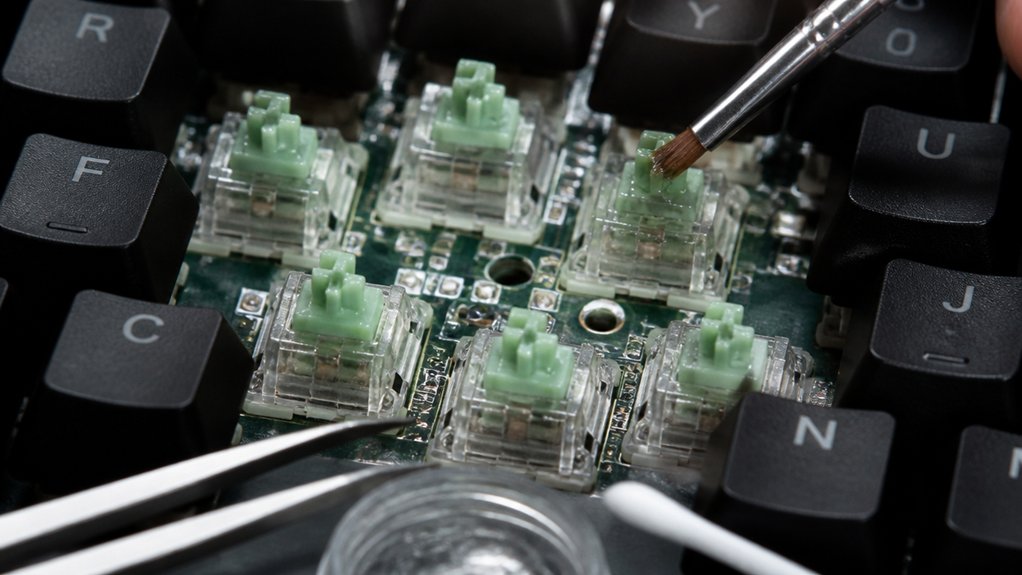
To apply lubricant effectively, start by carefully removing the keycaps and opening each switch housing to access the internal components. You’ll see the switch’s slider, stem, spring, and metal contacts. Use a thin, high-quality switch lubricant like Krytox or Tribosys. Apply it sparingly with a fine brush to the spring, slider rails, and stem, avoiding excess buildup. Lubricating the slider rails reduces friction and scratchiness, smoothing keystrokes and reducing the metal “ping” sound. Be cautious not to over-lubricate the switch leaf or spring, as too much can dampen tactile feedback or slow response. After applying the lubricant, reassemble the switch carefully. Test your keystrokes to guarantee quieter, smoother operation without compromising switch performance. Using appropriate application tools like precision brushes can also help improve the consistency and cleanliness of your lubrication process.
Using Sound-Dampening Foam and Mats to Muffle Noise
Using sound-dampening foam and mats can greatly reduce keyboard ping by absorbing vibrations and muffling high-frequency sounds. Proper placement of these materials inside or underneath your keyboard maximizes their noise-canceling effects without affecting your typing feel. Additionally, selecting the right foam thickness ensures an optimal balance between vibration absorption and maintaining key travel distance.
Selecting Appropriate Soundproofing Materials
Are you looking for an effective way to minimize the noise from your mechanical keyboard? Choosing the right soundproofing materials is key. High-density, closed-cell foam absorbs vibrations and prevents the metal backplate’s ping from echoing, greatly reducing noise.
Placing acoustic mats or foam pads beneath your keyboard acts as an extra barrier, muffling sound transmission to your desk surface and lowering overall noise levels. You can also apply thin layers of soundproofing material around switch housings and the PCB to cut down resonance without affecting key travel or switch function.
For the best results, consider combining foam with additional noise-reduction tools like rubber O-rings, which create a more effective muffling system for quieter typing. Using foam tapes and self-adhesive soundproofing pads can further enhance vibration damping and sound absorption.
Proper Placement Strategies
Proper placement of sound-dampening foam and mats is essential for effectively reducing keyboard noise. For your mechanical keyboard, place sound-dampening foam inside the case between the PCB and backplate to absorb vibrations and cut down on metal ping.
Cut foam carefully to fit snugly around stabilizers and switch housings, enhancing internal noise absorption. Use dense neoprene or open-cell foam mats under the keyboard to isolate it from hard surfaces that amplify ping sounds.
Layering multiple thin sheets of acoustic foam inside the case can further minimize resonance and reduce loud feedback from metal components. Combining rubber O-rings with strategically placed foam and mats creates a powerful synergy that greatly cuts bottom-out noise and the distinct ping, making your mechanical keyboard much quieter.
How to Adjust Keycaps and Stabilizers to Minimize Rattles and Ping
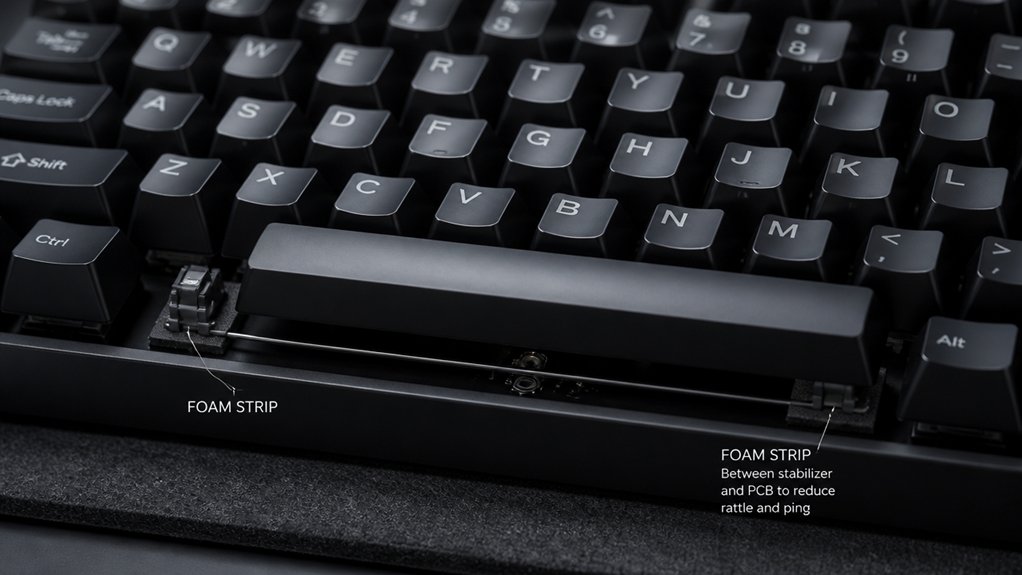
To minimize rattles and ping in your mechanical keyboard, ensuring your keycaps and stabilizers are properly adjusted is essential. Loose keycaps on switch stems cause unwanted rattling and pinging sounds, so firmly seat them.
For stabilizers, apply a small amount of dielectric grease or lubricant on wires and housing to lessen mechanical noise. Check and tighten stabilizers, especially under larger keys like the spacebar and Enter, as loose stabilizers often amplify rattles.
Consider upgrading to high-quality, lubed, and clipped stabilizers for smoother and quieter keypresses. Additionally, placing thin foam or silicone pads between the PCB and case helps dampen vibrations, reducing overall ping noise.
Properly adjusting stabilizers and keycaps makes a significant difference in creating a quieter, more enjoyable typing experience. Stabilizer quality and proper tuning play a crucial role in minimizing noise and ensuring reliable, vibration-free performance.
Tips for Regular Maintenance and Cleaner Keyboard Performance
Regular maintenance keeps your mechanical keyboard performing smoothly and quietly. To achieve this, regularly clean your mechanical keyboards by removing keycaps and clearing debris, which prevents dust buildup that can cause pinging noises.
Use compressed air to blow out dust and small particles from the switch mechanisms, helping maintain smooth keypresses and reduce noise. Applying a tiny amount of suitable lubricant to switch springs and stabilizers can dampen vibrations, minimizing ping sounds during typing.
Check for loose screws or stabilizer clips and tighten them to guarantee structural stability, which prevents rattling noises linked to pinging. Finally, avoid spills and clean promptly if residue appears inside your mechanical keyboards. These simple maintenance steps greatly enhance your keyboard’s performance and help keep it quieter during use.
Frequently Asked Questions
How to Make a Keyboard Less Pingy?
To make your keyboard less pingy, install rubber O-rings around the switch stems to dampen vibrations, especially on larger keys. This simple, affordable fix reduces noise by absorbing impact and sound resonance, making your typing much quieter.
Is There a Way to Make My Mechanical Keyboard Quieter?
Yes, you can make your mechanical keyboard quieter by installing rubber O-rings around the switch stems, which softens keystroke impact, reduces noise, and is quick, affordable, and effective for most keys, including larger ones.
What Is a 96% Keyboard Missing?
A 96% keyboard is missing dedicated navigation cluster keys like arrow keys, Home, End, Page Up, and Page Down, which are combined into a condensed layout. You might find slightly less space for comfortable key separation.
How to Reduce Latency on Keyboard?
You can reduce keyboard latency by choosing a high polling rate USB keyboard, using switches with shorter actuation points, enabling gaming mode, connecting wired instead of Bluetooth, and keeping your firmware and drivers updated for ideal response times.



