
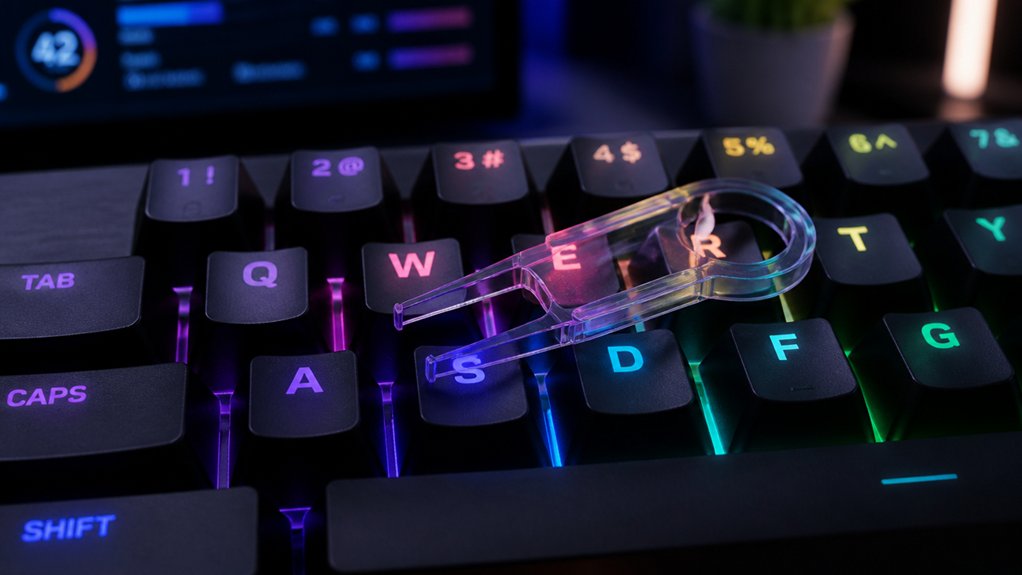
To reset key remapping on your mechanical keyboard, first undo any customizations in your remapping software like SharpKeys by deleting the assigned keys and saving the changes. Restart your computer to apply the resets, or reflash the firmware to restore factory defaults. If you’re using special firmware like QMK or VIA, reflash the original firmware or reset settings within those tools. For more detailed steps, keep exploring the options available to you.
Our Recommended Product on Amazon
As an Amazon Associate we earn from qualifying purchases.
Understanding Why You Need to Reset Key Remapping on Your Keyboard

Have you ever experienced confusion or frustration when keys don’t behave as expected? It’s common with mechanical keyboards, especially after customizing key assignments. When you remap keys using tools like SharpKeys, the key on your keyboard may no longer perform its original function. Resetting the key remapping becomes necessary to fix this.
You might also need to do it if you upgrade to a new mechanical keyboard lacking certain keys like home or end. Resetting removes any firmware-based or software modifications, restoring the keyboard to its default settings. This helps guarantee compatibility with software and prevents input issues.
Knowing when to reset key remapping helps you maintain a predictable, efficient keyboard input, especially after testing custom setups or making configuration changes. Understanding firmware support and how keymaps are stored can further aid in effective resets and troubleshooting.
Click ok to confirm the reset.
Other Ways to Revert Keyboard Customizations
Beyond using SharpKeys, there are several other methods to revert customizations on your mechanical keyboard. If you’ve customized firmware via QMK Configurator, reflash the keyboard with the default firmware to reset all key remaps. For keyboards with VIA firmware, you can restore defaults directly through the VIA software by selecting the reset option or upgrading the firmware. Alternatively, if you’ve made changes through Windows Registry or third-party tools, restoring a previous registry backup or performing a Windows System Restore will revert settings. To access firmware updates or software, you can visit the Microsoft Store, ensuring you’re downloading official and safe tools. Here’s a quick overview:
| Method | Description |
|---|---|
| Reflashing firmware (QMK) | Reinstall default firmware on your keyboard |
| VIA software reset | Restore defaults through VIA software |
| Registry backup restore | Revert changes via registry restore |
| Windows System Restore | Roll back system settings to previous state |
Additionally, consulting the firmware documentation can help guide you through specific reset procedures for your keyboard model.
How to Reset Your Keys Using SharpKeys on Windows

To reset your key remappings using SharpKeys on Windows, start by opening the application and viewing the list of currently assigned key remaps. Select each remapped key entry you want to undo, then click the “Delete” button to remove the custom assignments. A reset button simplifies this process, making it quick and easy to restore default settings. Once you’ve cleared the desired remaps, click “Write to Registry” to apply these changes to the Windows Registry. This step guarantees the reset is saved system-wide. Afterward, restart your computer to allow the registry updates to take effect fully. When your system reboots, test your keys to confirm they’ve returned to their default functions without remapping. This process effectively restores your keyboard’s original key behavior using SharpKeys.
How to Delete Remapped Keys in SharpKeys
When you need to remove specific key remappings in SharpKeys, start by opening the main interface, where all your current key assignments are listed. Find the remapped key you want to delete and click on it to select. Once selected, click the “Delete” button to remove that remapping from the list. Repeat this process for each remap you wish to eliminate.
After deleting all desired entries, click “Write to Registry” to save your changes. This action updates the Windows Registry with your modifications. Remember, you’ll need to restart your computer for the changes to take effect. Additionally, understanding how soldering techniques are essential for making precise modifications and repairs can further enhance your keyboard customization skills.
Removing remapped keys with SharpKeys is straightforward and helps restore your keyboard to its default functionality easily.
Save and Apply Your Reset in Windows

Once you’ve removed your key mappings, click “Write to Registry” to save the reset in SharpKeys. You’ll then need to restart Windows so the changes fully take effect across the system. After rebooting, test your keys to confirm they’ve reverted to their original functions. For consistent results, consider verifying your progress tracking settings to ensure the reset has been properly applied.
Reverting Registry Changes
After deleting the custom key assignments in SharpKeys, you’ll need to save your changes and write them to the registry to complete the reset process. This step updates the Windows Registry, which stores your key remapping data. To do this, click “Write to Registry,” and your remap settings are cleared. Once done, a system reboot is essential for the changes to take effect and restore default keyboard functions. Ensuring safe operation during this process prevents potential system issues. Here’s a quick overview of the process:
| Action | Purpose | Effect |
|---|---|---|
| Delete key remaps | Remove custom mappings | Reset to default behavior |
| Save changes | Commit changes to Windows | Prepare registry for reset |
| Write to Registry | Apply reset permanently | Clear previous remaps |
| Reboot system | Enforce changes | Restore original keyboard state |
This guarantees your keyboard functions correctly without custom mappings.
Restarting Windows Properly
To guarantee your key remapping resets take effect properly, it’s essential to restart Windows after saving the changes. Once you’ve applied and written the new settings to the Windows Registry via tools like SharpKeys, a system reboot is necessary.
Restarting guarantees that Windows fully reloads all keyboard drivers, incorporating the updated remapping configuration. Simply closing the remapping software isn’t enough; the previous key mappings remain active until you restart. This process clears any cached settings and prevents conflicts, making sure your reset functions correctly. Properly maintaining your tools ensures optimal performance and reliability when working with precision tweezers or other equipment used during keyboard repair.
Why a System Reboot Is Necessary After Reset
A system reboot is essential because it prompts Windows to reload and apply the updated keyboard registry settings. When you change key remappings through tools like SharpKeys, these modifications are stored in the registry but aren’t recognized by the system immediately. A new hardware setup or configuration change also requires a reboot to ensure the operating system fully detects and integrates the changes. Rebooting guarantees Windows fully recognizes the new configurations by reloading all drivers and software components. Without restarting, your keyboard might continue using the old key mappings because the operating system hasn’t refreshed its input settings. The reboot process synchronizes the software and drivers with the new remapping instructions, assuring the changes take effect. Additionally, testing remapped keys before reboot usually fails because the Windows keyboard driver cache still holds the previous key assignments. Restarting is the vital step to activate your remappings properly.
Resetting Firmware-Remapped Keys With QMK or VIA (Advanced)
Resetting firmware-remapped keys on a QMK-powered or VIA-compatible keyboard involves directly editing your keymap configuration to revert to the default layout. For QMK users, this means modifying your keymap file to remove custom layers or macros, then recompiling and reflashing the firmware. You can also ensure electrical compatibility by verifying that your key switch and socket meet the required specifications before reprogramming. VIA users can restore the default keymap within the VIA software interface before reflashing. Advanced users might also clear custom layers or macros via the QMK Configurator or build environment. To do this, you’ll need to:
- Edit your keymap or configuration files
- Recompile the firmware with updated default settings
- Flash the new firmware using tools like QMK Toolbox
Ensure all saved profiles and settings are cleared to eliminate remaining remaps.
How to Check If Your Keys Are Restored to Default
You can check if your keys are restored to default by testing their functions after reboot. If they don’t perform as expected, verify no other remapping software is overriding the settings. Additionally, you can use switch comparison charts to evaluate if the switches are operating at their original actuation force and travel distance.
Verify Key Functionality
Wondering if your keys are back to their default functions after resetting? To verify, open a text editor or command prompt and test the keys directly—if they produce the expected characters and commands, you’re on the right track.
You can also use Windows’ On-Screen Keyboard (osk.exe) to visually confirm the physical keys match the default layout. Additionally, check your remapping software, like SharpKeys, to make certain no active entries remain, indicating a successful reset.
For a more thorough test, run a keyboard tester website or software to see if keys respond with their original keycodes or characters. These steps help confirm your keys are restored and ready for normal use.
Test Keyboard Behavior
Ever tested your keyboard after making changes to verify everything’s back to normal? To do this, press the keys you previously remapped and see if they perform their original functions without modification.
Open a text editor or input field to verify keys like Page Up and Page Down input their standard commands, not the remapped ones. You can also use Windows’ built-in keyboard testing feature or third-party key testers to confirm each key’s output matches its default keycode.
After resetting remaps, reboot your system and test again, making sure the keys behave as expected. If everything functions as it should, with no signs of remapping, you can be confident that your reset was successful.
Use Key Detection Tools
To confirm that your key remapping has been successfully reset, utilizing key detection tools like Aqua’s KeyTest or Microsoft’s PowerToys Keyboard Manager is essential. These tools display real-time input when you press each key, allowing you to verify if remapped keys have returned to their default functions.
After resetting, run the detection tool and press the keys you previously remapped (such as page up/down) to see if they send their original scan codes. Some tools also log multiple key presses, helping you confirm that no custom mappings remain active.
If keys still appear altered, re-check your remapping settings or reboot your system to guarantee all remaps are fully cleared. This process helps you confidently confirm your keyboard’s defaults.
Troubleshooting When Your Keyboard Reset Doesn’t Work
When your keyboard reset doesn’t seem to work, it’s important to check whether the remapping changes were properly deleted or disabled in your software before restarting your system. Make sure you’ve completely removed or disabled the remapping entries in the app, like SharpKeys, and saved the changes.
Ensure remapping changes are fully deleted or disabled and saved before restarting for effective keyboard resets.
A system reboot is often necessary for the resets to take effect, so skipping this step can make the reset look ineffective.
If the remaps still persist, registry edits might be needed, or conflicting firmware settings or third-party software could override Windows resets.
In stubborn cases, re-flashing the keyboard firmware or using the manufacturer’s default firmware restore tool might be required to fully revert the key remapping. Always verify each step to troubleshoot effectively.
Alternatives to SharpKeys for Resetting Keys
If SharpKeys isn’t your only option, you can use PowerShell scripts to directly modify or reset registry keys related to remapping.
Alternatively, manually editing the Windows Registry Editor lets you revert changes, but it requires careful handling to prevent system issues. Both methods offer precise control if you’re comfortable with advanced tweaking.
Using PowerShell Scripts
PowerShell scripts offer a powerful, scriptable way to reset key remapping on your Windows system, providing an alternative to GUI tools like SharpKeys. You can modify or delete the registry entries responsible for remapping, mainly within the `HKEY_LOCAL_MACHINE\SYSTEM\CurrentControlSet\Control\Keyboard Layout` path where the “Scancode Map” value stores remap data.
Running a command like `Remove-ItemProperty -Path “HKLM:\SYSTEM\CurrentControlSet\Control\Keyboard Layout” -Name “Scancode Map”` deletes custom remaps, restoring default behavior. Keep in mind, after executing the script, you’ll need to reboot or log off for changes to take effect.
- Remove remap data via registry manipulation
- Use PowerShell for batch or automated processes
- Reboot or log off to apply changes
Registry Editor Methods
Using the Registry Editor provides a straightforward, manual way to reset key remapping on your Windows system without relying on third-party tools like SharpKeys. To do this, open the Registry Editor (`regedit`) and navigate to `HKEY_LOCAL_MACHINE\SYSTEM\CurrentControlSet\Control\Keyboard Layout`.
Look for the `Scancode Map` entry, which stores custom remapping data. To reset keys, delete this entry entirely, then restart your computer to restore default keyboard behavior.
This method offers advanced users more control and can help troubleshoot issues with remapped keys. However, editing the registry requires caution—incorrect changes can cause system problems. Always back up the registry before making modifications to avoid irreversible errors.
Restoring Default Functions for Mechanical Knob or Encoder Buttons
Restoring default functions for mechanical knob or encoder buttons typically involves reloading the keyboard’s firmware to its original, unmodified state. To do this, you’ll need tools like QMK Toolbox or your keyboard’s firmware updater.
Restoring default knob or encoder functions requires reloading the keyboard’s original firmware.
If your keyboard uses QMK or VIA firmware, reflash the original firmware or perform a factory reset if supported. For VIA-compatible models, load the default VIA firmware version that lacks custom encoder mappings.
If you remapped buttons through Windows software like SharpKeys, delete the remapping entries and reboot your system to apply changes. Always check your keyboard’s documentation or firmware guides for exact instructions.
Some key points to keep in mind:
- Reflash original firmware or perform factory reset
- Load default VIA firmware for VIA-based models
- Remove remapping entries in Windows software
Managing Firmware Updates That Might Override Your Reset
When you update your firmware, there’s a chance it could overwrite your custom key mappings, so you’ll need to reapply your settings afterward.
Always check the update notes to see if remapping features are affected, and back up your configuration files before flashing new firmware. Using tools like QMK Configurator or managing rollbacks can help you maintain your preferences without hassle.
Firmware Update Impact
Firmware updates can unexpectedly overwrite your custom key remapping settings by reverting the keyboard to its default configuration. To prevent losing your remaps, always back up your current firmware and keymap configurations before updating.
Some firmwares, like QMK, let you save and flash custom keymaps directly, avoiding resets after updates. If you use third-party tools such as SharpKeys, firmware updates usually don’t affect Windows registry remaps, but hardware-based remaps might reset.
Reviewing release notes for each firmware update helps you identify if key remapping features are impacted, guiding whether a reflash or reconfiguration is needed.
- Backup firmware and keymaps before updates
- Use customizable firmware like QMK
- Check release notes for remapping impacts
Preventing Reset Overwrites
To prevent your custom remaps from being overwritten during firmware updates, it’s essential to back up your current keymaps and firmware configurations beforehand. This way, you can restore your settings if they’re reset during an update.
Use tools like QMK’s build environment to embed key mappings directly into the firmware, reducing the risk of losing them. When updating VIA firmware, check if the release includes changes affecting your key mappings or encoder functions, as these may reset your custom setup.
While remapping tools like SharpKeys work at the OS level and aren’t affected by firmware updates, relying solely on such tools may not protect all customizations.
Always verify and save your configurations before any firmware update to safeguard your preferred key layout.
Managing Firmware Rollbacks
Have you ever performed a firmware rollback only to find your custom key remaps wiped out? When managing firmware rollbacks, keep in mind that flashing older or default firmware can overwrite your remaps set through tools like SharpKeys or QMK Configurator.
To avoid losing your settings, always back up your current firmware and keymap files beforehand so you can restore them afterward. Note that some firmware updates reset key mappings to factory defaults, requiring you to reapply remaps using firmware tools or system utilities.
Additionally, look for firmware versions that specifically support remapping features; for example, certain VIA updates for Keebio boards now include encoder remapping.
Use flashing utilities, like QMK Toolbox, carefully, selecting the exact firmware file to prevent overwriting your customized setup.
How to Prevent Unwanted Future Key Remappings
Preventing unwanted future key remappings starts with vigilance when installing and running third-party software. Always review settings carefully before use, and only choose trusted tools like SharpKeys, which show current remaps clearly. Regularly back up your Windows Registry so you can revert if needed. After making changes, reboot your system to finalize settings and verify mappings. Additionally, monitor scripts or software configured to automatically alter keys at startup, and disable them if unnecessary.
| Best Practice | Purpose |
|---|---|
| Review software settings before installation | Avoid accidental remap activation |
| Back up Windows Registry regularly | Easily revert to default if issues arise |
| Use trusted remapping tools | Maintain clear, manageable key configurations |
| Reboot after changes | Confirm modifications are properly applied |
| Disable auto-start scripts | Prevent unexpected, unwanted remap alterations |
Tips for Maintaining Your Keyboard’s Default Settings Long-Term
Maintaining your keyboard’s default settings over the long term requires regular backups and careful management of remapping configurations. To guarantee easy restoration when needed, regularly back up your custom keymaps or remapping files.
Regularly back up your keymaps and remapping files to ensure easy restoration of default settings.
Use software features like SharpKeys’ delete function or QMK Configurator to revert keys to their original functions without hassle. Avoid excessive firmware-level remapping without documentation, as complex changes can complicate resets.
Periodically check for official firmware updates, which often include bug fixes and reset options for key functions. When necessary, perform a full reset by flashing the default firmware, guaranteeing a clean restoration to factory settings.
- Regularly back up keymaps and configurations
- Use software tools to revert specific remappings
- Update firmware periodically for bug fixes and reset options
Frequently Asked Questions
How Do I Reset My Keyboard Mapping?
To reset your keyboard mapping, delete all remapped keys in SharpKeys, save and reboot. If you used custom firmware like QMK, reflash the default firmware. For VIA, reset through default profiles or update the firmware.
How to Fix Keyboard Remapping?
To fix keyboard remapping, open your remapping tool, remove or disable unwanted key assignments, save and write changes to the registry, then reboot your system. Re-flash firmware or reset configurators for deeper issues.
How to Reset Mechanical Keyboard Settings?
You can reset your mechanical keyboard by re-flashing the default firmware with QMK Toolbox, deleting remaps in software like SharpKeys, or pressing a specific hardware reset combination during startup. Always check your manual for exact steps.
Why Is My Keyboard Mapped Wrong?
Your keyboard is mapped wrong because custom software, firmware updates, OS settings, or hardware differences might interfere with default mappings. Check for remapping software, reset firmware, update drivers, or restore default settings to fix the issue.
In Summary
Resetting your key remapping on a mechanical keyboard helps restore your original layout and guarantees smooth daily use. Whether you used software like SharpKeys or manually changed settings, following the right steps guarantees your keyboard functions as intended. Keeping your firmware updated and avoiding unintended remaps will help maintain this setup in the long run. Regular maintenance and awareness of your customize options guarantee your keyboard remains reliable, comfortable, and perfectly tailored to your needs.



