

To keep your gaming keyboard responsive and clean, regularly remove keycaps using a keycap puller and soak them in warm water with mild soap or isopropyl alcohol. Use a soft brush or compressed air to clear dust from switches and internal parts. Disinfect weekly with 70%+ isopropyl alcohol, especially if you eat or drink nearby. Avoid harsh chemicals and always unplug before cleaning. For more expert tips on maintaining your keyboard’s peak performance, continue exploring the best practices.
Why Proper Gaming Keyboard Maintenance Matters
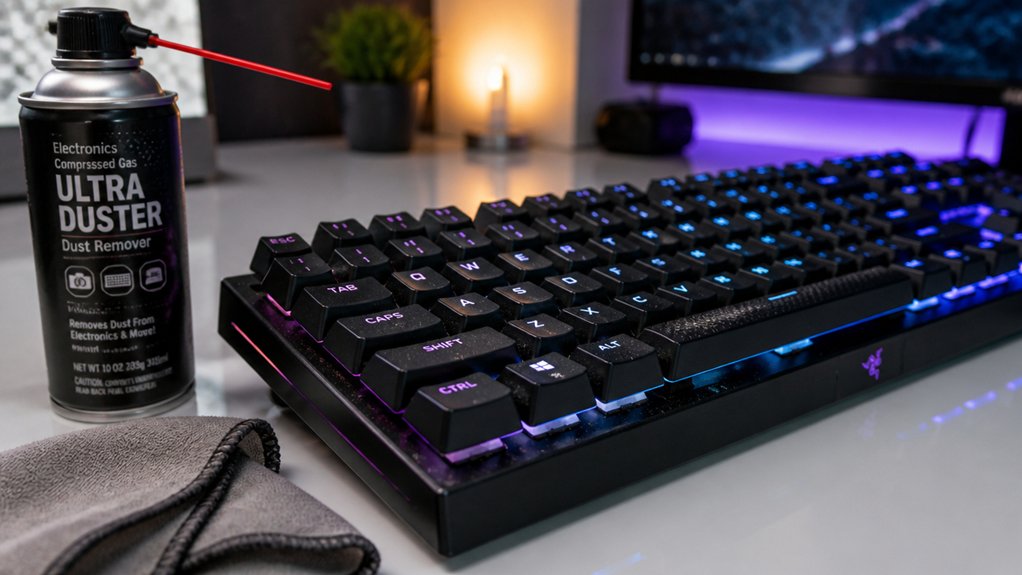
Maintaining your gaming keyboard is essential because it directly impacts your performance and overall experience. Regular maintenance guarantees your mechanical keyboard stays responsive, preventing sticky keys or unresponsive keycaps that can disrupt your gameplay. Cleaning your keyboard reduces dirt, dust, and bacteria buildup, which is especially important during long gaming sessions. A well-maintained keyboard not only looks appealing but also preserves its performance, helping you avoid costly repairs or early replacements. Follow a regular cleaning schedule to protect the mechanical switches and keep your keys functioning smoothly. When dirt accumulates, it can hinder your keyboard’s responsiveness, so staying proactive with maintenance helps maintain peak performance. Proper use of anti-static brushes ensures sensitive electronics are protected from static buildup during cleaning. Ultimately, routine care keeps your keyboard reliable and ready when you need it most.
The Tools You Need to Clean Your Gaming Keyboard Efficiently
Cleaning your gaming keyboard efficiently requires having the right tools at hand. To start, gather these essentials:
- Keycap puller — for safely removing keycaps without damage.
- Dust blower — preferred over compressed air for gentle dust removal without moisture buildup.
- Soft brush and microfiber cloth — for dislodging debris and wiping the surface safely.
Use a cotton swab dipped in isopropyl alcohol to disinfect and clean between keys, tackling sticky spots. For stubborn grime, a cleaning solution helps break down debris. Ensuring your tools include anti-static brushes can prevent electrostatic damage during cleaning.
Dampen a cotton swab with isopropyl alcohol to disinfect and remove buildup between your keyboard keys.
The keycap puller allows for thorough deep cleaning, while the dust blower keeps dust at bay without risking internal moisture. These tools are essential for maintaining a pristine, responsive gaming keyboard.
How Often Should You Deep Clean Your Gaming Keyboard?
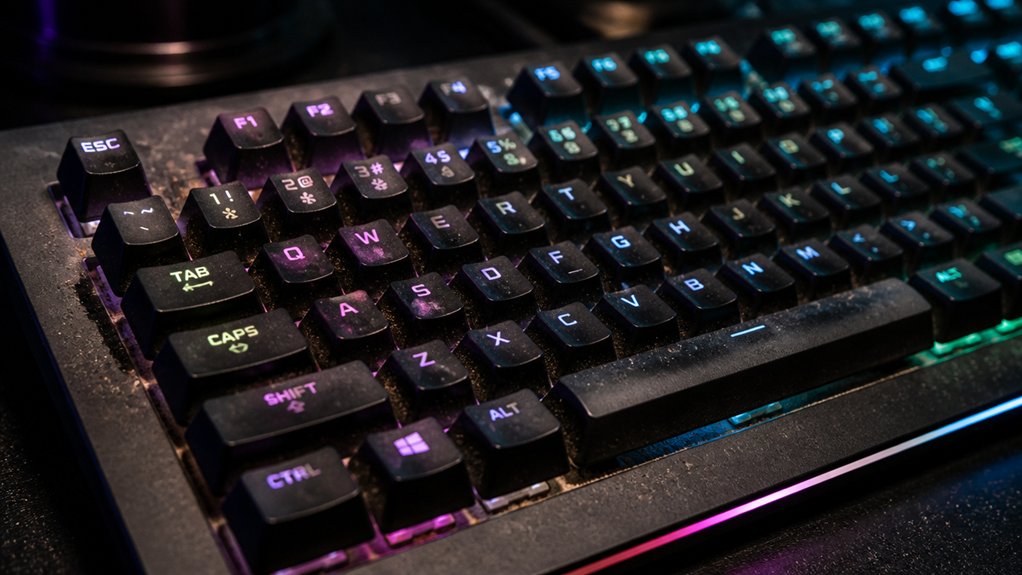
Incorporating regular deep cleans into your routine helps keep your gaming keyboard performing at its best. For most users, deep cleaning every 6 months to a year is enough to maintain peak performance and hygiene.
If you often eat, drink near your keyboard, or have pets, consider deep cleaning every 1-3 months to prevent sticky keys and debris buildup. Immediate cleaning is essential after spills or sticky residue, as neglected messes can damage keycaps and mechanical parts.
Regular deep cleaning removes debris from hard-to-reach areas, preventing hardware malfunctions and ensuring smooth key responsiveness. This consistent maintenance will also help avoid sticky keys and other issues, extending your keyboard’s lifespan and keeping your gaming experience uninterrupted. Incorporating compressed air cans can be an effective way to blow dust and debris out of tight spaces and vents safety features, helping you maintain optimal performance safely.
Step-by-Step: Removing Keycaps and Soaking Them Safely
Ever wondered how to safely remove your gaming keyboard’s keycaps without causing damage? First, always unplug your keyboard to avoid damage.
Always unplug your keyboard before removing keycaps to prevent damage.
Next, use a keycap puller or a gentle prying tool to carefully remove keycaps, making sure not to bend the stems.
Once removed, soak the keycaps in warm water mixed with mild dish soap or isopropyl alcohol for about 45 minutes.
During this time, agitate gently every 10-15 minutes to loosen grime without damaging the plastic. Using a durable material like stainless steel can help maintain scratch-free removal during the process.
After soaking, rinse thoroughly with clean water.
Let the keycaps air dry completely for 24-48 hours, with stems facing upward, to guarantee they’re thoroughly clean and ready to reinstall.
How to Clean Switches and Inside Parts Effectively
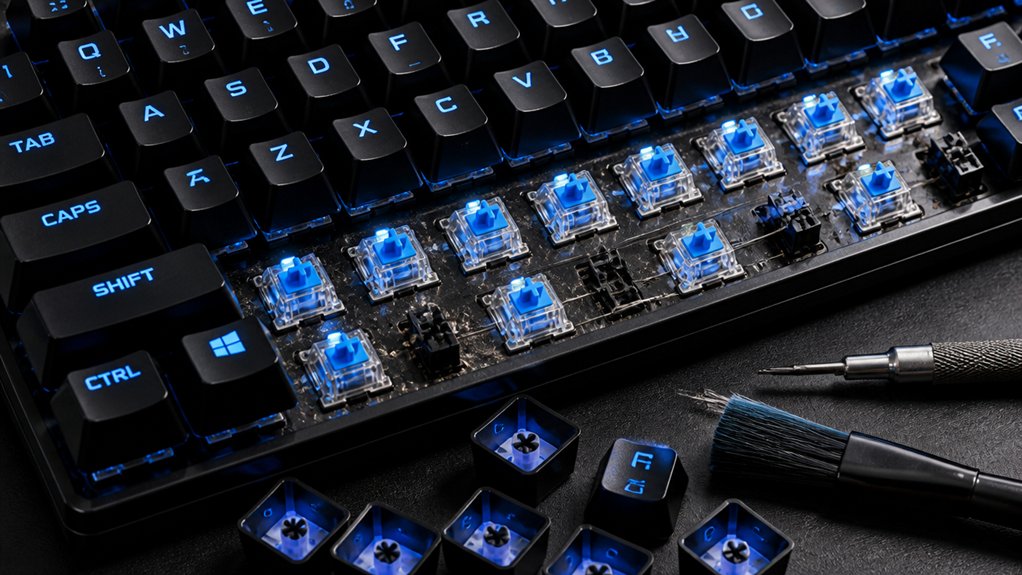
Whenever you want to maintain peak performance, it’s essential to carefully access the switches and interior components of your gaming keyboard. Start by unplugging the keyboard and removing keycaps with a keycap puller. Use compressed air or a soft brush on a low setting to gently clear dust from switch mechanisms and inside parts. For more thorough cleaning, dip a cotton swab in 70% or higher isopropyl alcohol to clean switch surfaces and adjacent areas, avoiding excess moisture. Make certain everything dries completely before reassembling to prevent corrosion. If you have a mechanical keyboard, consider lubricating switches with manufacturer-recommended lubricants for smoother operation.
| Action | Tools | Notes |
|---|---|---|
| Remove keycaps | Keycap puller | Access switches and interior |
| Clear debris | Compressed air | Gently blow away dust |
| Clean switches | Cotton swabs, isopropyl alcohol | Disinfect and dissolve grime |
| Dry thoroughly | N/A | Prevent corrosion |
| Lubricate switches | Lubricants | Improve switch smoothness |
Additionally, using high-purity IPA ensures quick evaporation and a residue-free surface, which is crucial for the longevity and safety of your gaming keyboard components.
Disinfecting Your Gaming Keyboard to Prevent Bad Germs
To keep germs at bay, choose disinfectants like 70% isopropyl alcohol and use a microfiber cloth or cotton swab for targeted cleaning. A Residue-Free Formula ensures no sticky residues are left behind that could trap germs or dust. Make sure to wipe down your keyboard regularly, especially after heavy use or spills, without soaking the keycaps. Disinfect at least weekly to maintain a hygienic gaming setup and prevent bacteria buildup.
Effective Disinfectant Choices
Looking for an effective way to keep your gaming keyboard germ-free? Choose a disinfectant with at least 70% isopropyl alcohol for safe, thorough cleaning. Use a microfiber cloth or cotton swabs to target sticky spots, greasy areas, and hard-to-reach spots between keys, reducing bacteria buildup and boosting hygiene.
Here are key tips:
- Apply disinfectant carefully with a microfiber cloth—avoid excess moisture that can seep into switches.
- Use cotton swabs to reach tricky corners and between keys for deep cleaning.
- Regularly disinfect weekly or after spills, preventing germs from lingering and maintaining peak hygiene.
- Opt for microfiber cloths with dense, tightly woven fibers to ensure lint-free and scratchless cleaning, protecting your keyboard surfaces.
Stick to these choices to avoid damaging keycaps or plastic surfaces, ensuring your keyboard stays clean and functional without risking corrosion.
Proper Cleaning Techniques
Proper cleaning techniques are essential for effectively disinfecting your gaming keyboard without causing damage. To clean your gaming keyboard, start by unplugging it or turning it off. Use compressed air to remove dust and debris from between the keycaps and hard-to-reach areas, preventing dust buildup. Remove keycaps with a keycap puller if needed, and wipe them with a microfiber cloth dampened with isopropyl alcohol (70% or higher) to disinfect without moisture seeping inside. Lightly dampen a cloth or cotton swab with alcohol to clean the surface and between keys, avoiding spraying liquids directly on the keyboard. Regularly disinfect, especially after spills or sticky residue, to keep germs at bay during long gaming sessions. Doing so helps maintain hygiene while preserving your mechanical keyboard’s longevity. Additionally, choosing a cleaning solution with residue-free evaporation properties can help prevent residue buildup that may impair the keyboard’s performance over time.
Frequency of Disinfection
How often should you disinfect your gaming keyboard to keep germs at bay? Regular disinfection is key to preventing bacteria buildup and maintaining responsiveness.
- Disinfect your gaming keyboard at least once a week to reduce germs.
- Increase the frequency to every 1-3 days if you eat, drink, or have pets nearby.
- Immediately disinfect after a spill or contamination to protect your keyboard’s components.
- Using anti-static mats during cleaning can help prevent static discharge and protect sensitive electronic parts.
Use isopropyl alcohol (70% or higher) with a microfiber cloth or cotton swab to clean sticky spots without damaging key legends.
Consistent disinfection not only minimizes health risks but also prolongs your keyboard’s lifespan and responsiveness. Adopting this frequency guarantees you stay germ-free and ready to game at peak performance.
What to Do When Spills Happen or Keys Get Sticky
When spills occur or keys become sticky, quick action can prevent serious damage to your gaming keyboard. Immediately unplug it and flip it upside down to stop liquid from seeping into the switches.
Remove the affected keycaps carefully using a keycap puller. Use a cotton swab dipped in alcohol (70% or higher) to clean away sticky residue from beneath the keycaps and switches.
Wipe the keyboard surface and exposed switches with a dry microfiber cloth to prevent moisture buildup and corrosion. Allow everything to air dry thoroughly, ideally for at least 48 hours in a well-ventilated space.
If sticky keys persist or malfunction after cleaning and drying, consider professional repair or switch replacement to avoid long-term damage. Properly maintaining material durability and construction can also help extend the lifespan of your keyboard components.
Troubleshooting Common Issues From Dirt or Dust Build-Up
Have you noticed keys sticking or not responding properly? Dust and debris buildup beneath or around keycaps can cause sticky keys and hinder your mechanical keyboard’s performance. To troubleshoot, follow these steps:
- Use a keycap puller to carefully remove affected keys and clean the debris with compressed air.
- Dipped cotton swabs with isopropyl alcohol can help clean stubborn dirt around switches and inside the keycaps.
- Regular maintenance, like shaking your keyboard upside down and using compressed air, prevents dirt accumulation that can lead to key chatter or switch failure.
Persistent issues after cleaning may mean a faulty keyboard switch or loose wiring. Testing your keyboard on different devices or reinstalling drivers helps diagnose the problem.
Staying proactive with cleaning safeguards your gaming setup’s performance.
Pro Tips for Keeping Your Gaming Keyboard in Top Shape
Keeping your gaming keyboard in top shape requires proactive care and regular maintenance.
For mechanical keyboard maintenance, use a keycap puller to safely remove keycaps every 1-3 months, especially if you eat or drink nearby. Clean debris with compressed air in short bursts, and use a soft brush or cotton swabs dipped in 70%+ isopropyl alcohol to disinfect and remove dirt around the keys.
Always unplug your gaming keyboard before cleaning and avoid harsh chemicals that can damage the keyboard surface or fade key legends. Regularly wipe down the surface with a microfiber cloth to prevent grime buildup.
If spills occur, immediately unplug, flip the keyboard to drain, remove keycaps, and allow all parts to dry thoroughly for at least 48 hours to prevent corrosion and electrical issues.
Simple Steps to Keep Your Keyboard Cleaner Longer
Using simple tools and habits can greatly extend the time your gaming keyboard stays cleaner.
First, always use a keyboard cover when not in use to shield against dust, spills, and debris that cause buildup. Second, avoid eating or drinking near your keyboard to prevent sticky keys and liquid damage.
Third, perform regular quick cleanings:
- Shake out debris by turning it upside down and gently tapping.
- Use compressed air or a dust blower to clear dust from tight spaces.
- Wipe the keyboard surface and keycaps with a microfiber cloth dampened with isopropyl alcohol to reduce grease and fingerprints.
This routine keeps dust buildup and sticky keys at bay and helps your keyboard stay fresh longer. Consistent maintenance saves you time and extends your gaming gear’s lifespan.
FAQs About Cleaning and Maintaining Your Gaming Keyboard
Wondering how often you should clean your gaming keyboard? Regular cleaning depends on usage, but aim for at least monthly, or weekly if you eat near it or have pets.
To clean sticky or unresponsive keys, use isopropyl alcohol (70% or higher) on a cotton swab or microfiber cloth. For a deep clean, carefully remove the keycaps with a keycap puller, soak them in warm, soapy water for up to 45 minutes, then dry thoroughly before reassembling.
Avoid aggressive compressed air or dishwasher cleaning, as excess moisture and heat can damage components. Regularly inspect underneath the keys using dust blowers, brushes, and cleaning gels to prevent buildup.
Keeping up with these practices will help extend your keyboard’s lifespan and maintain peak performance.
Frequently Asked Questions
How to Take Care of a Gaming Keyboard?
You should unplug your gaming keyboard before cleaning, use compressed air to clear debris, regularly remove and wash keycaps, wipe surfaces gently, avoid eating nearby, and perform deep cleans every 6-12 months to keep it responsive and durable.
What Is a 96% Keyboard Missing?
A 96% keyboard is missing a dedicated numeric keypad and sometimes extra macro keys or navigation clusters. It retains essential keys like arrows and function keys but offers a more compact design by omitting these additional components.
What Is Essential for Maintaining Keyboard?
To maintain your keyboard properly, you need to regularly unplug and clean it, use a keycap puller for thorough cleaning, disinfect with isopropyl alcohol, avoid eating or drinking nearby, and stick to a consistent cleaning schedule for peak performance.
Can I Use 70% Alcohol to Clean My Keyboard?
Yes, you can use 70% isopropyl alcohol to clean your keyboard. Lightly dampen a cloth or cotton swab, avoid applying it directly to key legends, and guarantee the keyboard dries properly to prevent moisture damage.
In Summary
Keeping your gaming keyboard clean isn’t just about looks; it guarantees peak performance and longevity. Regular maintenance, gentle cleaning, and quick fixes can save you from costly repairs and play disruptions. Follow these tips to keep your gear in top shape, enjoy smoother gameplay, and extend its lifespan. Stay attentive to dirt buildup and clean proactively—you’ll keep your gaming setup running at its best for longer. Happy gaming!



