
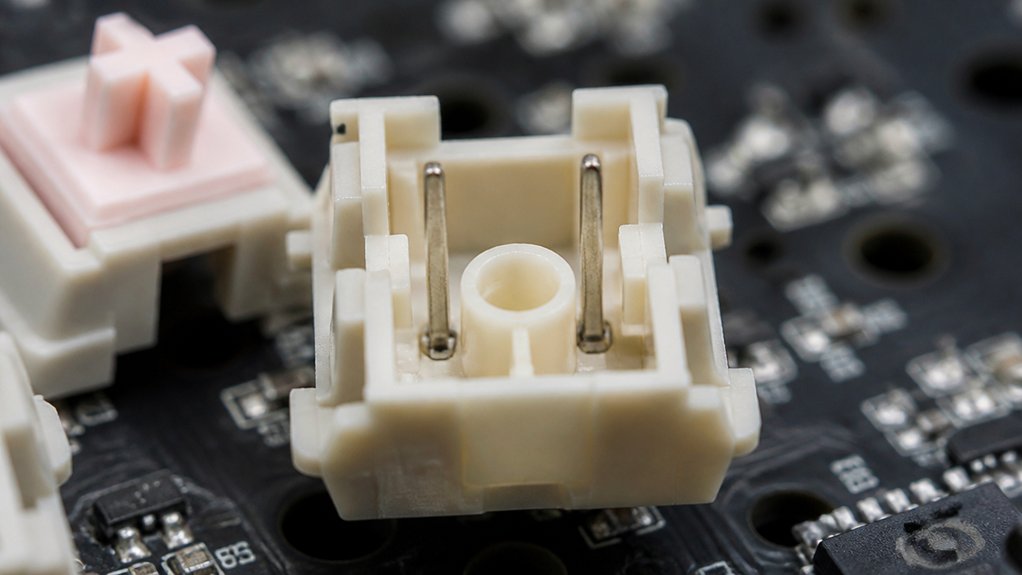
To check your mechanical keyboard switch pin alignment, carefully remove the keycap and switch using appropriate tools to prevent damage. Inspect the pins visually for any bending, curling, or misalignment—pins should be straight, vertical, and parallel. Gently straighten any bent pins with precision tweezers if needed. Support the switch and PCB during reinstallation to guarantee proper seating. If you want to learn more about maintaining perfect alignment and avoiding damage, keep exploring these essential tips.
Why Do Bent Switch Pins Cause Keyboard Failures?
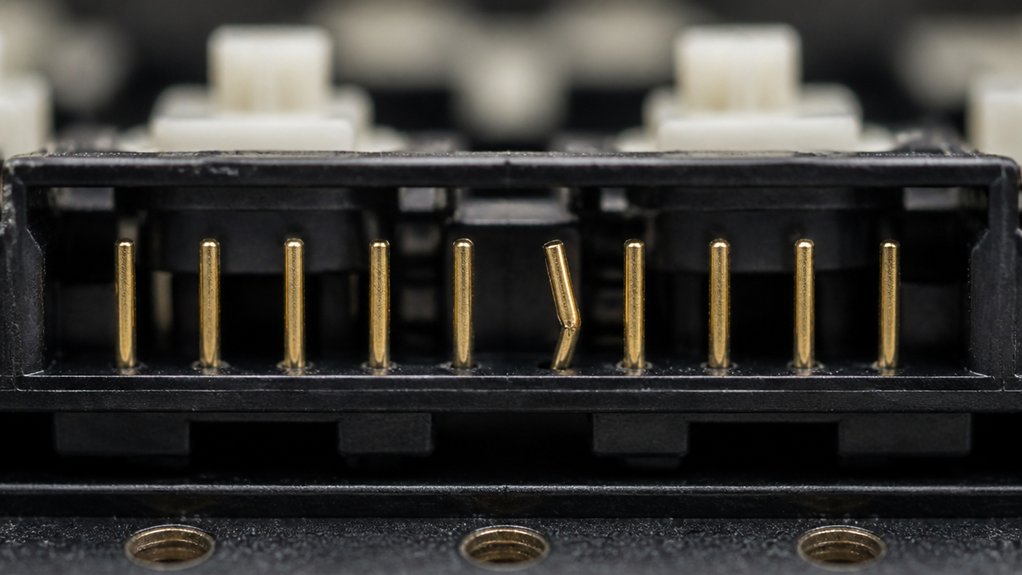
Have you ever wondered why bent switch pins cause your keyboard to malfunction? Bent pins in a mechanical switch prevent proper electrical contact with the circuit board, leading to inconsistent key registration.
Bent switch pins disrupt contact, causing unresponsive keys and unreliable keyboard performance.
When contact pins are misaligned or folded, they may not fully seat in hot-swap sockets, causing unreliable connections. Curled or folded pins increase resistance or break the circuit altogether, resulting in keys that don’t fire or register intermittently.
Excessive force during removal or insertion often causes these bends, which damage the switch’s connection. Straight, vertically aligned contact pins are crucial for a stable, functional keyboard. They guarantee each key press is accurately detected, preventing failures related to poor electrical contact.
Proper pin alignment keeps your keyboard responsive and reliable.
How to Remove Switches Safely for Inspection
To inspect your mechanical keyboard switches safely, start by removing the keycaps carefully using a wire keycap puller. This prevents damage and keeps your keycap order intact.
Next, use a stainless steel switch puller to gently remove the switch from the hot-swap sockets. Apply steady, even pressure—do not twist or force—to avoid bending the pins. Support the keyboard on a stable, flat surface to prevent stress on the PCB.
When you remove the switch, handle it carefully to avoid damaging the pins, especially if you suspect any bending. Place switches in a safe area to prevent pin damage.
Proper removal guarantees you can safely inspect the pins for any signs of damage or misalignment before proceeding with further diagnostics. Additionally, using durable materials like stainless steel corrosion resistance can help protect the tools and components during removal.
How to Identify Bent or Misaligned Switch Pins
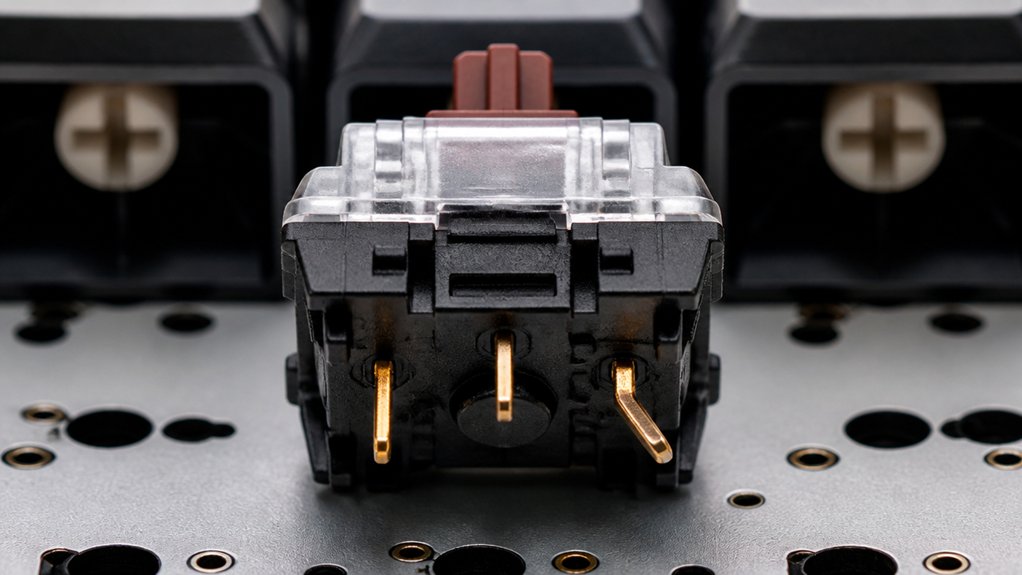
To identify bent or misaligned switch pins, carefully remove the keycap and switch, then inspect the pins closely. Look for signs of curling, sideways bends, or twisted pins that don’t sit straight, which can cause key issues. Also, check for any resistance when removing or reinserting switches, as difficulty may indicate damaged or misaligned pins. Ensuring proper alignment can prevent damage during soldering and maintain optimal keyboard performance.
Visual Inspection Techniques
When inspecting switch pins, a careful visual check is essential to identify any signs of misalignment or damage. Start by removing the keycap with a wire keycap puller, then carefully deploy a switch puller to access the contact pins.
During visual inspection, look for any bent pins, which may curl, fold inward, or shift sideways. Bent pins often appear uneven, crooked, or not protruding straight in a vertical line. Pay close attention to the pins’ alignment—misaligned or crooked pins can cause connection issues. Ensuring the pins are properly aligned helps prevent damage to the switch or PCB over time.
Confirm the pins are straight and symmetrical. Detecting these issues early prevents potential switch or PCB damage, maintaining proper key response and device longevity. Always double-check visually before reinstalling the switch.
Common Pin Bending Causes
Misalignment or bending of switch pins typically happens due to mishandling during removal or installation. It’s a common issue when you force switches in or out, which can curl the pins inward, sideways, or back.
Repeated use and rough treatment increase the risk of bent the pin back or twisting the pins out of proper alignment. This often results in inconsistent key response and registration problems.
To identify bent or misaligned pins, physically inspect the switches after removing keycaps with a switch puller. Look for pins that are twisted, folded, or not sticking out vertically.
If you notice the pins are misaligned, carefully straighten them to prevent damage to the keyboard’s hot-swap socket and guarantee proper connection.
Using high-quality switch openers can minimize mishandling and reduce the risk of damaging switch pins during maintenance.
Signs of Misaligned Pins
Do you notice keys feeling unresponsive or registering inconsistently? That can be a sign of misaligned or bent switch pins.
Here are some signs to look for:
- Visual clues after removing the keycap—pins curled inward, twisted sideways, or folded onto themselves in the switch housing.
- Excessive resistance when removing or reinserting the switch, indicating a bent pin catching on the switch housing.
- Keys that skip or register intermittently during typing tests, caused by pins not making proper contact.
- Pins that stick out at uneven angles or appear deformed when compared to unaffected switches, revealing misalignment or bending.
- Using proper soldering techniques and maintaining correct pin alignment during assembly can prevent these issues from occurring in the first place.
Always inspect visually; misaligned pins can disrupt electrical contact and affect keyboard performance.
How to Straighten Bent Switch Pins Without Damage
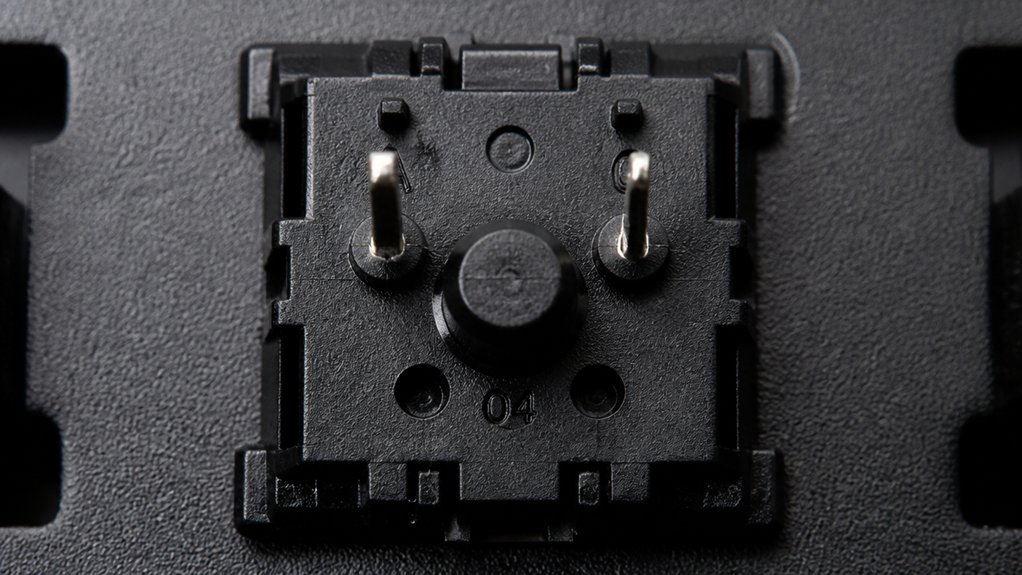
If you notice that a switch pin is bent or curled inward, carefully approach the situation with precision tools to avoid causing damage. Use precision tweezers to gently unfold and straighten the pins, applying minimal force to prevent breakage. For tightly bent or curled pins, carefully pry them apart with a needle or pin before bending them back to a vertical alignment. Lightly pull the pins from the base with tweezers to guarantee they are properly aligned and extend straight, avoiding twisting. Perform a visual inspection after adjustment to confirm the pins are straight and unbent, preventing damage to the PCB socket and securing a stable connection. Proper tool selection and technique are essential to maintain the material integrity of the switch components and ensure long-term functionality.
Tips for Reinserting and Securing Switches Properly
When reinserting switches, make sure they’re positioned correctly with pins aligned with the socket holes.
Apply gentle, even pressure until you hear a click or feel the switch seat firmly. Supporting the PCB during insertion helps prevent damage and guarantees the switch is securely in place.
Additionally, verifying that the compatible socket design matches your switch type ensures reliable electrical contact and longevity.
Correct Switch Placement
Proper switch placement is essential for ensuring reliable keyboard performance. To do this correctly:
- Before reinserting, check that the switch back is aligned vertically and its pins are straight.
- Support the bottom of the switch and the PCB or plate from underneath to prevent socket bending.
- Carefully align the switch housing with the socket openings, using a pair of tweezers if needed for better control.
- Press down gently but firmly until you hear a click, confirming the switch is fully seated.
- Ensure that the switch remains firmly in place and check for any wobbling or looseness, which could affect hot-swap socket stability.
Avoid forcing the switch in if resistance is felt, as misaligned pins can cause damage.
Once seated, test the key to verify secure placement and proper function.
Proper placement is key for smooth, reliable performance.
Apply Gentle Pressure
Applying gentle pressure is essential to securely reinsert switches without risking damage. When working on your mechanical keyboard, always apply gentle, steady pressure to avoid fixing bent pins or damaging the internal components.
Before pressing, verify the switch pins are fully aligned vertically; this will help prevent pin misalignment. Support the PCB from underneath with a finger or tool to prevent socket flexing, which can lead to poor contact or damage.
If you feel resistance, don’t force the switch into the socket. Remove it, realign the pins, and try again. A properly seated switch will sit flush against the keyboard plate, with no gaps, indicating the pins are correctly aligned and secured.
Applying gentle pressure safeguards your keyboard’s hot-swap sockets and guarantees a solid, reliable connection. Remember that stabilizer material can also influence overall stability, so choosing high-quality options supports smooth, rattle-free operation.
Common Mistakes That Bending or Damaging Switch Pins
Bending or damaging switch pins is a common issue during keyboard maintenance, often caused by careless handling or improper technique. To avoid this, you need to be careful when removing or installing switches.
Here are common mistakes to watch out for:
- Applying excessive force when removing keys or switches, which can bend pins.
- Not making sure the pins align properly with PCB sockets before insertion, causing them to curl.
- Using improper tools, like fingers or unsuitable instruments, instead of tweezers, which increases pin damage risk.
- Attempting to remove or install switches on hard surfaces rather than soft mats, leading to increased force and potential bend.
Always make sure to remove keycaps gently and check pin alignment before inserting switches. Additionally, understanding the switch pin design and its proper handling can significantly reduce the risk of damage.
Troubleshooting Key Registration and Performance Issues
When you notice that some keys aren’t registering or are sporadically failing, it may be due to misaligned or damaged switch pins affecting the electrical contact. To troubleshoot, remove the keycap and switch to visually inspect the two metal pins.
Inspect switch pins for misalignment or damage to restore reliable key registration.
If they appear bent, curling, or misaligned, gently straighten them with precision tweezers. Guarantee the pins protrude vertically and remain parallel to guarantee reliable connection in the socket.
After adjusting the pins, reinstall the switch carefully on a clean PCB socket and test the keyboard with software. If registration issues persist, the problem might lie with damaged pins or faulty switches that require replacement.
Replacing with new switches can restore performance and guarantee consistent key registration.
Frequently Asked Questions
Is 84 Keys 75%?
Yes, an 84-key keyboard typically falls under the 75% layout, offering a compact design with essential keys like function and arrow keys, balancing size and full functionality for improved productivity and space-saving on your desk.
How to Test Keyboard Switches With a Multimeter?
You test keyboard switches with a multimeter by setting it to continuity mode, then pressing the switch while measuring between pins. If it shows continuity when pressed and not when released, the switch functions correctly.
What Is a 96% Keyboard Missing?
A 96% keyboard is missing a dedicated number pad separated from the main cluster. It condenses keys closely together, saving desk space, but keeps almost all functions, with some keys combined or arranged tighter than on full-sized keyboards.
How to Test a Keyboard PCB?
You test a keyboard PCB by using online testing tools, performing typing tests, visually inspecting for dirt or damage, cleaning with compressed air, ensuring pins are straight, and using a multimeter or contacting support if issues persist.
In Summary
Checking your mechanical keyboard switch pin alignment is vital for peak performance. By inspecting and straightening bent pins carefully, you can avoid common issues like key misregistration or failure. Always handle switches gently, reinsert them properly, and double-check pin alignment before closing your keyboard. This simple maintenance can extend your keyboard’s lifespan and guarantee smooth, reliable typing. Stay attentive to pin condition, and your keyboard will serve you well for a long time.



