
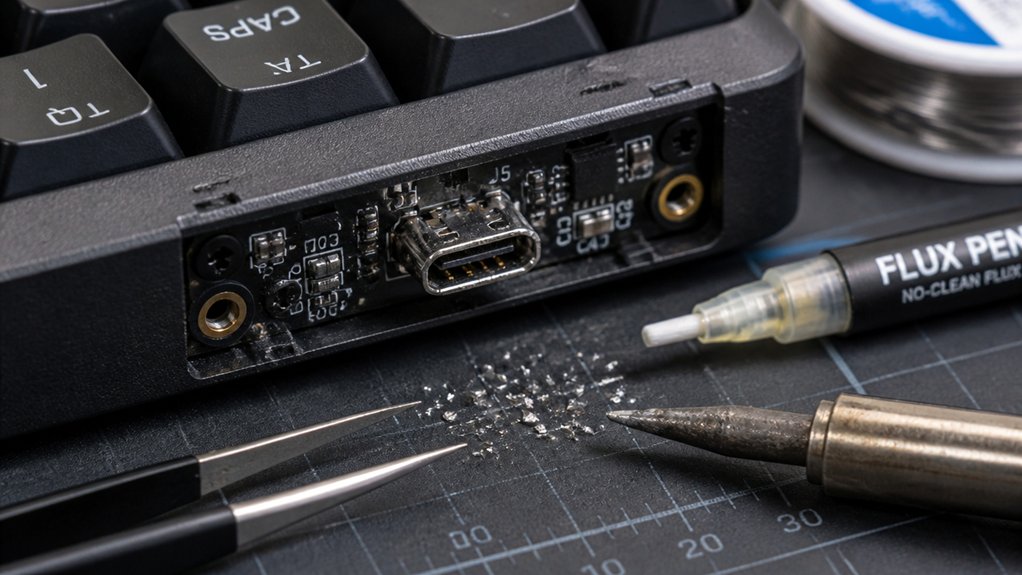
If your mechanical keyboard’s USB-C port is damaged, start by inspecting it closely for visible issues like bent pins, corrosion, or lifted pads using a magnifying glass. Carefully test internal solder joints and PCB traces for breaks or lifts with a multimeter. If needed, you can safely remove and replace the port with precise soldering, following proper techniques. Keep in mind, detailed steps for effective repair and prevention tips are just ahead, so continue, and you’ll learn everything you need.
How to Identify If Your USB-C Port Is Damaged

How can you tell if your USB-C port on a mechanical keyboard is damaged? Check for physical signs like looseness, bent or missing pins, or a wobbly connection that won’t hold the cable securely.
If your keyboard disconnects repeatedly, registers keys inconsistently, or loses power or data transfer, it could indicate a broken USB-C. Inspect the port with a magnifying glass to spot lifted or missing solder pads, corrosion, or broken connector pins—common issues in damaged USB-C ports.
Using a multimeter to test continuity between the port’s pins and the PCB traces can confirm internal damage. Symptoms like frequent unplugging, unresponsive keys, or visible deformation make it clear you need to repair or replace the USB-C port on your mechanical keyboard. Additionally, choosing durable connector materials can help prevent future issues.
Locating and Understanding the USB-C Port Inside Your Keyboard
To locate the USB-C port inside your keyboard, start by checking the edges of the PCB near where the cable connects. Understanding the internal layout means knowing if the port is surface-mounted or has pins underneath, which affects replacement difficulty. Additionally, data transfer speed, which can influence your troubleshooting approach, should be considered when inspecting the port’s condition. Consulting the device’s teardown images or service manual can help you pinpoint the exact position and connection points of the port.
Identifying USB-C Placement
Finding the USB-C port inside your mechanical keyboard requires opening the case to see its placement on the PCB. Typically, the USB-C connector is soldered near the edge of the circuit board, aligned with the external USB opening. Some keyboards use a daughterboard or detachable module, making identification easier. To locate the port, look for a small rectangular metal connector with multiple pins. Visual inspection helps identify damaged pads or lifted solder joints essential for functionality. Use this guide to help focus your search: compatibility issues can sometimes cause connection problems, so check for physical damage accordingly.
| Circumstances | Visual Clues | Additional Notes |
|---|---|---|
| Standard PCB | Soldered directly near edge | Multiple pins, complex replacement |
| Detachable module | Isolated component | Easier to replace or repair |
| Damage or wear | Visible cracked pads or lifted joints | Critical for proper connection |
| New or unknown model | Check external USB port alignment | Use guide to help locate correctly |
Understanding Internal Port Layout
Understanding the internal layout of the USB-C port inside your mechanical keyboard is essential for identifying potential issues and performing repairs. Make sure you know that the port is usually soldered directly to the PCB near the edge, where the cable exits the case. Correct pole count, orientation, and wiring standard prevent connection issues and ensure proper functionality. Inside, the connector includes multiple pins for high power, ground, differential data lines (D+ and D-), and sometimes sideband use (SBU), though many aren’t used in basic models. The physical port can be surface-mounted or through-hole, with SMT ports being more complex to solder due to pins beneath the connector body. Traces from the port are short and directly routed to the main controller. Carefully inspect for lifted pads, broken traces, or damaged solder joints before attempting to repair, ensuring a proper connection.
Inspecting Your USB-C Port for Visible Damage or Lifted Pads

Start by inspecting the USB-C port area closely for any signs of physical damage, like bent or loose housing.
Use a magnifying glass or microscope to check for lifted or missing solder pads, cracks, corrosion, or debris on the PCB.
Perform a continuity test with a multimeter to verify all pads and traces are properly connected.
Additionally, examine the connector pin count to ensure it matches the keyboard’s specifications and hasn’t been damaged or misaligned.
Recognizing Visible Damage Signs
Are you inspecting your keyboard’s USB-C port for issues? Look closely at the connector for bent or broken pins and check the housing for cracks.
Lifted or peeling PCB pads around the solder joints can also signal damage. Use a magnifier to spot tiny cracks, corrosion, or debris that might block electrical signals.
Damaged or lifted ground pads, typically on the outer edges, may cause connection problems or power drops, but if lifted pads show no traces underneath, they likely don’t affect core USB functions.
Carefully examine the port for any misalignment or unusual gaps. Recognizing these signs early helps you determine whether repair is needed before attempting further fixes.
Proper inspection guarantees you accurately identify visible damage and avoid missing subtle issues. Additionally, understanding hot-swap PCB compatibility can assist in diagnosing connection issues related to port damage.
Checking Pad and Trace Integrity
After visually examining your USB-C port for obvious damage, it’s important to check the integrity of the solder pads and PCB traces that connect the port to the board. Use a magnifying glass to spot lifted, missing, or damaged pads, which can break electrical contact. Also, inspect the traces leading from the pads for cracks or breaks, as this prevents signals from passing through. Use a multimeter to perform continuity tests, confirming that pads are still linked to corresponding traces and components—especially for power (VBUS) and ground (GND) lines. Be aware that some pins lack pads or are unused, so missing pads might not affect basic function. Cleaning the area with isopropyl alcohol helps reveal subtle damage before soldering or replacing parts.
| Step | Action |
|---|---|
| 1 | Visually inspect pads for damage |
| 2 | Examine PCB traces for cracks |
| 3 | Perform multimeter continuity test |
| 4 | Clean area with isopropyl alcohol |
How to Check the Internal Solder Joints and Traces for Issues
Ever wonder how to verify if the internal solder joints and traces are intact after a USB-C port repair? Start by using a multimeter in continuity mode to test for breaks or shorts between solder joints and PCB traces connecting the port to the controller.
Visually inspect the USB-C port and surrounding area under magnification to spot lifted or missing solder pads, cracks, or corrosion. Trace each pin on the PCB silk screen, comparing it with the schematic to guarantee proper connectivity for power, ground, and data lines.
Gently probe exposed copper traces to detect hidden breaks. Pay extra attention to the larger ground pads on the outer edges, as they’re essential for stable power and signals. Ensuring your multimeter is IEC 61010 compliant helps guarantee safe and reliable testing.
- Check for continuity between each pin and its corresponding pad or component.
- Look for cold or cracked solder joints under magnification.
- Scan traces for visible damage or corrosion.
- Confirm correct pinout alignment with schematic or datasheet.
Step-by-Step: Removing the Damaged USB-C Port Safely

Before removing the damaged port, gather your tools and verify the keyboard is unplugged. Next, identify the faulty USB-C port and prepare to desolder its connections carefully. With these steps in mind, you can safely proceed to detach the port without harming the PCB. To ensure a precise and secure desoldering process, consider using an appropriate desoldering pump model that provides strong suction power and reliable performance.
Prepare Necessary Tools
To safely remove the damaged USB-C port from your mechanical keyboard’s PCB, gather the essential tools needed for precise desoldering. First, use a fine-tip soldering iron (around 20-30W) with temperature control to carefully heat and desolder the port pins and pads without damaging the PCB. Next, have solder wick or desoldering braid ready to absorb old solder from both visible and hidden pins beneath the connector. Additionally, secure the PCB on a stable surface or use a PCB holder to prevent movement and protect surrounding components. If available, a hot air rework station can preheat the area, softening solder and adhesives for easier removal. Finally, prepare isopropyl alcohol and a soft brush to clean the pads after removing the port, ensuring a clean surface for re-soldering. Utilizing a high-quality soldering iron with temperature control capabilities ensures precise heat application, reducing the risk of damaging delicate components.
Identify Damaged Port
Start by locating the damaged USB-C port on your keyboard’s PCB. Inspect the port closely for visible signs of damage like bent or broken pins, corrosion, or burn marks. Check for instability when plugging in a cable, or if the port feels loose.
Look for solder joints that appear cracked or burned, indicating connection issues. Use a magnifying glass to examine the solder pads and surrounding traces for any lifting, lifting, or damage. If you notice corrosion or corrosion residue, it’s a clear sign the port is compromised.
Once you’ve identified damage, proceed carefully to the next step of desoldering. Accurate identification will prevent unnecessary removal or further damage during the repair process. The stability of the PCB during this process is crucial, which is why using a PCB holder is highly recommended to keep the board steady and secure.
Safely Desolder Connections
When desoldering a damaged USB-C port, verify your workspace is static-free by unplugging the keyboard and grounding yourself. This prevents static electricity from damaging sensitive components. Use a temperature-controlled soldering iron set between 300°C and 350°C to carefully melt the solder on all port pins and through-hole pads.
Apply solder wick or a desoldering pump to absorb excess solder, freeing each pin from the PCB. Once all solder is removed, gently lift the USB-C connector straight up, avoiding lateral force that could lift pads or damage the traces.
Before proceeding, clean the area with isopropyl alcohol and inspect for any damage or lifted pads. Taking these steps guarantees a safe, effective removal without harming your keyboard’s delicate circuitry.
- Maintain proper grounding throughout the process
- Avoid excessive heat to prevent PCB damage
- Use light, steady pressure when lifting the port
- Double-check the area for damage before installing the new port
How to Solder a Replacement USB-C Port Onto Your Keyboard
Soldering a replacement USB-C port onto your keyboard demands careful attention to detail and steady hands, especially when working with tiny pins and delicate PCB traces.
Start by aligning the new port carefully, tacking the corner pins first to guarantee correct orientation. Use a fine-tipped soldering iron and flux to properly solder each pin, including the power, ground, and data lines. Be cautious with pins beneath the port’s body, making certain they connect without bridging or shorts.
Before soldering, confirm the PCB pads are intact, clean, and free of residual solder using solder wick. Once all pins are soldered securely, check each connection with a multimeter for continuity on power, ground, D+, and D- lines. Proper soldering guarantees reliable electrical contact and mechanical stability.
Testing Your Repair: Making Sure the Port Is Working Properly
How can you be sure your USB-C port repair is successful? First, test for stable power delivery and data continuity with a multimeter or USB testing tool. Connect the keyboard to a known-good device and verify consistent key registration without disconnects.
Test power, data, and keyboard response to confirm USB-C port repair success.
Carefully inspect the solder joints beneath the USB-C port using a magnifier, checking for cold solder or lift issues that could cause failures. Additionally, use USB protocol analyzers or software utilities to confirm proper enumeration and data transfer speeds.
Finally, cycle the cable insertion and removal multiple times to evaluate mechanical durability and electrical contact stability.
- Check for stable power and data connection
- Verify keyboard response on a known device
- Inspect solder joints under magnification
- Confirm data transfer speeds and proper enumeration
Troubleshooting Common Problems During Port Repair
Identifying and resolving common issues that occur during USB-C port repair can save time and prevent further damage. Lifted or missing solder pads can often be spotted by checking continuity with a multimeter, helping you confirm which pins are crucial for keyboard function.
Ports with pins underneath the connector require precise soldering using fine-tip tools or hot air stations to avoid damaging PCB traces. Cleaning corrosion or debris from the port and surrounding area before resoldering improves electrical contact and reduces failure risks.
Always test the port for a stable connection and key registration before fully reassembling. Using magnification tools and high-quality flux minimizes bridging between pins, preventing short circuits. Addressing these issues early keeps the repair on track and guarantees reliable, long-lasting results.
When to Consider Professional Repair or Replacement Options
Deciding when to seek professional repair or replacement for a USB-C port often depends on the extent of the damage.
If pins under the connector are damaged or PCB pads are lifted or missing, it’s best to rely on experts, as soldering these requires advanced skills and tools. Similarly, damage involving broken traces or a port integrated into the PCB makes DIY repairs risky and likely to cause more harm.
If your port is loose, causing repeated disconnections despite cable replacements, professional diagnosis can guarantee proper fixes. Experts can perform continuity checks, clean damaged pads, replace ports with proper alignment, and verify power and ground connections.
You should consider professionals when:
- The port is mounted with pins under the connector
- PCB pads are lifted or missing
- Damage involves broken traces or integrated ports
- Persistent disconnections occur despite cable changes
Tips to Prevent Future USB-C Port Damage on Your Keyboard
To protect your keyboard’s USB-C port from damage, taking proactive steps during everyday use is essential. Use a high-quality braided USB-C cable with strain relief to reduce stress and wear on the port.
Always unplug the keyboard by firmly pulling the connector straight out; avoid twisting or yanking, which can loosen or damage the pins. Manage your cable routing to prevent excessive bending or sharp angles, and use cable clips or holders to support the connection point.
Regularly inspect and clean the USB-C port and cable connector with compressed air and a dry brush to remove debris that can cause connection issues.
Also, avoid placing heavy objects or tight spaces around the keyboard to prevent accidental pressure or pulling that could damage the port.
Frequently Asked Questions
Can Mechanical Keyboards Be Repaired?
Yes, you can repair mechanical keyboards if you’re skilled with soldering and tools. Carefully replace damaged parts or redo connections, but if you’re unsure, seeking professional repair guarantees safety and reliability without risking further damage.
How Much to Repair a USB-C Port?
Repairing a USB-C port on your mechanical keyboard typically costs between $20 and $80. Factors like port type, accessibility, and repair complexity influence the price. DIY kits are cheaper but professional services guarantee better reliability.
Can a Damaged Charging Port Be Fixed?
Yes, a damaged charging port can be fixed if you have soldering skills, proper tools, and experience. You’ll need to replace the port carefully, clean the PCB, and confirm the connections are secure for reliable charging.
How to Tell if a USB-C Port Is Damaged?
You can tell if your USB-C port is damaged by checking for looseness, bent pins, or cracks. Additionally, if the keyboard disconnects frequently or shows intermittent functionality, use a multimeter to verify electrical connections for power and data lines.
In Summary
Once you’ve inspected, repaired, or replaced your USB-C port, always test thoroughly to guarantee proper functionality. Handle your keyboard gently during use, and avoid excessive force when connecting cables. Regularly inspect the port for signs of wear to catch issues early. With proper care and maintenance, you can extend your keyboard’s lifespan and avoid future damage. Keep these tips in mind, and your keyboard will serve you reliably for years to come.



