

To clean and restore an old mechanical keyboard, carefully remove keycaps using a wire puller, pulling straight up to avoid damage. Soak the keycaps in warm water with denture tablets, then rinse and air-dry thoroughly. Clean the frame with damp wipes and use compressed air for dust. For damaged stems or switches, repair with superglue or replace parts if needed. With patience, you’ll bring your keyboard back to life—keep exploring for detailed steps and tips.
How Mechanical Keyboards Work and Material Challenges
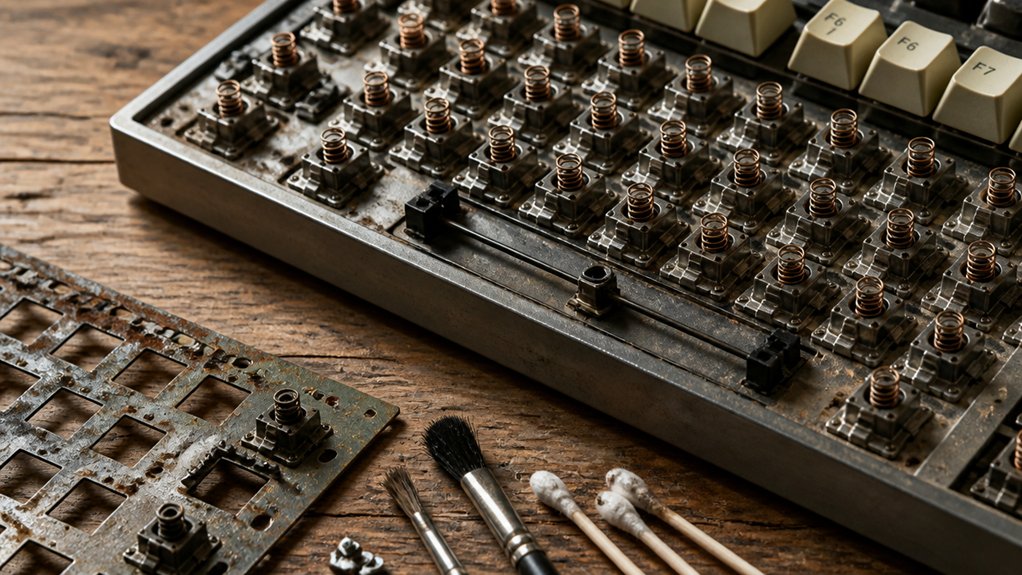
Mechanical keyboards operate through individual switches that use moving parts like Alps SKCM Black or Brown Alps, providing tactile feedback and reliable electrical contact. These switches use distinct mechanisms that differ from membrane or buckling spring designs, ensuring consistent performance.
However, the materials used in older mechanical keyboards can pose challenges. Keycaps are often made from brittle plastic, becoming fragile and prone to breaking during cleaning or removal. Unique layouts and non-standard key sizes, common in vintage models, make finding matching replacements difficult.
Despite these issues, mechanical keyboards with separate switches can often be restored without affecting their electrical contact, focusing on cosmetic cleaning. Proper cleaning with high-purity IPA is essential to ensure safe maintenance and prevent damage to delicate plastics.
Removing and Handling Keycaps Without Damage
To remove keycaps without damage, use a wire keycap puller and pull straight up to minimize stress on the stems. Handle fragile or brittle keycaps gently, especially with Brown Alps switches, to avoid breaking the stems. For larger keys like the spacebar, detach and reattach stabilizers carefully to prevent damage. Using the right tool, such as a multi-cap puller, can improve efficiency and reduce the risk of damaging multiple keys at once.
Gentle Removal Techniques
Removing keycaps carefully is essential to prevent damage, especially if your keyboard has brittle plastics or delicate wire supports. Make sure to use a wire keycap puller and pull straight up, which minimizes stress on the stems, particularly with brittle plastics like Brown Alps switches.
For large keys with wire assemblies, carefully unclip the plastic fasteners holding the wire supports before removing the keycap to avoid bending or breaking the wire. Collect the removed keycaps in a container to prevent loss or damage.
Make sure not to twist or pull the keycaps at awkward angles, as this can break fragile stems. When handling brittle or degraded plastics, support the keycap firmly but gently, and avoid using excessive force to prevent stem breakage.
Using the appropriate tools, such as specialized keyboard switch openers, can further reduce the risk of damage during removal.
Preventing Keycap Breakage
Careful handling during keycap removal is essential to prevent damage, especially when dealing with old keyboards with brittle plastic stems. Use a wire keycap puller and pull straight up to minimize stress on the keycaps’ fragile parts.
A high-quality tool with durable construction helps reduce the risk of accidental breakage during removal. For large keys with wire stabilizers, carefully disengage the plastic fasteners before removing to avoid breaking thin wire assemblies. Take photos during disassembly to guarantee correct reassembly and identify delicate parts needing extra care.
Handle keycaps made of brittle plastic, such as those from older Brown Alps keyboards, with minimal force to reduce the risk of stem breakage. Avoid twisting or bending keycaps during removal, as brittle materials are prone to cracking and snapping under lateral pressure.
Patience and gentle techniques are crucial for preserving your old keyboards’ keycaps.
How to Safely Clean Keycaps
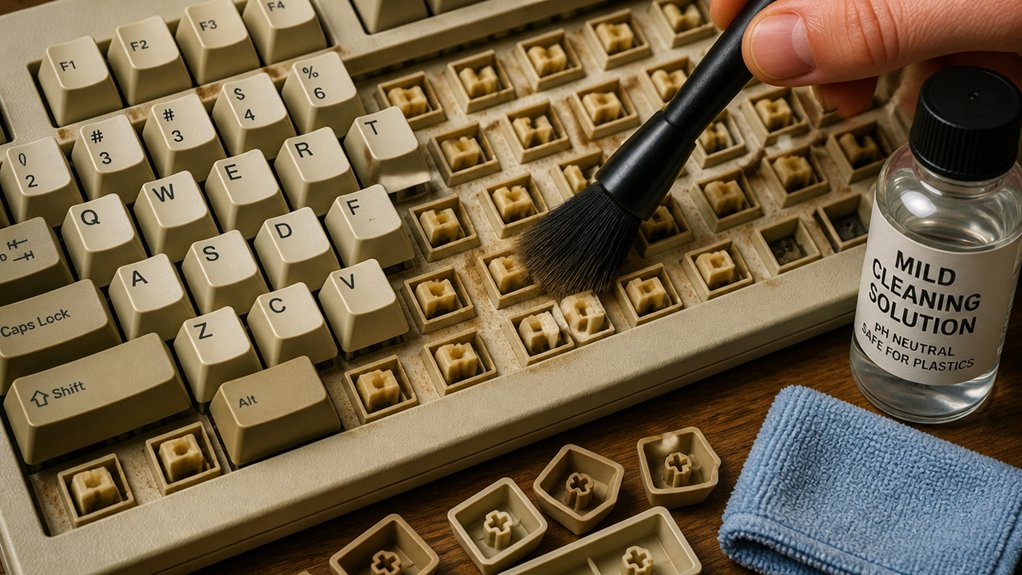
To clean your keycaps safely, start by removing them carefully with a wire keycap puller, pulling straight upward to prevent damage. Soak the removed caps in warm water with denture tablets for 24 hours, then rinse and dry them thoroughly to avoid warping or moisture damage. Be cautious with larger keys that have wire stabilizers, carefully disassembling and reassembling to keep everything intact. Using the right cleaning brushes, especially those with anti-static nylon bristles, can help prevent electrostatic damage during cleaning.
Proper Removal Techniques
Using a wire keycap puller is the safest way to detach keycaps from your old mechanical keyboard. Carefully pull the keycaps straight upward, avoiding sideways force that can break brittle stems, especially on older or fragile plastic.
For larger keys, like spacebar or enter, remove the wire stabilizer assemblies first, paying attention to plastic fastener positions to guarantee proper reattachment. Collect the removed keycaps in a container like a mixing bowl to keep them organized and prevent loss.
Be gentle, especially with keys made from brittle plastic, such as those with Brown Alps switches, as their stems can snap easily. Before removal, take photos of your keyboard’s layout. This helps you reassemble correctly and keeps the process smooth and safe. Maintaining the integrity of plastic components is essential for prolonging the lifespan of your keyboard.
Effective Cleaning Methods
Cleaning your keycaps safely involves choosing gentle methods that effectively remove dirt without damaging the legends or plastic. First, use a keycap puller to carefully lift each keycap straight up, especially large keys with wire stabilizers. Soak the keycaps in warm water mixed with denture tablets for 24 hours to loosen grime. Rinse thoroughly in cool water, using a sieve to avoid losing small pieces. For fragile or printed keycaps, skip harsh soaking. Instead, gently brush or wipe them with a damp cloth. To dry, air-dry on paper towels overnight, shaking occasionally to guarantee they’re completely dry. Avoid heat sources, which can warp plastic. Here’s a visual guide:
| Step | Method | Focus |
|---|---|---|
| Removal | Keycap puller | Carefully extract |
| Soaking | Warm water + tablets | Loosen grime |
| Rinsing | Cool water, sieve | Prevent loss |
| Drying | Air on paper towels | Avoid warping |
| Fragile caps | Gentle brushing/wiping | Protect legends & plastic |
Additionally, choosing appropriate cleaning solutions ensures the plastic and legends remain intact during cleaning.
Cleaning Your Keyboard Frame and Preventing Water Damage
Before you start cleaning your keyboard frame, it’s important to shake the keyboard upside-down to loosen and remove any loose debris. This step prevents dirt from settling deeper into the chassis.
Shake your keyboard upside-down to remove loose debris before cleaning.
Use wet wipes and cotton buds carefully around the switches and keyboard body, avoiding excess moisture that could seep into electronic parts. Never soak the keyboard or allow water to penetrate internal components, as this can cause permanent damage.
After cleaning, let them dry completely—this is essential to prevent moisture-induced malfunctions. Use dry cloths or let the keyboard air dry in a well-ventilated area before reassembling.
Ensuring the keyboard is fully dry protects the electronics and preserves its functionality, keeping your mechanical keyboard clean and safe from water damage long-term. Additionally, applying an anti-static spray can help neutralize charge buildup and maintain static control, reducing dust attraction and static discharge risks.
Repairing Mechanical Switches and Restoring Keycap Stems

When a keycap stem breaks, you can often repair it with a small amount of superglue, but you need to be careful to keep it from entering the switch. Replacing an entire switch is an option if repair isn’t possible, especially for common models, but restoring stems is usually more practical for vintage or rare keys. Ensuring everything is properly seated and avoiding force during reassembly helps prevent further damage and keeps your keyboard functioning smoothly. Using precise soldering techniques can also be helpful when working with delicate keyboard components.
Replacing Broken Switches
If a mechanical switch becomes faulty or breaks, repairing or replacing it can restore your keyboard’s functionality. To start, carefully take the keycaps off to access the switches.
When replacing a switch, confirm compatibility with your keyboard’s original type, like Alps Brown or Black switches, for proper tactile feedback. You can repair broken switches by resoldering contacts or replacing the switch entirely.
- Verify the new switch matches your keyboard’s specifications
- Carefully disconnect or remove the faulty switch without damaging surrounding parts
- Reattach the new switch, confirming it clicks and functions correctly
Avoid forcing or applying excessive pressure when taking the keycaps or handling brittle plastics, as this can cause further damage. Proper attention guarantees your replacement switch restores peak performance. Additionally, applying a suitable stabilizer lubricant can help reduce rattling and ensure smooth operation after reassembly.
Repairing Keycap Stems
Broken keycap stems can often be repaired effectively with a small drop of cyanoacrylate (superglue), but you need to apply it carefully to avoid damaging the switch mechanism.
Start by cleaning the broken surfaces with isopropyl alcohol to remove any dirt or residue, ensuring a strong bond. Apply the glue sparingly directly onto the damaged stem, avoiding its entry into the switch mechanics.
Hold the pieces firmly until the glue bonds, then let it cure fully for at least 24 hours before reattaching the keycap.
For larger keys with wire assemblies or plastic fasteners, double-check that supports are correctly aligned during reattachment to prevent damage.
If stems are irreparable and replacement keycaps aren’t available, repairing with glue is your best option to restore functionality.
Dealing With Brittle Plastic Keycaps and Finding Replacement Parts
Old mechanical keyboards, especially those with Brown Alps switches, often have keycaps made from brittle plastic that can crack or break during cleaning or handling. To prevent further damage, handle keycaps gently and avoid excessive force when clean keycaps.
Handle vintage keycaps gently to prevent cracking or breakage during cleaning or handling.
If a keycap is cracked, consider repairing it with a small amount of cyanoacrylate glue, but only after proper cleaning and drying.
You might face difficulty finding replacement parts for vintage or uniquely laid-out keyboards, such as 1.12 unit keys. Here are some tips:
- Search online vintage keyboard communities and marketplaces for custom or compatible replacement keycaps.
- Consider using keycap sets from newer keyboards that match the size and profile.
- Be cautious with specialty keys and wire stabilizers during disassembly to avoid additional damage.
Finding the right parts can be challenging but rewarding.
Reassembling Your Keyboard for Long-Term Use
Before reassembling your keyboard, make sure all components are completely dry, especially the keycaps and internal parts, to prevent moisture damage and guarantee proper function. It’s time to clean properly, making certain no residual debris or moisture remains inside the chassis, especially around switches. Carefully reattach each keycap, aligning and pressing straight down without forcing. For larger keys, reattach wire supports properly to avoid damage. If you find broken stems, fix them with a tiny drop of superglue, waiting 24 hours before use. To avoid mix-ups, document your disassembly with photos or notes, so everything returns to its original place. Here’s a quick reminder:
| Tip | Importance |
|---|---|
| Dry components | Prevents damage |
| Accurate reattachment | Maintains layout |
| Repair broken parts | Ensures longevity |
| Document process | Saves time |
| Check for debris | Preserves function |
How to Restore Capacitive Contacts for Better Key Response
Restoring the capacitive contacts in your keyboard is a delicate process that can greatly improve key response if done correctly. Start by carefully inspecting the layered “sandwich” of the contacts—consisting of plastic, sponge, foil, and insulating layers.
Use a hole punch (~10mm diameter) to precisely cut matching circles from damaged layers. To guarantee smooth dryness, gently heat the sponge on a moderately hot surface outdoors—never before soaking in warm water—to achieve the correct thickness.
When testing, place sample circles on PCB contacts and press with plastic tools to verify proper registration. Use neoprene glue to attach sponge to plastic, avoiding harsh adhesives that can damage the layers.
Properly restored contacts will yield a more responsive, consistent key feel.
Troubleshooting Common Cleaning and Restoration Problems
When troubleshooting common cleaning and restoration problems, start by carefully inspecting the keyboard for damage or debris that might interfere with proper operation. Use compressed air to blow out dust, dirt, and debris from between switches and inside hard-to-reach areas. This prevents buildup that can affect key response and prevents damage during reassembly.
Be cautious with fragile parts—identify switch types and handle keycaps delicately, especially Brass Alps or similar brittle plastics. Avoid soaking the entire keyboard or exposing electronic parts to moisture, which could cause short circuits. Instead, clean the chassis with damp wipes or cotton buds.
If keycap stems are broken, use minimal cyanoacrylate glue carefully, avoiding excess that could seep into switches. Proper inspection and gentle cleaning help resolve most issues.
Maintaining Your Restored Mechanical Keyboard
Once you’ve thoroughly cleaned your mechanical keyboard, maintaining its performance requires regular care. To keep it in top shape, you need to be able to remove dirt and debris effectively.
Regularly remove and clean keycaps by soaking them in warm water with denture tablets or mild detergent, making sure they’re completely dry before reassembly. Use a wire keycap puller to safely detach keycaps and handle large keys carefully to avoid bending or breaking stabilizers.
Clean the keyboard chassis with damp wipes and cotton buds—avoid soaking to protect electrical components and switch functionality. Also, inspect key stems and switches for brittleness or damage; you’re able to use cyanoacrylate glue for minor repairs and need to allow 24 hours to cure before use.
Periodic dusting and light cleaning help preserve both appearance and performance.
Frequently Asked Questions
How to Clean a Really Dirty Mechanical Keyboard?
To clean a really dirty mechanical keyboard, start by unplugging it, then carefully remove keycaps and soak them. Use a damp cloth for the chassis, and clean switches with cotton buds, ensuring everything dries thoroughly before reassembly.
What Is a 96% Keyboard Missing?
A 96% keyboard misses a dedicated navigation cluster, separate function keys, and sometimes extra spacing or unique key sizes. It combines these functions into secondary layers, offering a compact design but losing some distinct keys found on larger layouts.
Can I Use WD40 to Clean a Mechanical Keyboard?
You shouldn’t use WD40 to clean your mechanical keyboard. It’s meant for metal parts and can damage plastic components. Instead, use electronic-safe contact cleaners for switches and mild detergents or isopropyl alcohol for keycaps and casing.
How to Restore an Old Keyboard?
To restore an old keyboard, carefully disassemble it, clean each part with gentle disinfectants, replace broken keycap stems with glue, and reassemble everything carefully, making sure all stabilizers and switches function smoothly for peak performance.
In Summary
Restoring your old mechanical keyboard can breathe new life into it, but it requires patience and careful handling. By understanding how it works and following proper cleaning techniques, you can prevent damage and guarantee longevity. Regular maintenance keeps your keyboard responsive and looking great, ultimately saving you money and frustration. With these tips, you’ll enjoy a reliable, refreshed keyboard that offers smooth performance for years to come. Happy cleaning!



