
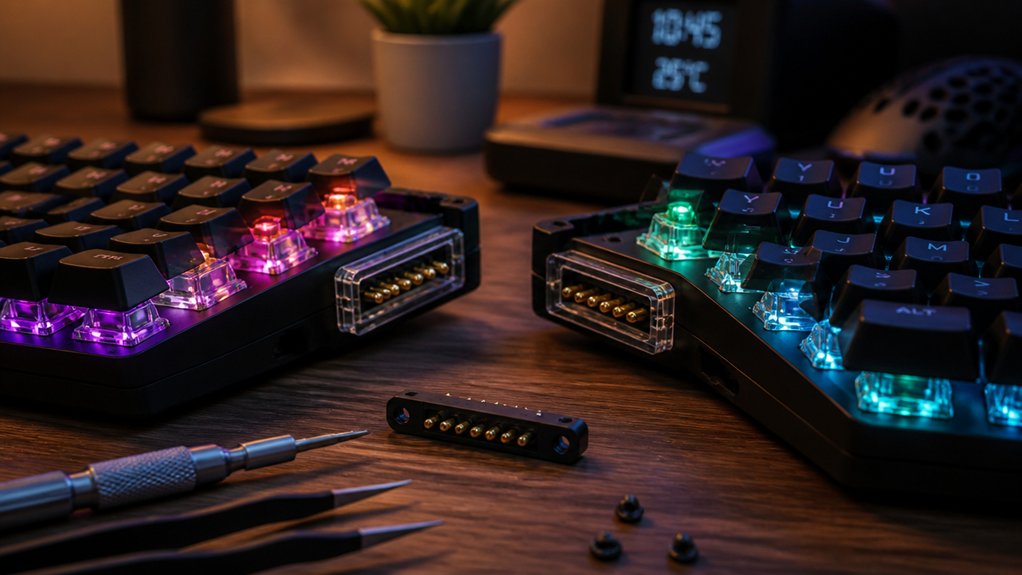
To build a split mechanical keyboard with sockets, guarantee your PCB supports compatible hot-swap sockets and switches, like MX or Kailh Choc. Use tools like precision tweezers and a soldering iron set around 150°C for assembly. Organize your thumb clusters and key layout ergonomically for comfort. Customize firmware with QMK or Vial, and consider adding OLEDs or encoders for functionality. Keeping maintenance simple with socket compatibility and lubrication helps longevity. Keep exploring for more tips to perfect your build.
Why Choose a Split Mechanical Keyboard With Sockets for Ergonomics

Choosing a split mechanical keyboard with sockets can greatly improve your ergonomic setup because it allows each half to be independently controlled and positioned. The split keyboard layout helps align your hands and arms naturally, reducing wrist strain and ulnar deviation. Additionally, many of these PCBs support Hot-swappable MX-compatible PCB features, making it easy to customize your switches to suit your comfort preferences. Hotswap sockets make it easy to replace or lube switches without risk to solder pads or switch legs, boosting comfort and durability during long typing sessions. They also let you experiment with different switch types or layouts, helping you find the tactile response that suits your ergonomic needs best. Additionally, the split design with socketed switches makes it simple to incorporate tenting accessories or adjust splay angles for a more neutral wrist position. Overall, sockets support customization, enhancing comfort and reducing injury risk.
How to Pick the Right Parts for Your Split Keyboard Build
When selecting parts for your split keyboard, you need to prioritize compatibility to guarantee everything fits and works smoothly. It’s also important to take into account availability, so you can source components easily and avoid delays.
Compatibility Considerations
Ensuring compatibility is essential when building a split mechanical keyboard, as mismatched parts can cause functionality issues or damage.
For split keyboards, verify that your PCB supports hot-swap sockets compatible with your switch type, like MX style or Kailh Choc, to avoid having to solder the switches. Check that switch leg spacing and pin configurations match the sockets and PCB footprint, particularly ensuring straightened legs to prevent damage during installation.
Confirm that the TRRS jack and communication port are compatible between the split halves, including wiring standards and connectors, for seamless data transfer.
Also, choose controller chips, like Arduino Pro Micros, supported by firmware such as QMK, to enable proper operation and programming.
Finally, match your keycap profile and size to your switches and layout for comfort and aesthetics. Additionally, ensure that the hot-swap sockets and PCB materials are compatible with the chosen switches to maintain durability and reliable performance, as highlighted in hot-swap socket applications.
Availability and Sourcing
Looking for the best parts to build your split mechanical keyboard can be challenging, especially with ongoing supply chain shortages. To navigate this, consider second-hand fully built split keyboards as alternative sources for quality components.
Focus on open-source hardware like the Lily58 Pro kit, which uses hot-swap sockets and Arduino Pro Micro controllers, ensuring both compatibility and community support.
Choose tactile MX-style switches, such as DROP + INVYR Holy Panda pairs, that work seamlessly with socket-compatible PCBs for easy installation and switch swapping without soldering.
When sourcing sockets, Millmax sockets are highly recommended; they enable simple insertion and removal of Arduino Pro Micros, making maintenance more straightforward.
A split ergonomic layout can also facilitate easier wiring and placement when designing your custom build.
Enhance your build with accessories like OLED screens, magnetic cables, and lubricants to optimize functionality and typing feel.
Complete Assembly Guide: Building Your Split Keyboard With Hot Swap Sockets

Before assembling your split keyboard, gather all your tools and prepare the switches and PCB properly.
Use Millmax sockets to mount switches and Arduino Pro Micros without soldering, ensuring easy swaps later.
Follow best practices like supporting the sockets while pressing switches and hand-tightening screws to prevent damage.
Additionally, consider verifying the electrical ratings of your sockets to ensure they meet your device’s voltage and current requirements for safe operation.
Gathering Necessary Tools
Gathering the right tools is essential for a smooth assembly process when building your split keyboard with hot swap sockets.
First, make sure you have a soldering iron set to about 150°C; this temperature safely solder SMD diodes and sockets without damaging components. Precision tweezers or a small flat tool are necessary to carefully straighten bent switch legs before inserting them into the sockets. Using high-quality, anti-static tweezers can prevent static discharge damage to sensitive electronics ESD-safe, ensuring your components remain uncompromised during assembly.
Use Millmax sockets to attach the Arduino Pro Micro, allowing easy removal or replacement later. Keep Krytox GPL 205 grade 0 lubricant nearby to smoothly lube mechanical switches’ stems and springs for better keystrokes before placement.
Finally, prepare magnetic USB and braided TRRS cables for secure connections between the halves and to your computer. Having these tools ready guarantees a seamless build process.
Preparing Switches and PCB
To guarantee a smooth assembly process, start by carefully straightening any bent switch legs using tweezers or your fingernail. This prevents damage to the hot swap sockets and PCB pads when inserting switches. Use Millmax sockets to attach Arduino Pro Micros, allowing easy removal without soldering later. Firmly support the back of hot swap sockets while pressing switches into the plate to avoid dislodging them. When assembling, insert switches into opposing corners first, then align the plate with the PCB before pressing in the remaining switches. Proper preparation guarantees your keyboard’s switches fit securely and function flawlessly, with attention to material durability ensuring long-term performance.
Soldering and Assembly Tips
Once you’ve prepared your switches and PCB, the next step is assembling the components securely. Use Millmax sockets for your Arduino Pro Micro to make switch removal easier during upgrades. When installing switches into hot swap sockets, support the backplate to prevent dislodging or damaging the socket pins. Straighten bent switch legs beforehand to avoid damaging the sockets or breaking PCB pads. Hand-tighten screws with 6mm or 8mm spacers, depending on your switch type, and remove the protective foil from acrylic plates before assembly. Insert switches starting from opposing corners to guarantee proper alignment. Align the plate carefully with the PCB, then press in remaining switches to secure everything properly. Ensuring component quality and proper handling reduces errors during assembly, making the process smoother and more reliable. Following these tips helps ensure a smooth build process and a durable, functional split keyboard.
How to Solder and Install Switches in Your Hot Swap Split Keyboard

Begin by carefully preparing your switches and hot swap sockets to guarantee a smooth installation process. Make certain all switch legs are perfectly straight to prevent damage to the hot swap sockets or PCB pads.
When inserting MX switches with metal plates, start by placing switches into opposing corners, then gradually add remaining switches for a secure fit. Support the back of the hot swap socket during installation to avoid dislodging it from the PCB or plate.
Avoid using excessive force—if switch clips don’t fully seat, gently press side clips with a tool like a nail, especially with Kailh Choc switches. To test switch alignment, press one pin first; if misaligned, reheat the solder joint to correct the position before finalizing.
- Straighten switch legs before installation
- Support socket backs during insertion
- Insert MX switches into opposing corners first
- Use gentle pressure with tools if clips don’t seat
- Reheat solder to adjust switch alignment
Additionally, ensuring the hot-swappable PCB is designed to support the specific switch types and layouts you’re using can help prevent compatibility issues during installation.
Setting Up Firmware and Customizing Layouts for Your Split Keyboard
Setting up firmware for your split keyboard involves choosing the right tools and configuring both halves to work seamlessly together. For split mechanical keyboards, QMK firmware is the best option, as it supports split layouts and offers extensive keymap customization through layered keymaps accessible via LOWER and RAISE keys.
Configure your split mechanical keyboard with QMK for seamless layouts and customizable layered keymaps.
To program your dual Arduino Pro Micro controllers, compile and flash the firmware in a virtualized environment to manage dependencies and guarantee proper communication via the TRRS cable interface.
You can customize multiple keymaps (up to 4 layers) to access symbols, media keys, and macros, boosting productivity without adding physical keys. Additionally, switch the default master half in the firmware to match your hand preference, enabling smooth operation regardless of your setup.
Use community-supported tools like QMK Configurator and Vial for graphical editing and real-time layout remapping.
How to Adjust Tent Angle and Tenting for Maximum Comfort
Adjusting the tent angle of your split mechanical keyboard is a key step toward maximizing comfort and reducing strain during extended typing sessions. To achieve ideal tenting, start with small angles—around 5-10°—and gradually increase while monitoring wrist and forearm comfort.
For sockets, carefully add tenting accessories like 3D printed legs or magnetic risers between the PCB and case, ensuring stability without stressing wiring. You can also use foldable laptop stand feet or desk risers temporarily to test different heights before committing to permanent solutions.
To maintain proper ergonomics, keep both halves evenly tilted to avoid strain from uneven angles. Proper tenting supports ergonomic keyboards and helps align your wrists naturally, reducing fatigue and minimizing discomfort. Additionally, choosing adjustable ortholinear PCBs with customizable tilt options can further enhance ergonomic benefits.
Organizing Thumb Clusters and Key Layouts for Better Ergonomics
Organizing your thumb clusters with multiple keys close at hand helps reduce strain and improves efficiency. Using columnar staggering aligns keys with natural thumb movement, boosting comfort. Designing intuitive layouts and layering keys allows for maximum functionality without sacrificing ergonomic balance. Incorporating hot-swappable switches enables easier customization and maintenance, further enhancing overall ergonomic design.
Optimizing Thumb Key Placement
To achieve ideal ergonomics on a split mechanical keyboard, arranging your thumb keys thoughtfully is crucial. Focus on creating a well-designed thumb cluster that matches your natural thumb range of motion and reduces strain.
Position high-frequency modifier keys and layer toggles within easy reach to minimize finger travel, boosting efficiency. Customize your thumb key layout with software like QMK to assign macros, media controls, or navigation keys, enhancing workflow.
Use tactile differentiation, such as varied switches or keycap profiles, to give clear feedback and prevent accidental presses. Adjust thumb cluster angles and spacing through tenting or remapping to find the most natural, comfortable thumb posture for extended typing sessions.
Fundamentally, well-organized thumb clusters contribute greatly to a user-friendly ergonomic keyboard setup.
- Arrange thumb cluster with varied sizes and spacing
- Position high-use keys within easy reach
- Customize with software for macros and controls
- Use tactile keys for clear feedback
- Adjust angles and spacing for comfort
Designing Intuitive Layouts
Designing intuitive layouts begins with understanding the natural movement of your thumbs and fingers. Organize thumb clusters with ergonomic spacing and tactile differentiation to reduce pinky strain and evenly distribute frequent functions.
Place high-frequency modifiers, layer switch keys (LOWER/RAISE), and navigation controls within easy thumb reach—this minimizes finger travel and boosts typing efficiency. Use consistent sizing and positioning for thumb keys, reflecting natural thumb movement arcs, to prevent cramped layouts that could cause strain or overuse injuries.
Incorporate columnar or staggered arrangements in main clusters to support ergonomic wrist, finger, and thumb movements. Include dedicated thumb cluster keys for common actions like space, backspace, enter, and shift, leveraging strong thumb muscles and reducing the strain placed on weaker fingers.
These steps promote a truly ergonomic, intuitive layout.
Troubleshooting Common Socket and Switch Compatibility Issues
Are you experiencing issues with switch and socket compatibility in your split mechanical keyboard? Troubleshooting begins with checking switch pin alignment and socket fit. Misaligned or oversized pins can cause poor contact or damage the socket.
Check switch pin alignment and socket fit to prevent contact issues and socket damage.
Carefully straighten bent switch legs before insertion to prevent tearing PCB pads or damaging the socket. Pay special attention to switches like Kailh Choc, where legs may not fully protrude through acrylic plates, affecting seating and solder joints.
If you solder sockets, guarantee good heat application to avoid cold joints that cause keypress issues. Additionally, verify that switch pin thickness matches socket hole diameters. Proper compatibility and installation prevent unstable key actuation and potential socket damage.
- Straighten bent switch legs before installation
- Confirm socket and switch size compatibility
- Guarantee smooth, aligned insertion without force
- Check for fully protruding switch pins
- Properly solder sockets to prevent intermittent issues
Enhancing Your Keyboard With OLED Displays, Encoders, and Dampers
Enhancing your split mechanical keyboard with OLED displays, encoders, and dampers can greatly improve both functionality and user experience. OLED displays, soldered to PCB headers, showcase custom status info, logos, or layer indicators for a sleek look and quick access. Rotary encoders provide versatile input options, handling volume adjustments, scrolling, or other functions with support for rotation and push actions programmed via firmware. Sound dampening plates placed between switches and the top plate reduce noise and vibrations, creating a quieter typing environment. When integrating OLEDs and encoders, careful wiring and soldering guarantee reliable communication with Arduino Pro Micro controllers on each half. Consider this visual:
| Component | Function | Benefits |
|---|---|---|
| OLED displays | Show statuses and logos | Aesthetic, informative |
| Rotary encoders | Volume, scrolling controls | Efficient, customizable |
| Dampers | Reduce noise and vibration | Quieter, smoother typing |
Final Tips: Maintaining and Personalizing Your Split Mechanical Keyboard
To keep your split mechanical keyboard performing at its best, regular maintenance and personalization are essential. Using Millmax sockets for your Arduino Pro Micro makes it easy to remove and replace components without desoldering, simplifying upkeep.
Before inserting switches, check for bent legs to avoid damaging hot swap sockets and PCB pads, ensuring your custom keyboards last longer.
Keep your firmware up to date, and customize keymaps via QMK for better comfort and productivity.
Lubricate switches with Krytox GPL 205 grade 0, and carefully reseat keycaps and plates during reassembly to preserve smooth keystrokes.
Additionally, document your modifications to track changes.
Regular checks and personal tweaks help you enjoy peak performance and tailor your split mechanical keyboard precisely to your needs.
- Use Millmax sockets for easy maintenance
- Check switch legs for proper insertion
- Keep firmware updated and customize keymaps
- Lubricate switches and reseat components carefully
- Document modifications for troubleshooting
Frequently Asked Questions
How Do I Customize My Split Keyboard’s Layout for Optimal Ergonomics?
To customize your split keyboard’s layout, experiment with key positions to match your natural hand angles, adjust tenting height for comfort, and use software to remap keys for easier access, ensuring an ergonomic setup tailored to your needs.
What Are the Best Practices for Adjusting Tenting and Tilt Angles?
Adjust tenting and tilt angles by gradually increasing or decreasing them, testing comfort and wrist position. Keep them aligned with your natural hand pose, and make small adjustments over time for ideal ergonomics and reduced strain.
How Can I Ensure Compatibility Between Sockets and Switches?
To guarantee compatibility, you should check that the socket type matches your switches, like MX or Alps. Verify pin configuration and size, and consult manufacturer specifications. Testing switches in sockets before assembly helps confirm perfect fit and function.
What Macro and Key Mapping Options Are Available for Split Keyboards?
You can customize your split keyboard’s macros and key mappings using firmware like QMK or VIA, which allow you to assign functions, create layers, and optimize your layout easily, making your typing experience more efficient and ergonomic.
How Do I Maintain and Troubleshoot Hot-Swap Socket Connections?
To maintain and troubleshoot hot-swap socket connections, regularly clean the contacts, guarantee sockets are securely seated, check for corrosion or debris, update firmware if needed, and gently reseat modules if you experience connection issues or instability.
In Summary
Building a split mechanical keyboard with sockets is a rewarding project that enhances your typing comfort and customization. By choosing the right parts, following proper assembly and soldering techniques, and customizing firmware, you can create a setup tailored to your needs. Keep organizing your layout thoughtfully, troubleshoot compatibility issues promptly, and consider adding extras like OLED displays for a personalized touch. With patience and care, you’ll enjoy a highly ergonomic and unique keyboard that transforms your typing experience.



