

To enhance your keyboard stabilizers with foam mods, choose a medium to high-density closed-cell foam like neoprene or EVA, ensuring it’s thin enough not to hinder key travel. Carefully insert cut pieces into the stabilizer housings at wire contact points to absorb vibrations, reduce rattling, and dampen hollow sounds. Proper installation and regular maintenance help keep your stabilizers quiet and smooth. Keep exploring for detailed tips to perfect your foam mods and achieve the best feel.
Why Foam Mods Improve Stabilizer Sound and Feel
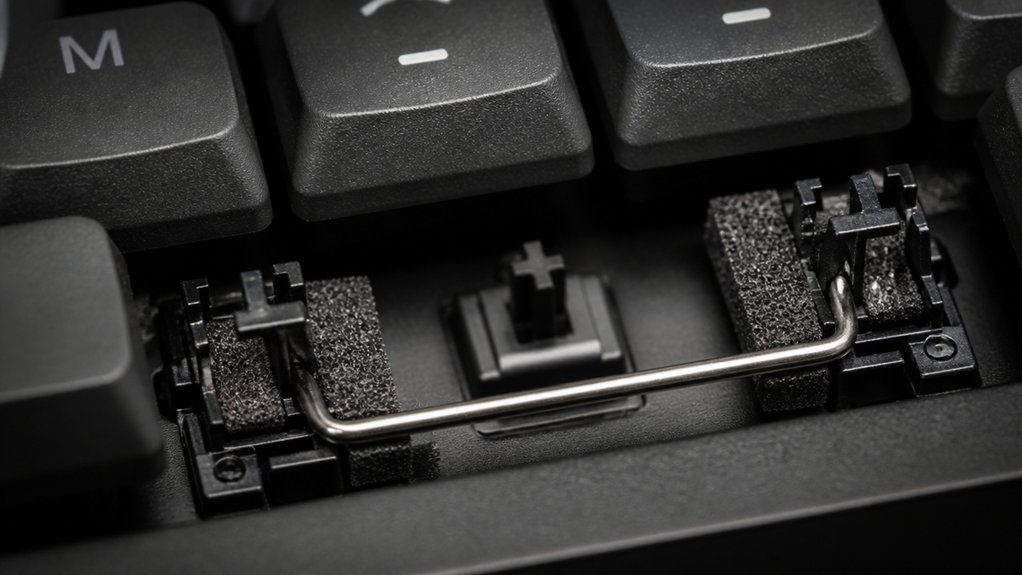
Ever wondered why foam mods make your stabilizers quieter and feel better? Foam mods absorb vibrations around stabilizer housings, reducing rattling and ticking sounds from metal-on-metal contact.
When you place foam under or around stabilizers, they dampen the hollow, echoing noise, especially from larger keys. This not only softens the noise but also enhances the overall typing feel by decreasing harshness on bottom-out. The foam cushions surface contacts, helping to prevent vibrations from resonating through the case and plate.
As a result, the stabilizers feel smoother and more controlled. Foam mods don’t just cut noise—they also influence key feel, making larger keys less rattly and more satisfying to press. Properly installed, foam layers create a more refined, quieter typing experience overall. Additionally, using appropriate foam material ensures durability and effective sound dampening over time.
How to Choose the Right Foam Material for Stabilizers
Selecting the right foam for stabilizers depends on balancing damping effectiveness with maintaining smooth key travel. You’ll want foam that dampens stabilizer noise without making the key feel mushy or uneven. Medium to high-density foam works best, as it absorbs sound while keeping the stabilizer movement responsive. Closed-cell foam is preferred because it resists moisture and offers consistent cushioning over open-cell options. Thin foam layers (around 1-2 mm) are ideal, since thicker foam can interfere with key travel or cause rattling and ticking. Look for foam with a firm but flexible texture to reduce noise and rattling while maintaining smooth stabilizer function. Material quality plays a crucial role in durability and noise reduction during long-term use. Common choices include shelf liner foam, neoprene, or thin EVA sheets sourced from keyboard modding vendors or craft stores.
Step-by-Step Guide to Installing Foam Inside Stabilizers
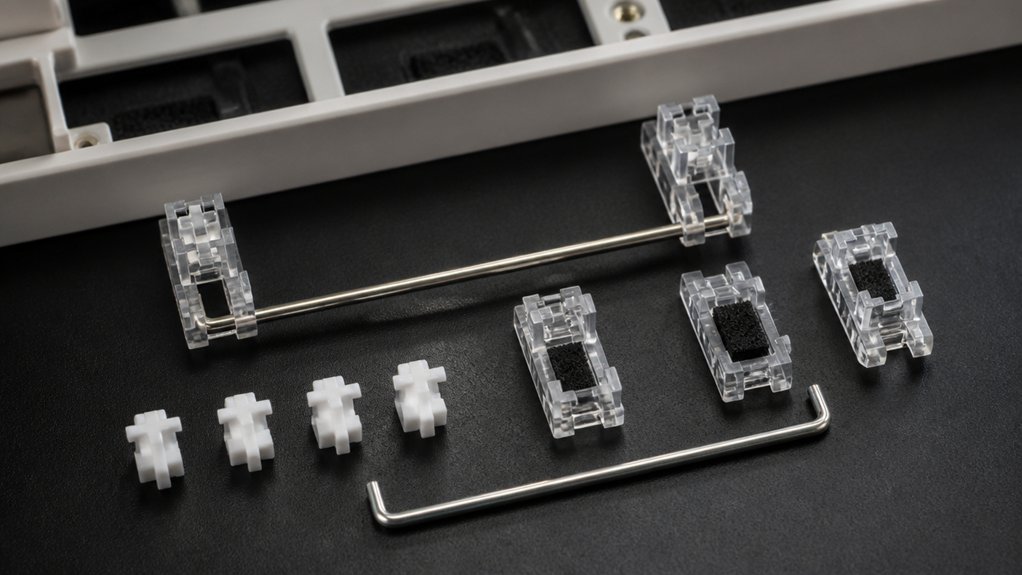
Before installing foam inside your stabilizers, carefully remove the stabilizer housings and wires from your keyboard to prevent damage and gain full access.
Cut small, high-density foam pieces or thin foam strips to fit inside the stabilizer housing, ensuring they don’t hinder stem movement. Insert the foam pieces strategically at wire contact points to cushion the metal parts, reducing rattling and absorbing noise during key presses. Place the foam evenly to achieve a secure fit within the stabilizer housing.
Utilize noise-reducing pads compatible with large spacebars and stabilizers to further dampen sound and minimize shaking, ensuring an optimal acoustic profile.
Reassemble the stabilizers by clipping or screwing them back securely, making sure the foam doesn’t interfere with proper seating or keycap stabilization.
After reassembly, test your keys for smoothness and reduced sound, adjusting the foam thickness if needed to maintain a balanced, high-quality feel.
Maintaining and Fine-Tuning Foam Mods for Best Results
To maintain ideal sound dampening and stabilizer performance, it’s essential to regularly inspect your foam mods for signs of compression or displacement. A well-maintained foam also helps preserve the gasket’s material compatibility, ensuring consistent performance over time.
Over time, compression can reduce noise reduction and alter the key feel, making stabilizers feel mushy or inconsistent. Adjust the foam thickness by trimming a thin layer if necessary, balancing cushioning and avoiding excessive resistance during keypress.
Keep your foam clean by removing dust or oils that could degrade resilience or cause key binding. Use compatible foam types with low density for peak damping without adding too much travel resistance.
When performance declines or foam shows visible wear, replace or reapply your foam mods to sustain their noise reduction and stabilizer support. Consistent maintenance guarantees smooth key operation and long-lasting stabilizer effectiveness.
Fixing Common Foam Mod Problems in Stabilizers
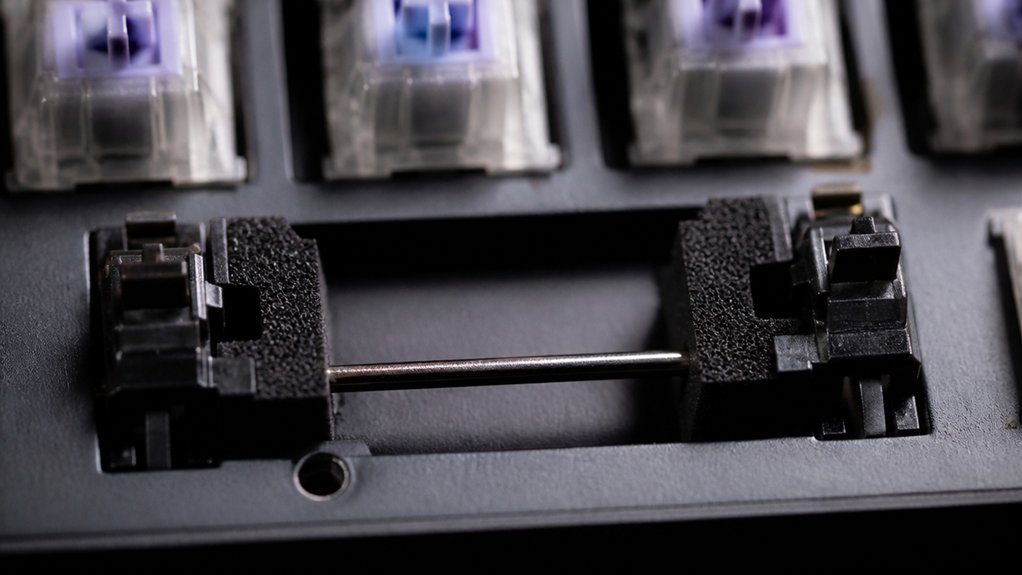
When foam mods don’t perform as expected, it’s often due to common installation issues that can be quickly corrected. Using overly thick foam pads in stabilizer housings can cause a mushy bottom-out feel and sluggish keypresses, so trim or opt for thinner foam.
Proper foam placement and trimming ensure optimal typing feel and noise dampening.
Improper foam placement may obstruct wire movement or housing clips, leading to sticky or slow key movement and uneven stabilizer activation.
If the foam is too thin or loosely applied, it won’t effectively dampen noise or rattle, diminishing noise dampening benefits.
Also, dense foam that degrades or compresses unevenly over time can cause inconsistent feel.
To fix these problems, guarantee precise foam shaping, proper fit, and placement that avoids interfering with key or wire movement. Material compression over time can also affect the performance, so choosing durable foam with fine cell structures ensures long-lasting dampening effects.
Frequently Asked Questions
How to Make Keyboard Stabilizers Better?
You can improve your keyboard stabilizers by adding foam mods to dampen vibrations and reduce rattling. Place dense foam inside stabilizer housings and between the PCB and plate, then lubricate for smoother, quieter, more stable keypresses.
What Does Foam Mod Do to Keyboard?
A foam mod reduces vibrations and noise in your keyboard by absorbing sound and stabilizer rattle, making your typing quieter and smoother. It also enhances the overall sound profile and feel, giving you a more solid, customized typing experience.
How to Add More Foam to Keyboard?
You add more foam to your keyboard by inserting thin foam sheets between the PCB and the plate or inside the case underneath the PCB. Carefully cut and secure the foam to dampen sound, reduce vibrations, and improve typing feel.
What Does a 96% Keyboard Not Have?
A 96% keyboard doesn’t have a dedicated number pad, extra macro keys, or large space for internal foam mods beneath stabilizers. It retains most cluster keys but features a compact layout, saving space without full-size keys.



