
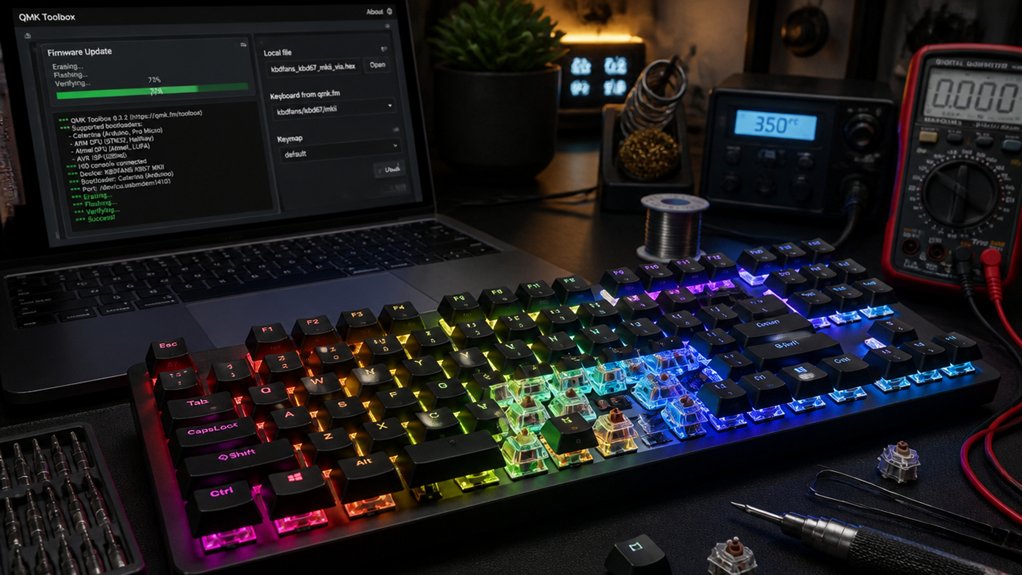
When troubleshooting firmware issues on your mechanical keyboard, first identify your keyboard’s microcontroller and firmware version to guarantee compatibility. Use the correct tools like QMK Toolbox and follow proper procedures to enter bootloader mode. Always back up your keymaps and settings before flashing and double-check the firmware matches your PCB revision. Avoid power interruptions during flashing, and if problems persist, seek community support or professional repair options—there’s more to discover to keep your keyboard functioning perfectly.
Understanding Your Keyboard’s Microcontroller and Firmware Basics

Have you ever wondered what makes your mechanical keyboard tick? It all starts with the firmware embedded in its microcontroller—like the ATmega32U4, RP2040, or STM32. This firmware is crucial software that manages key scanning and communication with your computer. Understanding the microcontroller architecture is essential for proper firmware flashing and troubleshooting. Your keyboard firmware, such as QMK Firmware, is often customizable, letting you modify key layouts and features. Different keyboard models and revisions need specific firmware versions to work correctly, preventing issues like bootloader loops or device bricking. Knowing your keyboard’s microcontroller type and how to access its firmware is indispensable for safe updates or troubleshooting. By understanding these basics, you can confidently manage firmware updates, recover your keyboard if needed, and avoid damaging it through incorrect flashing or incompatible versions.
How to Identify Your Keyboard’s MCU and Firmware Version
To identify your keyboard’s MCU and firmware version, start by inspecting the PCB for markings that specify the microcontroller model. You can also connect your keyboard in bootloader mode and use tools like QMK Toolbox to view details like the MCU type and firmware version. Recognize that different microcontroller support configurations may require specific flashing procedures. Refer to your keyboard’s documentation or examine firmware files for additional information on the compatible MCU and firmware version.
Detecting Microcontroller Model
Identifying your keyboard’s microcontroller (MCU) model is a crucial step before modifying or flashing firmware, as using incompatible firmware can cause bootloader loops or bricking.
To find the microcontroller model, inspect the PCB labels or markings, usually visible under keycaps or on the back of the board. When connected in Bootloader Mode, the QMK Toolbox displays the MCU identification, including the chip type and bootloader status, indicated by a yellow message.
Confirming the MCU and PCB revision guarantees you select the correct firmware file for flashing. Manufacturer documentation and firmware download pages often specify the exact MCU, such as ATmega32U4 or STM32. Additional details about compatible switch types and socket configurations can also influence your firmware choice, especially if you’re utilizing hot-swap PCB sockets for switch replacements.
Tools like QMK Configurator and community forums can further assist in verifying your device’s MCU and firmware version.
Checking Firmware Version
When you connect your keyboard in bootloader mode, tools like QMK Toolbox can provide essential information about your device’s current firmware and MCU. The software displays the MCU type and firmware version, helping you verify if a firmware update is necessary. To identify the MCU, check the PCB labels, model documentation, or the yellow status message in QMK Toolbox (e.g., ATmega32U4, RP2040). Confirm the firmware version by inspecting firmware file names and metadata before flashing, ensuring compatibility with your specific MCU and PCB revision. Use the table below for a quick overview: Additionally, understanding the firmware updating process can help troubleshoot common issues effectively.
| Step | Action | Result |
|---|---|---|
| 1 | Enter bootloader mode | Connects to flashing tools |
| 2 | Launch QMK Toolbox | Displays firmware info |
| 3 | Check MCU and firmware version | Confirm compatibility |
This process helps prevent compatibility issues during firmware updates.
Using Diagnostic Tools
Have you ever wondered how to confirm your keyboard’s microcontroller and firmware version without guessing? To do this, connect your Mechanical Keyboard in bootloader mode using tools like QMK Toolbox.
When connected, the yellow status message confirms the detected MCU, such as ATmega32U4 or RP2040, helping verify firmware compatibility. You can also check your keyboard’s PCB name and revision printed on the device or its documentation for matching firmware.
Using Device Manager on Windows or System Information on macOS reveals driver and bootloader status during flashing mode. Additionally, pressing the physical reset button or key combo (like Space + B) helps you enter bootloader mode easily.
To ensure proper communication and firmware compatibility, verifying hardware specifications on your device can be very helpful.
For further guidance, consult your support page or try the QMK Configurator for detailed diagnostics.
Common Causes of Firmware Failures and Bricking
Firmware failures often happen because of interrupted flashing processes, which can happen if your power cuts out or you disconnect during the update.
Installing the wrong firmware version, especially if it doesn’t match your keyboard’s hardware, can cause serious issues like bricking or boot loops.
Additionally, using unstable USB connections or incompatible hardware can lead to communication errors and corruption during flashing.
A reliable reset button can help prevent some of these issues by making firmware reinstallation safer and more controlled.
Firmware Version Mismatch
A firmware version mismatch can cause significant issues during the flashing process, often resulting in failed updates or your keyboard becoming bricked. Using open source tools like QMK Toolbox, you need to confirm that the firmware matches your specific MCU and PCB revision.
Connecting your keyboard directly to an unstable USB hub or a shared port can interfere with proper flashing, especially if the firmware isn’t compatible.
Installing firmware designed for a different revision—like Planck Rev5 on a Rev6 PCB—may cause bootloader loops, preventing the keyboard from exiting flash mode. Incorrect firmware can also overwrite critical areas, such as the bootloader, especially with nRF52840 chips.
Always verify firmware compatibility before flashing to avoid damaging your hardware beyond repair.
Interrupted Flash Process
Interruptions during the flashing process are among the most common causes of firmware failures and bricking your keyboard. Power loss, unplugging the USB cable, or disconnecting during a flash can corrupt the firmware, leaving your keyboard unresponsive or “bricked.” Interrupting the process can also damage the EEPROM, causing stuck keys or erratic behavior. Ensuring the use of a hot-swap socket compatible PCB can help prevent damage by simplifying switch replacements without soldering. Using incompatible firmware versions for your keyboard’s MCU or layout can trigger bootloader loops or prevent successful verification. Unstable USB connections, like faulty cables or through USB hubs, increase the risk of interruptions during flashing, leading to potential corruption.
The QMK Firmware documentation explicitly warns against unplugging or powering down the device during flashing. To avoid issues, guarantee a stable connection and don’t interrupt the process once it has started.
Hardware Compatibility Issues
Guaranteeing your keyboard’s hardware matches the firmware you’re installing is crucial, as any mismatch can lead to serious issues like bootloader loops or permanent bricking.
To avoid this, check the following:
- Use firmware that matches your keyboard’s MCU and PCB revision to prevent incompatible configurations, like applying Rev5 firmware on Rev6 hardware.
- Be cautious of overlapping firmware regions, especially on nRF52840 controllers, which can erase the bootloader and disable your keyboard.
- Use quality, properly coiled or short USB cables, and connect directly to the computer to prevent power issues during flashing.
- Confirm correct driver installation, including bootloader drivers, to guarantee your flashing tool recognizes the keyboard without communication failures.
- Ensure the firmware supports the hot air rework stations you are using, especially regarding temperature and airflow controls, to avoid damage during updates.
How to Back Up Your Settings Safely Before Firmware Repair
Before starting any firmware repair on your mechanical keyboard, it’s essential to back up your current settings to prevent data loss.
Always back up your keyboard settings before firmware repairs to avoid losing custom configurations.
First, use the QMK Configurator to export and save your keymap JSON file as a backup. Additionally, back up configurable settings like debounce time, layers, and macros separately, since these aren’t always included in the keymap export.
If you’ve custom-compiled firmware, save a copy of the firmware file (.hex or .bin) to facilitate restoration.
It’s also helpful to document your keyboard model, PCB revision, and MCU type, ensuring you can re-flash the exact same firmware afterward.
Pay attention to switch compatibility options and the specific firmware features to ensure your custom switches and lighting settings are preserved.
Finally, store all backups on a reliable external drive or cloud service, protecting your data in case of computer crashes during the repair process.
How to Enter Bootloader Mode on Different Keyboard Models

To access bootloader mode on your keyboard, you’ll need to use different methods depending on the model. Some require pressing a reset button, while others need specific key combinations or shorting pins on the PCB.
A step-by-step instruction manual can help guide you through the process accurately and safely.
Different Bootloader Methods
Entering bootloader mode on a mechanical keyboard varies greatly depending on the model and microcontroller used. You might need to use specific key combinations, hold certain keys, or press a hidden button.
- For many models, press a key combo like Space + B or hold fn + J + Z for about 4 seconds during connection.
- Some keyboards have a hidden reset or bootloader button, often located under the spacebar or on the PCB, requiring pressing or shorting.
- RP2040-based keyboards trigger bootloader mode by holding the top-left key while plugging in the USB, causing the device to appear as RPI-RP2 drive.
- ATmega32U4 controllers often need you to press a reset button or short specific PCB pins to enter DFU mode.
Reset Button Usage
Many mechanical keyboards are equipped with a physical reset button hidden in discreet corners or beneath keycaps, serving as a direct method to access bootloader mode. You’ll often find these buttons on the PCB or under the spacebar.
To use it, press and hold the reset button, then connect the keyboard to your computer. Release the button once the device is recognized, which puts it into bootloader mode. Some models require you to press a specific key combination or hold certain keys while plugging in the keyboard, so check your manual for details.
If your keyboard doesn’t have a reset button, other methods like shorting pins or specific key presses may be necessary. Always consult your keyboard’s documentation or community resources for the precise reset procedure for your model.
Shorting Pin Procedures
Shorting pins on a keyboard’s PCB provides a reliable way to force entry into bootloader mode when other methods aren’t available.
First, identify the correct pins by consulting your keyboard’s documentation or PCB labels. Once located, follow these steps:
- Power off the keyboard.
- Briefly short the designated reset pins (common in ATmega32U4 models) using a metal object.
- Keep the pins shorted for a few seconds to trigger bootloader mode.
- Release the short and connect the keyboard to USB if not already connected.
For RP2040 models, hold a specific key (e.g., top-left) while plugging in. On STM32F072 controllers, short the boot pins during power-up.
Always double-check the exact pin locations to avoid hardware damage.
How to Verify Firmware Compatibility Before Flashing

Before flashing new firmware, it’s essential to verify that it matches your keyboard’s specific hardware specifications. Check that the firmware corresponds precisely to your keyboard’s PCB name, revision, and microcontroller unit (MCU).
Using the QMK Toolbox, confirm the device is detected properly and look for the yellow DFU mode message, confirming the MCU type. Carefully review firmware file names to verify they match your keyboard model and MCU—this helps prevent installation errors or corrupted firmware.
Avoid flashing bootloader or production hex files unless explicitly instructed, as these can overwrite critical bootloader sections. Always consult official manufacturer or community sources to verify you’re downloading the latest compatible firmware version.
Proper verification reduces the risk of bricking your keyboard or causing boot loops.
Step-by-Step Guide to Flashing Firmware Correctly
To flash your keyboard firmware successfully, you need to follow a clear, step-by-step process. Make sure your firmware file is compatible with your specific keyboard model, and use a stable connection to prevent interruptions.
Then, carefully execute each step, from entering bootloader mode to confirming the firmware has been properly installed.
Verify Firmware Compatibility
How can you verify you’re flashing the correct firmware? First, guarantee the firmware matches your keyboard’s exact MCU model and revision. For example, Planck Rev5 firmware won’t work on Rev6 hardware.
Next, use tools like QMK Toolbox to confirm your keyboard is in bootloader mode and detected correctly before flashing.
Then, check that the firmware file name precisely matches your keyboard’s layout and MCU type—avoid generic or mismatched files like _bootloader.hex unless instructed.
Finally, connect your keyboard directly to a stable USB 2.0 port with a good-quality cable, avoiding hubs and USB 3.0 ports to prevent disruptions. These steps help ensure compatibility and prevent potential bricking.
Prepare Stable Connection
Guaranteeing a stable connection during firmware flashing is essential to preventing errors or bricking your keyboard. Use the included stock USB cable or a high-quality, short, uncoiled cable for reliable data transfer. Connect directly to a dependable USB 2.0 port on your motherboard or laptop, avoiding USB hubs and USB 3.0 ports, which can cause power or communication issues.
Keep your computer powered on and disable sleep mode so the flashing process isn’t interrupted by power loss. Before starting, enter the keyboard’s bootloader mode correctly using reset buttons, key combinations, or shorting pins to guarantee the firmware tool detects your device properly.
Finally, verify that the firmware file matches your keyboard model and microcontroller to avoid flashing errors or permanent damage.
Follow Proper Flashing Steps
Before starting the firmware flashing process, it’s essential to follow a precise, step-by-step method to avoid errors or damaging your keyboard. Here’s what you should do:
- Verify that the firmware file matches your keyboard’s MCU and PCB revision to prevent issues.
- Use a stable USB 2.0 port and a high-quality cable, avoiding hubs and USB 3.0 ports for reliable communication.
- Enter bootloader mode by pressing the reset button, using a key combination, or shorting specific pins.
- Keep the computer powered and don’t disconnect the USB cable until the process finishes completely.
Following these steps guarantees a safe, successful firmware upgrade without risking damage or glitches.
Troubleshooting If Your Keyboard Becomes Unresponsive During Flashing
When your keyboard becomes unresponsive during flashing, it’s often due to an interrupted or corrupted firmware update. Power loss, disconnection, or using an incompatible firmware can corrupt the firmware or EEPROM, causing the issue. To recover, manually enter bootloader mode via the reset button, specific key combinations, or shorting pins. Always use a stable, direct USB 2.0 port and a quality cable; avoid USB hubs or USB 3.0 ports that might cause power or communication problems. If the keyboard still doesn’t respond, clear the EEPROM using tools like QMK Toolbox in DFU mode before retrying. Proper setup helps prevent further failures.
| Issue | Solution |
|---|---|
| Firmware corrupt or interrupted | Enter bootloader mode, re-flash firmware |
| USB connection issues | Use USB 2.0 port and quality cable |
| EEPROM corruption | Clear EEPROM with QMK Toolbox |
| Incorrect firmware version | Verify firmware matches MCU/model |
How to Clear EEPROM and Perform a Factory Reset

If your keyboard is still unresponsive or behaving oddly after attempting a firmware re-flash, clearing the EEPROM can often resolve lingering issues.
Clearing the EEPROM can fix unresponsiveness and strange behavior after a firmware re-flash.
To do this:
- For ATmega32U4-based keyboards, enter the bootloader (DFU) mode and use QMK Toolbox to clear the EEPROM.
- For RP2040 controllers, hold a specific key (like the top-left key) when reconnecting to enable EEPROM clearing via the mass storage device.
- Use factory reset key combinations—such as holding fn + J + Z for four seconds on Keychron V/Q series—to restore default settings without reflashing firmware.
- Always clear the EEPROM before flashing new firmware to eliminate glitches and start with a clean configuration.
Following these steps helps resolve stuck settings and persistent issues easily.
Restoring Factory Firmware Using Manufacturer Recovery Tools
Restoring your keyboard to its factory firmware guarantees you’re starting with a clean, stable setup, especially after troubleshooting or custom modifications. First, download the official firmware file (.hex or .bin) from the manufacturer’s support page. Enter the bootloader or DFU mode using a hidden reset button, key combo, or by shorting pins as instructed. Use the manufacturer’s recommended flashing tool or QMK Toolbox to load and flash the firmware while in bootloader mode. Some keyboards, like the Keychron V/Q series, support a factory reset by holding specific key combos (e.g., fn + J + Z for 4 seconds). Always avoid interrupting the process and verify the firmware matches your keyboard model to prevent damage.
| Step | Description |
|---|---|
| Download | Get official firmware from support page |
| Enter Mode | Use reset button, combo, or pins |
| Firmware Loading | Use flashing tool or QMK Toolbox |
| Reset Support | Factory reset via key combo (if available) |
| Verify | Confirm firmware matches device model |
Reflashing Firmware With QMK Toolbox: a Simple How-To

Reflashing your keyboard’s firmware with QMK Toolbox is a straightforward process that guarantees your device operates smoothly after adjustments or troubleshooting.
Start by putting your keyboard into bootloader mode—press the reset button, use a key combo, or short the pins as needed. Next, download the correct firmware file (.hex or .bin) specific to your keyboard model and microcontroller from the official source.
Then, open QMK Toolbox and load your firmware file by dragging it into the “Local file” box or browsing for it. Afterward, click the “Flash” button while your keyboard is in bootloader mode, ensuring your USB connection remains stable.
Once complete, your keyboard should exit bootloader mode automatically and be ready to use.
How to Prevent Firmware Mismatches and Bricking in Future Updates
To prevent firmware mismatches and avoid bricking your keyboard during updates, always verify that the firmware file precisely matches your device’s PCB model, revision, and microcontroller. Double-check the firmware’s compatibility before flashing.
Use the QMK Toolbox or similar software to confirm your keyboard is recognized in bootloader mode, ensuring proper communication. Connect your keyboard through reliable, stable USB 2.0 ports with high-quality cables, avoiding hubs, long, or coiled cables which can cause interruptions.
Before updating, back up your existing keymaps and settings so you can restore them if needed. Keep your computer powered and prevent it from entering sleep mode during the process.
Following these steps helps minimize the risk of firmware mismatches and reduces the chance of bricking your keyboard.
What to Do If Firmware Flashing Goes Wrong (Community Support & Recovery)
What should you do if your firmware flashing process encounters issues? First, avoid unplugging the keyboard during flashing, as power loss can corrupt the firmware and EEPROM.
Next, enter the keyboard’s bootloader mode by pressing the reset button, a specific key combination, or shorting pins. Then, use QMK Toolbox to clear the EEPROM and attempt to flash official or tested firmware files (.hex or .bin).
Enter bootloader mode via reset button, key combo, or pin shorting, then clear EEPROM and flash verified firmware files.
Finally, verify that the firmware matches your keyboard’s PCB revision and microcontroller to prevent bricking or bootloader loops.
If problems persist, seek assistance from community resources like /r/olkb, Discord channels, or official support forums. Community advice can provide specific steps for recovery and troubleshooting, helping you restore your keyboard efficiently.
Next Steps: When to Seek Help or Professional Repair Services
When repeated firmware flashing fails to fix your mechanical keyboard’s issues, it’s a clear sign that you should consider seeking professional repair services. Persistent problems due to hardware damage, corrupted bootloader, or irreparable flashing errors require expert diagnosis. If troubleshooting steps like cable replacement, EEPROM reset, or firmware updates don’t restore functionality, professional help is necessary. Physical damage such as a broken PCB, bent pins, or malfunctioning switches also indicates the need for repair. For complex issues involving microcontroller-specific bootloader problems, technical expertise is essential to avoid bricking your device.
| Issue | Recommended Action |
|---|---|
| Firmware flashing failure due to hardware damage | Seek professional repair services |
| Persistent switch or PCB damage | Contact authorized repair centers |
| Microcontroller or bootloader errors | Consult experienced technicians or vendor support |
Frequently Asked Questions
How to Troubleshoot a Mechanical Keyboard?
To troubleshoot your mechanical keyboard, test it with a different cable and port, inspect switch pins, reset firmware, clear EEPROM, and swap switches to identify hardware or firmware issues, ensuring you isolate and fix the problem efficiently.
Is 84 Keys 75%?
Yes, an 84-key keyboard usually falls into the 75% layout category, offering a compact design that retains essential keys like arrows and navigation while saving space. This size is well-supported by QMK firmware for customization.
What Is a 96% Keyboard Missing?
A 96% keyboard is missing dedicated navigation cluster keys like Insert, Home, Page Up, Page Down, Delete, End, and sometimes scrollbar keys, integrating these functions into layered keymaps to save space while maintaining functionality.
What Causes Firmware Failure?
Firmware failure happens when interrupted flashing, using incompatible firmware, EEPROM corruption, driver issues, or hardware problems like faulty cables or ports. These disruptions prevent successful updates, leave your keyboard unresponsive, or cause erratic behavior.



