
The best stabilizer clipping methods involve carefully using sharp tools like flush cutters to trim plastic legs evenly, keeping cuts horizontal and symmetrical for stability. Make sure to clip just above the bottom mounting foot, then smooth any rough edges with fine sandpaper. Proper handling and precision prevent weakening the stabilizer or damaging the housing. Pairing clipping with lubrication and proper assembly can greatly improve noise and feel. Keep exploring to discover detailed techniques and tips for perfect results.
What Is Stabilizer Clipping and Why Does It Matter?
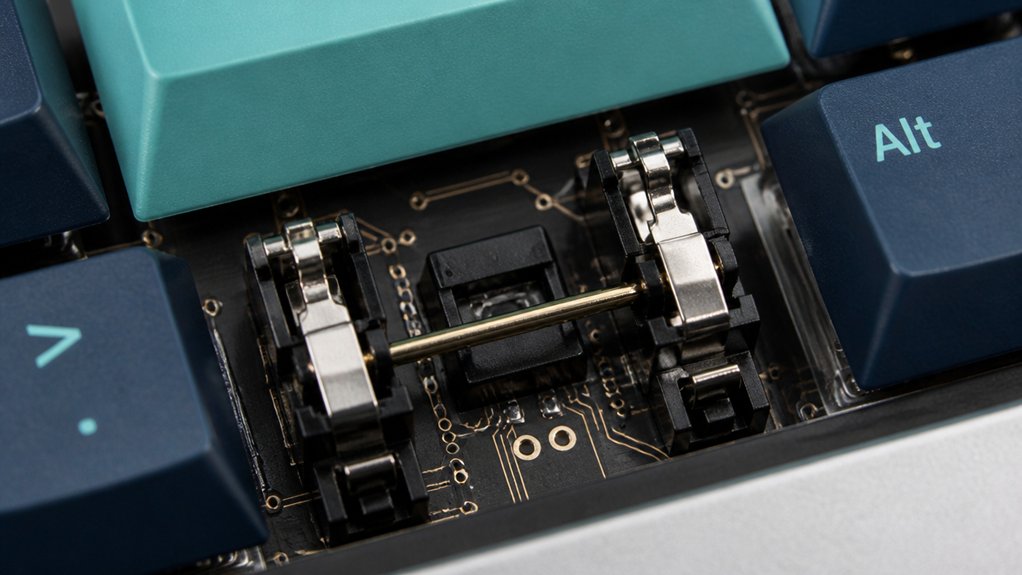
Have you ever noticed a scratchy or wobbly feeling when pressing certain keys on your mechanical keyboard? That’s often due to issues with the stabilizers. Stabilizers, especially for larger keys, help keep these keys balanced and steady.
Stabilizer clipping involves trimming the plastic legs of Cherry-style stabilizer housings, particularly clip-in stabilizers like Cherry clips. This process reduces noise and makes keypresses feel smoother by minimizing friction and eliminating unwanted contact points.
Clipping is essential because untrimmed stabilizer legs can cause scratchiness and wobble. Proper clipping, combined with lubrication, greatly improves sound and feel. It’s a foundational step in tuning your stabilizers for a quieter, more responsive typing experience, ensuring your keyboard performs at its best. Improving stabilizer performance through clipping and maintenance can significantly enhance your overall typing experience.
Types of Stabilizer Clips and How They Differ
Understanding the different types of stabilizer clips is essential for effective modding, as each type has unique characteristics that influence how you trim and adjust your stabilizers.
Choosing the right stabilizer clips ensures effective modding and optimal keyboard performance.
With stabilizer clipping, you’ll encounter various designs, mainly for clip-in stabs and screw-in stabilizers built with plastic legs.
- Clip-in stabs: Typically easier to clip due to their quick-release design.
- Screw-in stabilizers: Often feature more secure fittings but require different clipping techniques.
- Plastic legs: The part that’s clipped to cut down noise and friction.
- Top clips: Some stabilizers have clips at the top for added stability.
- Material differences: Variations in plastic quality impact clipping ease and stability.
Knowing these differences helps you decide on the best clipping method for your stabilizers, especially considering materials used, which can affect durability and sound performance.
Beginner Clipping Techniques for Cherry and Similar Stabilizers
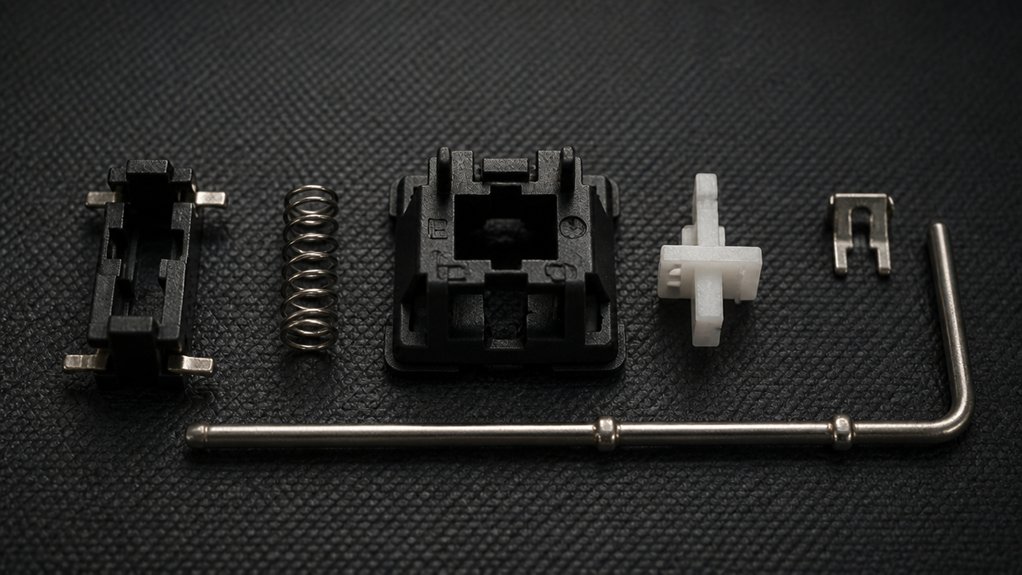
Start by carefully removing your stabilizers from the board, ensuring you don’t damage any clips. Use sharp flush cutters or nail clippers to trim only the horizontal legs on the bottom of the housing, keeping the vertical posts intact. After clipping, test the fit and apply lubrication for smoother, quieter keypresses. Additionally, checking the material compatibility for your stabilizer can help prevent damage during clipping and ensure optimal performance.
Proper Stabilizer Removal
Removing stabilizers carefully from your keyboard is essential to avoid damage and guarantee smooth keypresses. Start by gently extracting the stabilizer from the PCB, making certain you don’t bend or distort the wire or housing.
Use sharp, flush cutters to clip the stabilizer’s plastic feet evenly, trimming just above the base to reduce wobble. Focus on clipping only the two plastic legs on the stabilizer housing, not the wire or stem—this keeps full functionality intact. Be sure to clip both sides symmetrically to balance the stabilizer and avoid uneven keypresses.
Practicing on a spare stabilizer first helps you master steady, precise removal. Proper stabilization extraction guarantees your keyboard remains durable and provides peak performance over time.
- Remove the stabilizer from the PCB carefully before clipping.
- Use sharp flush cutters for clean cuts on the stabilizer clip.
- Clip only the plastic legs, avoiding the wire or stem.
- Trim both sides symmetrically for proper balance.
- Practice on a spare stabilizer to perfect your technique.
Correct Clipping Technique
When clipping Cherry-style stabilizers, focus on trimming only the two plastic legs extending from the bottom of each insert with sharp flush cutters or nail clippers. This precise clipping prevents damage and maintains proper fit, especially for plate mounted stabilizers. Be careful not to cut the housing or wire, and avoid over-clipping, which can cause wobbling and noise. Always clip before stabilizer lubing, as it makes handling easier and helps check fit afterward. The key is to smooth out sharp burrs for quiet operation. Proper lubricant compatibility ensures smooth movement and prevents rattling over time.
Pro Tips for Clipping Stabilizers for O-Ring and Band-Aid Compatibility
Ever wondered how to clip stabilizers for ideal O-ring and band-aid compatibility? Start by trimming the stabilizer legs carefully with sharp flush cutters, just above the bottom mounting “foot” to keep stability intact. Make sure to clip the stabilizer legs evenly to prevent wobbling and maintain proper height.
Trim stabilizer legs carefully above the bottom foot for stability and even height.
For O-ring compatibility, leave enough clearance around the legs to accommodate thicker rings, avoiding interference with keycap travel.
When doing the band-aid mod, guarantee the housing sits flush against the PCB and tape pad for a snug fit, preventing looseness.
Always test the stabilizers after clipping and reassembling with your chosen O-rings or band-aids to confirm smooth movement.
Remember these tips:
- Use sharp flush cutters for precise cuts
- Maintain proper height for stabilizer legs
- Leave extra clearance for thicker O-rings
- Clip stabilizer legs evenly
- Test stability before final assembly
- Material quality can also influence how well the stabilizers respond after clipping, so consider using high-quality components for durability.
What Tools You’ll Need to Clip Stabilizers
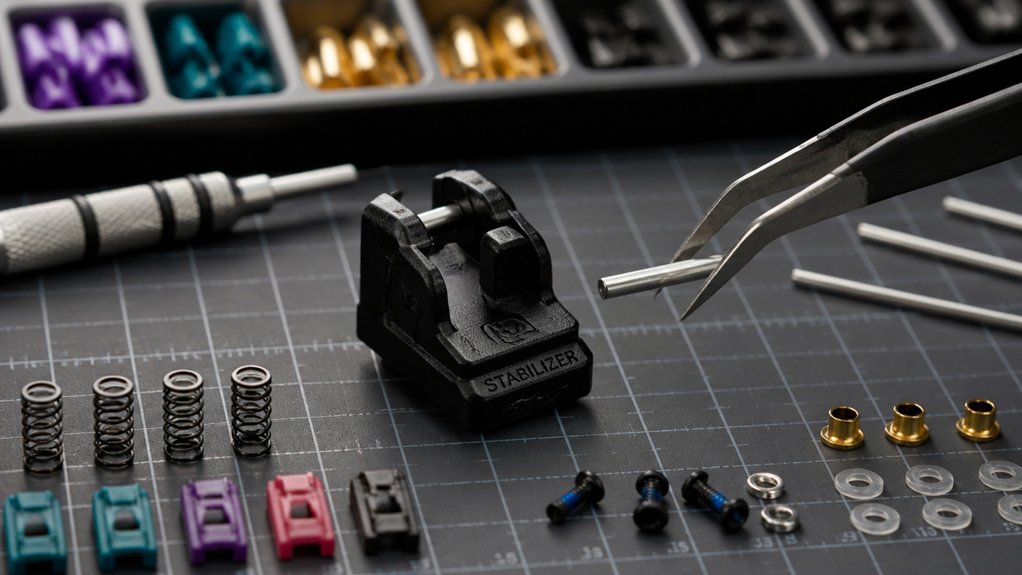
To effectively clip stabilizers, you’ll need a few essential tools that enable precise and safe work. A pair of sharp flush cutters or nail clippers is vital for cleanly trimming the stabilizer legs without cracking the plastic housing.
Tweezers or needle-nose pliers help hold parts steady, giving you better control during clipping. It’s best to clip stabilizer legs outside the plate or PCB before installing, protecting the mechanical keyboard’s components.
Proper lighting or a magnifying glass improves accuracy, helping you identify the exact clipping points. Keep a small container or tray handy to catch clipped plastic pieces, preventing loss. Additionally, understanding the compatible mounting styles can help you choose the right stabilizer clips or modification techniques.
These tools guarantee you can clip stabilizers safely and efficiently on your mechanical keyboard, maintaining the integrity of the plate and PCB while optimizing stabilization.
Step-by-Step: How to Clip Stabilizer Feet and Legs
First, identify the type of stabilizer feet you’re working with to choose the right tools and approach. Use sharp cutters or nail clippers for precise, clean cuts, and be sure to handle the stabilizer carefully to avoid damage. After clipping, lightly sand any rough edges and always test fit before final installation. For optimal results, consider the stabilizer’s compatibility with keyboard layouts to ensure proper fit and function.
Identifying Stabilizer Feet Types
Before clipping stabilizer feet, you need to identify which type you’re working with, as the method varies depending on the design. Recognizing whether your stabilizer is a clip-in or screw-in influences your approach to clipping the feet on your PCB mounted stabilizers.
For clip-in stabilizers, you’ll typically see two small plastic legs or feet beneath the housing. To modify them, use sharp flush cutters to remove the protruding parts carefully, ensuring you don’t damage the housing or the PCB mount.
- Check for clip-in or screw-in design
- Look for plastic stabilizer feet beneath the housing
- Confirm stability and fit before clipping
- Use flush cutters for clean cuts
- Avoid damaging the housing during removal
- Sound dampening features can also influence the decision to clip or modify stabilizers to improve sound quality during installation.
Proper Tool Usage Techniques
Using the right tools with careful technique guarantees a clean, damage-free clip when removing stabilizer feet. Start by using flush cutters or sharp nail clippers, positioning them close to the stabilizer’s base.
Focus on clipping only the stabilizer legs that insert into the PCB or plate, which helps reduce rattle and excess wobble. Hold the stabilizer housing firmly to prevent movement, ensuring a precise cut and avoiding bending or breaking parts.
After clipping, inspect the ends for sharp edges or plastic burrs that could cause noise or interfere with smooth movement. Lightly sand any rough areas if needed.
Perform the clipping before lubing and assembling to make lubrication easier and improve the stabilizer’s overall sound and feel.
According to the stability considerations, proper handling during clipping also helps maintain the integrity of the stabilizer, ensuring it remains securely in place during use.
How to Fix Common Clipping Mistakes and Damage
Clipping stabilizer legs can sometimes lead to mistakes or damage, but most issues can be fixed with careful attention. If a stabilizer leg is clipped too short, gently file the edges to smooth out rough spots. Proper tools like sharp flush cutters or nail clippers ensure clean cuts, reducing the risk of damage. Inspect for damage like cracks or splits; if you find any, replace the stabilizer to prevent long-term failure. Applying lubricant to clipped areas minimizes scratchy sounds caused by rough surfaces. Use flush cutters or sharp nail clippers for clean cuts. Avoid cutting too close to the housing to prevent weakening support. Carefully file edges if legs are shortened excessively. Check for cracks or splits after clipping. Re-lubricate clipped areas to reduce noise and wobble. Additionally, considering switch compatibility during the modding process can help maintain stability and performance over time.
Pairing Clipping and Lubrication for Better Stabilizer Sound
Clipping your stabilizer legs correctly guarantees smoother application of lubricant and reduces harsh sounds, leading to a cleaner, deeper thock.
Use proper techniques to remove excess plastic before applying Krytox or dielectric grease, avoiding sticky or sluggish keypresses.
When paired properly, clipping and lubrication can greatly improve your stabilizer’s overall sound and feel.
Proper Clipping Techniques
For achieving a cleaner, quieter stabilizer, pairing proper clipping techniques with thorough lubrication is essential.
To do this, carefully clip the stabilizer legs using flush cutters or sharp nail clippers to guarantee clean, precise cuts without damaging the housing or stems. Focus on clipping the plastic feet flush with the stabilizer legs — this reduces stem wobble and prevents scratchy sounds. Always clip before assembly to avoid difficult removal or keycap wobble later.
Additionally, make sure to trim evenly and avoid jagged edges that could cause noise or instability. Proper clipping sets the foundation for a smoother stabilizer, especially when combined with lubrication.
Effective Lubrication Methods
Pairing effective lubrication methods with proper clipping enhances stabilizer performance considerably.
After clipping stabilizer legs, apply a small amount of lubricant like Krytox 205g0 inside the stabilizer housing and on the stabilizer stem walls using a fine brush. This reduces scratchy noises and guarantees smoother movement.
On stabilizer wires, use a light coat of dielectric grease—such as Loctite or XHT BDZ—avoiding past the bends, to dampen metal-on-plastic impact sounds while maintaining a responsive feel. Adding a thin layer of 205g0 inside the wire slot behind the clip minimizes wire rattle and boosts smoothness.
Remember to allow a break-in period of several days, enabling the lubricant to settle fully, which leads to quieter, more stable stabilizer performance over time.
Troubleshooting Clipping Issues During Modding
Ever wondered why your stabilizers feel loose or difficult to reinsert after clipping? Troubleshooting clipping issues during the modding process can be tricky, but attention to detail helps.
Make sure you only trim the bottom of the stabilizer legs straight across to avoid weakening the housing. Always cut with flush cutters or sharp nail clippers outside the keyboard to prevent damage to the PCB.
If stabilizers feel loose after clipping, check that the legs aren’t too short; adding thin shims or padding can help. Avoid over-clipping, which can cause popping out or rattling noise.
When reinserting clipped stabilizers, try gently bending the legs inward or testing different clip points for a secure fit. Doing so will improve overall stability and reduce rattling during typing.
Tips for Combining Clipping and Tuning Stabilizers Perfectly
When combining clipping and tuning stabilizers, precision is key to achieving a smooth, stable feel. Start by trimming the clip-in stabilizer legs flush or slightly shorter than the housing base to reduce wobble and noise, using sharp flush cutters. Carefully clip stabilizers aiming for clean edges to prevent catching or extra friction. Apply Krytox 205g0 lubricant inside the housing walls and stem, and dielectric grease on wire segments that enter the housing for enhanced smoothness. For residual rattling, add minimal extra lubricant inside the wire channel but avoid over-lubricating, which can slow keypresses. Use stabilizer shims to adjust fit and stability. For clip-in stabilizers, slight leg trimming combined with housing and stem lubrication prevents popping out and rattling.
| Stabilizer Type | Clipping Technique | Additional Tips |
|---|---|---|
| Screw-in | Angle legs slightly away | Use lubricant for smoothness |
| Clip-in | Flush or slightly shorter | Add stabilizer shims if needed |
| Both | Clean cuts, lubricate | Test and re-adjust if necessary |
| Stabilizer shims | Fine-tune fit | Reduce rattling and wobble |
| Lubricant | Inside housing and stems | Minimize noise and friction |
When and Why to Re-Clip or Fine-Tune Stabilizers Over Time
Over time, stabilizers may require re-clipping or fine-tuning to maintain peak performance, especially as wear and environmental factors take effect. If you notice persistent scratchy sounds or wobbling, re-clipping stabilizers can restore smoothness.
For uneven larger keys, fine-tuning stabilizer clipping by trimming the legs helps balance movement and noise. Be cautious—over-aggressive clipping weakens the stabilizer legs.
Regular lubrication with a lubricant is essential to optimize the typing experience, reducing friction and noise that clipping alone can’t fix. Environmental changes like humidity or frequent keycap swaps might also necessitate re-clipping.
Monitoring key feel and sound regularly guarantees your stabilizers stay in top condition and contribute to a consistent, satisfying typing experience.
Frequently Asked Questions
Are Clip-In or Screw-In Stabilizers Better?
You find screw-in stabilizers better because they offer more stability, less wobble, and consistent performance. However, if you want quick installation and easy replacements, clip-in stabilizers can still work well, especially when properly clipped and lubed.
What Is the Best Lubricant for Stabilizers?
You should use Krytox 205g0 for stabilizer plastic parts because it offers smooth, low-friction movement without excess thickness. Apply it with a fine brush, and allow time for the grease to settle for ideal noise reduction and feel.
Should I Clip My Stabilizers?
Yes, you should clip your stabilizers if you want quieter, smoother keystrokes and reduced wobble. Carefully trim the plastic legs without damaging other parts, then consider lubricating for ideal sound and feel.
How to Clip in Stabilizers?
You clip stabilizers by carefully trimming the front legs with flush cutters or nail clippers, ensuring your cuts are clean and even. Do this before lubing and assembling, removing just enough to reduce friction without compromising stability.
In Summary
Mastering stabilizer clipping can greatly improve your keyboard’s feel and sound. By understanding the different clipping methods, using the right tools, and combining clipping with lubrication, you’ll achieve smoother, quieter stabilizers. Remember to troubleshoot, fine-tune, and revisit your clips over time to maintain peak performance. With patience and practice, you’ll customize your keyboard for the perfect typing experience that’s satisfying and tailored to your preferences. Keep experimenting and enjoy your modding journey!



