
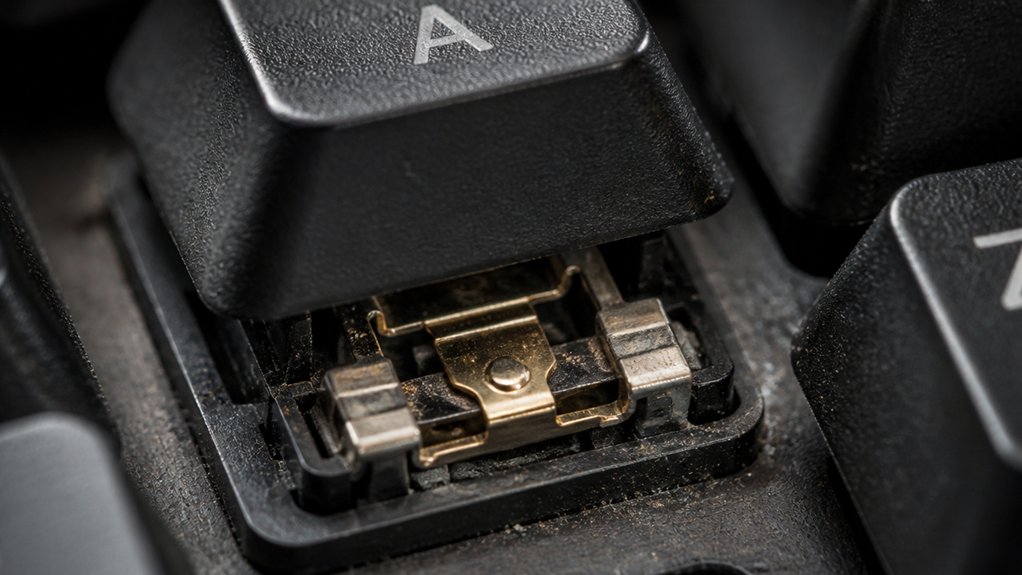
If your mechanical keyboard debounce fails, it’s likely due to worn, dirty, or contaminated switches that cause multiple signals from a single press. Poor solder joints, switch quality, or internal damage can also create unstable connections, leading to chatter. Firmware settings that are too low or high in debounce time may fail to filter signals properly. Regular maintenance and choosing better hardware can improve reliability, and if you keep exploring, you’ll find more ways to fix it effectively.
What Causes Switch Bounce and Debounce Failures in Mechanical Keyboards?
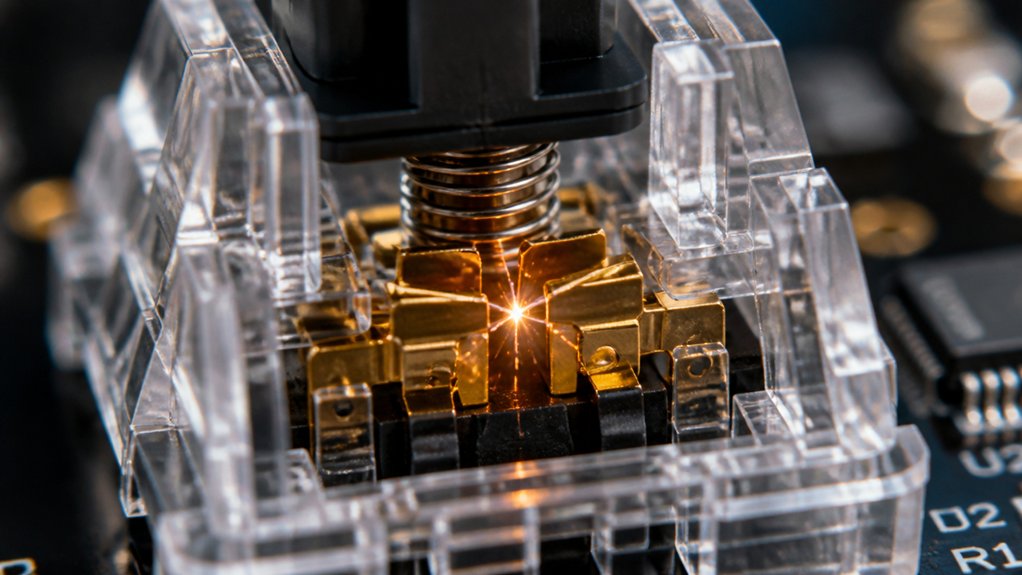
Ever wondered why your mechanical keyboard sometimes registers multiple key presses from a single tap? It’s often due to switch bounce, where the switch’s metal contacts rapidly make and break the circuit within milliseconds.
This rapid contact bounce causes spurious signals, which the firmware must filter through debounce. When the debounce isn’t effective—due to dirty, worn, or sticky switches—the contact bounce lasts longer, resulting in debounce failures. Poor solder joints or weak PCB connections can also interfere with signal integrity, making bounce more problematic.
Some switch types, like linear Cherry MX Reds, tend to have worse bounce characteristics, increasing debounce issues. Additionally, overly aggressive or inadequate debounce settings in firmware may fail to filter out chatter or cause lag, making switch bounce more noticeable in your typing.
Implementing switches with high durability and consistent contact quality can reduce these bounce problems over time.
How to Recognize Signs of Debounce Problems and Chattering Keys
If your keyboard starts responding inconsistently or registering multiple characters for a single press, you might be noticing debounce issues.
Repeated keystrokes, unusual input delays, or keys that sometimes don’t register are common warning signs. Using online testers or software can help confirm whether key chatter or random activations are caused by debounce failures.
Performing switch testing with different switch testers can help identify if certain switches are more prone to bouncing, indicating internal contact problems.
Inconsistent Key Responses
Inconsistent key responses often become noticeable through multiple characters appearing from a single press, a phenomenon known as key chatter. This happens when switch bouncing causes signals to register repeatedly, reflecting longer debounce time.
A mechanical switch tester can help identify if bounce times are excessive and contributing to debounce failure. You may notice some keys over-registering or under-registering, requiring constant corrections and disrupting your typing flow. Frequently used keyboard switches are more prone to these issues, especially as dirt, wear, or poor connections increase bounce times.
To recognize sign of debounce failure, press suspect keys repeatedly at different speeds using online keyboard testers or tools like Switch Hitter. Early signs include sporadic input delays, repeated characters, or keys feeling “stuck.” Addressing dirt, switch wear, or connection issues can help improve debounce performance and reduce key chatter.
Repeated Character Input
Repeated character input is a common sign of debounce problems, occurring when a single keypress registers multiple times due to switch bounce lasting longer than the firmware’s debounce window. When switch bounce persists, your keyboard interprets one press as several, causing repeated characters like “Heello” instead of “Hello.” To diagnose this, check your debounce settings; if they’re too short, switch bounce may not be filtered out effectively. You might notice only some keys, especially heavily used ones like WASD, produce repeated input due to dirt or wear. Using an online keyboard tester and pressing affected keys at various speeds can confirm debounce failure. Adjusting debounce settings or cleaning your switches often resolves repeated character input caused by switch bounce. Additionally, ensure your switches are compatible with your keyboard’s ESD protection diodes to prevent further malfunctions.
Random Key Activation
Random key activation caused by debounce failure appears as multiple characters appearing from a single press, often leading to unintended repeated letters like “Heello” instead of “Hello.” This erratic behavior disrupts your typing or gaming since some keys over-register or sometimes don’t register at all.
To identify debounce issues, look for signs like frequent error corrections or multiple key presses from one tap.
You can:
- Test your keyboard with online tools like Switch Hitter to detect irregular key patterns.
- Notice if specific keys, especially heavily used or dirty ones, produce chattering sounds.
- Observe inconsistent responses from mechanical switches, indicating debounce problems affecting certain keys.
- Keep in mind that sound calibration and microphone placement can influence the accuracy of your testing sound testing, making proper assessment critical for diagnosing debounce failure.
These signs point to debounce failure causing random key activation and multiple key presses.
How Dirt, Wear, and Liquid Damage Lead to Switch Bouncing
Dirt, food debris, hair, and other contaminants can easily become trapped inside mechanical switches, disrupting their contact surfaces. When this happens, the switch’s electrical connection becomes irregular, causing unintended bouncing.
Over time, this extra bounce can overwhelm your mechanical keyboard’s debounce logic, leading to multiple false signals.
Liquid spills are even more damaging; moisture and residue cause corrosion or stickiness, resulting in prolonged bounce times and erratic keypresses.
Worn switches, from heavy use, develop resin buildup or lose their smooth contact surfaces, increasing bounce duration beyond normal 1–5 milliseconds.
Contaminants inside switches prevent stable conductivity, producing rapid open/close signals that standard debounce settings can’t filter.
A lubricant applied appropriately can help reduce friction and noise but cannot fully compensate for internal contamination or damage caused by dirt and wear.
Consequently, dirt, wear, and liquids greatly degrade switch reliability, making keypresses inconsistent and challenging your debounce efforts.
How Firmware Settings Affect Your Keyboard’s Debounce Performance

Firmware settings play a crucial role in how well your mechanical keyboard handles switch debounce, directly affecting input reliability. Improper debounce timing can cause multiple key presses from a single press, leading to chatter or double typing.
To prevent this, you should:
- Adjust debounce delay (typically 5–20 ms) to balance responsiveness and bounce filtering.
- Use customizable firmware like QMK or ZMK to fine-tune debounce timing based on your switch type and preferences.
- Guarantee the firmware debounces both key press and release signals for thorough bounce control.
- Proper firmware configuration helps in managing debounce parameters effectively, ensuring consistent key registration.
Reducing debounce times may boost response speed but can sacrifice accuracy, while longer delays improve reliability. Proper firmware configuration optimizes your keyboard’s performance by effectively managing switch bounce and avoiding debounce failures.
Common Hardware Issues Causing Debounce Failures: Solder Joints and Switch Quality
Solder joints that crack or weaken over time can cause unstable connections and debounce failures.
Poor-quality switches without proper contact plating tend to bounce longer, leading to inconsistent signals.
Additionally, loose connections on the PCB can mimic debounce issues, especially under heavy use.
Utilizing appropriate solder alloy with the right alloy composition and flux content can improve joint strength and reduce the likelihood of debounce failures.
Solder Joint Cracks
Have you ever experienced inconsistent keypresses or double inputs on your mechanical keyboard? That’s often caused by solder joint cracks. When solder joints between the switch and the PCB break or crack, they disrupt electrical contact, leading to debounce issues.
Here’s what to check:
- Intermittent contact: Cracked solder joints cause false or multiple key signals, mimicking debounce failure.
- Poor signal stability: Cold or weak solder joints magnify switch bounce noise, failing to produce clean, stable signals.
- Faulty switch behavior: Continuously unreliable circuit connections result in repeated characters or missed inputs.
Inspecting solder joints under magnification and reflowing or resoldering weak or cracked joints is usually necessary to restore proper debounce function and fix the hardware issue.
Switch Quality Variability
Switch quality variability plays a significant role in causing debounce failures in mechanical keyboards. Cheaper switches often lack proper plating, increasing the chances of extended switch bounce and unreliable signals.
Manufacturing inconsistencies in switches can lead to contact instability, making some keys more prone to multiple signals during a single press.
Worn or damaged switches due to heavy use, especially on frequently pressed keys like W, A, S, D, can produce longer bounce times and electrical contact issues, affecting debounce accuracy.
Additionally, poor internal contacts or internal damage within the switches make them more susceptible to chatter. If your mechanical keyboard experiences debounce problems, inspecting or replacing low-quality switches can often resolve the issue, ensuring more consistent key registration. Material quality and durability are crucial factors in maintaining reliable switch performance.
Loose PCB Connections
Loose PCB connections are a common hardware culprit behind debounce failures, as they disrupt the stable flow of electrical signals from the switch to the microcontroller. These issues often stem from:
- Solder joints that are cracked or loose, causing intermittent contacts and erratic signals recognized as debounce failures.
- Poor-quality switch pins that degrade the electrical connection, increasing bounce duration and triggering multiple key events.
- Faulty PCB traces that weaken connections between switches and the MCU, creating unstable input signals mimicking debounce problems.
- Incorporating reliable soldering techniques, such as using high-quality solder and proper heat application, can significantly reduce the risk of cracked solder joints and improve overall connection stability.
Inspecting and re-soldering compromised solder joints is a simple yet effective fix to restore steady connections.
Ensuring switch pins are secure and PCB traces are intact helps prevent debounce failures caused by loose PCB connections.
How to Test Your Keyboard for Debounce and Key Chattering Using Software
Wondering if your keyboard is experiencing debounce issues or key chatter? To test for this, use online keyboard testers or specialized tools like Switch Hitter. These track key states visually, helping you spot multiple unintended press signals.
Press suspect keys multiple times at different speeds to see if they register as multiple rapid presses or miss some taps altogether. Software like QMK Toolbox offers a straightforward interface to log keypress timing patterns, revealing irregular bounce signals.
Look for symptoms like a single press producing multiple characters or inconsistent response timing in your tests. Document any irregularities, especially with specific keys, to guide your cleaning, firmware tweaks, or hardware fixes. This approach helps identify debounce problems before attempting repairs.
Step-by-Step: Cleaning and Maintaining Switches to Reduce Bounce
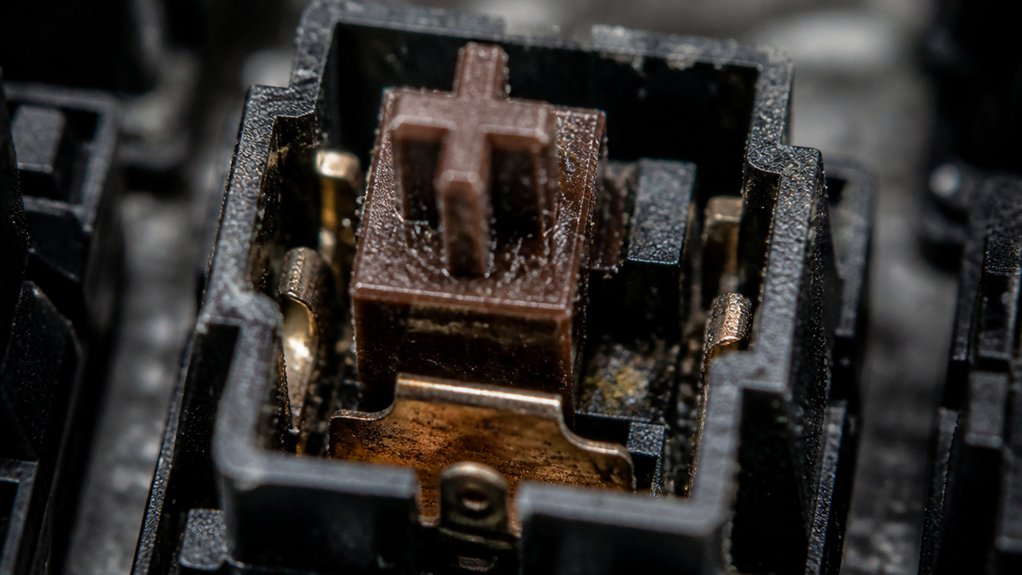
Regular cleaning and maintenance are essential for ensuring your mechanical keyboard’s switches function smoothly and prevent bouncing issues.
Keep your mechanical keyboard switches clean and well-maintained to avoid bouncing and ensure smooth, reliable performance.
To start, carefully remove the keycaps and use compressed air and a soft brush to clear debris and dust from around and inside the switches. Next, apply a small amount of 70% or higher isopropyl alcohol to the switch contact points to dissolve sticky residue from dirt or spills that can increase bounce time.
If possible, disassemble switches to inspect and clean internal contacts, since worn or contaminated metal surfaces can cause longer bounce durations. Finally, lightly lubricate the switch components with appropriate lubricant to reduce friction and improve contact stability.
Regularly performing these steps every 3–6 months helps keep your switches clean and ideally adjusted to prevent debounce failures.
How to Adjust Firmware Debounce Settings to Fix Input Errors
When you experience input errors like multiple characters registering from a single key press, adjusting your keyboard’s firmware debounce settings can often provide an effective fix.
To do this, start by updating the firmware of your keyboard—many models or programs like QMK and ZMK offer customizable options. Look for settings related to debounce time, typically measured in milliseconds (5-20 ms). Increasing this value can help reduce switch chatter caused by excessive bounce or worn switches might be contributing.
Be careful, though: setting the debounce too high can cause minor input lag. Find a balance that minimizes errors without affecting responsiveness. Adjusting debounce is often straightforward through firmware configuration tools or software like Keychron launcher, giving you a quick way to improve your typing experience.
When to Replace or Re-Solder Faulty Switches for Better Reliability
You should consider replacing or re-soldering switches when you notice persistent key chatter or intermittent registration, especially on heavily used keys.
If visual inspection shows cracked or cold solder joints, re-soldering can restore proper connections; otherwise, switch replacement might be necessary.
Hot-swappable keyboards make this process easier and more reliable, reducing downtime and maintaining consistent performance.
Detecting Switch Wear or Damage
How can you tell if a mechanical switch is worn or damaged? Signs include increased key chatter or multiple unintended presses, indicating switch wear and tear beyond normal debounce times.
Persistent sticky keys or a gummy feel usually mean internal switch damage that cleaning can’t fix, requiring replacement.
To detect switch wear or damage:
- Check for inconsistent registration on specific keys, which hints at faulty internal contact or dirt buildup.
- Examine solder joints and PCB connections for cracks or corrosion; these can cause unreliable signals and point to switch wear.
- Test for sticky keys that don’t respond smoothly and produce multiple inputs, revealing internal degradation or dirt affecting the switch’s contact points.
If cleaning or firmware adjustments fail, switch wear and tear likely warrant a replacement for better reliability.
Soldering or Replacement Process
Faulty solder joints or cold solder connections on the PCB can cause intermittent key signals, which may lead to debounce failures. When you notice unreliability despite cleaning and firmware tweaks, it’s time to think about soldering or replacing the keyboard switch.
Re-solder faulty switch pins carefully to make sure you get strong, consistent electrical connections; weak joints can lead to key chatter or missed inputs. If your keyboard supports hot-swappable switches, replacing a faulty switch is straightforward, avoiding the need for soldering.
However, on standard boards, you’ll need to desolder the old switch and solder a new one in place. Using high-quality solder and proper technique helps improve long-term connection stability, ensuring better debounce performance and reliable key inputs.
Ensuring Long-Term Reliability
Ensuring long-term reliability requires paying close attention to the condition of your switches and PCB connections over time.
If you notice intermittent key presses or bounce, consider these steps:
- Re-solder cracked solder joints or loose connections to restore stable electrical contact and prevent debounce failures caused by wear and tear.
- Replace switches exhibiting persistent debounce issues, especially if cleaning or firmware adjustments don’t help, as mechanical wear or damaged contacts may be the culprit.
- Use hot-swappable keyboards or quality replacement switches with proper plating to maintain signal integrity, especially for heavily used keys like WASD, which often endure more wear.
Tips for Preventing Future Debounce Failures With Regular Maintenance
Regular maintenance is essential for preventing debounce failures and keeping your mechanical keyboard functioning smoothly. To avoid dirt and debris buildup that can extend bounce times, regularly use compressed air to clean around the switches and keycaps every 3–6 months.
Remember, cleaning doesn’t help if dirt has already caused stubborn contact issues; in those cases, tweaking debounce settings or lubricating switches can be more effective.
Perform routine switch lubrication every 6–12 months to reduce friction and bounces caused by mechanical wear or factory residues. Keep firmware updated and adjust debounce settings for ideal filtering without increasing input lag.
Finally, inspect solder joints and store your keyboard in a dry, dust-free environment with a dust cover to prevent moisture and particulate contamination, safeguarding your switch contacts from future debounce problems.
How Switch Types and Build Quality Influence Bounce and Reliability
The type of switch you choose plays a crucial role in bounce behavior and overall reliability. Different switch types, such as linear (Cherry MX Reds) versus tactile (Blues or Browns), influence bounce duration and debounce effectiveness.
Cheaper mechanical switches often lack quality contact plating and materials, making them more prone to longer bounce times and signal issues. Higher-quality switches with durable components tend to have shorter, more consistent bounce durations, improving reliability.
Variations in switch design, like contact leaf shape and spring tension, directly affect bounce characteristics. Additionally, build quality factors—such as solid solder joints and reliable PCB connections—also impact debounce success. Poor connections or cracked points can mimic or worsen switch bounce, impairing your Mechanical Keyboard’s performance.
Troubleshooting Firmware-Level Debounce Issues in Custom Keyboards
When troubleshooting firmware-level debounce issues, understanding how your keyboard’s firmware handles keyscan signals is essential. Firmware manages debounce by setting timing parameters to filter out switch bounce, but if these are too low—below 5 ms—you risk registering multiple keypresses.
Custom firmware like QMK or ZMK lets you adjust debounce settings to improve reliability. Poorly optimized firmware debounce implementations may fail to differentiate between a key’s initial contact and release, causing false multiple inputs.
High polling rates can also worsen bounce detection if the debounce algorithm isn’t tuned to match your switches’ mechanical bounce characteristics. To troubleshoot, use key testing tools like Switch Hitter to analyze raw scan data, then tweak debounce durations accordingly.
This iterative process helps achieve consistent, single key registration in your keyboards firmware.
Final Tips for Keeping Your Mechanical Keyboard Quiet and Chatter-Free Over Time
To keep your mechanical keyboard quiet and free of chatter over time, consistent maintenance is key. Dust and debris buildup can lead to persistent chatter, so regular cleaning is essential.
Regular cleaning is essential to keep your mechanical keyboard quiet and prevent chatter.
Every 3–6 months, remove keycaps, clean switches with compressed air, and wipe down surfaces. Lubricate switches every 6–12 months to reduce friction, preventing noise and ensuring smooth keystrokes.
Keep your firmware updated and tweak debounce settings if adjustable, to improve filter effects on switch bounce signals. Additionally, store your keyboard in a clean, dry environment—avoiding temperature swings and humidity—to prevent switch degradation.
To minimize issues, avoid eating or drinking near your keyboard. Regular cleaning, switch lubrication, and proper storage are your best tools for a quiet, trouble-free typing experience over time.
Frequently Asked Questions
What Is a Good Debounce Time for a Keyboard?
A good debounce time for your mechanical keyboard is typically between 5 and 10 milliseconds. This range minimizes key chatter without introducing noticeable input delay, ensuring a responsive and stable typing experience tailored to different switch types.
Why Is My Mechanical Keyboard Key Not Bounce Back?
Your mechanical keyboard key isn’t bouncing back because of dirt, grime, or worn components that cause stickiness. Try cleaning, lubricating, or replacing the switch to restore proper function and guarantee it returns smoothly after each press.
What Is a 96% Keyboard Missing?
A 96% keyboard is missing some dedicated navigation keys like Insert, Print Screen, and Pause, along with extra top-row function keys. It combines essential keys into secondary layers, offering a compact yet full key set.
What Is the Average Lifespan of a Mechanical Keyboard?
Your mechanical keyboard typically lasts 5 to 10 years, depending on usage and maintenance. Frequently used keys may wear out sooner, but regular cleaning and switch replacement can extend its lifespan considerably.
In Summary
To keep your mechanical keyboard functioning smoothly, stay on top of maintenance, keep it clean, and check your firmware settings regularly. Use quality switches and guarantee proper soldering to prevent bounce issues. If you notice chattering or debounce failures, troubleshoot promptly to avoid ongoing damage. With a little care and attention, you’ll enjoy a quieter, more reliable typing experience that lasts over time. Keep learning and maintaining, and your keyboard will serve you well.



