

To improve your keyboard stabilizers, start by carefully removing the large keycaps and inspecting the stabilizers for damage or misalignment. Lubricate the housing, stems, and wires with the right lubricants like Krytox 205g0 and dielectric grease, applying thin, even coats. You can also clip excess plastic on stems or add foam or fabric tape inside housings to reduce wobble and noise. For more tips on achieving a smoother feel, continue exploring these modding techniques.
Understanding How Stabilizers Affect Keyboard Feel and Sound
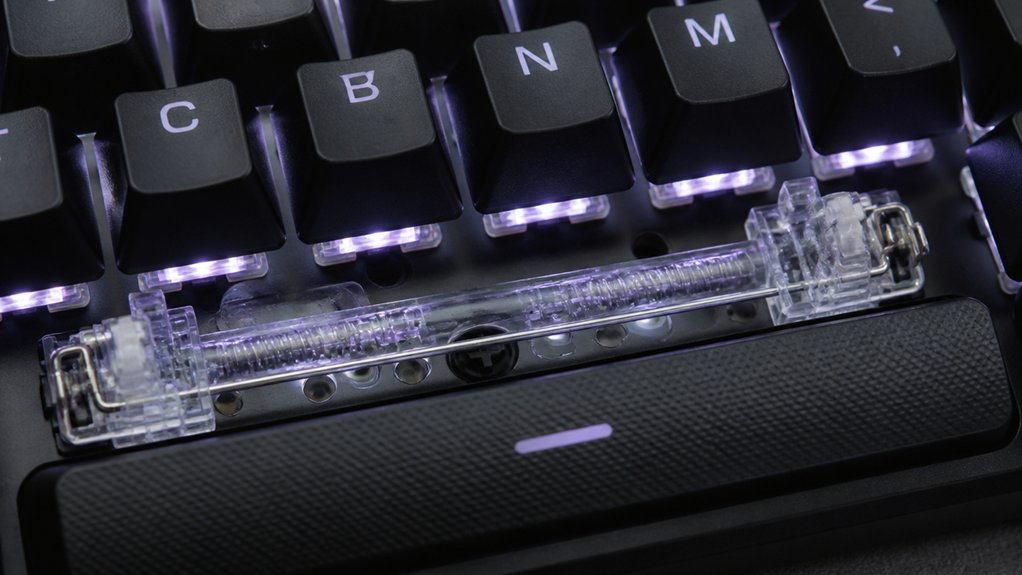
Stabilizers play a crucial role in shaping your keyboard experience by ensuring larger keys activate smoothly and consistently. Mechanical keyboard stabilizers, such as stabilizer stems and housings, help distribute pressure evenly across keys like the spacebar, preventing wobbling and ensuring a satisfying feel.
If these stabilizers aren’t lubricated or are poorly installed, you’ll notice rattling or ticking sounds, which can be distracting. To improve the sound and feel, you need to tune your stabilizers by applying lubricant to reduce friction and dampen noise.
Properly lubricated stabilizers produce a deeper, more subdued “thock,” making your typing more enjoyable. Clipping stems or adding padding can also reduce unwanted noise and improve stability, giving you a more refined keyboard experience.
Identifying Common Stabilizer Problems
Have you noticed your spacebar or larger keys rattling or feeling uneven during use? That rattling is often caused by loose stabilizers or a stabilizer wire that’s not fully seated.
Loose stabilizers or unseated wires can cause spacebar rattling and uneven feel.
Ticking sounds, sharp clicks from contact points, can indicate interfering with the stabilizer, especially in plate-mounted setups, which are more prone to flex and noise without proper lubrication or padding.
Sticky or slow keys might result from over-lubrication or excess padding interfering with stabilizer movement, affecting how stabilizers feel.
An uneven keypress could be a sign that screws, clips, or the stabilizer wire aren’t secured properly.
Mushy bottom-outs, on the other hand, usually indicate too much padding or foam obstructing normal stabilizer travel.
Proper material quality and precise molding, as highlighted in stabilizer durability, play a crucial role in maintaining consistent feel and longevity.
Identifying these issues helps guide effective stabilizer modding later.
Gathering Tools and Materials for Stabilizer Modding

To start your stabilizer modding project, gathering the right tools and materials is essential for smooth and effective work. Begin with stabilizer kits designed for compatibility and quality, which simplify the process.
You’ll need a Phillips screwdriver (#0 or #00) to remove and reinstall stabilizers, along with a keycap puller for safely removing keycaps. Flush cutters or sharp nail clippers help trim and clean wires and stabilizer parts. A small paintbrush (size 0-2) is perfect for applying lubricant precisely.
Use dielectric grease to coat stabilizer wires, reducing noise and friction, and Krytox 205g0 for housings and stems. Additional helpful items include tweezers, stabilizer foam or shims, and adhesive tape. Keeping a clean, organized workspace guarantees efficient modding and professional results, especially when considering stabilizer tuning techniques for optimal sound and feel.
Disassembling and Inspecting Stabilizers
Start by unplugging your keyboard and carefully removing the large keycaps to expose the stabilizers.
Use a small Phillips screwdriver to remove the bottom shell, then gently uninstall the stabilizers, keeping track of all parts.
Finally, inspect each component for damage, misalignment, or rough spots that may need lubrication or adjustment, especially focusing on stabilizer components such as housings, stems, and wires.
Removing Keycaps Carefully
Careful removal of keycaps is essential to prevent damage to stabilizers and the surrounding components. Use a small, proper keycap puller to make sure you don’t apply uneven force.
For larger keys like the spacebar, shift, enter, and backspace, gently remove the keycap straight up without twisting. This prevents deformation or damage to the stabilizer wire or stems.
Before removing, make sure to note each key’s location to guarantee correct reassembly. Keep track of the keycaps and stabilizer parts separately to avoid mix-ups.
When you remove the keycaps, check the stabilizer housings, stems, and wires for any wear or misalignment. If needed, use a screwdriver carefully to disassemble or tighten parts, always handling components with precision manufacturing for the best feel after modding.
Checking Stabilizer Components
Before inspecting your stabilizers, remove each keycap carefully to access their components. Disassemble the stabilizer by separating the housing, stem, and wire, so you can examine each part closely. A thorough inspection can help identify common issues like wobble and noise, which are often caused by wear or misalignment. 1. Check the stabilizer wire for bends, kinks, or uneven tension that might cause rattling or inconsistent keystrokes. 2. Inspect the housing and stem for debris, cracks, or wear, which could impede smooth movement. 3. Examine the fit of the stem inside the housing, looking for misalignment or looseness that can lead to wobbling or scratching noises. 4. Verify the wire hooks and attachment points are intact and properly seated to guarantee peak pressure distribution on the PCB. This careful inspection helps confirm your stabilizers work smoothly and sound quieter.
Lubricating Stabilizers: How and Why
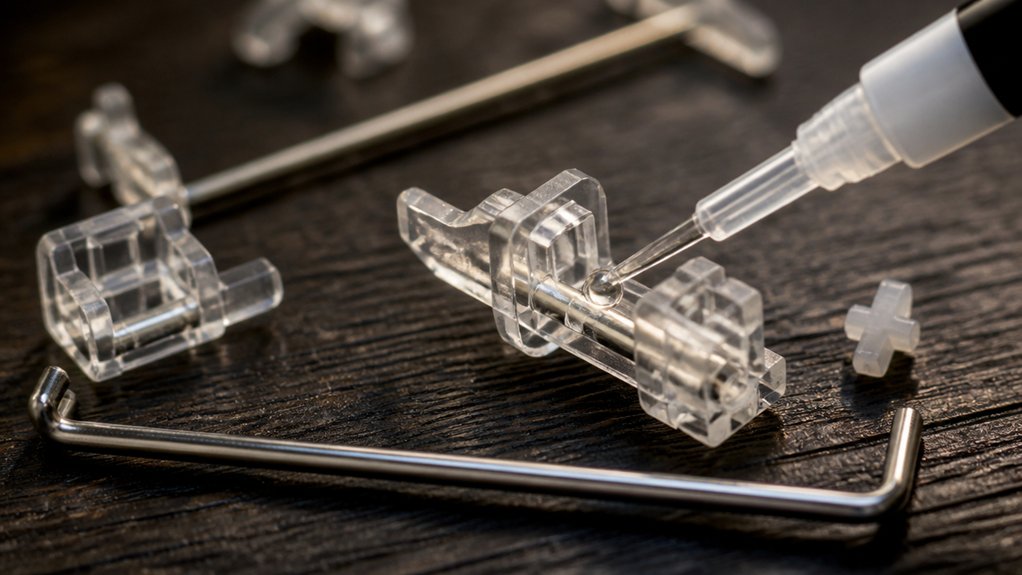
Lubricating your stabilizers can make a noticeable difference in how your keyboard feels by reducing rattling and noise.
To do this effectively, you need to apply the right amount of lubricant using a fine brush and focus on the housing, stems, and wires.
Being careful with your technique helps avoid common mistakes that could lead to sluggish action or leftover squeaks.
Proper Lube Application Techniques
Have you ever wondered how a tiny amount of lubricant can dramatically improve your stabilizer’s performance? Proper lube application is key.
Here’s how to do it:
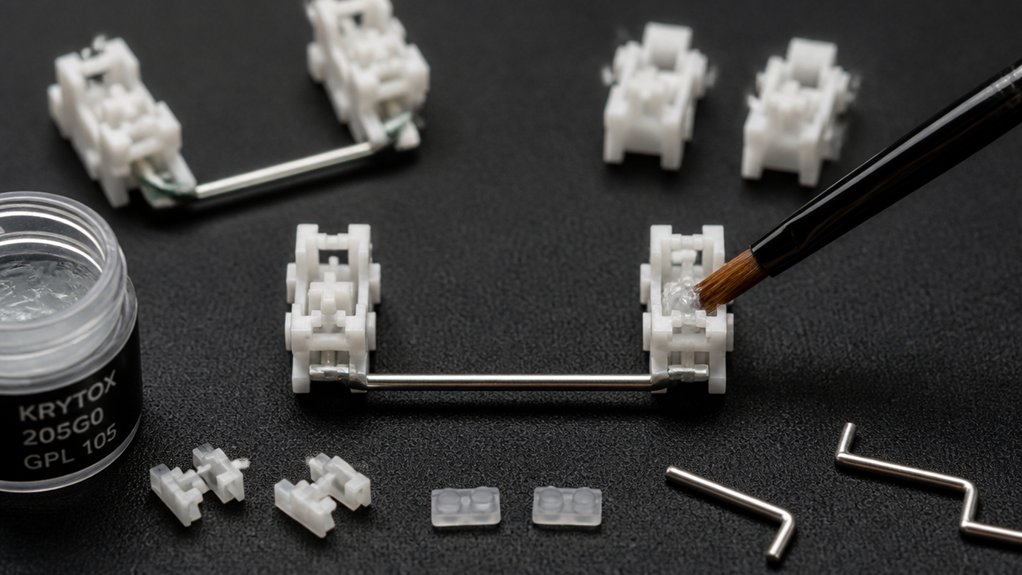
- Use a small, fine paintbrush (size 0–2) to apply a *small amount* of Krytox 205g0 evenly inside the stabilizer housing walls and on *both sides of the stem*, making sure the coverage is precise.
- Focus on coating the *sides of the stabilizer*, especially at contact points, without over-lubricating.
- Lightly coat the stabilizer wire with dielectric grease, avoiding excess past the bends.
- After assembling, lubricate the inside of the wire channel for smoother movement.
Following these steps will guarantee your stabilizer is *successfully lubed*, reducing noise and friction. Additionally, choosing stabilizers made of premium materials can further enhance durability and performance.
Benefits of Lubrication
Applying lubricant to your stabilizers offers immediate benefits, such as substantially reducing noise and eliminating unwanted rattling. It smooths contact points within the stem, housing, and wire, minimizing scratchy plastic-on-plastic noise often heard during keystrokes.
Lubricants like Krytox 205g0 help create a deeper “thock” sound and decrease lateral wobble, resulting in more stable keypresses. For plate-mounted stabilizers, proper lubrication prevents flex noise and reduces rattling caused by dry or poorly installed stabilizers.
When applied evenly with a fine brush, it distributes pressure smoothly across the parts, ensuring a quieter, more consistent typing experience. Regular lubrication not only enhances sound quality but also prolongs stabilizer lifespan by preventing unnecessary friction and wear.
Common Lubrication Mistakes
While lubrication enhances the sound and stability of stabilizers, mistakes during application can undermine these benefits. You should avoid the following common errors:
- Applying a small, much lubricant—too much causes mushy, slow keys; a thin, even coat is best.
- Failing to insert the wire correctly or forgetting to switch puller tools can result in uneven coverage.
- Repeating the process without checking for any ticking might worsen squeaks if contact points aren’t lubricated properly.
- Over-lubricating the wire bends or extending dielectric grease past them leads to dust buildup and sticky keys.
- Using a lubricant with incompatible material compatibility or unsuitable viscosity can cause damage or performance issues.
Mods to Reduce Wobble and Noise: Clipping, Band-Aid, and More

Reducing wobble and noise in your keyboard stabilizers often involves several simple yet effective mods. Start by clipping the excess plastic from the stabilizer stems to smooth out scratchiness and improve key feel.
Clip excess plastic from stabilizer stems to reduce scratchiness and enhance key feel.
The band-aid mod places a thin adhesive fabric or bandage inside the stabilizer housing or on the PCB plate, cushioning the wire impact and greatly lowering rattle and noise.
Applying a high-quality lubricant like Krytox 205g0 on the stabilizer housing and stems, combined with dielectric grease on the stabilizer wire, reduces friction and ticking sounds.
Additionally, straightening and carefully bending the stabilizer wire on a flat surface guarantees even pressure across stems, preventing rattling.
Using stabilizer pads and films can further dampen vibrations and enhance sound quality, making your keyboard feel more refined.
Combining these mods—clipping, band-aid, and lubrication—allows you to fine-tune stability, sound, and overall feel.
Reassembling Stabilizers and Testing Their Performance
Once you’ve completed your mods and lubrication, reassembling the stabilizers correctly is essential for peak performance. Start by carefully reassemble the stem bottom-first into the housing, ensuring the wire hooks align properly for smooth movement. Using high-quality polymers and proper assembly techniques helps ensure durability and consistent sound. When attaching the stabilizer to the PCB or plate, secure the screws firmly but avoid overtightening, which can cause misalignment or damage. To test your reassembled stabilizers, press the center and edges of the corresponding keys, listening for any rattling or ticking noises. Use key tester software if available to verify consistent, responsive key activation.
If rattling persists, disassemble, adjust the lubrication or mods, then retest before full keyboard reassembly. This process maximizes stability, feel, and reliability.
Troubleshooting Persistent Stabilizer Issues
Persistent rattling sounds in stabilizers often indicate small alignment issues or loose parts that haven’t been properly addressed during reassembly. To fix this, remove the wire from your stabilizers and check for misalignment.
For prebuilt keyboards with plate-mounted stabilizers, make sure they’re securely clipped in or use screws if needed.
If stabilizers still rattle, remove the excess lubricant or dielectric grease that might cause noise or sluggishness. Sticky or slow keypresses usually result from over-lubrication, so re-clean the stabilizers thoroughly before re-lubricating with a thinner layer.
Ensuring proper wire contact and secure housing prevents instability. Ultimately, addressing these issues with attention to alignment and proper assembly will greatly reduce persistent noise or movement, restoring stability and sound quality. Additionally, selecting gasket-mount kits made from durable, heat-resistant materials can further enhance stability and reduce unwanted vibrations.
Tips for Maintaining and Improving Stabilizer Feel Over Time
Maintaining and improving your stabilizer feel over time requires regular attention to their condition and some simple upkeep. To keep them smooth and quiet, start by lubing the stabilizer housings and stems with Krytox 205g0, ensuring consistent keypresses.
Check screw-in stabilizers periodically and re-tighten them on a flat surface to prevent wobbling without overtightening. For Mode Stabilizers or hot-swappable keyboards, inspect wires for bends and rebalance them gently, avoiding rattles.
Test key sounds after use, and add light dielectric grease to wires if rattling returns. Finally, perform mods like using fabric tape inside stems, which help maintain padding and quiet operation over time.
Regularly tending to these areas keeps your stabilizers feeling optimal and prolongs their lifespan.
Frequently Asked Questions
How to Make Keyboard Stabilizers Better?
You can improve your keyboard stabilizers by lubricating housings and stems, clipping excess plastic, adding the band-aid mod, tuning wires for alignment, and testing adjustments to guarantee quieter, smoother, and more stable key presses.
How to Mod Keyboard Stabilizers?
To mod keyboard stabilizers, clip the protruding legs with flush cutters, then lubricate the housing and stem with Krytox 205g0, add dielectric grease, and consider the band-aid mod. Finally, reassemble carefully and test keys thoroughly.
How to Make a Keyboard More Comfortable?
You make a keyboard more comfortable by lubing stabilizers, adding foam padding or band-aid mods, clipping protruding legs, choosing screw-in stabilizers, and testing adjustments to reduce noise and wobble, ensuring a smoother, quieter, and more stable typing experience.
How to Make a Keyboard Less Rattly?
To make your keyboard less rattly, lubricate stabilizer housings and stems, use dielectric grease on wires, secure stabilizers tightly with screws, perform stem clipping, and add dampening mods like band-aid or Holee to reduce noise and movement.



