
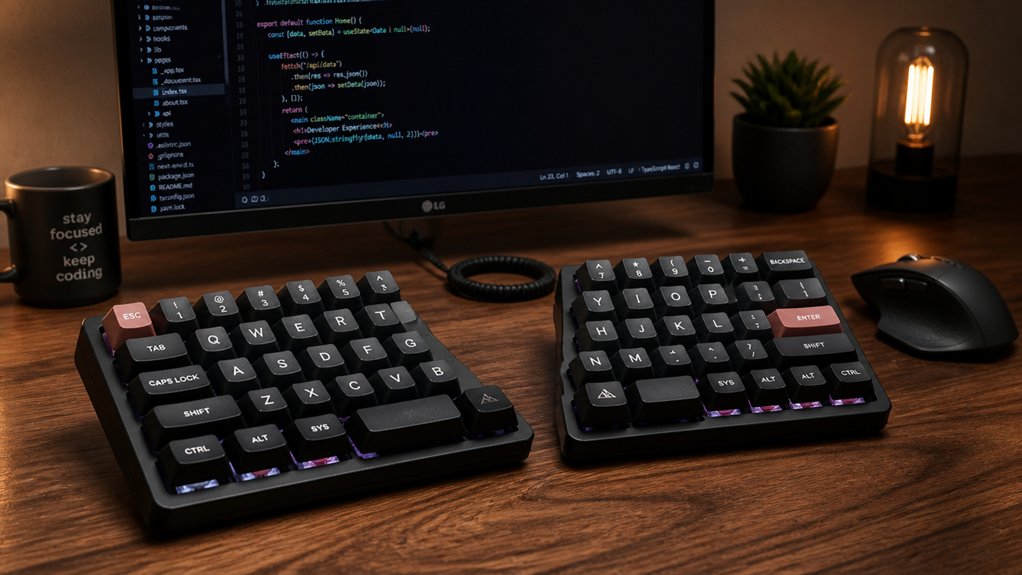
To get the most out of your split mechanical keyboard for programming, start by adjusting it to match your shoulder width and keep your wrists straight with proper tenting angles of 5° to 9°. Maintain a natural split distance and splay for comfort. Customize your key layout and macros for efficiency, and make certain your monitor and posture support long sessions. If you continue exploring, you’ll discover how to optimize your setup for maximum comfort and performance.
Why Proper Adjustment Matters for Your Split Keyboard

Properly adjusting your split keyboard is essential because it guarantees you maintain a comfortable and ergonomic typing position.
Adjusting your split keyboard ensures a more comfortable, ergonomic typing posture for long, strain-free sessions.
With split keyboards, such as programmable models, you can customize the separation distance to fit your shoulder width, reducing back and shoulder strain during long sessions. Tenting angles up to 9º help lessen forearm pronation, promoting better circulation and decreasing fatigue.
By customizing the position of each half, you keep your wrists straight, preventing ulnar deviation that causes wrist pain and minimizes pressure on the carpal tunnel. Adjusting the negative tilt along with ergonomic wrist rests supports a natural hand posture, reducing muscle tension and muscle fatigue.
Proper setup stabilizes the device, ensuring muscle memory and consistent finger placement, which helps prevent repetitive strain injuries common in programmers. Adjustable split layouts allow for personalized positioning that further enhances comfort during extended use.
How to Adjust Your Split Keyboard for Maximum Comfort
To achieve maximum comfort with your split keyboard, start by adjusting the separation distance so that each half aligns with your shoulder width. This helps maintain ergonomic comfort by preventing strain and keeping your wrists straight, reducing ulnar deviation.
Use the tenting feature to lift the inner edges of each half up to about 9º—this minimizes forearm pronation and improves blood flow during long sessions.
Position the keyboard halves so your elbows stay close to your body with relaxed shoulders, avoiding unnecessary neck and upper back tension.
Employ the included wrist supports to keep your wrists neutral; these supports should cradle your palms, not pressure points on your wrists.
Begin with a staggered layout for familiar key placement, then customize key mappings to reduce finger travel and boost ergonomic comfort. Proper hand positioning is essential for long-term comfort and to prevent strain.
Choose the Best Tenting and Tiling Angles for Your Workflow

Finding the right tenting and tilting angles depends on your body and typing style, so don’t hesitate to experiment. Adjusting your keyboard’s angles can reduce strain, improve circulation, and boost comfort during long sessions. Personalizing these settings guarantees you work more efficiently and reduce the risk of repetitive injuries. Incorporating ortholinear layouts can further enhance ergonomic benefits by aligning keys in straight rows and columns to minimize finger movement.
Optimal Tenting Angles
Have you ever wondered how the angle of your split mechanical keyboard can influence comfort during long coding sessions? Ideal tenting angles typically range from 5° to 9°, helping to reduce wrist strain and forearm pronation. Adjustable tenting allows you to customize based on your anatomy and typing posture, essential for an ergonomic setup. Negative tilting combined with tenting keeps your wrists in a relaxed, neutral position, improving blood flow. Many programmable split keyboards, like the Matias Ergo Pro, support various tenting heights to help you find your perfect angle. Start with low tenting, then gradually increase while monitoring wrist and shoulder comfort. Finding the right tenting angle guarantees sustained productivity and reduces fatigue, especially when paired with build quality materials that provide lasting comfort.
Adjusting for Comfort
Adjusting your split keyboard for comfort involves fine-tuning the tenting and tilting angles to match your body’s natural posture. Tenting angles can be adjusted up to 9º on models like the Matias Ergo Pro, reducing forearm pronation and muscle strain during long coding sessions.
Employ negative tilting—where the wrist side is higher—together with wrist rests to maintain a relaxed, ergonomic hand position and decrease wrist bending. Customize the separation distance between keyboard halves to match your shoulder width, preventing ulnar deviation and encouraging better posture. Additionally, consider the knob or adjusters available on many models to fine-tune the tilt and tenting angles more precisely for your comfort.
Experiment with small micro-adjustments in tenting and tilting to find the ideal setup that minimizes fatigue. Taking the time to tweak these angles will support comfortable, extended programming sessions and improve overall ergonomic health.
Personal Ergonomic Preferences
How do you determine the best tenting and tiling angles for your workflow? Start by adjusting your split keyboard’s tenting up to 9º per half; this reduces forearm pronation and boosts blood flow during long typing sessions. Employ negative tilting—raising the wrist side—to align your hand positions naturally and lessen wrist strain. Customize tenting and tiling so the halves match your shoulder width, promoting neutral elbow rotation and straight wrists. Experiment with incremental adjustments to find an angle that minimizes fatigue without sacrificing key stability or accuracy. Use removable palm supports that complement your setup to maintain ergonomic wrist alignment comfortably. Additionally, selecting cases with precise cutouts and durable finishes can help protect your devices and ensure seamless functionality during extended coding sessions.
Find Your Perfect Split Distance and Splay Settings

Finding the right split distance and splay settings is key to optimizing your ergonomic comfort while typing. Adjust the split distance to match your shoulder width to keep your wrists in a neutral position, reducing strain and supporting better posture. Use the splay feature to angle each half outward, which helps keep your wrists straight despite elbow rotation and prevents ulnar deviation. Many split keyboards allow for customizable layout and key placement, enabling you to tailor the setup to your specific needs and workflow. Experiment with different separation widths, starting from close together and extending up to about 20 inches, similar to models like the Kinesis Freestyle2. Additionally, take advantage of adjustable tenting combined with these settings to minimize forearm pronation. Up to a 9º tenting angle can improve comfort. Proper split and splay adjustments guarantee long-term fatigue reduction and enhance your typing efficiency.
Customize Your Key Layout and Macros to Boost Coding Speed
Customizing your key layout and macros can dramatically improve your coding speed by streamlining frequently used commands and functions. With a programmable keyboard, you can assign shortcuts, snippets, and functions to easily accessible keys. Utilizing features like tap-dance, tap-hold, and double-tap-hold creates multi-function keys that trigger code snippets or modifiers, minimizing finger movement. Remapping thumb cluster keys to essential inputs like backspace, enter, or shift harnesses your strong thumbs, making key presses faster and less tiring. You can also customize layout layers to switch between languages or toolsets seamlessly. Regularly refining your keymaps guarantees muscle memory develops, leading to smoother and more efficient coding sessions. Understanding how to configure layer systems with support for macros and advanced keycodes enhances your ability to tailor workflows precisely.
How to Maintain Ergonomic Posture During Long Programming Sessions
Setting up your desk properly and taking regular posture breaks can greatly reduce fatigue during long coding sessions. Keep your split keyboard aligned to your shoulder width with wrists straight, and use the tenting feature to lessen forearm strain. Supporting your palms and maintaining relaxed shoulders helps guarantee you stay comfortable and avoid injuries. Incorporating an ergonomic wrist rest can further promote neutral wrist alignment, reducing pressure points and enhancing overall comfort during extended typing.
Proper Desk Setup
Maintaining an ergonomic desk setup is essential for comfort and efficiency during long programming sessions. Position your split keyboard with the halves shoulder-width apart, using adjustable separation and tenting angles to keep your wrists straight and reduce ulnar deviation. Use a keyboard tray or desk space that allows your elbows to stay at a 90-degree angle, relaxed by your sides, preventing shoulder and neck tension. Incorporate palm supports that contact your palms, not wrists, to maintain neutral wrist alignment and reduce strain. Guarantee the keyboard is tented with adjustable legs or accessories, decreasing forearm pronation for better blood circulation. Proper placement of your monitor and mouse inline with the keyboard halves promotes a natural, relaxed posture. Additionally, selecting adjustable monitor stands allows for fine-tuning your monitor height and angle, supporting better ergonomics.
Regular Posture Breaks
To keep your posture healthy during long programming sessions, it’s important to take regular breaks that focus on relieving tension and realigning your body. Set timers to remind you to pause every 20-30 minutes for posture breaks.
During these breaks, stretch your shoulders and elbows, and check your position to avoid strain. When using a split keyboard, adjust the tenting angles and split distance to support a natural wrist position and prevent discomfort. Position the keyboard halves shoulder-width apart, ensuring your wrists stay in a neutral, natural posture.
Remember to shift your left and right hands, and use palm supports that contact your palms—not wrists—to maintain comfortable wrist elevation. These actions promote blood circulation and prevent repetitive strain, keeping you comfortable during long coding sessions.
Troubleshoot Common Issues When Transitioning to a Split Keyboard
Shifting to a split keyboard can be challenging at first, as your muscles need time to adapt to the new layout and key positions. Expect some initial drops in typing speed and accuracy. To troubleshoot, adjust the separation and tenting features for comfort, reducing strain and preventing module slipping. Familiarize yourself with the staggered layout and thumb cluster keys to remap functions efficiently for programming. Gradually introduce programmable key functions like tap-hold or double-tap-hold to minimize finger movement and pinky strain. Proper workspace rearrangement guarantees stability and easy access to both keyboard halves and your pointing devices. If issues persist, experiment with remapping and ergonomic adjustments. Remember, muscle memory takes time to rebuild when adopting a new keyboard layout.
| Issue | Solution |
|---|---|
| Reduced typing speed | Remap keys and practice consistently |
| Discomfort or strain | Adjust separation/tenting; tweak layout |
| Module slipping | Secure with adjustable features |
| Poor muscle memory adaptation | Use gradual remapping and practice routines |
| Fatigue or pinky strain | Use programmable functions to minimize movement |
Frequently Asked Questions
How Do I Prevent Wrist Fatigue With a Split Mechanical Keyboard?
To prevent wrist fatigue with a split mechanical keyboard, you should adjust the keyboard’s angle and distance to match your natural hand position, take regular breaks, and guarantee your wrists stay straight, avoiding unnecessary strain during long typing sessions.
What Are the Best Materials for a Comfortable Split Keyboard Setup?
You should choose soft, cushioned materials like silicone or gel for wrist rests, and use high-quality foam or memory foam for padding in your keyboard setup. These materials reduce pressure, increase comfort, and help prevent fatigue during long programming sessions.
Can Split Keyboards Improve Overall Typing Accuracy?
Yes, split keyboards can improve your overall typing accuracy by reducing strain and promoting proper hand positioning. This setup encourages better ergonomics, helping you type more precisely and comfortably, especially during long coding sessions.
How Often Should I Clean and Maintain My Split Keyboard?
You should clean your split mechanical keyboard weekly to prevent dust buildup and maintain performance. Regularly check for loose keys, and use compressed air and gentle wipes to keep it in good shape, ensuring smooth typing.
What Accessories Can Enhance My Split Keyboard Experience?
You can enhance your split keyboard experience with accessories like custom keycaps for better comfort, wrist rests for support, and cable management solutions to keep your workspace organized. Adding switches, stabilizers, or keycap pullers also boosts customization.
In Summary
Switching to a split mechanical keyboard can boost your comfort and productivity once you find the right adjustments. Remember to personalize your setup with the best angles, distances, and key layouts that suit your workflow. Stay mindful of your posture during long coding sessions, and don’t hesitate to troubleshoot any issues that come up. With a little tweaking, you’ll enjoy a more ergonomic and efficient typing experience, making your programming sessions more enjoyable and sustainable.



