
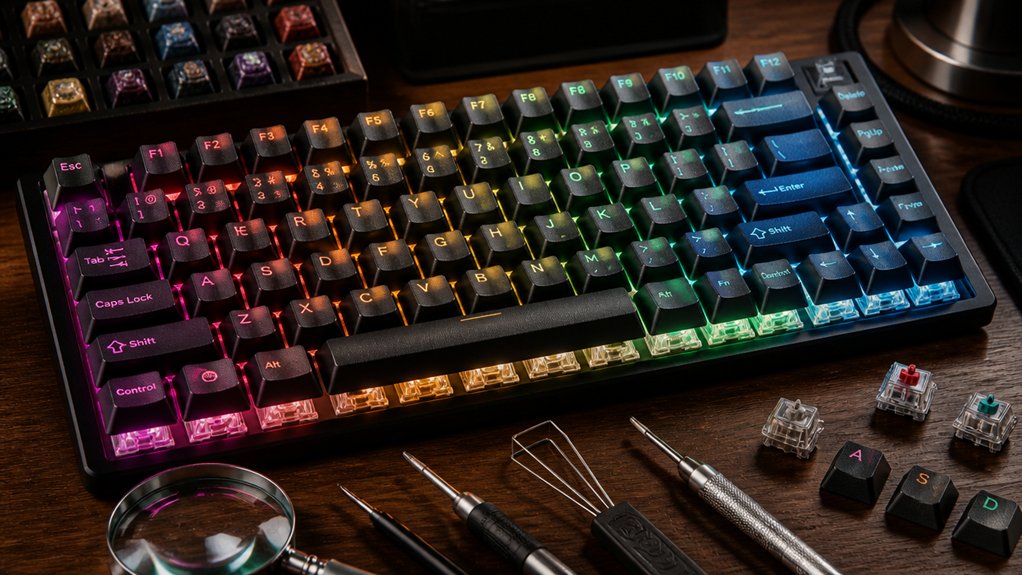
To keep your custom mechanical keyboard running smoothly, regularly clean keycaps and the case with warm water and isopropyl alcohol, and use compressed air to remove dust and debris. Lubricate stabilizers and switches with proper oils to improve sound and feel, avoiding harsh chemicals. Address sound and rattle issues by tightening stabilizers and adding foam or tape mods. Staying consistent with your maintenance routines will extend your keyboard’s lifespan and performance—continue to explore for more expert tips.
Why Regular Keyboard Maintenance Matters
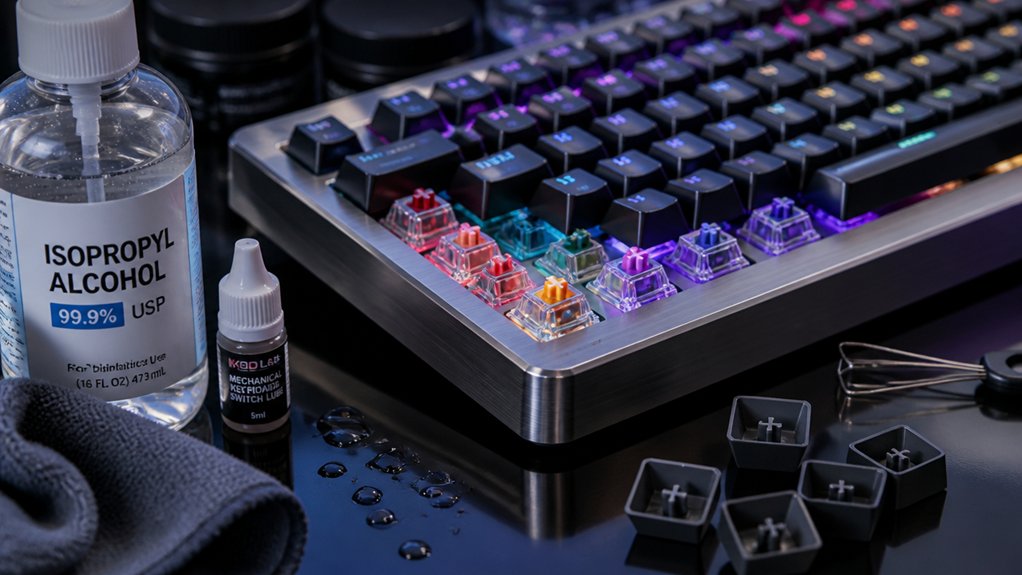
Regular maintenance is essential because it helps prevent dust, debris, and oils from building up inside your mechanical keyboards, which can degrade switch performance and make keys feel less responsive over time. For your custom mechanical keyboard, staying on top of cleaning and lubrication prolongs the life of keyboard switches, rated for 50–80 million keystrokes. Proper upkeep also helps control keyboard sound, reducing rattle and noise caused by stabilizer issues. Using appropriate keycap cleaning kits ensures thorough and safe cleaning of your keycaps without risking damage. Neglecting routine care can lead to sticky or unresponsive keys, forcing you to replace switches prematurely. Scheduling weekly quick cleans and monthly deep cleans keeps your setup feeling and sounding great. Ultimately, consistent maintenance preserves your keyboard’s smooth actuation, enhances typing experience, and guarantees long-term longevity of your entire build.
How to Clean Your Keycaps and Case Effectively
Keeping your keyboard looking and feeling fresh starts with thorough cleaning of the keycaps and case. Use a keycap puller to carefully remove the keycaps, then soak them in warm water with mild dish soap for 30–60 minutes to break down oils and grime.
Rinse and dry the keycaps thoroughly on a lint-free towel for 2–4 hours before reinstalling.
To clean the keyboard case, use a soft brush or a cloth dampened with 90%+ isopropyl alcohol, avoiding direct liquid application to prevent damage.
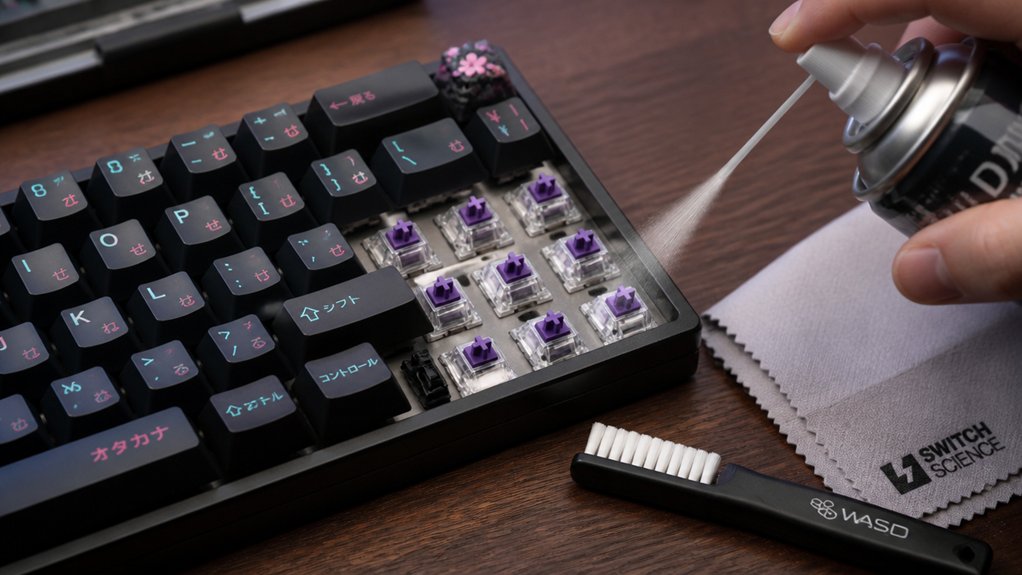
Blow out dust and debris from the case and switches with compressed air in short bursts, keeping the can upright.
Performing these steps weekly helps maintain your keyboard’s cleanliness and prolongs its lifespan, especially when selecting safe and residue-free cleaning products for your switches and electronics.
Best Practices for Lubricating Stabilizers and Switches
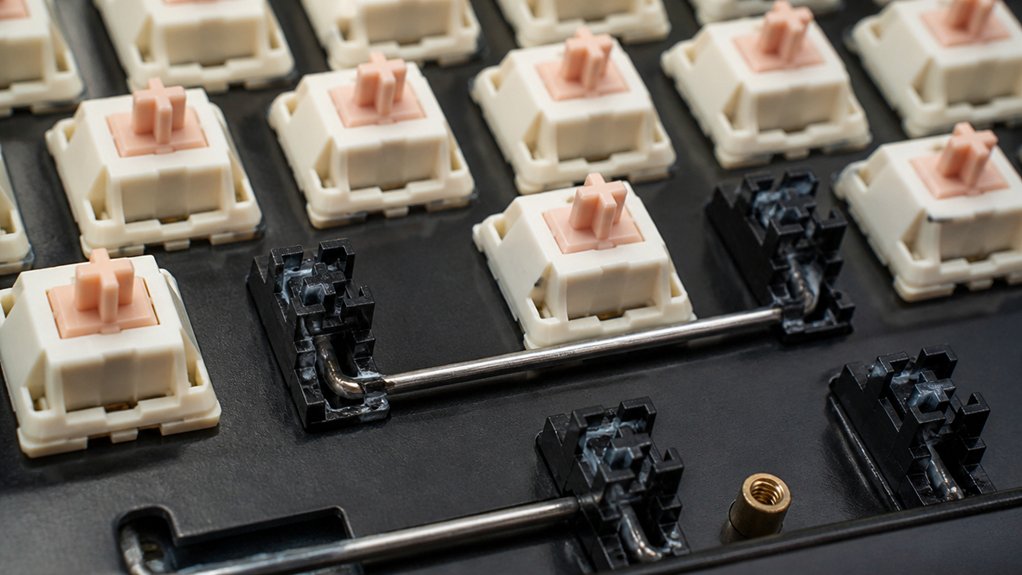
Lubricating stabilizers and switches is essential for achieving a quieter, smoother typing experience, but it requires careful attention to detail.
Lubricating stabilizers and switches ensures a quieter, smoother typing experience with careful, detailed application.
For stabilizers, disassemble them and apply Krytox 205g0 to the housing and Krytox XHT-BDZ to the wires using a fine brush or syringe to reduce noise and rattle. Be sure to cover contact points completely for ideal results.
When lubing switches, carefully open the housings with a switch opener tool, then lubricate the slider rails, spring, and stem to enhance smoothness and sound. Avoid over-lubing, which can cause sluggish keypresses.
Keep in mind that lubing switches can be time-consuming, often taking longer than assembly, so plan accordingly. If time is tight, consider factory-lubed or pre-lubed switches to maintain your custom keyboard build efficiently.
Additionally, choosing a suitable lubricant with the appropriate viscosity and material compatibility can significantly improve your keyboard’s sound and feel.
How to Detect and Fix Common Typing and Sound Issues
Start by testing each key with software like VIA to spot unresponsive ones and check for solder or pin issues.
Listen and look for rattling from stabilizers, keycaps, or loose parts, then fix with lubrication or added washers.
If the sound feels hollow or harsh, try adding foam or adjusting mounting to improve acoustics.
Be mindful of sound calibration and microphone placement as they can influence the accuracy of acoustic testing.
Identifying Mechanical Noise Sources
Have you ever noticed a rattling or hollow sound when typing on your mechanical keyboard? Identifying sound issues is key to maintaining a satisfying typing experience.
First, check the stabilizers, as loose stabilizer wires or insufficient lubing can cause rattling—apply Krytox 205g0 and make certain the wires face the PCB holes during installation.
Second, inspect the switch stems and keycaps; gaps can cause persistent switch noise, so insert thin plastic pieces to minimize rattle.
Third, use testing tools like tweezers and VIA software to verify that switches and PCB connections are working properly before full assembly. Remember, vibrations from the PCB or loose components can also create hollow or metallic sounds.
Additionally, consider the sound damping features of your stabilizers, such as foam inserts or tension-designed wires, which can significantly reduce internal resonance and rattling.
Addressing these sources directly can greatly improve your keyboard’s sound profile and overall feel.
Troubleshooting Unresponsive Keys
When your mechanical keyboard isn’t registering keystrokes, it’s essential to troubleshoot systematically to pinpoint the issue. First, test your PCB and switches with software like VIA or VIAL. Tap each switch’s contact pad with tweezers to confirm they register correctly before and after installation. If keys remain unresponsive, inspect for missed solder joints or bent switch pins. Straighten pins with tweezers and resolder poor connections using a soldering iron. Removing switches from hot-swap sockets allows pin adjustments or replacements without damage; reinsert pins correctly for proper contact. Use this table for guidance:
| Issue | Solution |
|---|---|
| Non-responsive switches | Check solder joints and pins, resolder if needed |
| Bent switch pins | Straighten pins with tweezers |
| Switches in hot-swap sockets | Reinsert correctly, adjust pins if needed |
| Persistent unresponsiveness | Clean switches with isopropyl alcohol |
Regular inspection of your PCB and proper hold-down mechanisms can also help prevent accidental disconnections during intensive typing or gaming sessions.
Reducing Rattle and Vibration
Unresponsive keys can be frustrating, but once your basic troubleshooting is complete, addressing sound and vibration issues becomes the next step to improving your typing experience.
To reduce rattle and vibration, start by lubing your stabilizers with Krytox 205g0 and Krytox XHT-BDZ. Proper lubing greatly lessens common noise in larger keys like spacebar and enter. Confirm stabilizers are installed with the wire toward the PCB holes and use washers on screw-in stabilizers for a secure fit, minimizing movement and noise.
If rattle persists, check for loose keycap stems; adding a thin plastic shim can seal gaps and dampen sound. You can also experiment with gasket placement or foam inserts to soften vibrations and improve overall sound and feel. Additionally, selecting high-quality stabilizers such as the GATERON Crystal or Glorious GSV2 can significantly enhance key stability and reduce noise stabilizer quality.
Tips for Protecting Your Keyboard From Dust and Spills
Ever wonder how to keep your mechanical keyboard clean and free from damage caused by dust and spills? For a custom keyboard, regular maintenance is key.
Use short bursts of compressed air to quickly blow out dust from between your PBT keycaps—this keeps debris from accumulating and affecting performance. Prevent spills by steering clear of eating or drinking near your keyboard, and if an accident happens, unplug it immediately and let it drain upside down for at least 30 minutes.
Blow out dust with compressed air, avoid eating nearby, and unplug spills immediately to minimize damage.
Using a keyboard cover when you’re not actively using your build minimizes dust buildup on exposed switches and keycaps.
For minor spills, apply 1–2 drops of 90%+ isopropyl alcohol on sticky switches, actuate to spread, then allow the keyboard to dry thoroughly in a warm, ventilated space.
Additionally, choosing a moisture-free aerosol compressed air can help prevent moisture buildup and corrosion in your keyboard components.
When and How to Deep Clean Your Mechanical Keyboard
- Unplug the keyboard before cleaning
- Photograph your layout for reassembly
- Avoid harsh chemicals and abrasives
- Utilize appropriate keyboard cleaning brushes to thoroughly remove dust and debris from between keys and delicate components.
Troubleshooting Rattling and Unwanted Sounds in Your Keyboard
Rattling and unwanted sounds often come from loose stabilizers or poorly fitting keycaps. You can fix this by lubricating stabilizers properly and ensuring keycap stems sit snugly in their housings. Using stabilizers with minimal wobble and noise features can also significantly reduce these noises. Tightening stabilizer screws and adding padding or shims can also help silence those distracting noises.
Stabilizer Looseness Corrections
Looseness in your stabilizers can cause unwanted rattling and noise, but you can often fix this simply by proper lubrication and installation.
First, make sure everything is installed correctly: orient the stabilizer wire toward the larger holes in the PCB and avoid overtightening screws or clips. Proper lubing is essential—use Krytox 205g0 for the stabilizer body and Krytox XHT-BDZ on the wire to eliminate rattle.
If rattling persists, check for loose keycap stems that create gaps, and fill these with a thin plastic piece to reduce noise. Test the stabilized keys after lubing by pressing repeatedly; this confirms smoothness and highlights any residual rattling.
For better results, use a stabilizer tuning kit with a syringe lubricant and brush, and remember, make sure everything in your keyboard kit is properly assembled.
Keycap Stem Fit Adjustments
When your keyboard produces unwanted noises or rattling sounds despite proper stabilizer lubing, the issue may lie with the fit between your keycap stem and switch stem. A loose keycap stem can create gaps that cause movement and rattling stabilizers.
To fix this, check for looseness after installing the keycap, and consider inserting a thin plastic piece to fill the gap, which improves stability. Ensuring a snug fit is essential for reducing rattle and achieving a quieter, more refined sound in your custom keyboards.
Visual demonstrations and video guides are available to help identify fit issues and guide you through adjustments. Properly lubed stabilizers combined with a tight keycap stem fit make your keyboard feel more solid and minimize unwanted noise.
How to Reinstall and Fine-Tune Stabilizers for Better Sound and Feel
Reinstalling and fine-tuning your stabilizers can greatly improve both sound and feel, leading to a more satisfying typing experience. Proper lubrication is key—apply Krytox 205g0 to stabilizer housings and Krytox XHT-BDZ to the stabilizer wire for smoother keypresses and reduced rattle.
When installing, orient the wire toward the larger PCB holes for correct alignment and minimized wobble. Use washers on screw-in stabilizers but avoid overtightening to prevent binding and uneven movement. After installation, test the keys by pressing and listening for rattles. If noise persists, add thin plastic inserts under keycap stems.
To fine-tune stability and sound signatures, you can also:
- Carefully lubricate accessible points
- Adjust wire placement
- Check for gaps and wobble
Balancing Key Feel and Sound to Match Your Preferences
You can fine-tune your keyboard’s feel and sound by adjusting stabilizer lubrication, which reduces rattles and creates smoother keypresses.
Changing your gasket’s vibrancy levels or choosing different keycap profiles also impacts how soft or firm your typing feels, as well as your keyboard’s noise level. Experimenting with these options helps you customize your setup to match your preferred balance of feel and sound.
Adjust Stabilizer Lubrication
Adjusting stabilizer lubrication is key to achieving a balanced key feel and sound that matches your preferences. Properly lubing your stabilizers reduces rattle and noise, making your typing smoother and quieter.
To recommend lubing, use specific lubricants like Krytox 205g0 for the housing and slider, and Krytox XHT-BDZ for stabilizer wires. During the process of building, apply lubricant carefully with a brush or syringe, covering all contact points evenly without over-lubing. Remember, over-lubing can cause sluggish keys.
After installation, test your keys; if you notice rattle, consider additional lubing or small plastic inserts to fill gaps. Adjust stabilizer lubrication patiently; small tweaks greatly improve key feel and sound, a vital step for any serious keyboard hobbyist.
Modify Gasket Vibrancy Levels
Modifying gasket vibrancy levels is an effective way to fine-tune your gasket-mounted keyboard’s feel and sound to match your preferences. Adjusting the placement or number of gaskets can increase or decrease typing flex, influencing how soft or firm the keypresses feel.
Removing some gaskets cautiously can enhance flex and create a livelier feel, but may lessen sound dampening. Adding or repositioning softer gasket materials such as foam or silicone can mellow higher-pitched sounds, resulting in a warmer, more “thocky” experience.
Experimenting with different gasket materials and thicknesses allows you to balance vibration transmission, achieving the desired vibrancy of feel and sound. Keep in mind that modifications are best planned before assembly, as changes afterward can be more difficult and may require partial disassembly.
Select Keycap Profiles
Selecting the right keycap profile directly influences both the feel and sound of your mechanical keyboard, making it essential to take into account how height and shape impact your typing experience. Custom keycap profiles like Cherry balance comfort and quieter typing, while taller sculpted profiles such as SA produce a deeper “thocky” sound.
Thicker keycaps, especially in PBT, enhance sound depth and reduce sharp “clacky” feedback compared to thinner ABS caps. Keep in mind that:
- Uniform profiles guarantee consistent finger placement and smoother typing.
- Sculpted profiles offer ergonomic shaping but can affect acoustics across rows.
- Compatibility with your keyboard layout and LED orientation is critical, as some profiles may not fit certain boards.
Choosing the perfect keycap profile depends on your personal preference for feel and sound, as well as practical compatibility.
Using Tape Mods and Other Techniques to Customize Your Keyboard’s Sound
Using tape mods is a simple and effective way to customize your keyboard’s sound, especially if you want to amplify or alter its acoustics.
When you make a tape mod, it’s time to build and test different setups—masking tape or painter’s tape on the bottom of the PCB can boost volume by reflecting keystrokes. This method is reversible if applied carefully, so you can experiment without permanently changing your build.
Keep in mind that tape mods may make different builds sound more similar, reducing their unique character. They work best on hollow cases, which benefit from a denser reflective surface underneath.
For further customization, combine tape mods with acoustic dampening materials like foam or Poly-Fil to fine-tune your keyboard’s sound profile during testing.
Creating a Maintenance Routine to Keep Your Keyboard in Top Shape
Establishing a consistent maintenance routine is essential for keeping your custom mechanical keyboard performing at its best and extending its lifespan. Start with a clear cleaning schedule: perform quick cleans weekly, regular cleans every 1–2 months, and deep cleans every 6–12 months.
Use compressed air and gentle shaking for quick dust removal without removing keycaps, preserving your build’s integrity. Remember to lubricate stabilizers regularly to reduce noise and improve feel, and consider hand-lubing switches for smoother keystrokes.
Keep an eye on key switch response and address sticky or unresponsive keys promptly by applying 90%+ isopropyl alcohol to prevent damage. Always unplug your keyboard before cleaning and avoid moisture or harsh chemicals to protect your electronics. Consistency is key for top performance.
Community Tips and Resources for Advanced Keyboard Care
Have you tapped into the wealth of knowledge available within the custom keyboard community? You strongly recommend checking out specialized Discord groups and Twitch streams for expert advice on advanced cleaning techniques and switch maintenance.
Influencers like Taeha Types and Alexotos provide detailed video guides on stabilizer lubing and switch disassembly, helping reduce rattle and improve switch actuation. Community-shared resources are invaluable for troubleshooting sticky or unresponsive keys, offering tips on alcohol application and precise switch handling.
You can also explore acoustic modding suggestions like foam placement, poly-fil addition, and tape mods within enthusiast forums to enhance sound and feel. Participating in group buys and aftermarket exchanges lets you access rare lubricants, switch materials, and replacement parts, ensuring your keyboard stays in top condition for the long haul.
Frequently Asked Questions
How to Maintain Your Mechanical Keyboard?
To maintain your mechanical keyboard, clean it weekly, remove and wipe keycaps monthly, deep clean every 6-12 months, fix sticky keys with alcohol, and lubricate stabilizers regularly. These steps keep it responsive, smooth, and prolong its lifespan effectively.
What Is a 96% Keyboard Missing?
A 96% keyboard is missing a dedicated navigation cluster, some extra function keys, and extended macro or media keys. It condenses a full-size layout into a compact design, sacrificing minimal keys while keeping almost all essential ones.
Is 84 Keys 75%?
Yes, an 84-key keyboard typically falls into the 75% layout category. You get a balanced design that’s more compact than full-size keyboards but still includes dedicated function and navigation keys for added versatility.
Are Custom Keyboards Hard to Build?
Building a custom keyboard isn’t too hard once you follow guided steps. You’ll handle basic tools, test components, and learn as you go. With patience and community resources, you’ll find the process manageable and rewarding, even for beginners.
In Summary
Regular maintenance keeps your custom mechanical keyboard performing at its best and extends its lifespan. By cleaning, lubricating, and protecting your build, you’ll enjoy a smoother, quieter typing experience tailored to your preferences. Establishing a routine guarantees issues are caught early, saving you time and frustration. Plunge into community tips and explore new mods to personalize your keyboard even further. Stay proactive, and your keyboard will reward you with consistent, enjoyable performance for years to come.



