
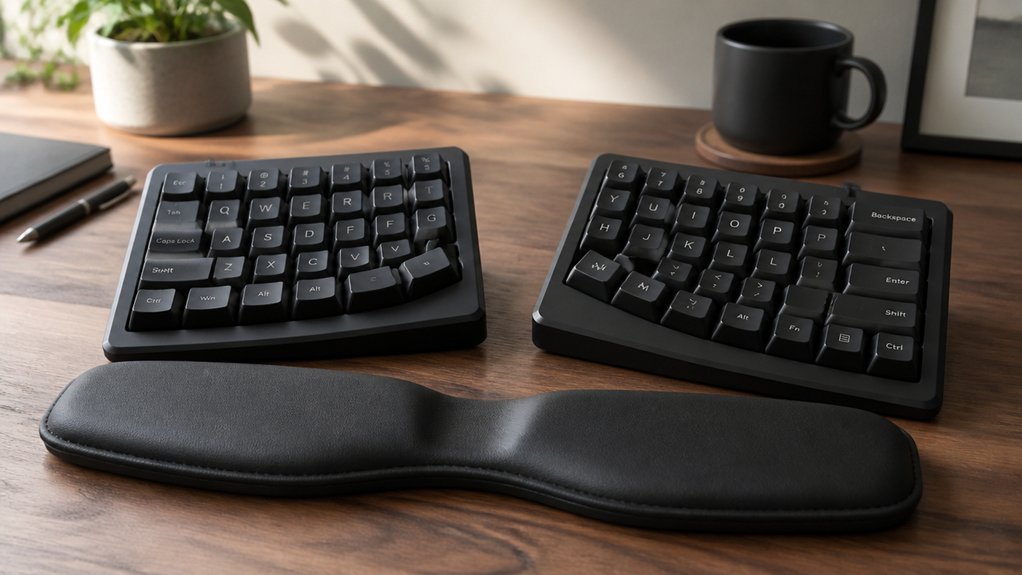
To use ergonomic split keyboards for wrist pain, position each half shoulder-width apart to keep your arms relaxed and align your wrists with your forearms. Adjust the tenting angle inward to reduce forearm pronation, and keep your wrists neutral by avoiding excessive extension or ulnar deviation. Use palm supports properly by resting your palms, not wrists, and guarantee your keyboard height and tilt promote comfortable angles. If you keep these tips in mind, you’ll find better wrist comfort and support for long-term use.
How Do Split Keyboards Reduce Wrist and Shoulder Strain?
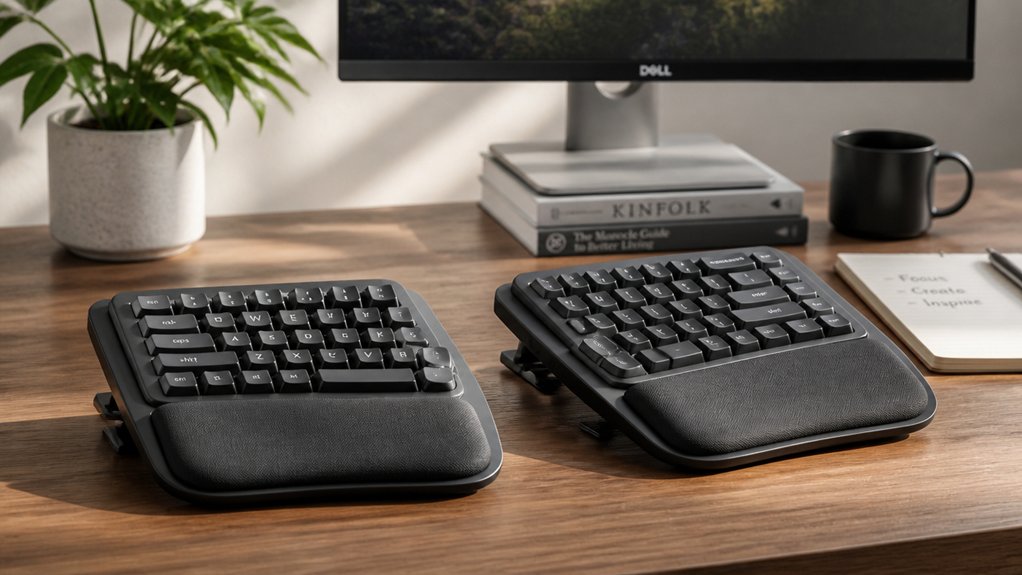
Have you ever wondered how split keyboards actually reduce wrist and shoulder strain? With a split keyboard, you can adjust the separation and positioning so your wrists stay straight and aligned with your shoulders. This setup prevents ulnar deviation, which occurs when wrists bend outward, causing discomfort.
Raising the inner edges of the keyboard—known as tenting—further reduces forearm pronation, lowering muscle tension and circulation issues. The split design also allows each half to be positioned according to your shoulder width, fostering a relaxed posture and neutral arm position.
Additionally, staggered key layouts align with natural finger movements, minimizing finger travel and effort. Palm supports help keep your wrists neutral, reducing pressure and preventing strain. Moreover, ergonomic layout design promotes a natural hand posture, contributing significantly to long-term comfort.
All these features work together to make typing more ergonomic and less painful.
Key Ergonomic Features to Look for in a Split Keyboard
When choosing a split keyboard, look for adjustable tenting options that help reduce wrist strain by aligning your forearms comfortably.
Also, consider layouts like columnar or staggered keys, which follow natural finger movement to minimize unnecessary reaching or bending. These features can make a significant difference in supporting your ergonomic goals. Additionally, choosing PCBs with programmable features like QMK or VIAL firmware allows for personalized key remapping to further optimize comfort during extended typing sessions layout and key count.
Adjustable Tenting Options
Adjustable tenting is a crucial feature worth evaluating when choosing a split keyboard, as it allows you to customize the angle of the inner edges to suit your physiology. A well-designed split ergonomic keyboard enables you to set the tenting at comfortable angles, reducing forearm pronation and muscle strain. By aligning wrists and forearms naturally, you lessen the risk of RSI and carpal tunnel syndrome symptoms. The ability to adjust tenting also helps alleviate repetitive strain, especially for heavy users typing 8-12 hours daily. Look for models that provide stable, reproducible settings to maintain ergonomic benefits without constant repositioning. Incorporating adjustable tenting features enhances the overall ergonomic benefits and accommodates different user preferences.
Columnar and Staggered Layouts
Columnar and staggered layouts are essential features to take into account in a split ergonomic keyboard because they align keys in a way that follows the natural shape of your hands. These layouts reduce finger travel and strain by positioning keys according to each finger’s natural reach and movement. A staggered columnar design prevents awkward finger extensions and contractions, supporting comfortable, efficient typing. By arranging keys in vertical columns, these layouts help minimize ulnar deviation, encouraging a neutral wrist position. Additionally, optimized finger placement lessens muscle fatigue and lowers the risk of repetitive strain injuries (RSI). Many models include a tactile thumb cluster, allowing effective use of your thumbs beyond just space bar presses, further enhancing ergonomics and typing comfort. Exploring programmable layers enables custom key assignments that improve workflow and reduce unnecessary wrist movements.
How to Properly Position Your Split Keyboard for Comfort
To maximize comfort and reduce wrist strain, position each half of your split keyboard shoulder-width apart so your arms stay relaxed and naturally aligned. This setup helps maintain a neutral wrist position, preventing unnecessary ulnar deviation that can strain your wrists. A compact design like that of ergonomic split keyboards allows for better positioning and promotes a more natural typing posture.
Angle the keyboard halves inward to match the natural angle of your hands and forearms, lowering wrist bending and discomfort. Adjust the tenting by lifting the inner edges of the halves to decrease forearm pronation and reduce muscle strain.
Place palm supports so they contact your palms, not wrists, providing stability without forcing extension. Finally, guarantee your keyboard height and tilt keep your wrists in a neutral or slightly extended position, avoiding wrist extension beyond 10–15 degrees and minimizing fatigue.
How Tenting and Angles Help Minimize Wrist Fatigue
Adjusting the tenting angle of your split keyboard can greatly reduce wrist strain by promoting a more natural hand position. When you set the right angle, it aligns your wrists to prevent overstretching and minimizes muscle fatigue during extended typing. Properly adjusting these angles can also help improve overall ergonomic comfort and support in your setup. A key factor in achieving this is understanding device compatibility and precise design, ensuring your setup complements your natural posture. Fine-tuning these angles helps maintain comfort and reduces the risk of wrist discomfort over time.
Benefits of Adjustable Tenting
When you raise the inner edges of split keyboards through adjustable tenting, you help reduce forearm pronation, allowing your wrists to rest in a more natural, neutral position. This ergonomic keyboard feature minimizes muscle pressure and tissue strain, vital for avoiding wrist fatigue and pain. Using high-quality, durable construction ensures that your keyboard maintains proper alignment and stability during extended typing sessions. Since ideal tenting angles vary individually, adjustable tenting lets you find the most comfortable and effective wrist alignment. Benefits include:
- Decreasing forearm and shoulder discomfort
- Promoting natural wrist and shoulder alignment
- Preventing excessive wrist bending and ulnar deviation
- Supporting prolonged typing sessions with less strain
Adjustable tenting enhances the ergonomic benefits of split keyboards, making it easier to maintain comfort during extended use and reducing the risk of repetitive strain injuries.
Optimal Angle Settings
Ideal angle settings play an essential role in minimizing wrist fatigue by allowing you to customize the tilt of your split keyboard to best support natural wrist and forearm alignment.
Ergonomic tenting involves raising the inner edges of the keyboard halves, which reduces forearm pronation and alleviates muscle pressure. Adjustable tenting angles enable you to find the most comfortable position, helping keep your wrists in a neutral posture and preventing extension beyond 10-15 degrees.
Proper angle settings also align your wrists with your forearms, avoiding ulnar deviation, and promote relaxed shoulder positioning. By angling the keyboard halves inward, you minimize wrist bending outward, supporting natural wrist and finger alignment during typing.
Additionally, choosing heat-resistant materials for your setup can be beneficial, especially if you use heated desks or accessories that could impact your ergonomic configuration. This tailored setup decreases strain and helps prevent wrist fatigue over extended periods.
How to Find the Right Separation and Splay for Your Body Size
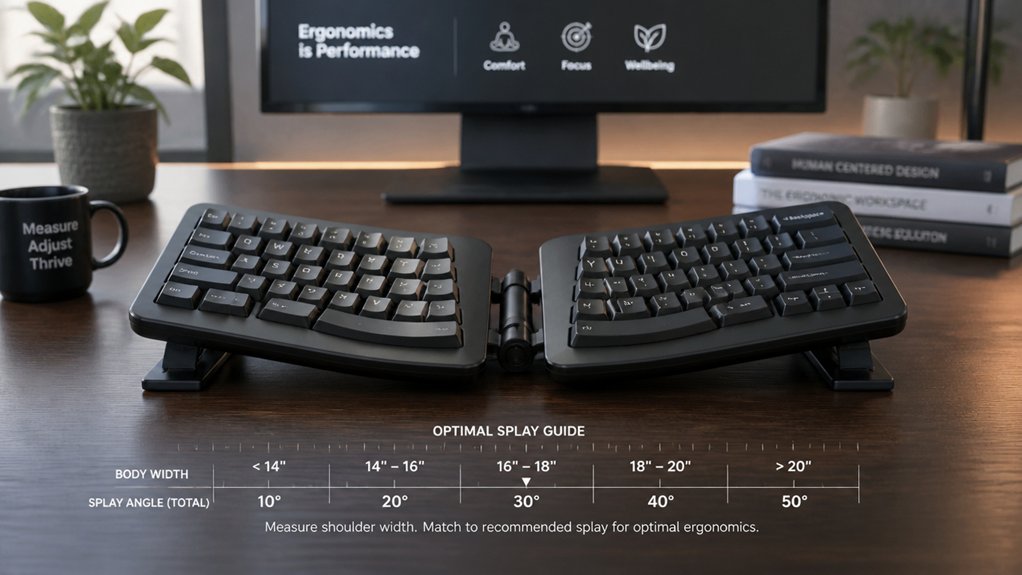
How you set the separation and splay of your split keyboard can greatly impact your comfort and posture. To reduce wrist pain, align the keyboard halves with your shoulder width to keep your arms and wrists in a neutral position, avoiding ulnar deviation.
Align your split keyboard with shoulder width to promote neutral wrists and reduce strain.
Adjust the split distance so your wrists aren’t bending outward or inward excessively, balancing ergonomic benefits with workspace practicality. Apply inward splay by angling the halves toward you, which helps align your wrists with your forearms and lessens strain.
Consider medium to shoulder split separations to open your chest and rotate your shoulders back, promoting an upright posture and reducing wrist extension. Guarantee your separation and splay settings remain stable and consistent to maximize ergonomic gains during extended typing sessions.
- Align with shoulder width for neutral arm and wrist position
- Set split distance to prevent wrist bending outward
- Use inward splay to align wrists with forearms
- Maintain stable and reproducible settings
What Are the Best Practices for Aligning Your Wrists and Forearms?
Proper wrist and forearm alignment depends on your keyboard setup and posture. To maintain a neutral position, keep your wrists straight and slightly extended, no more than 10-15 degrees. Position your keyboard halves to keep your wrists aligned and hands shoulder-width apart, reducing ulnar deviation that strains muscles and nerves. Tenting the keyboard by lifting the inner edges decreases forearm pronation, lowering muscle fatigue. Keep your forearms parallel to the floor and elbows close to your body to relax your shoulders. Use palm supports that contact your palms, not your wrists, preventing pressure and tendon strain. Ensuring the use of ergonomic wrist rests can further improve comfort and health during long sessions.
How to Customize Your Keyboard Layout to Reduce Finger Travel
Customizing your keyboard layout is essential for minimizing finger travel and reducing strain during extended typing sessions. To achieve this, you can use programmable software like Oryx for ZSA Ergodox EZ or Chrysalis for Keyboardio Model 100 to customize your split keyboard layout. Choosing firmware that supports layered key functions ensures you can implement multiple configurations for different tasks. Aim for columnar or staggered key layouts that align with natural finger positions, decreasing lateral movements. Additionally, utilize layered key functions and palm keys to bring frequently used or modifier keys closer to your thumbs, leveraging the thumb cluster. Consider adopting compact layouts like Miryoku style, which uses fewer keys and multiple layers to cut down travel distance and boost efficiency—especially for tasks like programming. Practice your new layout daily to develop muscle memory and increase proficiency.
How and Where to Use Wrist Supports and Palm Contacts Correctly
Using wrist supports and palm contacts correctly can greatly reduce strain during long typing sessions. Position your wrist supports so they contact the palm area, not the wrist bones, to prevent increased tendon pressure and wrist extension.
Proper placement of wrist supports and palm contacts reduces strain and promotes neutral, comfortable typing positions.
Make sure the palm rests are removable and padded for cushioning, helping you maintain a neutral wrist position during breaks or pauses. When using wrist supports, keep your wrists straight and aligned with your forearms to avoid ulnar deviation or excessive bending.
Place the supports to prevent wrists from hovering over the keyboard, which reduces muscle exertion. Proper palm contact with the supports promotes relaxed shoulders by facilitating neutral wrist alignment and minimizing forearm pronation.
Correct placement and awareness of your supports and palm contacts are key to comfort and injury prevention.
How to Transition to a Split Keyboard Without Sacrificing Productivity
To shift smoothly, start with at least 30 minutes of daily practice to build muscle memory and get comfortable with the new layout.
Consider switching to ergonomic keyboard layouts like Colemak-DH or Miryoku to ease finger travel and muscle strain.
Be consistent, take regular breaks, and use remapping features to customize your keys, which will help you regain productivity faster.
Gradual Adjustment Strategies
Shifting to a split keyboard smoothly involves adopting a gradual approach that minimizes disruptions to your workflow. During this gradual adjustment period, use often short daily sessions of at least 30 minutes, gradually increasing your typing time to develop muscle memory and adapt to the new key layout.
Expect an initial dip in speed and accuracy, but practice reduction of finger travel and efficiency techniques to mitigate productivity loss. Customize programmable features such as layers and key remapping beforehand to streamline your adaptation.
Maintain ergonomic habits like neutral wrist positioning, adjustable tenting, and proper palm support to prevent discomfort.
- Set small, achievable goals every few days
- Track your progress and tweak settings
- Use supportive tools to reinforce proper posture
- Reach out to community resources for guidance
Key Layout Familiarization
Shifting to a split keyboard doesn’t have to be a productivity setback if you start by familiarizing yourself with the new layout carefully. Begin by practicing on layouts like colemak-dh or miryoku style, which minimize finger travel and ease the learning curve.
Spend at least 30 minutes daily typing to build muscle memory, focusing on the home row and adjusting to the different key spacing. Use programmatic layers and thumb clusters for common functions to stay efficient and limit finger movement early on.
Expect an initial slowdown in speed and accuracy, but recognize it as temporary. Regularly customize key placement with software like Oryx or Chrysallis, tailoring the layout based on your feedback to enhance comfort and maintain productivity during the adjustment.
Practice and Consistency
Shifting to a split keyboard requires consistent practice to maintain productivity and build muscle memory effectively. During the adjustment period, expect a temporary drop in typing speed as your brain learns ergonomic key placements and split spacing.
Start by dedicating at least 30 minutes daily to practice, gradually increasing your typing duration while taking frequent breaks to prevent strain.
To support your adjustment:
- Use programmable features and layers to customize layouts, reducing finger travel.
- Incorporate slow, deliberate practice sessions to reinforce muscle memory.
- Adjust layout settings incrementally to fit your comfort.
- Maintain consistency by practicing daily, which fosters long-term ergonomic benefits.
This approach guarantees you regain productivity while protecting your wrists and promoting healthy habits.
What Habits Keep Your Hands and Body Ergonomically Healthy?
Ever wonder how to keep your hands and body comfortable and injury-free while working? One key habit is maintaining neutral wrist positioning.
With ergonomic keyboards, adjust and align the keyboard halves with your shoulders, avoiding wrist extension beyond 10-15 degrees to reduce muscle strain. Use features like adjustable tenting and split distance to decrease forearm pronation and ulnar deviation, keeping your shoulders and wrists relaxed.
Remember to rest your palms on supportive palm rests—not your wrists—to prevent tendon pressure during long typing sessions. Incorporate short breaks—about five minutes every hour—to stretch your wrists and fingers, supporting muscle endurance.
Start with at least 30 minutes of daily practice on the split layout, gradually building your muscle memory while avoiding overuse.
Troubleshooting Common Setup Issues and Maintaining Long-Term Comfort
Setting up your ergonomic split keyboard correctly is key to long-term comfort. Properly positioning the keyboards guarantees your wrists stay neutral and reduces strain.
Proper setup of your ergonomic split keyboard ensures wrist neutrality and lasting comfort.
Adjust the split distance and tenting angles to keep wrist extension within 10-15 degrees and minimize ulnar deviation. Use palm supports that contact your palms, not wrists, to lessen tendon pressure and avoid hovering.
Regularly check that the keyboard halves stay stable and don’t shift during use, maintaining consistent ergonomic alignment. Gradually increase your daily usage, starting with at least 30 minutes of focused practice to build muscle memory and adapt to the staggered columnar layout. Incorporate frequent breaks, wrist stretches, and micro-movements to support sustained comfort and prevent long-term strain.
- Adjust split distance and tenting angles for peak wrist alignment
- Use palm supports that contact palms rather than wrists
- Regularly verify stability of your keyboards
- Gradually increase usage time to foster comfort
Frequently Asked Questions
Do Split Keyboards Help With Wrist Pain?
Yes, split keyboards help with wrist pain by allowing you to maintain a natural, neutral wrist position, reducing strain, ulnar deviation, and muscle pressure. Adjust the separation and tenting features for ideal comfort and better support.
How to Stop Wrist Hurting When Using Keyboard?
You can stop wrist hurting by adjusting your keyboard to keep wrists straight, using a palm rest for support, taking frequent breaks with stretches, and gradually building your typing duration to prevent strain and promote comfort.
Are Split Keyboards Good for Ergonomics?
Yes, split keyboards are good for ergonomics because they keep your wrists straight, promote neutral arm positioning, and reduce muscle strain. Adjusting separation and tenting helps personalize comfort, allowing you to work longer without wrist or shoulder pain.
Do You Need a Wrist Rest With an Ergonomic Keyboard?
You don’t necessarily need a wrist rest with an ergonomic keyboard, but using one that supports your palms and allows neutral wrist positioning can reduce strain, improve comfort, and prevent wrist pain during long typing sessions.
In Summary
Switching to an ergonomic split keyboard can greatly reduce wrist and shoulder pain when set up correctly. Pay attention to proper positioning, angles, and support to maximize comfort. Practice good habits, take regular breaks, and make adjustments as needed. With patience and proper setup, you’ll improve your typing posture, prevent discomfort, and enjoy a healthier, more comfortable workspace in the long run. Your wrists will thank you for making these ergonomic changes.



