
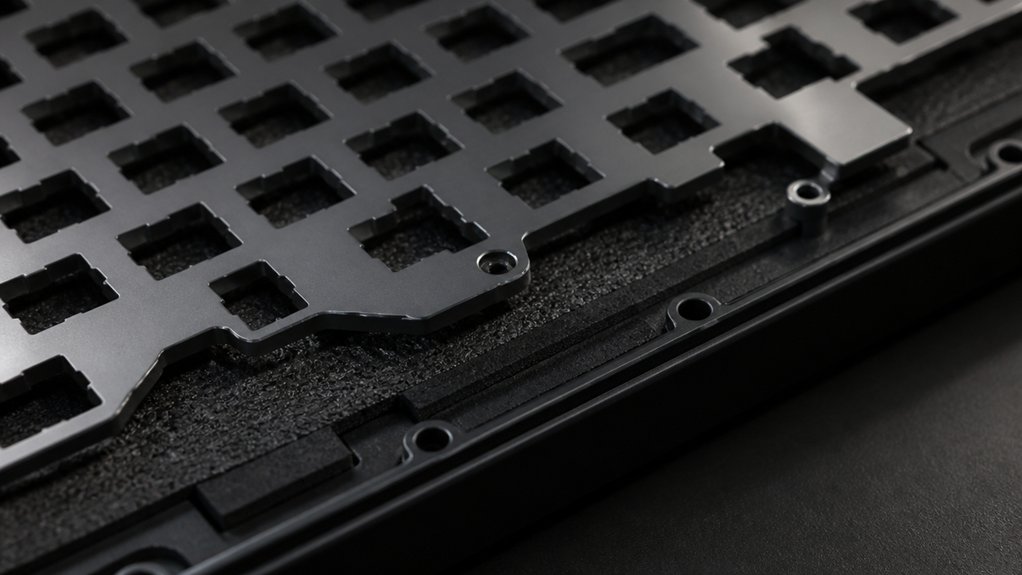
To dampen keyboard plate sounds, you should add sound-absorbing materials like EVA foam or IXPE between the plate and PCB, and around stabilizers to reduce rattling. Using gasket mounts or filling hollow case parts with dense padding minimizes vibrations and resonance. Lubricating stabilizers and choosing softer plate materials also help soften noise. Experimenting with placement and different dampening layers allows you to fine-tune your setup for quieter, more comfortable typing—learn how to optimize your keyboard for the best sound profile.
What Is Keyboard Plate Sound Dampening and Why Is It Important?
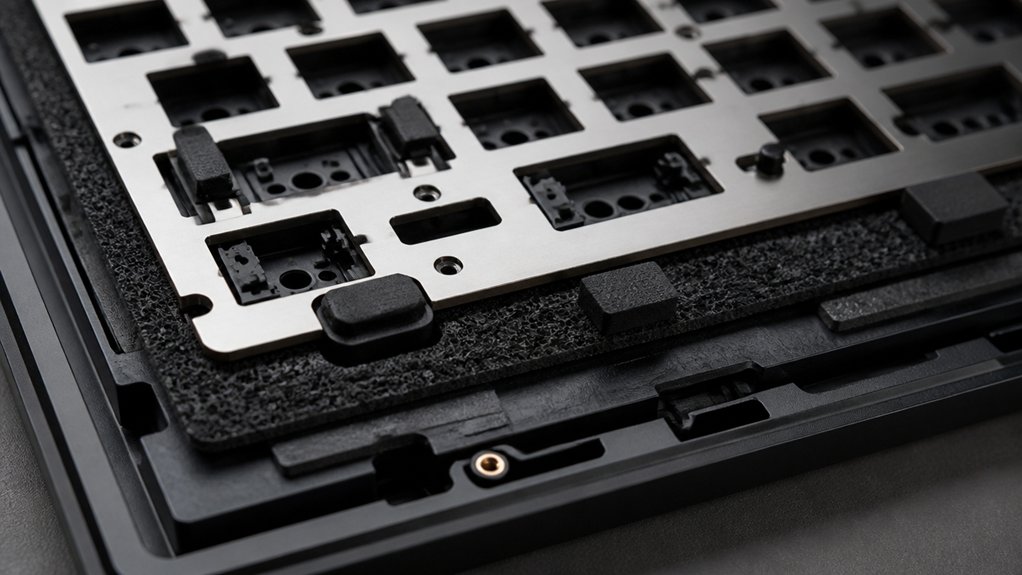
Have you ever noticed how some mechanical keyboards sound sharp or metallic during use? That’s often due to the keyboard plate’s acoustics. Keyboard plate sound dampening involves using materials or design strategies to reduce vibrations and keyboard noise caused by keypresses. It’s essential because the plate material and how it handles sound directly affect your typing experience. Using material compatibility considerations, you can select damping materials that best integrate with your keyboard’s structure to enhance sound absorption. This not only improves sound quality but also creates a more comfortable, less distracting typing environment, making each keystroke more enjoyable.
What Factors Affect the Noise of Your Mechanical Keyboard?
Your keyboard’s noise level depends on several key factors. The switch type, case materials, keycap quality, and stabilizer condition all influence how loud or muted your typing sounds. A lesser-known factor that significantly impacts sound is the foam dampening used within the keyboard, which can absorb vibrations and shape the overall sound profile.
Switch Type Variations
The type of switch you choose greatly impacts the noise produced by your mechanical keyboard. Mechanical switches vary in their keyboard sounds, with each type offering different sound profiles.
Linear switches, like Cherry MX Red, produce smoother keystrokes with minimal tactile feedback, resulting in quieter operation. Tactile switches generate moderate noise, featuring a noticeable bump on actuation that adds to the sound level.
Clicky switches, such as Cherry MX Blue, are the loudest due to internal click jackets that produce distinct clicking noises. Additionally, the switch housing and mounting style influence how vibrations resonate, affecting overall noise. Shorter actuation distances can also minimize sound duration.
Choosing the right switch type depends on your preferred sound level and typing feel, directly shaping your keyboard’s noise profile. The durability and quality of the clicky sound, as well as the materials used, play a significant role in the consistency and intensity of the noise produced.
Case and Material Choices
The material choice for your keyboard case plays a crucial role in shaping its overall noise level. A metal case amplifies the key sound produced, often resulting in sharper, echoing tones due to increased case resonance.
Conversely, plastic cases tend to dampen vibrations, creating a quieter typing experience. To deepen sound dampening, consider these factors:
- Case structure and mounting style — gasket mounts can reduce vibration transmission, smoothing out the acoustic profile.
- Filling voids — inserting dense materials like foam or EVA cotton beneath the PCB absorbs vibrations, softening keystrokes.
- Plate material — stiff plates like aluminum generate sharper sounds with metal cases, while flexible polycarbonate plates produce muted, cushioned feedback.
Choosing the right combination of case and plate materials can greatly influence the overall sound characteristics of your keyboard, especially when considering aluminum cases noted for their impact on resonance and tone.
Keycap and Stabilizer Quality
Keycap and stabilizer quality directly influence the noise produced during typing. The material and thickness of your keycaps matter; thicker PBT keycaps dampen sound, producing quieter, lower-frequency clicks, while thinner ABS keycaps create sharper, higher-pitched noise.
Stabilizers on larger keys can rattle and wobble if poorly made or unlubricated, increasing sound produced. Lubricating stabilizer metal bars and contact points with thick grease reduces clack and rattling, improving overall sound. Pre-lubrication of stabilizers enhances their ability to dampen noise and ensures smoother keystrokes.
Simple modifications, like clipping stabilizer stems or using band-aids under stabilizers, help dampen impact noise. Additionally, the bottoming out force of keycaps on stabilizers influences sound level—cushioned pads or O-rings soften the impact, further muffling the noise generated by your key switch and stabilizer assembly.
Which Plate Materials Make the Biggest Difference in Sound and Feel?
The material of your keyboard plate has a big impact on both sound and feel. Stiff materials like aluminum produce sharper, more metallic sounds and a crisp feel, while flexible options like polycarbonate offer softer, quieter keystrokes. Additionally, incorporating sound dampening foam layers can significantly reduce resonance and hollow sounds, enhancing overall acoustics. Choosing the right plate depends on whether you prioritize crispness, quietness, or comfort during typing.
Acoustic Properties and Sound Profiles
Choosing the right keyboard plate material can dramatically change how your keyboard sounds and feels during use. In Mechanical Keyboards, the material influences the sound output and overall keyboard design.
For instance, aluminum produces a sharper, metallic “pingy” sound, giving a crisp, tactile feedback that resonates loudly. Polycarbonate offers a softer, muted “thock,” absorbing impact and vibrations for a more cushioned experience. Stiff materials like brass and steel create louder, more resonant keystrokes with pronounced acoustic feedback. Additionally, the material’s stiffness impacts the degree of vibration transfer, influencing both sound and feel.
These differences matter because:
- Resonance varies, affecting the richness of sound and vibration propagation.
- Sound profile shifts from bright and sharp to muted and cozy.
- Feel and tone directly impact the typing experience and overall comfort.
Typing Comfort and Rigidity
Different plate materials greatly influence your typing experience by affecting both comfort and rigidity. Stiff plate materials like aluminum and brass deliver a firm, tactile typing feel with sharper, metallic sound signatures. These rigid plates often produce crisp acoustic feedback and improve keystroke precision, but may generate more noise.
Flexible materials such as polycarbonate and POM absorb force, creating a softer, more cushioned typing feel with muted, deeper “thock” sounds. They reduce vibration and resonance inside the keyboard, resulting in quieter typing and less finger fatigue.
Choosing between stiff or flexible plates depends on your preference and environment. Stiff plates are ideal for tactile feedback and louder settings, while flexible plates cater to softer, quieter comfort, enhancing overall typing satisfaction.
How Do Plate Stiffness and Flexibility Impact Keyboard Sound?
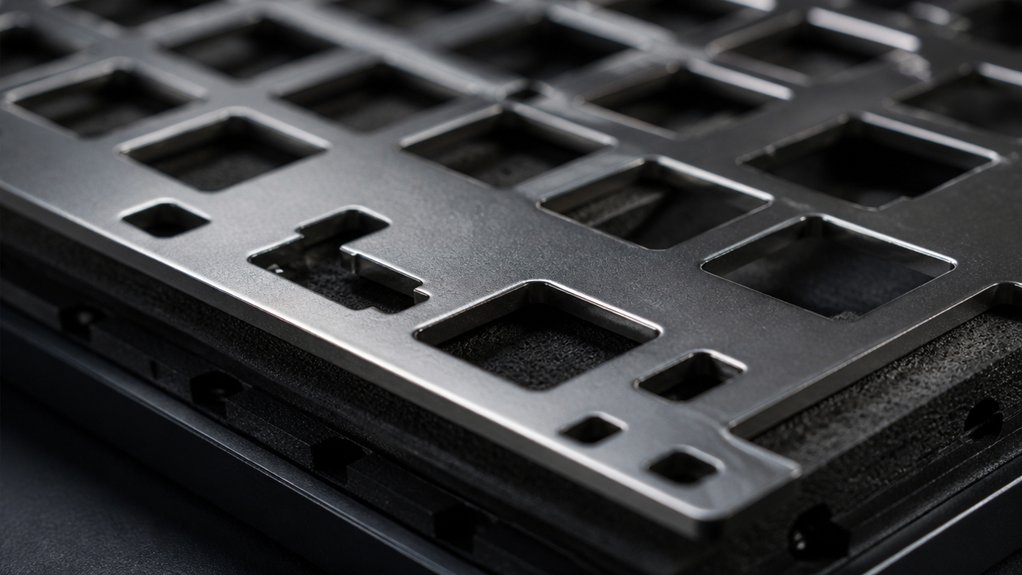
Ever wondered how the stiffness or flexibility of a keyboard plate shapes its sound? In a mechanical keyboard, plate stiffness directly impacts the sound profile. Rigid plates like aluminum or brass transmit vibrations more efficiently, producing sharper, metallic keystrokes. Flexible plates such as polycarbonate or POM absorb impact and dampen the sound, resulting in softer, muted “thock” noises and a cushioned typing feel. Specifically: 1. Stiff plates amplify vibrations and resonance, making the keyboard sound brighter and more aggressive. 2. Flexible plates dampen acoustic feedback, creating a quieter, more subdued tone. 3. Plate material differences influence both the auditory profile and typing comfort, with softer plates reducing finger fatigue and stiffer plates offering tactile stability. Additionally, the use of gasket foams between the plate and PCB can further reduce vibrations and noise, enhancing the overall sound profile. Your choice of plate stiffness and flexibility is essential in customizing your keyboard’s sound and feel.
How to Install Dampening Materials on Your Keyboard Plate (Step-by-Step)
First, gather your dampening materials like EVA foam, IXPE, or silicone pads, and make sure you have all the tools you need. A helpful tip is to consider foam density and thickness to choose the best option for your desired sound profile. Next, carefully cut the materials to fit precisely on the keyboard plate without blocking switch pins or stabilizers. Once prepared, apply the dampening flat and evenly before reassembling and testing your keyboard.
Gather Necessary Materials
Before you start installing dampening materials on your keyboard plate, gather all the necessary supplies. As a keyboard enthusiast, you’ll want materials that effectively absorb sound inside the keyboard case. These include acoustic foam, EVA cotton, and silicone pads, all ideally 1.5-3mm thick for ideal dampening.
Additionally, selecting materials with appropriate density and thickness ensures optimal sound dampening performance.
- Acoustic foam sheets or blocks
- Precise cutting tools like scissors or craft knives
- Disassembly tools to carefully access the inside of the keyboard case
Make sure to disassemble your keyboard carefully, removing keycaps and switches so you can reach the plate area. Choose materials that fit your specific model, ensuring they won’t obstruct switch mounts or stabilizers. Proper preparation simplifies the installation process and maximizes sound dampening efficiency.
Properly Apply Dampening
To properly apply dampening materials on your keyboard plate, start by carefully disassembling your keyboard to remove keycaps and separate the plate from the PCB and case. Prepare a clean workspace for installation.
Cut or trim your chosen dampening material—such as EVA cotton, foam, or IXPE pads—to match the dimensions of the keyboard plate without interfering with switch positions.
Place the dampening material evenly on the keyboard plate, ensuring it lies flat and doesn’t shift during reassembly.
Carefully reassemble the keyboard by securing the plate back onto the case, making sure the dampening material stays in place during screw tightening.
Finally, test the keyboard for consistent keypress feel and sound; make adjustments by repositioning or replacing dampening material for ideal acoustic performance.
Best Practices for Using Foam, Silicone, and Gasket Inserts to Reduce Noise

Using foam, silicone, and gasket inserts effectively requires careful placement and attention to detail. To maximize noise reduction, follow these best practices:
- Place foam pads like EVA cotton or IXPE foam directly between the keyboard PCB and plate to absorb vibrations and soften keystrokes, creating a creamy thock sound.
- Install silicone pads or gasket inserts around switch housings or between the plate and case to cushion impacts and minimize reverberation.
- Use gasket inserts with a thickness of 1.5mm to 3mm for a flexible layer that isolates vibrations without hindering key travel.
Ensure all materials are compressed properly for ideal contact, avoiding interference with switch movement.
Proper placement guarantees a quieter, more refined typing experience.
How Do Case Design and Mounting Options Affect Keyboard Sound?
The design of your keyboard case and the way it’s mounted play significant roles in shaping its sound profile. Heavier cases, like CNC-machined aluminum, tend to cut down on noise amplification compared to lighter plastic cases, making your keyboard quieter.
Gasket mounts, where the plate or PCB is isolated from the case with soft silicone or foam pads, effectively lessen vibrations and produce a softer, more muted typing sound. The case’s mounting style, such as sandwich or tray mounting, influences how vibrations travel, affecting keystroke sharpness or softness.
The number and placement of screws also matter; fewer or strategically placed screws promote more consistent, quieter sounds across your keyboard model. Overall, these design choices directly impact how your keyboard sounds during use.
How Can You Test and Tune Your Dampening Setup for the Quietest Typing?
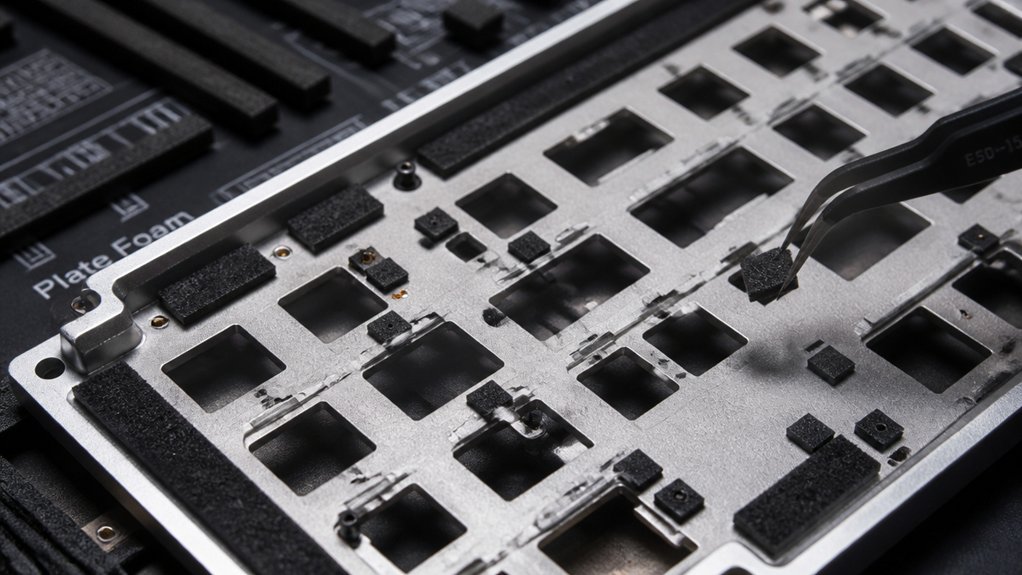
Ever wonder how to guarantee your keyboard setup is as quiet as possible? To tune your dampening, start by testing different materials like EVA cotton, IXPE foam, or silicon pads both individually and combined. Use a consistent typing force and measure key noise levels with a decibel meter or smartphone app to compare effectiveness.
Next, adjust the placement and thickness of foam or silicone pads inside the case and between the PCB and plate to maximize vibration absorption while maintaining key travel. Finally, refine stabilizer lubrication and add mods like band-aid clips to reduce rattling noise on larger keys.
To deepen your understanding:
- Experiment with different dampening materials and layer configurations.
- Quantify improvements with sound measurements.
- Tune foam placement and switch lubrication for ideal noise reduction.
Troubleshooting Common Noise and Resonance Issues
Addressing resonance and noise issues often starts with identifying specific causes within your keyboard’s construction. Mechanical keys can generate noise when their plates vibrate or echo within the case.
Stiff plates, like aluminum, often cause pingy resonance, which you can reduce by placing foam or EVA cotton between the plate and PCB to absorb vibrations.
Rattling stabilizers on larger keys create noise from metal-to-metal contact; fixing this involves clipping stabilizer stems, applying lubricant, and adding band-aid dampening pads.
Hollow case cavities might produce echoing sounds; filling these voids with dense sound-dampening materials lowers resonance.
Finally, if keys bottom out loudly, installing O-rings can soften impacts. Regularly check for loose screws or mounting points to prevent uneven vibrations and guarantee consistent sound quality.
Final Tips for Achieving a Quieter, More Comfortable Mechanical Keyboard

Achieving a quieter, more comfortable mechanical keyboard often involves combining multiple sound-dampening techniques tailored to your setup. To optimize sound reduction and typing comfort, consider these tips:
- Use a flexible plate material like polycarbonate or POM. These cushion keystrokes better and produce a softer, quieter “thock” than stiffer metals like aluminum or brass.
- Add internal sound-absorbing foam, such as EVA cotton or silicone pads, between the plate and PCB to dampen vibrations and lessen noise transmission.
- Properly lubricate switch sliders and stabilizers to minimize friction noise. Experiment with layered foam or silicone pads (1.5-3mm) to find what works best for amplifying dampening without sacrificing typing feel or stability.
Different combinations will work best for your setup—test and adjust to find your ideal balance.
Frequently Asked Questions
Do Keyboard Sound Dampeners Really Work?
Yes, keyboard sound dampeners really work. They absorb vibrations and muffling impact sounds, reducing noise by up to 50%. When combined with other mods, they greatly improve your typing environment, making it quieter and more pleasant.
Do Gamers Prefer Membrane or Mechanical?
You probably prefer mechanical keyboards because of their faster actuation, better tactile feedback, and durability, which improve gaming performance. Membrane keyboards are quieter and cheaper but don’t offer the same precise response that many gamers seek for competitive or enthusiast play.
Are FR4 Plates Thocky?
Yes, FR4 plates are thocky because they produce a balanced, warm sound with a soft, muted quality. You’ll notice a satisfying, firm tactile feedback that reduces sharpness and harsh reverberations, creating a pleasant, resonant typing experience.
How to Sound Dampen Your Keyboard?
To dampen your keyboard’s sound, you can use softer plates like polycarbonate, add foam layers, install dampening pads, lubricate stabilizers and switches, and choose gasket mounts. These steps absorb vibrations and reduce echo for quieter, softer typing.



